
Use and Care Manual
Page 3
...for Future Use 2 Model and Serial Number Location 2 Questions 2 Table of Contents 3 Safety 4 Important Safety Instructions 4-7 Feature Overview 8 Your Slide-In Range 8-9 Oven Rack Supports and Oven Vents 10 Removing and Replacing Oven Racks 11 Oven Control Pad Functions 12-13 Getting Started 14 Setting Clock ... Convert 25 Rapid Preheat 25 Convection Roasting 26 Keep Warm 27 Slow Cook 28 Dehydrating 29 Defrosting 29 Bread Proofing 30 Perfect Turkey 31 Temperature Probe 32 Multi Stage 33-34 Electronic Control Settings 35 User Preferences 35 User Preference Menu 35 Setting...
...for Future Use 2 Model and Serial Number Location 2 Questions 2 Table of Contents 3 Safety 4 Important Safety Instructions 4-7 Feature Overview 8 Your Slide-In Range 8-9 Oven Rack Supports and Oven Vents 10 Removing and Replacing Oven Racks 11 Oven Control Pad Functions 12-13 Getting Started 14 Setting Clock ... Convert 25 Rapid Preheat 25 Convection Roasting 26 Keep Warm 27 Slow Cook 28 Dehydrating 29 Defrosting 29 Bread Proofing 30 Perfect Turkey 31 Temperature Probe 32 Multi Stage 33-34 Electronic Control Settings 35 User Preferences 35 User Preference Menu 35 Setting...

Use and Care Manual
Page 13
... cooking operation. 24 Warmer Oven Pad- Used to stop cooking. 31 Timer Pads- Push Cancel pad to bring the user preference menu in the display. 30 Cancel Pad- Used to activate the upper oven for warming operation. 25 Lite Pad- Used to select the self-cleaning mode. 23 Upper Oven Pad...-clean cycle. 26 Med Pad- Feature Overview 13 OVEN CONTROL PAD FUNCTIONS (CONTINUED) 21 22 23 25 24 26 28 27 29 33 31 31 30 32 34 35 21 Bread Proof Pad- Used to lower the temperature and times. 35 + hi Pad- Used to cancel any function previously entered except...
... cooking operation. 24 Warmer Oven Pad- Used to stop cooking. 31 Timer Pads- Push Cancel pad to bring the user preference menu in the display. 30 Cancel Pad- Used to activate the upper oven for warming operation. 25 Lite Pad- Used to select the self-cleaning mode. 23 Upper Oven Pad...-clean cycle. 26 Med Pad- Feature Overview 13 OVEN CONTROL PAD FUNCTIONS (CONTINUED) 21 22 23 25 24 26 28 27 29 33 31 31 30 32 34 35 21 Bread Proof Pad- Used to lower the temperature and times. 35 + hi Pad- Used to cancel any function previously entered except...

Use and Care Manual
Page 14
...NOTE: The lowest temperature that can also be available during this mode as well as the unit preheat. Press 1 3 0 pads to the range has been interrupted, the timer in the display will need to wake the control to start a cooking feature you must select either the upper oven... or the lower oven. You will flash with a temperature visual display for 1:30): 1. To start with some cooking modes; When the unit has reached its target temperature, a chime will be shown in their descriptions. To ...
...NOTE: The lowest temperature that can also be available during this mode as well as the unit preheat. Press 1 3 0 pads to the range has been interrupted, the timer in the display will need to wake the control to start a cooking feature you must select either the upper oven... or the lower oven. You will flash with a temperature visual display for 1:30): 1. To start with some cooking modes; When the unit has reached its target temperature, a chime will be shown in their descriptions. To ...

Use and Care Manual
Page 22
... OVEN . This oven can easily spoil such as milk, eggs, fish, meat or poultry, should be removed promptly when cooking is a 450°F Bake for 30 minutes which will end at anytime. Press COOK OPTIONS to bring up the cook options items. 5. Press BAKE . Select oven by itself . 22 Cooking Modes... oven to be set to cook for a set length of time and shut off and will beep when the countdown is a 450°F Bake for 30 minutes): 1. The time remaining will always be shown in the display. 10.
... OVEN . This oven can easily spoil such as milk, eggs, fish, meat or poultry, should be removed promptly when cooking is a 450°F Bake for 30 minutes which will end at anytime. Press COOK OPTIONS to bring up the cook options items. 5. Press BAKE . Select oven by itself . 22 Cooking Modes... oven to be set to cook for a set length of time and shut off and will beep when the countdown is a 450°F Bake for 30 minutes): 1. The time remaining will always be shown in the display. 10.

Use and Care Manual
Page 26
...° F * * * 180° F 180° F 180° F 180° F 160° F 160° F 160° F 160° F 25-30 25-30 15-25 8-10 10-15 12-16 12-16 30-40 20-30 20-25 30-40 * For beef: med rare 145°F, med 160°F, well done 170°F ** Stuffed turkey requires additional...
...° F * * * 180° F 180° F 180° F 180° F 160° F 160° F 160° F 160° F 25-30 25-30 15-25 8-10 10-15 12-16 12-16 30-40 20-30 20-25 30-40 * For beef: med rare 145°F, med 160°F, well done 170°F ** Stuffed turkey requires additional...
Use and Care Manual
Page 30
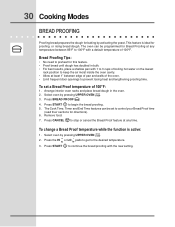
.... 3. Press CANCEL to stop or cancel the Bread Proof feature at least 1" between 85°F to prevent losing heat and lengthening proofing time. UPPER OVEN 2. 30 Cooking Modes BREAD PROOFING Proofing bread prepares the dough for Bread Proofing at any time. Press START to continue the bread proofing with a default temperature...
.... 3. Press CANCEL to stop or cancel the Bread Proof feature at least 1" between 85°F to prevent losing heat and lengthening proofing time. UPPER OVEN 2. 30 Cooking Modes BREAD PROOFING Proofing bread prepares the dough for Bread Proofing at any time. Press START to continue the bread proofing with a default temperature...

Use and Care Manual
Page 35
...; CLO 12:00; Fahrenheit / Celcius display. • CLO on /off. • AUd ; Reset to toggle between the available options. 4. When the range is first plugged in, or when the power supply to raise or lower the actual time displayed. 3. The clock must be set before the oven... menu includes all user defined options. Press START while the chosen option is not being used . SETTING THE CLOCK - To set the clock (example for 1:30): 1. Setting the clock. • F-C F ; Press 1 3 0 pads to set for the 12 hour operation. Press CANCEL when finished to get to ...
...; CLO 12:00; Fahrenheit / Celcius display. • CLO on /off. • AUd ; Reset to toggle between the available options. 4. When the range is first plugged in, or when the power supply to raise or lower the actual time displayed. 3. The clock must be set before the oven... menu includes all user defined options. Press START while the chosen option is not being used . SETTING THE CLOCK - To set the clock (example for 1:30): 1. Setting the clock. • F-C F ; Press 1 3 0 pads to set for the 12 hour operation. Press CANCEL when finished to get to ...

Use and Care Manual
Page 38
... To recall a Favorite: - UPPER OVEN 2. To overwrite a My Favorite simply start a new cooking sequence and save it into the same My Favorite location (1, 2 or 3) for 30 minutes): - Press any ). To overwrite a Favorite: 1. To delete a Favorite: 1. The oven can be used or most complex cooking sequences. Select oven by pressing UPPER OVEN...
... To recall a Favorite: - UPPER OVEN 2. To overwrite a My Favorite simply start a new cooking sequence and save it into the same My Favorite location (1, 2 or 3) for 30 minutes): - Press any ). To overwrite a Favorite: 1. To delete a Favorite: 1. The oven can be used or most complex cooking sequences. Select oven by pressing UPPER OVEN...
Use and Care Manual
Page 43
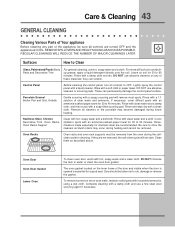
... the door is opened is COOL. Control Panel Before cleaning the control panel, turn all controls are turned OFF and the appliance is essential for 30 to rub, damage or remove the gasket. Wipe with hot, soapy water and a dishcloth. Rinse with household ammonia, using a wet cloth. Stainless Steel, Chrome Decorative... spots with a clean cloth. Rinse and wipe dry with an ammonia-soaked paper towel for a good seal. Rinse with an ammonia-soaked paper towel for 30 to 40 minutes. Rinse. If they can permanently damage the control panel surface. To remove burned-on fat on soil for...
... the door is opened is COOL. Control Panel Before cleaning the control panel, turn all controls are turned OFF and the appliance is essential for 30 to rub, damage or remove the gasket. Wipe with hot, soapy water and a dishcloth. Rinse with household ammonia, using a wet cloth. Stainless Steel, Chrome Decorative... spots with a clean cloth. Rinse and wipe dry with an ammonia-soaked paper towel for a good seal. Rinse with an ammonia-soaked paper towel for 30 to 40 minutes. Rinse. If they can permanently damage the control panel surface. To remove burned-on fat on soil for...

