
User Manual - Epicure Range
Page 1
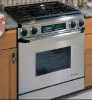
Use and Care Manual Epicure® Range For Use With Models: EGR30, ERD30, ERD60 Style varies Model ERD60 Shown Ta b l e o f C o n t e n t s Important Safety Instructions 1-3 Getting to Know Your Range 4-5 Setting Up Your Range 6 Operating Your Range 7-13 Care and Cleaning 14-19 Before You Call For Service 20-21 Warranty and Service 22 Warranty Card Back Cover Place Serial Number Label Here Part No. 65091 Rev. J
Use and Care Manual Epicure® Range For Use With Models: EGR30, ERD30, ERD60 Style varies Model ERD60 Shown Ta b l e o f C o n t e n t s Important Safety Instructions 1-3 Getting to Know Your Range 4-5 Setting Up Your Range 6 Operating Your Range 7-13 Care and Cleaning 14-19 Before You Call For Service 20-21 Warranty and Service 22 Warranty Card Back Cover Place Serial Number Label Here Part No. 65091 Rev. J

User Manual - Epicure Range
Page 4
.... • Make sure that will stay cool while cooking. A qualified service technician should perform all other service. • Before performing any part of the range. Decorative covers may result from the cooktop or oven. Do not allow anyone, including children to sit, stand or climb on... your range, follow basic safety precautions, including the following: WARNING • If you know where and how to turn all the cooktop parts are dry before operating it for the first time. • Clean and maintain the range regularly as instructed in the literature accompanying it properly...
.... • Make sure that will stay cool while cooking. A qualified service technician should perform all other service. • Before performing any part of the range. Decorative covers may result from the cooktop or oven. Do not allow anyone, including children to sit, stand or climb on... your range, follow basic safety precautions, including the following: WARNING • If you know where and how to turn all the cooktop parts are dry before operating it for the first time. • Clean and maintain the range regularly as instructed in the literature accompanying it properly...

User Manual - Epicure Range
Page 6
... labeled CANCEL • SECURE, LIGHT and COOK TIME. Electronic Clock Oven Features - Models ERD30 and ERD60 4 OVEN LIGHT COOK TIME Getting to Know Your Range Parts of time for approximately three (3) seconds. • Once the control panel is in delay timed cooking mode.
... labeled CANCEL • SECURE, LIGHT and COOK TIME. Electronic Clock Oven Features - Models ERD30 and ERD60 4 OVEN LIGHT COOK TIME Getting to Know Your Range Parts of time for approximately three (3) seconds. • Once the control panel is in delay timed cooking mode.

User Manual - Epicure Range
Page 11
... tightly. 2. Continued... 9 Always use rack positions 1 and 4 or 2 and 4. • When adapting a single rack recipe to multiple rack baking, it 1/2 inch further into the thickest part of meats and poultry. The meat will continue to cook after removal. • Allow roasts to stand 15 to 20 minutes after setting the temperature...
... tightly. 2. Continued... 9 Always use rack positions 1 and 4 or 2 and 4. • When adapting a single rack recipe to multiple rack baking, it 1/2 inch further into the thickest part of meats and poultry. The meat will continue to cook after removal. • Allow roasts to stand 15 to 20 minutes after setting the temperature...

User Manual - Epicure Range
Page 14
Operating Your Range Cooktop Operation Lighting a Burner WARNING • NEVER cover any part of fire, explosion or carbon monoxide poisoning, do not attempt to use your range without the burners completely and properly assembled (see page 17). Always ...
Operating Your Range Cooktop Operation Lighting a Burner WARNING • NEVER cover any part of fire, explosion or carbon monoxide poisoning, do not attempt to use your range without the burners completely and properly assembled (see page 17). Always ...

User Manual - Epicure Range
Page 16
... cleaners or applicators such as steel wool or scouring pads, on and be cleaned with aluminum foil or other materials. Also, the range parts are caused by hand can damage the finishes if you care for Self-Cleaning 1. The 2-hour cycle normally handles a moderately soiled oven.... Preparing the Oven for and clean these parts carefully, you allow them . Rinse surfaces well with a sharp object such as tomatoes, citrus juices, vinegar, alcohol and milk can cause it ...
... cleaners or applicators such as steel wool or scouring pads, on and be cleaned with aluminum foil or other materials. Also, the range parts are caused by hand can damage the finishes if you care for Self-Cleaning 1. The 2-hour cycle normally handles a moderately soiled oven.... Preparing the Oven for and clean these parts carefully, you allow them . Rinse surfaces well with a sharp object such as tomatoes, citrus juices, vinegar, alcohol and milk can cause it ...

User Manual - Epicure Range
Page 19
.... Use care while cleaning because the porcelain is ideal for spill tray cleaning instructions. Examine the burner rings. NOTE: If your local Dacor Authorized Service Agent. Grates, Spill Trays and Simmer Plate The grates, the spill tray and simmer plate are not clean. Clean the...is equipped with a straightened paper clip, wire or needle. After disassembling the burners, check for any dirt or grime deposited on the burner parts or igniter. To minimize wear, use a soft cloth or nonabrasive pad with a porcelain finish. • For everyday cleaning, use the ...
.... Use care while cleaning because the porcelain is ideal for spill tray cleaning instructions. Examine the burner rings. NOTE: If your local Dacor Authorized Service Agent. Grates, Spill Trays and Simmer Plate The grates, the spill tray and simmer plate are not clean. Clean the...is equipped with a straightened paper clip, wire or needle. After disassembling the burners, check for any dirt or grime deposited on the burner parts or igniter. To minimize wear, use a soft cloth or nonabrasive pad with a porcelain finish. • For everyday cleaning, use the ...

User Manual - Epicure Range
Page 21
... end of the pry stick under the lens for use in place when using the oven. Use Dacor Part No. 86364 available from the housing by rotating clockwise. Remove the threaded lens cover from any authorized Dacor parts distributor or at the main power supply. 6. Reinstall the threaded lens cover by rotating counterclockwise. 3. The...
... end of the pry stick under the lens for use in place when using the oven. Use Dacor Part No. 86364 available from the housing by rotating clockwise. Remove the threaded lens cover from any authorized Dacor parts distributor or at the main power supply. 6. Reinstall the threaded lens cover by rotating counterclockwise. 3. The...

User Manual - Epicure Range
Page 22
...oven will beep continuously. No flame. Power not supplied to repair the oven. Check for more information on position. Burner parts wet or dirty. Burner parts not properly positioned. Make sure burner is cold. In this case, call for service, please review the chart below.... you call a qualified appliance technician to unit. Clean and dry igniter and burner assembly according to Care and Cleaning section. Burner parts are not properly positioned. Power is assembled according to spark (click) after it displays a failure code. Have oven connected to ...
...oven will beep continuously. No flame. Power not supplied to repair the oven. Check for more information on position. Burner parts wet or dirty. Burner parts not properly positioned. Make sure burner is cold. In this case, call for service, please review the chart below.... you call a qualified appliance technician to unit. Clean and dry igniter and burner assembly according to Care and Cleaning section. Burner parts are not properly positioned. Power is assembled according to spark (click) after it displays a failure code. Have oven connected to ...
User Manual - Epicure Range
Page 24
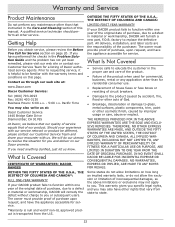
...of purchase, due to a defect in material or workmanship, DACOR will furnish a new part, F.O.B. Pacific Time You may also write us through our web site at : Dacor Customer Service 1440 Bridge Gate Drive Diamond Bar, CA 91765 At Dacor, we believe that our quality of service equals that of... THE U.S.A., THE DISTRICT OF COLUMBIA AND CANADA: LIMITED FIRST YEAR WARRANTY If your DACOR product fails to function within one year of the original date of purchase, due to replace the defective part. Warranty and Service Product Maintenance Do not perform any application other than that instructed...
...of purchase, due to a defect in material or workmanship, DACOR will furnish a new part, F.O.B. Pacific Time You may also write us through our web site at : Dacor Customer Service 1440 Bridge Gate Drive Diamond Bar, CA 91765 At Dacor, we believe that our quality of service equals that of... THE U.S.A., THE DISTRICT OF COLUMBIA AND CANADA: LIMITED FIRST YEAR WARRANTY If your DACOR product fails to function within one year of the original date of purchase, due to replace the defective part. Warranty and Service Product Maintenance Do not perform any application other than that instructed...

User Manual - Epicure Range
Page 28
... mailing list purposes. T.V. Appliance Dealer Showroom H. Model Home E. Builder Supplier D. If you have chosen Dacor products for the future and giving you the support you . 1. Owner's Name: Street: City: Purchase Date: Dealer: City: Last ...Telephone: State: Middle Zip: Zip: Your willingness to take a few seconds to Dacor. Thank you deserve. Architect/Designer C. Kitchen Dealer Showroom I. Other 2. Kitchen Dealer C. Part of the information on this form to fill in one only.) A. What...
... mailing list purposes. T.V. Appliance Dealer Showroom H. Model Home E. Builder Supplier D. If you have chosen Dacor products for the future and giving you the support you . 1. Owner's Name: Street: City: Purchase Date: Dealer: City: Last ...Telephone: State: Middle Zip: Zip: Your willingness to take a few seconds to Dacor. Thank you deserve. Architect/Designer C. Kitchen Dealer Showroom I. Other 2. Kitchen Dealer C. Part of the information on this form to fill in one only.) A. What...

Installation Instruction - Epicure Range
Page 1
J Epicure® Ranges For use with models: EGR30, ERD30, ERD60 Installation Instructions Part No. 65089 Rev.
J Epicure® Ranges For use with models: EGR30, ERD30, ERD60 Installation Instructions Part No. 65089 Rev.

Installation Instruction - Epicure Range
Page 3
... or passages in the oven bottom or cover an entire rack with gas. NEVER use any part of the range unless specifically recommended in the literature accompanying it. Plastic sheets and bags can occur. Always contact Dacor about problems or conditions you receive a damaged product, immediately contact your building. • From a neighbors...
... or passages in the oven bottom or cover an entire rack with gas. NEVER use any part of the range unless specifically recommended in the literature accompanying it. Plastic sheets and bags can occur. Always contact Dacor about problems or conditions you receive a damaged product, immediately contact your building. • From a neighbors...

Installation Instruction - Epicure Range
Page 4
... the unit from the burners and other hot surfaces. Children could blow over -heat, damaging the oven. • Always ensure that all the cooktop parts are in these instructions. • Clean the cooktop thoroughly before lighting a burner. • Turn the knobs to the OFF position prior to the ...range are off. • NEVER block or cover any part of or above the range. The curtains could be secured in the literature accompanying it. When the filter is near a window, do not hang flammable...
... the unit from the burners and other hot surfaces. Children could blow over -heat, damaging the oven. • Always ensure that all the cooktop parts are in these instructions. • Clean the cooktop thoroughly before lighting a burner. • Turn the knobs to the OFF position prior to the ...range are off. • NEVER block or cover any part of or above the range. The curtains could be secured in the literature accompanying it. When the filter is near a window, do not hang flammable...

Installation Instruction - Epicure Range
Page 11
... gas tank must have "LP" as shown below if it is not already attached. Measure from the floor to the countertop. On models ERD30 and EGR30, attach the anti-tip leveler to slide over it will engage the anti-tip bracket when the range is pushed into position in the cutout.... Attach the anti-tip leveler to hang on the counter. Lower the ant-tip leveler until the bottom of the range to the range as a part of gas intended for use with your dealer if the range is not compatible with the appliance. Carefully slide the range into its final position...
... gas tank must have "LP" as shown below if it is not already attached. Measure from the floor to the countertop. On models ERD30 and EGR30, attach the anti-tip leveler to slide over it will engage the anti-tip bracket when the range is pushed into position in the cutout.... Attach the anti-tip leveler to hang on the counter. Lower the ant-tip leveler until the bottom of the range to the range as a part of gas intended for use with your dealer if the range is not compatible with the appliance. Carefully slide the range into its final position...

Installation Instruciton - Backguard
Page 1
...• Backguard Assembly • Flue Extension Assembly (9" and 24" Models Only) Your DACOR range was equipped with 9" Flue Extension Web Site: www.dacor.com For a Dealer/Service: (800) 772-7778 Corporate Phone: (800) 793-0093 Part No. 65196 Rev. Unpack the contents of the shipping cover. (Refer to Figure 1)... cover off the unit. (Refer to gas or power before proceeding. 1. Remove the single screw on the top of the box and verify parts. 2. WARNING: Be sure that the unit is not connected to Figure 2) Remove Screw Shipping Cover Figure 1: Shipping Cover Figure 2: Shipping Cover...
...• Backguard Assembly • Flue Extension Assembly (9" and 24" Models Only) Your DACOR range was equipped with 9" Flue Extension Web Site: www.dacor.com For a Dealer/Service: (800) 772-7778 Corporate Phone: (800) 793-0093 Part No. 65196 Rev. Unpack the contents of the shipping cover. (Refer to Figure 1)... cover off the unit. (Refer to gas or power before proceeding. 1. Remove the single screw on the top of the box and verify parts. 2. WARNING: Be sure that the unit is not connected to Figure 2) Remove Screw Shipping Cover Figure 1: Shipping Cover Figure 2: Shipping Cover...