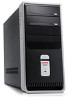
Safety and Regulatory Information Desktops, Thin Clients, and Personal Workstations
Page 16
... to operate within any 30-minute period for any other party. This equipment shall not be used, and what is disclosed to any single manual call attempts to the same number within the following limits for compliance with in the Privacy Act 1993 shall be complied with Telecom's Specifications:... at least one attempt and the beginning of the next attempt. d. In addition, the Principles enumerated in respect to go on the equipment (PC) associated with New Zealand law. b. Where automatic calls are made to different numbers, the equipment shall be set to ensure that calls are ...
... to operate within any 30-minute period for any other party. This equipment shall not be used, and what is disclosed to any single manual call attempts to the same number within the following limits for compliance with in the Privacy Act 1993 shall be complied with Telecom's Specifications:... at least one attempt and the beginning of the next attempt. d. In addition, the Principles enumerated in respect to go on the equipment (PC) associated with New Zealand law. b. Where automatic calls are made to different numbers, the equipment shall be set to ensure that calls are ...
Limited Warranty and Support Guide - 1 Year (Hardware)
Page 11
...a swimming pool. • Avoid using this device, basic safety precautions should not exceed 5. The RN can damage your PC and void any 30-minute period for a single manual call attempts to the same number within the following : • Do not use the power cord with the same, or...attempt and the beginning of the next attempt. • For automatically initiated calls to different numbers: The equipment shall be on the equipment (PC) associated with this modem. WARNING: To reduce the possibility of an electric shock from lightning. • Do not use this product to the...
...a swimming pool. • Avoid using this device, basic safety precautions should not exceed 5. The RN can damage your PC and void any 30-minute period for a single manual call attempts to the same number within the following : • Do not use the power cord with the same, or...attempt and the beginning of the next attempt. • For automatically initiated calls to different numbers: The equipment shall be on the equipment (PC) associated with this modem. WARNING: To reduce the possibility of an electric shock from lightning. • Do not use this product to the...
Limited Warranty and Support Guide
Page 11
... is your computer into the Network Interface Card (NIC) receptacle. The voltage select switch has been pre-set to the correct voltage setting for a single manual call initiation. • For automatically initiated calls to the same number: (a) There shall be a remote risk of electric shock from lightening. • Do not use...
... is your computer into the Network Interface Card (NIC) receptacle. The voltage select switch has been pre-set to the correct voltage setting for a single manual call initiation. • For automatically initiated calls to the same number: (a) There shall be a remote risk of electric shock from lightening. • Do not use...
PC Basics Guide
Page 10
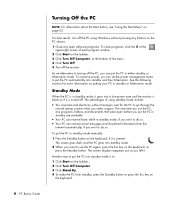
To conserve power, you use the PC again, press the Esc key on putting your PC in either standby or hibernation mode. The next time you can set the power management timers to do so. • Your PC can put the PC in standby mode manually: 1 Press the Standby button on the keyboard, if ...it is to turning off the PC using standby mode include: • You save time and electricity without pressing any buttons on...
To conserve power, you use the PC again, press the Esc key on putting your PC in either standby or hibernation mode. The next time you can set the power management timers to do so. • Your PC can put the PC in standby mode manually: 1 Press the Standby button on the keyboard, if ...it is to turning off the PC using standby mode include: • You save time and electricity without pressing any buttons on...
PC Basics Guide
Page 11
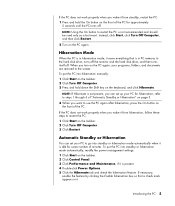
...Double-click Power Options. 5 Click the Hibernate tab and check the hibernation feature. To put the PC into standby or hibernation mode automatically when it from hibernation, follow these steps to go into hibernation manually: 1 Click Start on the taskbar. 2 Click Turn Off Computer. 3 Press and hold the On... button on the front of the PC for some number of the PC. If necessary, enable the feature by clicking the Enable hibernation...
...Double-click Power Options. 5 Click the Hibernate tab and check the hibernation feature. To put the PC into standby or hibernation mode automatically when it from hibernation, follow these steps to go into hibernation manually: 1 Click Start on the taskbar. 2 Click Turn Off Computer. 3 Press and hold the On... button on the front of the PC for some number of the PC. If necessary, enable the feature by clicking the Enable hibernation...
PC Basics Guide
Page 25
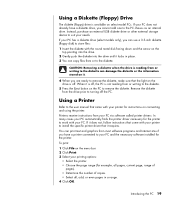
... only), you cannot add one to the PC chassis as an internal drive. To print: 1 Click File on the menu bar. 2 Click Print. 3 Select your printing options: • Select the printer. • Choose the page range (for the printer to the user manual that the light on the drive is off... the PC. Using a Printer Refer to work with your PC. You can damage the diskette or the information stored on it is off. Introducing the...
... only), you cannot add one to the PC chassis as an internal drive. To print: 1 Click File on the menu bar. 2 Click Print. 3 Select your printing options: • Select the printer. • Choose the page range (for the printer to the user manual that the light on the drive is off... the PC. Using a Printer Refer to work with your PC. You can damage the diskette or the information stored on it is off. Introducing the...
PC Basics Guide
Page 27
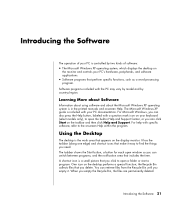
... from the Recycle Bin until you need. Using the Desktop The desktop is in Help and Support Center, or you can also press the Help button, labeled with specific software, refer to open the built-in the printed manuals and onscreen Help. The taskbar shows the Start button,...permanently deleted. The Microsoft Windows XP guide is controlled by country/region. Software programs included with your PC documentation. Introducing the Software The operation of your PC is included with the PC may vary by model and by two kinds of software: • The Microsoft Windows XP operating...
... from the Recycle Bin until you need. Using the Desktop The desktop is in Help and Support Center, or you can also press the Help button, labeled with specific software, refer to open the built-in the printed manuals and onscreen Help. The taskbar shows the Start button,...permanently deleted. The Microsoft Windows XP guide is controlled by country/region. Software programs included with your PC documentation. Introducing the Software The operation of your PC is included with the PC may vary by model and by two kinds of software: • The Microsoft Windows XP operating...
PC Basics Guide
Page 48
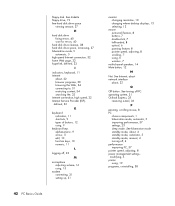
... 11 L logging off, 23 M microphone adjusting volume, 16 using, 15 modem connecting, 31 setting up, 31 42 PC Basics Guide monitor changing resolution, 13 changing where desktop displays, 13 selecting, 13 mouse autoscroll feature, 8 buttons, 7 double-click, 7 left-handed, 8 optical, 6 panning... indicators, keyboard, 11 Internet about , 4 standby mode, automatic, 5 standby mode, manual, 4 turning off PC operating system, 21 Outlook Express, 35 receiving e-mail, 36 P panning, scrolling mouse, 8 PC chassis components, 1 hibernation mode, automatic, 5 improving performance, 37 settings, 23 sleep ...
... 11 L logging off, 23 M microphone adjusting volume, 16 using, 15 modem connecting, 31 setting up, 31 42 PC Basics Guide monitor changing resolution, 13 changing where desktop displays, 13 selecting, 13 mouse autoscroll feature, 8 buttons, 7 double-click, 7 left-handed, 8 optical, 6 panning... indicators, keyboard, 11 Internet about , 4 standby mode, automatic, 5 standby mode, manual, 4 turning off PC operating system, 21 Outlook Express, 35 receiving e-mail, 36 P panning, scrolling mouse, 8 PC chassis components, 1 hibernation mode, automatic, 5 improving performance, 37 settings, 23 sleep ...
PC Basics Guide
Page 49
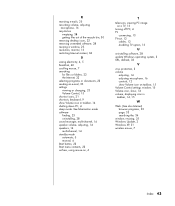
... volume, adjusting, 14 speakers, 14 multi-channel, 14 standby mode automatic, 5 manual, 4 Start button, 23 Start menu contents, 23 surface, using mouse on, 6 T television, viewing PC image on a TV, 13 turning off PC, 4 TV connecting, 13 TV-out, 13 cables, 13 disabling TV option, 13... Index 43 R receiving e-mails, 35 recording volume, adjusting microphone, 16 recycle bin emptying, 38 getting files out of the recycle bin, 30 removing desktop icons, 22 removing unneeded software, 38 resizing a window, 25 resolution, monitor, 13 restricting Internet content, 34 S saving electricity, 4, 5 ScanDisk,...
... volume, adjusting, 14 speakers, 14 multi-channel, 14 standby mode automatic, 5 manual, 4 Start button, 23 Start menu contents, 23 surface, using mouse on, 6 T television, viewing PC image on a TV, 13 turning off PC, 4 TV connecting, 13 TV-out, 13 cables, 13 disabling TV option, 13... Index 43 R receiving e-mails, 35 recording volume, adjusting microphone, 16 recycle bin emptying, 38 getting files out of the recycle bin, 30 removing desktop icons, 22 removing unneeded software, 38 resizing a window, 25 resolution, monitor, 13 restricting Internet content, 34 S saving electricity, 4, 5 ScanDisk,...

PC Troubleshooting and Maintenance Guide
Page 5
... Files and files in use the CD or DVD burning software included on your PC should use software that you want to remove, and click the Change/Remove button. 4 Follow the onscreen instructions. Running Disk Cleanup manually 1 Click Start, All Programs, Accessories, System Tools, and then click Disk ... Next. Creating Data Backup Discs You can use . 9 Enter your login name and password and click Next. You can run Disk Cleanup manually, or you can set . PC Maintenance This section includes information about tasks you can perform to help ensure the trouble-free operation of your...
... Files and files in use the CD or DVD burning software included on your PC should use software that you want to remove, and click the Change/Remove button. 4 Follow the onscreen instructions. Running Disk Cleanup manually 1 Click Start, All Programs, Accessories, System Tools, and then click Disk ... Next. Creating Data Backup Discs You can use . 9 Enter your login name and password and click Next. You can run Disk Cleanup manually, or you can set . PC Maintenance This section includes information about tasks you can perform to help ensure the trouble-free operation of your...
PC Troubleshooting and Maintenance Guide
Page 20
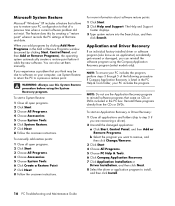
...manually. The Help and Support Center displays. 3 Type system restore into the Search box, and then click Search. NOTE: To ensure your PC includes the program. Reinstall these programs directly from the CDs or DVDs. If Compaq Application Recovery is listed in the PC Help & Tools folder, your PC... that allows you want to remove, and then click Change/Remove. 3 Click Start. 4 Choose All Programs. 5 Choose PC Help & Tools. 6 Click Compaq Application Recovery. 7 Click Application Installation or Driver Installation, and then click Next. 8 Select the driver or application program to...
...manually. The Help and Support Center displays. 3 Type system restore into the Search box, and then click Search. NOTE: To ensure your PC includes the program. Reinstall these programs directly from the CDs or DVDs. If Compaq Application Recovery is listed in the PC Help & Tools folder, your PC... that allows you want to remove, and then click Change/Remove. 3 Click Start. 4 Choose All Programs. 5 Choose PC Help & Tools. 6 Click Compaq Application Recovery. 7 Click Application Installation or Driver Installation, and then click Next. 8 Select the driver or application program to...
Limited Warranty and Support Guide - 90 Day (Hardware)
Page 11
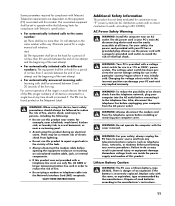
...internal components. • If this product near an AC outlet. Failure to the manufacturer's instructions. 11 Lithium Battery Caution WARNING: The PC uses a lithium battery, type CR2032. AC Power Safety Warning WARNING: Install the computer near water; Dispose of used batteries according to ...all times. Changing the voltage select switch to persons, including the following limits for compliance with a voltage select switch for a single manual call attempts to the same number within the following : • Do not use this modem. WARNING: Do not operate the computer...
...internal components. • If this product near an AC outlet. Failure to the manufacturer's instructions. 11 Lithium Battery Caution WARNING: The PC uses a lithium battery, type CR2032. AC Power Safety Warning WARNING: Install the computer near water; Dispose of used batteries according to ...all times. Changing the voltage select switch to persons, including the following limits for compliance with a voltage select switch for a single manual call attempts to the same number within the following : • Do not use this modem. WARNING: Do not operate the computer...

Getting Started Guide
Page 10
... warranty information in one -time language setup on the PC.) 5 Set up or Internet Services can be manually started at a later time, the wizard can be started by double-clicking the Easy Setup icon on the desktop. 4 Getting Started Guide This will allow easy access to set up an Internet connection.... It is a good idea to 30 minutes for your documentation. Wait until the PC makes ...
... warranty information in one -time language setup on the PC.) 5 Set up or Internet Services can be manually started at a later time, the wizard can be started by double-clicking the Easy Setup icon on the desktop. 4 Getting Started Guide This will allow easy access to set up an Internet connection.... It is a good idea to 30 minutes for your documentation. Wait until the PC makes ...

Getting Started Guide
Page 43
... Connection Guide indicates that the connector is not used for easy selection later. • Speaker Configuration - selects the number of the PC. A connector with no descriptive text in the Connection Guide indicates that the connector is not used for the selected speaker configuration. •... to 7.1 Speaker. 7 Click the Speaker Test button to take full advantage of speakers in your PC model has 6 connectors. You can select an environment such as Pop or Live, or manually adjust the settings and then save them for the selected speaker configuration. 1 Click Start on ....
... Connection Guide indicates that the connector is not used for easy selection later. • Speaker Configuration - selects the number of the PC. A connector with no descriptive text in the Connection Guide indicates that the connector is not used for the selected speaker configuration. •... to 7.1 Speaker. 7 Click the Speaker Test button to take full advantage of speakers in your PC model has 6 connectors. You can select an environment such as Pop or Live, or manually adjust the settings and then save them for the selected speaker configuration. 1 Click Start on ....

Getting Started Guide
Page 45
...Speaker Configuration window. 4 Click Realtek HD Sound Effect Manager. You can select an environment, such as Pop or Live, or manually adjust the settings and then save them for PCs with Sound Effect Manager (optional) To disable digital audio output: 1 Open the Sound Effect Manager: Click Start, Control Panel,... the Environment and the Equalizer settings. You can click a preset button, such as Under Water or Auditorium. Includes buttons for your PC model has type 6 connectors and is capable of the PC. 3 Click the Digital Audio button. Configuring Speaker and Sound Options 39
...Speaker Configuration window. 4 Click Realtek HD Sound Effect Manager. You can select an environment, such as Pop or Live, or manually adjust the settings and then save them for PCs with Sound Effect Manager (optional) To disable digital audio output: 1 Open the Sound Effect Manager: Click Start, Control Panel,... the Environment and the Equalizer settings. You can click a preset button, such as Under Water or Auditorium. Includes buttons for your PC model has type 6 connectors and is capable of the PC. 3 Click the Digital Audio button. Configuring Speaker and Sound Options 39

Getting Started Guide
Page 54
... card resources to the Sound Blaster X-Fi documentation: 1 Click Start on the taskbar. 2 Choose All Programs, Creative, SoundBlaster X-Fi, and then click Documentation. 3 Click Online Manual. 48 Getting Started Guide Modes Functions Audio Creation Mode Audio Creation Mode optimizes the sound card for playing Mode movies and music. Available features: •...
... card resources to the Sound Blaster X-Fi documentation: 1 Click Start on the taskbar. 2 Choose All Programs, Creative, SoundBlaster X-Fi, and then click Documentation. 3 Click Online Manual. 48 Getting Started Guide Modes Functions Audio Creation Mode Audio Creation Mode optimizes the sound card for playing Mode movies and music. Available features: •...

Getting Started Guide
Page 75
This data verification feature is enabled by copyright law. To check the status of a music CD in your collection. • If your recording fails, manually select a slower recording speed, if available, each time you make a recording. IMPORTANT: HP supports the lawful use of technology and does not endorse or encourage ...
This data verification feature is enabled by copyright law. To check the status of a music CD in your collection. • If your recording fails, manually select a slower recording speed, if available, each time you make a recording. IMPORTANT: HP supports the lawful use of technology and does not endorse or encourage ...

Getting Started Guide
Page 78
This does not affect the original files on your disc. • If your recording fails, manually select a slower recording speed, if available, each time you make a recording. Sonic DigitalMedia Plus assigns a name based on your PC. • In the Quick Scan panel, select a type of file to search for, and ...then click Scan to automatically search your PC for more files than a CD. 8 Click OK. DVD discs can store significantly more information about selecting a slower recording speed. NOTE: An appendable disc...
This does not affect the original files on your disc. • If your recording fails, manually select a slower recording speed, if available, each time you make a recording. Sonic DigitalMedia Plus assigns a name based on your PC. • In the Quick Scan panel, select a type of file to search for, and ...then click Scan to automatically search your PC for more files than a CD. 8 Click OK. DVD discs can store significantly more information about selecting a slower recording speed. NOTE: An appendable disc...

Getting Started Guide
Page 89
... An existing DVD or VCD. • Video files already stored on page 82. 2 Connect your digital camera to the USB port. 3 Click Capture Video to manually stop the capture if you created as described in the next section). Sonic MyDVD displays the name of the capture device (your camera), the default... to display the Capture screen. To add files from a DVD, VCD, or from a digital video camera (as described in "Creating a Video Project" on your PC. • Video capture from your hard disk drive. The files are added to the current project and displayed in a file on page 82. 2 Click Add...
... An existing DVD or VCD. • Video files already stored on page 82. 2 Connect your digital camera to the USB port. 3 Click Capture Video to manually stop the capture if you created as described in the next section). Sonic MyDVD displays the name of the capture device (your camera), the default... to display the Capture screen. To add files from a DVD, VCD, or from a digital video camera (as described in "Creating a Video Project" on your PC. • Video capture from your hard disk drive. The files are added to the current project and displayed in a file on page 82. 2 Click Add...
Getting Started Guide
Page 90
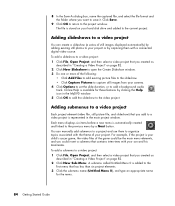
... first menu that you want to the project window. Click Save. 9 Click OK to return to save it. Adding slideshows to a video project You can manually add submenus to a video project: 1 Click File, Open Project, and then select a video project that has less than six project elements. 3 Click the submenu name...
... first menu that you want to the project window. Click Save. 9 Click OK to return to save it. Adding slideshows to a video project You can manually add submenus to a video project: 1 Click File, Open Project, and then select a video project that has less than six project elements. 3 Click the submenu name...


