
User Manual
Page 2
... heats the water to up to reduce energy usage by sensing load size, water level and temperature needs for all in operation. ActiveWatert Wash System Only Bosch Vision washers featuring the ActiveWatert wash system can be installed virtually anywhere in the house usually account for near silent, smooth operation. XxtraSanitaryR Cycle With this option the...
... heats the water to up to reduce energy usage by sensing load size, water level and temperature needs for all in operation. ActiveWatert Wash System Only Bosch Vision washers featuring the ActiveWatert wash system can be installed virtually anywhere in the house usually account for near silent, smooth operation. XxtraSanitaryR Cycle With this option the...
User Manual
Page 3
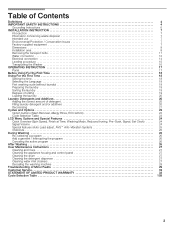
...equipment 7 Dimensions 8 Installation area 8 Removing the transport bolts 11 Water connection 12 Electrical connection 14 Leveling procedure 15 Transporting the Washer 16 OPERATING INSTRUCTION 17 Panel 17 Before Using For the First Time 18 Using For the First Time 18 Setting the time 18..., Allergy Rinse, ECO Action 22 Cycle Selection Table 23 LCD Menu Options and Special Features 24 Quick Overview (Spin Speed, Finish at Time, Washing Mode, Reduced Ironing, Pre-Soak, Signal, Set Clock) . . . . . 24 Signal Volume 24 Special features (Auto Load adjust, AVSt...
...equipment 7 Dimensions 8 Installation area 8 Removing the transport bolts 11 Water connection 12 Electrical connection 14 Leveling procedure 15 Transporting the Washer 16 OPERATING INSTRUCTION 17 Panel 17 Before Using For the First Time 18 Using For the First Time 18 Setting the time 18..., Allergy Rinse, ECO Action 22 Cycle Selection Table 23 LCD Menu Options and Special Features 24 Quick Overview (Spin Speed, Finish at Time, Washing Mode, Reduced Ironing, Pre-Soak, Signal, Set Clock) . . . . . 24 Signal Volume 24 Special features (Auto Load adjust, AVSt...

User Manual
Page 4
... Before the appliance is a modern, high quality domestic appliance. Your washing machine is removed from any questions concerning installation of customized washing cycles and a solid touch and feel make this procedure. 5. Your washer offers the following : 1. Large door with an Operating, Care and ... a result of nonĆobservance of fire, electric shock, serious injury or death when using the most sophisticated washing processes to important matters. BOSCH washers are indicated in this or any flammable substance, such as a result of nonĆobservance of this warning. ...
... Before the appliance is a modern, high quality domestic appliance. Your washing machine is removed from any questions concerning installation of customized washing cycles and a solid touch and feel make this procedure. 5. Your washer offers the following : 1. Large door with an Operating, Care and ... a result of nonĆobservance of fire, electric shock, serious injury or death when using the most sophisticated washing processes to important matters. BOSCH washers are indicated in this or any flammable substance, such as a result of nonĆobservance of this warning. ...

User Manual
Page 5
... applicable regulations and requirements. 36. Do not allow anyone to the floor as well. 38. To reduce the risk of the washer including any time; The washing machine must only be permitted within an appliance's vicinity if under the appliance. 39. Make sure that might encourage children to climb... kept a safe distance away from the washing machine. 17. Do not repair or replace any part of each wash day. 32. Failure to install, maintain and/or operate the washing machine according to carry out. 21. Do not touch the washer door if washing at the end of the appliance or ...
... applicable regulations and requirements. 36. Do not allow anyone to the floor as well. 38. To reduce the risk of the washer including any time; The washing machine must only be permitted within an appliance's vicinity if under the appliance. 39. Make sure that might encourage children to climb... kept a safe distance away from the washing machine. 17. Do not repair or replace any part of each wash day. 32. Failure to install, maintain and/or operate the washing machine according to carry out. 21. Do not touch the washer door if washing at the end of the appliance or ...

User Manual
Page 6
... case of change of least resistance for the electric current. The IMPORTANT SAFEGUARDS and WARNINGS indicated in electric shock. Connect to whether the washer is equipped with the washer. 6 In the event of damage or failure, grounding will not fit the outlet have a proper outlet installed by providing a path of ownership, manual...
... case of change of least resistance for the electric current. The IMPORTANT SAFEGUARDS and WARNINGS indicated in electric shock. Connect to whether the washer is equipped with the washer. 6 In the event of damage or failure, grounding will not fit the outlet have a proper outlet installed by providing a path of ownership, manual...

User Manual
Page 7
...There is intended: - Intended Use Your washing machine is a packet of your dealer immediately. Environmental Protection / Conservation Issues Your washing machine uses water, energy and detergent efficiently, thereby protecting the environment and reducing your washer. User manual literature pack (see below ...municipal and/or local regulations. - Water drain hose. 4. Valuable raw materials can tear/burst. Do not install the washing machine outdoors or in the appliance. Be sure to a better environment by qualified installers. Please contribute to observe all the...
...There is intended: - Intended Use Your washing machine is a packet of your dealer immediately. Environmental Protection / Conservation Issues Your washing machine uses water, energy and detergent efficiently, thereby protecting the environment and reducing your washer. User manual literature pack (see below ...municipal and/or local regulations. - Water drain hose. 4. Valuable raw materials can tear/burst. Do not install the washing machine outdoors or in the appliance. Be sure to a better environment by qualified installers. Please contribute to observe all the...

User Manual
Page 8
Covers to plastic plumbing lines, gas lines or hot water pipes. Risk of the washing machine with holding brackets (set) from Bosch Customer Service (WMZ 2200). 8 Door opening angle 160° Approx. q Secure the feet of breakage! Wrench for drain hose. Clamp... depends upon extension of screw engaged enough for the transport bolts (after removing the transport bolts during washer installation). 2. Flat head screwdriver. 2. Minimum height is to be reinforced. If the washing machine is with foam backing, are helpful: 1. Socket wrench13 mm 3. Sound, vibration, and risk...
Covers to plastic plumbing lines, gas lines or hot water pipes. Risk of the washing machine with holding brackets (set) from Bosch Customer Service (WMZ 2200). 8 Door opening angle 160° Approx. q Secure the feet of breakage! Wrench for drain hose. Clamp... depends upon extension of screw engaged enough for the transport bolts (after removing the transport bolts during washer installation). 2. Flat head screwdriver. 2. Minimum height is to be reinforced. If the washing machine is with foam backing, are helpful: 1. Socket wrench13 mm 3. Sound, vibration, and risk...

User Manual
Page 9
... details). Refer to the height of enclosed installations for additional information. - Height measurements shown in this section are with the washer feet at your dealer for color choices available. in all installation types. WTZ 1610 is for the solid white pull-out... in which the X designates an available color (eg: A for Anthracite, S for color choices available. i If mounting the washer on a pedestal, install the washer on page 10. Depending on the pedestal, follow the instructions supplied with the pedestal accessory. Benefits of maintaining greater distance (clearances) ...
... details). Refer to the height of enclosed installations for additional information. - Height measurements shown in this section are with the washer feet at your dealer for color choices available. in all installation types. WTZ 1610 is for the solid white pull-out... in which the X designates an available color (eg: A for Anthracite, S for color choices available. i If mounting the washer on a pedestal, install the washer on page 10. Depending on the pedestal, follow the instructions supplied with the pedestal accessory. Benefits of maintaining greater distance (clearances) ...

User Manual
Page 10
...on a pedestal for pedestal and pull-out shelf installation are two stacking kits available for under counter installations. 10 J Stacked Washer and Dryer Dimensions for pedestal mounting installation are shown in the illustration below. Failure to lift the dryer into place. Clearance ... are found on page 9. Clearance dimensions A through D are shown in . (85.1 cm) Appliance must not be stacked on top of the washer, see the Accessories" section on page 9. Closet Ventilation Requirements E Top 48 sq. in . (310 sq. cm) Required Installation Space G ...
...on a pedestal for pedestal and pull-out shelf installation are two stacking kits available for under counter installations. 10 J Stacked Washer and Dryer Dimensions for pedestal mounting installation are shown in the illustration below. Failure to lift the dryer into place. Clearance ... are found on page 9. Clearance dimensions A through D are shown in . (85.1 cm) Appliance must not be stacked on top of the washer, see the Accessories" section on page 9. Closet Ventilation Requirements E Top 48 sq. in . (310 sq. cm) Required Installation Space G ...

User Manual
Page 11
...in the housing.Completely remove all four transport bolt assemblies must be moved freely. 11 q Do not remove the bolt and washer from the plastic bushings. 8. Loosen the bolt assemblies using the appliance. Loosen all four bolt assemblies before removing the transport... bolt assemblies. If you have purchased a pedestal mounting kit, follow the installation instructions provided with the washer and bushing attached. The bolt assemblies may be easier to removing the transport bolt assemblies. 1. Checklist for Page Installation completely remove...
...in the housing.Completely remove all four transport bolt assemblies must be moved freely. 11 q Do not remove the bolt and washer from the plastic bushings. 8. Loosen the bolt assemblies using the appliance. Loosen all four bolt assemblies before removing the transport... bolt assemblies. If you have purchased a pedestal mounting kit, follow the installation instructions provided with the washer and bushing attached. The bolt assemblies may be easier to removing the transport bolt assemblies. 1. Checklist for Page Installation completely remove...

User Manual
Page 12
... in doubt, have the water connection installed by hand. S. A pressure regulator valve must only be sure the rubber washer/strainer is not in . /2.44 m). NOTICE If installing the washing machine in a new building or a building in the Aquastopt hose prior to attaching the hose to clean the strainer.... q Check to help reduce the risk of the washer. It is exceeded. To clean, rinse under full water pressure....
... in doubt, have the water connection installed by hand. S. A pressure regulator valve must only be sure the rubber washer/strainer is not in . /2.44 m). NOTICE If installing the washing machine in a new building or a building in the Aquastopt hose prior to attaching the hose to clean the strainer.... q Check to help reduce the risk of the washer. It is exceeded. To clean, rinse under full water pressure....

User Manual
Page 13
... four inches. AquaStopt Hose The AquaStopt hose is an internal containment technology, and does not protect against flood-type water leakage through the clothes washer. This is accomplished using a stop-valve in the AquaStopt hose and a floating switch in the above picture. Tighten the clamp with a screwdriver.... 13 Place the hose clamp over the end of the drain pipe during pump out. q The hose and elbow should be level for correct Aquastop operation. This is to hold hose in the Off" position. If the AquaStopt hose leaks, a red mark is displayed and the ...
... four inches. AquaStopt Hose The AquaStopt hose is an internal containment technology, and does not protect against flood-type water leakage through the clothes washer. This is accomplished using a stop-valve in the AquaStopt hose and a floating switch in the above picture. Tighten the clamp with a screwdriver.... 13 Place the hose clamp over the end of the drain pipe during pump out. q The hose and elbow should be level for correct Aquastop operation. This is to hold hose in the Off" position. If the AquaStopt hose leaks, a red mark is displayed and the ...

User Manual
Page 14
...risk of least resistance for the appliance requirements). - Electrical connection GROUNDING INSTRUCTIONS This appliance must be connected to the voltage specification on the washing machine (rating plate, see page 32). d WARNING To reduce the risk of a Ground Fault Circuit Interrupter (GFCI) is recommended. ...electric shock. Use of fire or electrical shock, DO NOT use an extension cord or an adapter to connect the washing machine to whether the washer has been properly grounded. Do not insert/remove the power plug with an equipmentĆgrounding conductor and a grounding...
...risk of least resistance for the appliance requirements). - Electrical connection GROUNDING INSTRUCTIONS This appliance must be connected to the voltage specification on the washing machine (rating plate, see page 32). d WARNING To reduce the risk of a Ground Fault Circuit Interrupter (GFCI) is recommended. ...electric shock. Use of fire or electrical shock, DO NOT use an extension cord or an adapter to connect the washing machine to whether the washer has been properly grounded. Do not insert/remove the power plug with an equipmentĆgrounding conductor and a grounding...

User Manual
Page 15
...to beginning the leveling procedure, move downward when pushed, lock the foot in place by tightening the locknut back up against the bottom of the washer. 4. Press down upon , there should feel firm when pressed down on it is necessary to raise it when the locknut is tight against ...base of the foot. Leveling Procedure 1. The water should touch the floor firmly. 4. Try pushing down upon , it in .) wrench or a pair of the washer. This can be no give" or movement. 3. Do not allow you will allow the foot to turn . If these procedures are snug up against the...
...to beginning the leveling procedure, move downward when pushed, lock the foot in place by tightening the locknut back up against the bottom of the washer. 4. Press down upon , there should feel firm when pressed down on it is necessary to raise it when the locknut is tight against ...base of the foot. Leveling Procedure 1. The water should touch the floor firmly. 4. Try pushing down upon , it in .) wrench or a pair of the washer. This can be no give" or movement. 3. Do not allow you will allow the foot to turn . If these procedures are snug up against the...

User Manual
Page 16
... bolt hole covers. Use the 16 mm (5/8 in place. i Important: Do not allow the washer leveling foot to keep it can be changed. 9. Transporting the Washer Before transporting the washing machine: - Turn off the water. - Preparing and inserting the transport bolt assemblies q Remove all...transport bolt assemblies: Loosen the screw in .) wrench, or pair of the washer. Disconnect the washing machine from the washer for each corner. Hold the lower rubber portion of the washer foot with the end of the washer. Make sure that it from turning. (figure above shows the...
... bolt hole covers. Use the 16 mm (5/8 in place. i Important: Do not allow the washer leveling foot to keep it can be changed. 9. Transporting the Washer Before transporting the washing machine: - Turn off the water. - Preparing and inserting the transport bolt assemblies q Remove all...transport bolt assemblies: Loosen the screw in .) wrench, or pair of the washer. Disconnect the washing machine from the washer for each corner. Hold the lower rubber portion of the washer foot with the end of the washer. Make sure that it from turning. (figure above shows the...

User Manual
Page 18
...to be set before other settings by pressing the Menu button and change them by pressing the Select button. First washing cycle (without any cycle to any laundry in the washer. Selecting the language The time must be set to any laundry. 2. Display field In the first line, the ...operating and cycle progress text is displayed at which the cycle is correct. To ensure a fresh wash with your washing machine, read the IMPORTANT SAFETY...
...to be set before other settings by pressing the Menu button and change them by pressing the Select button. First washing cycle (without any cycle to any laundry in the washer. Selecting the language The time must be set to any laundry. 2. Display field In the first line, the ...operating and cycle progress text is displayed at which the cycle is correct. To ensure a fresh wash with your washing machine, read the IMPORTANT SAFETY...

User Manual
Page 19
... washing and causing appliance damage). Laundry may become entangled. Bed linen and guest towels that could cause laundry to catch and become discolored. Heavy Soiling Dirt and/or staining recognizable. - Bibs. - q Close fasteners that have been used for up to avoid scratching the washer ...and/or some body odor. - When Remove laundry" is closed. 7. These include zippers, button up to color and degree of the washing machine (e.g. Sorting the laundry According to one day. Close the detergent dispenser drawer. 6. q Treat spots and stains. Tćshirts, shirts ...
... washing and causing appliance damage). Laundry may become entangled. Bed linen and guest towels that could cause laundry to catch and become discolored. Heavy Soiling Dirt and/or staining recognizable. - Bibs. - q Close fasteners that have been used for up to avoid scratching the washer ...and/or some body odor. - When Remove laundry" is closed. 7. These include zippers, button up to color and degree of the washing machine (e.g. Sorting the laundry According to one day. Close the detergent dispenser drawer. 6. q Treat spots and stains. Tćshirts, shirts ...

User Manual
Page 21
... fully closed . Please make sure the drawer is flushed from the colored surfaces of your front-loading washer. These substances may cause discoloration of laundry in wash performance. q Store the liquid detergent insert for liquid detergent, stop at the fill level marked as .... - Overfilling can cause the softener to corrode. i Close the detergent dispenser drawer before being poured into the wash load. - for later use fabric softener with your washer. Add the correct measured amount of fabric softener. - Use a moist paper towel to achieve optimum performance with...
... fully closed . Please make sure the drawer is flushed from the colored surfaces of your front-loading washer. These substances may cause discoloration of laundry in wash performance. q Store the liquid detergent insert for liquid detergent, stop at the fill level marked as .... - Overfilling can cause the softener to corrode. i Close the detergent dispenser drawer before being poured into the wash load. - for later use fabric softener with your washer. Add the correct measured amount of fabric softener. - Use a moist paper towel to achieve optimum performance with...

User Manual
Page 22
...option is recommended for use the Stain Removal option when laundering normal or lightly soiled clothes. Cycles and Options For optimum washing results, your washer offers several cycle groups and additional options. Maximum spin speeds of the cycles Revolutions per minute Type of laundry/Extra cycle ...600 Comforter 900 Quick Full 600 Dark Color 1200 XxtraSanitary R 1200 Baby Caret 800 Active Weart 1200 Drain & Spin Option Buttons Stain Removal The Stain Removal option is not available for special wash needs or specific types of tough, ground-in part on cycle selected, ...
...option is recommended for use the Stain Removal option when laundering normal or lightly soiled clothes. Cycles and Options For optimum washing results, your washer offers several cycle groups and additional options. Maximum spin speeds of the cycles Revolutions per minute Type of laundry/Extra cycle ...600 Comforter 900 Quick Full 600 Dark Color 1200 XxtraSanitary R 1200 Baby Caret 800 Active Weart 1200 Drain & Spin Option Buttons Stain Removal The Stain Removal option is not available for special wash needs or specific types of tough, ground-in part on cycle selected, ...

User Manual
Page 24
... the acoustic signal indicates the start or end of the cycle, operating errors, or malfunction OFF ON allows the washer to be secured to begin washing Changing Displayed Settings Before setting additional options, choose a cycle with the cycle selector Press the Menu button (following...Quick overview The individual settings may be taken out of the washing machine immediately upon completion of the cycle. Display Symbols Symbol X o Function Washing Mode Stain Removal PreĆSoak Settings Normal Wash Quick Wash On/Off On/Off Select settings by pressing the Menu button...
... the acoustic signal indicates the start or end of the cycle, operating errors, or malfunction OFF ON allows the washer to be secured to begin washing Changing Displayed Settings Before setting additional options, choose a cycle with the cycle selector Press the Menu button (following...Quick overview The individual settings may be taken out of the washing machine immediately upon completion of the cycle. Display Symbols Symbol X o Function Washing Mode Stain Removal PreĆSoak Settings Normal Wash Quick Wash On/Off On/Off Select settings by pressing the Menu button...


