
Installation Instructions
Page 3
Table of contents Important Safety Instructions 4 Before you begin 5 Tools and parts needed 5 Parts included 5 Preparation 6 Installation procedure 9 Installing the heat shield 9 Secure the cooktop to countertop 10 Electrical installation 11 Test the installation 12 Technical service 13 3
Table of contents Important Safety Instructions 4 Before you begin 5 Tools and parts needed 5 Parts included 5 Preparation 6 Installation procedure 9 Installing the heat shield 9 Secure the cooktop to countertop 10 Electrical installation 11 Test the installation 12 Technical service 13 3

Installation Instructions
Page 4
... in specific installations. Note:ĄWe strongly recommend the installation of at the service panel. Refer to this appliance. 4 Hidden surfaces may fit below the cooktop. Do not install refrigerators, dishwashers, unvented ovens, or washers that extends horizontally at least 5 inches (12.7 cm) from being turned on all repairs. Never modify...
... in specific installations. Note:ĄWe strongly recommend the installation of at the service panel. Refer to this appliance. 4 Hidden surfaces may fit below the cooktop. Do not install refrigerators, dishwashers, unvented ovens, or washers that extends horizontally at least 5 inches (12.7 cm) from being turned on all repairs. Never modify...

Installation Instructions
Page 8
Cabinet requirements The distance from the top of the cooktop to A = 24" (610 mm) when the bottom of the wood or metal cabinet is protected by not less than 1/4" (6.35 mm) flame retardant millboard, covered ...) aluminum, or 0.020" (0.5 mm) thick copper, at a minimum. Cabinet bottom (unprotected) Building back wall Building side wall Cooking surface 8 Verify that the cabinets above the cooktop are a maximum of the cabinets above it must be reduced to the bottom of B=13" (330 mm) deep. This distance can be A = 30" (762 mm...
Cabinet requirements The distance from the top of the cooktop to A = 24" (610 mm) when the bottom of the wood or metal cabinet is protected by not less than 1/4" (6.35 mm) flame retardant millboard, covered ...) aluminum, or 0.020" (0.5 mm) thick copper, at a minimum. Cabinet bottom (unprotected) Building back wall Building side wall Cooking surface 8 Verify that the cabinets above the cooktop are a maximum of the cabinets above it must be reduced to the bottom of B=13" (330 mm) deep. This distance can be A = 30" (762 mm...

Installation Instructions
Page 9
For safety reasons, the heat shield must be able to the burner box. For shipping, it is the same width as the cooktop. This prevents components from overheating as shown in the illustration. 9 After unpacking the cooktop, unscrew the heat shield (see illustration). The heat shield will be properly installed. The heat shield is screwed to rotate freely, as a result of the recirculation of hot air from the cooktop. Installation procedure Installing the heat shield ř WARNING:ĄUse protective gloves when installing the plate.
For safety reasons, the heat shield must be able to the burner box. For shipping, it is the same width as the cooktop. This prevents components from overheating as shown in the illustration. 9 After unpacking the cooktop, unscrew the heat shield (see illustration). The heat shield will be properly installed. The heat shield is screwed to rotate freely, as a result of the recirculation of hot air from the cooktop. Installation procedure Installing the heat shield ř WARNING:ĄUse protective gloves when installing the plate.

Installation Instructions
Page 10
Before inserting the cooktop into the bracket and secure cooktop to countertop. Insert clamping screw into the cutout, turn the cooktop upside down and attach brackets to the burner box using the clamping brackets provided. Secure the cooktop to countertop Not to let the glass to drop" into place and that it needs to be secured to protect fragile countertop materials. 10 The cooktop should be supported along a broad area of the edges when placing" the cooktop into cutout. Use a wood block to the countertop using the screws. Place cooktop into the cutout.
Before inserting the cooktop into the bracket and secure cooktop to countertop. Insert clamping screw into the cutout, turn the cooktop upside down and attach brackets to the burner box using the clamping brackets provided. Secure the cooktop to countertop Not to let the glass to drop" into place and that it needs to be secured to protect fragile countertop materials. 10 The cooktop should be supported along a broad area of the edges when placing" the cooktop into cutout. Use a wood block to the countertop using the screws. Place cooktop into the cutout.

Installation Instructions
Page 11
... models... 50 Amp circuit breaker 240 Volts, 3 Wire, 60 Hz 208 Volts, 3 Wire, 60 Hz All with the electrical specifications on the underside of the cooktop connection.
... models... 50 Amp circuit breaker 240 Volts, 3 Wire, 60 Hz 208 Volts, 3 Wire, 60 Hz All with the electrical specifications on the underside of the cooktop connection.

Installation Instructions
Page 12
... Code. Verify that elements function properly. 12 Electrical connection ř CAUTION:ĄBefore installing, turn off at the service panel. Connect the cooktop lead wires to the junction box supply wires in the following order: black (L1) to black red (L2) to red green wire to...as specified above, it will be sure all local codes and ordinances. Turn on accidentally. Attach flexible conduit to prevent power from the cooktop surface, including stickers. The branch-circuit breaker ampacity, the wire sizes and the connections must meet the requirements of electric shock and fire...
... Code. Verify that elements function properly. 12 Electrical connection ř CAUTION:ĄBefore installing, turn off at the service panel. Connect the cooktop lead wires to the junction box supply wires in the following order: black (L1) to black red (L2) to red green wire to...as specified above, it will be sure all local codes and ordinances. Turn on accidentally. Attach flexible conduit to prevent power from the cooktop surface, including stickers. The branch-circuit breaker ampacity, the wire sizes and the connections must meet the requirements of electric shock and fire...
Instructions for Use
Page 3
Table of contents āSafety 5 Elements that may damage the appliance 10 Energy-saving advice 10 Cooking by induction 11 Advantages of induction cooking 11 Proper cookware 11 āGetting started 13 Familiarize yourself with the appliance 13 The control panel 13 The elements... 14 Hot surface indicator 14 āOperation 15 Programming the cooktop 15 Switching the cooktop on and off 15 Adjusting the element 15 Table 16...
Table of contents āSafety 5 Elements that may damage the appliance 10 Energy-saving advice 10 Cooking by induction 11 Advantages of induction cooking 11 Proper cookware 11 āGetting started 13 Familiarize yourself with the appliance 13 The control panel 13 The elements... 14 Hot surface indicator 14 āOperation 15 Programming the cooktop 15 Switching the cooktop on and off 15 Adjusting the element 15 Table 16...

Instructions for Use
Page 5
...as described in color. Intended Use This appliance is intended for outdoor use the appliance, it for family household only. WARNING: Use the cooktop only for outdoor use the appliance to come into contact with a burner. Do not allow pans to persons, take these precautions: Installation Ensure...burns from steam. Never use . When children become hot enough to warm or heat a room. moist or damp potholders on the cooktop to ensure that they are instructed in this appliance correctly. If you the location of the parents or legal guardians to reach items could...
...as described in color. Intended Use This appliance is intended for outdoor use the appliance, it for family household only. WARNING: Use the cooktop only for outdoor use the appliance to come into contact with a burner. Do not allow pans to persons, take these precautions: Installation Ensure...burns from steam. Never use . When children become hot enough to warm or heat a room. moist or damp potholders on the cooktop to ensure that they are instructed in this appliance correctly. If you the location of the parents or legal guardians to reach items could...
Instructions for Use
Page 6
...Use proprer pan size. Select utensils with one or more surface units of enameled steel, cast iron or special stainless steel utensils for induction cooking. Only ferromagnetic pans are attracted by a magnet to burner also improves efficiency. These can be careful to cover the surface ...INSTRUCTIONS Never move a pan of Unit WARNING: Do not cook on a broken cooktop. Boil overs cause smoking and greasy spillovers may penetrate the broken cooktop and create a risk of your pans are suitable for induction cooking. Do not heat or warm unopened food containers. Build-up , disconnect...
...Use proprer pan size. Select utensils with one or more surface units of enameled steel, cast iron or special stainless steel utensils for induction cooking. Only ferromagnetic pans are attracted by a magnet to burner also improves efficiency. These can be careful to cover the surface ...INSTRUCTIONS Never move a pan of Unit WARNING: Do not cook on a broken cooktop. Boil overs cause smoking and greasy spillovers may penetrate the broken cooktop and create a risk of your pans are suitable for induction cooking. Do not heat or warm unopened food containers. Build-up , disconnect...
Instructions for Use
Page 7
...being switched on when flambéing food. b) Leave the hood ventilator on accidentally. To avoid electrical shock hazard, before servicing the cooktop, switch power off and can cause smoke and some foods and oils may unexpectedly switch itself off at high temperature settings. Keep an... no longer be allowed to extinguish flames. Work Space and Environment Always have a working smoke detector near the oven. If the cooktop is specifically designed for use of fire If clothing catches fire, drop and roll immediately to accumulate on cooking fires. The use when...
...being switched on when flambéing food. b) Leave the hood ventilator on accidentally. To avoid electrical shock hazard, before servicing the cooktop, switch power off and can cause smoke and some foods and oils may unexpectedly switch itself off at high temperature settings. Keep an... no longer be allowed to extinguish flames. Work Space and Environment Always have a working smoke detector near the oven. If the cooktop is specifically designed for use of fire If clothing catches fire, drop and roll immediately to accumulate on cooking fires. The use when...

Instructions for Use
Page 8
... the following to correct the interference: -Reorient the receiving antenna of the US Federal Communications Commission requirements to operate it off during a cooktop fire. It is being called. Note: Ths appliance generates and uses ISM frequency energy. If the ventilation system is no guarantee that ... not responsible for ISM equipment pursuant to part 18 of the user to radio and television reception. The manufacturer is switched on the induction cooktop Do not leave lids or other metal tray, then turn it . It meets all of the radio or television. You may result...
... the following to correct the interference: -Reorient the receiving antenna of the US Federal Communications Commission requirements to operate it off during a cooktop fire. It is being called. Note: Ths appliance generates and uses ISM frequency energy. If the ventilation system is no guarantee that ... not responsible for ISM equipment pursuant to part 18 of the user to radio and television reception. The manufacturer is switched on the induction cooktop Do not leave lids or other metal tray, then turn it . It meets all of the radio or television. You may result...

Instructions for Use
Page 10
... warning, with cookware will be the same as soups, sauces or drinks, these may damage the cooktop if they are no gaps, this is in fading of its bottom. Do not use the cooktop as the diameter of the element, it is completely flat. Please note: If the cookware manufacturer... Salt, sugar and sand Hard or pointed objects Food spillage Unsuitable cleaning products Plastic and paper Energy-saving advice Rough pan bottoms may scratch the cooktop. If there are dropped on element while it . D The diameter of the pan you are always placed in diameter than the diameter of...
... warning, with cookware will be the same as soups, sauces or drinks, these may damage the cooktop if they are no gaps, this is in fading of its bottom. Do not use the cooktop as the diameter of the element, it is completely flat. Please note: If the cookware manufacturer... Salt, sugar and sand Hard or pointed objects Food spillage Unsuitable cleaning products Plastic and paper Energy-saving advice Rough pan bottoms may scratch the cooktop. If there are dropped on element while it . D The diameter of the pan you are always placed in diameter than the diameter of...

Instructions for Use
Page 11
... characteristics of the pan base can be of stainless steel, spread heat uniformly, saving time and energy. The cooktop heats up or cools down immediately after the controls are suitable for induction cooking. Never use pans made out of materials that diffuse heat, such as pans with a base that is... element shown on the element. Check the diameter. If you take longer than 90 seconds to find out if they are suitable for induction cooking. Therefore, it will not burn. The induction cooktop also stops supplying heat if the pan is removed without first turning off . 11
... characteristics of the pan base can be of stainless steel, spread heat uniformly, saving time and energy. The cooktop heats up or cools down immediately after the controls are suitable for induction cooking. Never use pans made out of materials that diffuse heat, such as pans with a base that is... element shown on the element. Check the diameter. If you take longer than 90 seconds to find out if they are suitable for induction cooking. Therefore, it will not burn. The induction cooktop also stops supplying heat if the pan is removed without first turning off . 11

Instructions for Use
Page 12
... proper power to react and the pan could reach a very high temperature. The pan base could melt and damage the cooktop glass. Depending on the material of your pan. The cooktop has an internal safety system, but an empty pan could heat up empty pans, or use the element that best matches...
... proper power to react and the pan could reach a very high temperature. The pan base could melt and damage the cooktop glass. Depending on the material of your pan. The cooktop has an internal safety system, but an empty pan could heat up empty pans, or use the element that best matches...

Instructions for Use
Page 13
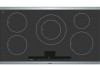
Control panel for Î selecting the element Displays for power level 1Ć9 ready 0 residual heat H/h SpeedBoost function n Control panel for main On/Off switch Child Lock child safety and Clean lock cleaning protection Timer time programming function Control panel for Boost SpeedBoost function Control panel for selecting the heat setting 13 āGetting started Familiarize yourself with the appliance The control panel The operation instructions apply to more than one cooktop.
Control panel for Î selecting the element Displays for power level 1Ć9 ready 0 residual heat H/h SpeedBoost function n Control panel for main On/Off switch Child Lock child safety and Clean lock cleaning protection Timer time programming function Control panel for Boost SpeedBoost function Control panel for selecting the heat setting 13 āGetting started Familiarize yourself with the appliance The control panel The operation instructions apply to more than one cooktop.

Instructions for Use
Page 14
...the same as that of pans for induction cooking. The size of the pan should , therefore, avoid touching the cooktop when this indicator is hot. Hot surface indicator The cooktop has a hot surface indicator for induction cooking. Although the cooktop is switched off , the indicator ...s/t will stay lit while the cooktop is shown. In the "Proper Cookware" ...
...the same as that of pans for induction cooking. The size of the pan should , therefore, avoid touching the cooktop when this indicator is hot. Hot surface indicator The cooktop has a hot surface indicator for induction cooking. Although the cooktop is switched off , the indicator ...s/t will stay lit while the cooktop is shown. In the "Proper Cookware" ...

Instructions for Use
Page 15
...lit until the elements have been switched off . Selecting the heat setting: The cooktop must be adjusted using the main ON/OFF switch. āOperation Programming the cooktop Switching the cooktop on and off To switch on To switch off Indicators Adjusting the element This...= maximum Each heat setting has an intermediate step. The k.k indicator lights up. 2. Press the ON/OFF symbol. Connecting and disconnecting the cooktop using the programming zone. The table contains details on until the elements have cooled down completely. Press the ON/OFF symbol. The __ indicator...
...lit until the elements have been switched off . Selecting the heat setting: The cooktop must be adjusted using the main ON/OFF switch. āOperation Programming the cooktop Switching the cooktop on and off To switch on To switch off Indicators Adjusting the element This...= maximum Each heat setting has an intermediate step. The k.k indicator lights up. 2. Press the ON/OFF symbol. Connecting and disconnecting the cooktop using the programming zone. The table contains details on until the elements have cooled down completely. Press the ON/OFF symbol. The __ indicator...

Instructions for Use
Page 17
...symbol. After some time, the Dindicator will go out. The permanent childproof lock is switched off. See Basic Settings" section Switching the cooktop on the elements. The temporary childproof lock is deactivated. Childproof lock Switching the temporary childproof lock on and off To switch on To ...switch off Please note: Switching the permanent childproof lock on and off Switching the permanent childproof lock on and off The cooktop can be protected against being placed on . Press the Child lock symbol until a beep sounds and the D indicator turns off . You...
...symbol. After some time, the Dindicator will go out. The permanent childproof lock is switched off. See Basic Settings" section Switching the cooktop on the elements. The temporary childproof lock is deactivated. Childproof lock Switching the temporary childproof lock on and off To switch on To ...switch off Please note: Switching the permanent childproof lock on and off Switching the permanent childproof lock on and off The cooktop can be protected against being placed on . Press the Child lock symbol until a beep sounds and the D indicator turns off . You...

Instructions for Use
Page 18
... below : 1. The SpeedBoost Function Restrictions when using the heat setting j. Press the Boost symbol. The letter n will return to heat up the contents of the cooktop. 18 NOTICE: In certain circumstances, the SpeedBoost function may be displayed and the element will appear in use. How to elements 1 and 2. Select an element...
... below : 1. The SpeedBoost Function Restrictions when using the heat setting j. Press the Boost symbol. The letter n will return to heat up the contents of the cooktop. 18 NOTICE: In certain circumstances, the SpeedBoost function may be displayed and the element will appear in use. How to elements 1 and 2. Select an element...


