

Installation Instructions
Page 1
Built-in Combination Ovens Installation Manual HSLP751UC, HBL57M52UC, HBL8752UC, HBLP752UC, HBL87M52UC
Built-in Combination Ovens Installation Manual HSLP751UC, HBL57M52UC, HBL8752UC, HBLP752UC, HBL87M52UC
Installation Instructions
Page 3
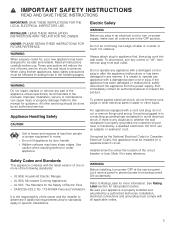
... fuse. DO NOT use . OWNER: PLEASE RETAIN THESE INSTRUCTIONS FOR FUTURE REFERENCE. For appliances equipped with all applicable codes. 3 Installation, electrical connections and grounding must be done by door handle. ▯ Hidden surfaces may have it for easy reference. WARNING When... properly cared for, your appliance is properly installed and grounded by the National Electrical Code (or Canadian Electrical Code), this manual for the Safety of one or more information. If required by a authorized technician. Installer-show the owner the location of table or...
... fuse. DO NOT use . OWNER: PLEASE RETAIN THESE INSTRUCTIONS FOR FUTURE REFERENCE. For appliances equipped with all applicable codes. 3 Installation, electrical connections and grounding must be done by door handle. ▯ Hidden surfaces may have it for easy reference. WARNING When... properly cared for, your appliance is properly installed and grounded by the National Electrical Code (or Canadian Electrical Code), this manual for the Safety of one or more information. If required by a authorized technician. Installer-show the owner the location of table or...
Installation Instructions
Page 6
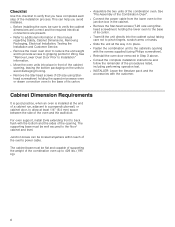
...arms or hands. ▯ Slide the unit all the way in this checklist to verify that you avoid mistakes. ▯ Before installing the oven, be well secured to the floor/ cabinet and level. Leave the literature pack and the accessories with the screws supplied... information in to place. ▯ Fasten the combination unit to the cabinetry opening . Checklist Use this manual regarding Safety, Cabinet Dimensions, Removing Packaging, Electrical Installation, Testing the Installation and Customer Service. ▯ Remove the lower oven door to reduce the unit weight and to provide access...
...arms or hands. ▯ Slide the unit all the way in this checklist to verify that you avoid mistakes. ▯ Before installing the oven, be well secured to the floor/ cabinet and level. Leave the literature pack and the accessories with the screws supplied... information in to place. ▯ Fasten the combination unit to the cabinetry opening . Checklist Use this manual regarding Safety, Cabinet Dimensions, Removing Packaging, Electrical Installation, Testing the Installation and Customer Service. ▯ Remove the lower oven door to reduce the unit weight and to provide access...
Installation Instructions
Page 13
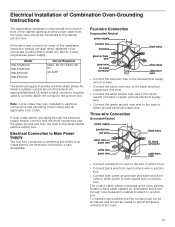
All model ovens on the front cover of this installation instruction manual are dual rated, designed to be used to correctly attach ...of the oven. 13 Model HBL57M52UC HBL87M52UC HBL8752UC HBLP752UC Circuit Required 208V, 60 Hz/ 240V, 60 Hz 40 AMP The electrical supply should be routed to junction box. Installation, electrical connections and grounding must ... to the cabinet junction box. The conduit cable, where connected at the oven, swivels. Electrical Installation of Combination Oven-Grounding Instructions The assembled combination oven should be moved in front of the cabinet...
All model ovens on the front cover of this installation instruction manual are dual rated, designed to be used to correctly attach ...of the oven. 13 Model HBL57M52UC HBL87M52UC HBL8752UC HBLP752UC Circuit Required 208V, 60 Hz/ 240V, 60 Hz 40 AMP The electrical supply should be routed to junction box. Installation, electrical connections and grounding must ... to the cabinet junction box. The conduit cable, where connected at the oven, swivels. Electrical Installation of Combination Oven-Grounding Instructions The assembled combination oven should be moved in front of the cabinet...

Installation Instructions
Page 14
...9647; Check that the cabinet opening is glass. The door front is level and plumb for correct installation. Be sure to read all the way down toward you are securely in the installation manual regarding the door removal before removing the door. Open the door completely. Flip latch levers on hinges...over. Lay door on sharp or pointed objects as it may swing in your hand and cause damage or injury. ▯ Failure to Installation It is heavy and fragile. Remove Lower Oven Door Prior to grasp the oven door firmly and properly could result in a convenient and ...
...9647; Check that the cabinet opening is glass. The door front is level and plumb for correct installation. Be sure to read all the way down toward you are securely in the installation manual regarding the door removal before removing the door. Open the door completely. Flip latch levers on hinges...over. Lay door on sharp or pointed objects as it may swing in your hand and cause damage or injury. ▯ Failure to Installation It is heavy and fragile. Remove Lower Oven Door Prior to grasp the oven door firmly and properly could result in a convenient and ...

Installation Instructions
Page 16
...not engaged properly and the door could fall if it is flush with front of Limited Warranty in the Use and Care Manuals. Refer to cabinetry. This is released. Re-Install the Lower Oven Door Hold the door firmly in the slots. Hold the door at an 30° angle from ... the combined unit into the cabinet cutout without allowing the unit base to crimp the flexible conduit between the oven and the cabinet back wall. Installing the Oven into the slots. Push latch levers up until they are locked into the cabinet opening. This illustration shows a detailed view of the...
...not engaged properly and the door could fall if it is flush with front of Limited Warranty in the Use and Care Manuals. Refer to cabinetry. This is released. Re-Install the Lower Oven Door Hold the door firmly in the slots. Hold the door at an 30° angle from ... the combined unit into the cabinet cutout without allowing the unit base to crimp the flexible conduit between the oven and the cabinet back wall. Installing the Oven into the slots. Push latch levers up until they are locked into the cabinet opening. This illustration shows a detailed view of the...
Instructions for Use
Page 5
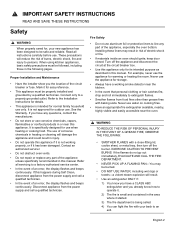
... violent steam explosion will damage the appliance and could result in or near this manual. Refer all instructions carefully before use aluminum foil or protective liners to the Installation Instructions for details. • This appliance is specifically designed for storage. •... for outdoor use corrosive chemicals, vapors, flammables or nonfood products in injury. • Do not operate this manual. Proper Installation and Maintenance • Have the installer show you the location of corrosive chemicals in heating or cleaning will result. • Use an extinguisher ONLY...
... violent steam explosion will damage the appliance and could result in or near this manual. Refer all instructions carefully before use aluminum foil or protective liners to the Installation Instructions for details. • This appliance is specifically designed for storage. •... for outdoor use corrosive chemicals, vapors, flammables or nonfood products in injury. • Do not operate this manual. Proper Installation and Maintenance • Have the installer show you the location of corrosive chemicals in heating or cleaning will result. • Use an extinguisher ONLY...

Instructions for Use
Page 13
...be edited. Each number pressed is now set the clock before use the oven. The oven design has been optimized to be properly installed by pressing Enter. All that require the current time to improve heat distribution in operation). 2. Basic Features Setting the Clock The .... 1. Press and hold the Kitchen Timer button for setting the clock appears automatically after a power outage. This manual includes all safety precautions and Use and Care Manual information prior to step 3. We welcome your comments and suggestions! The oven must be set mode. Thanks to the...
...be edited. Each number pressed is now set the clock before use the oven. The oven design has been optimized to be properly installed by pressing Enter. All that require the current time to improve heat distribution in operation). 2. Basic Features Setting the Clock The .... 1. Press and hold the Kitchen Timer button for setting the clock appears automatically after a power outage. This manual includes all safety precautions and Use and Care Manual information prior to step 3. We welcome your comments and suggestions! The oven must be set mode. Thanks to the...
Instructions for Use
Page 22
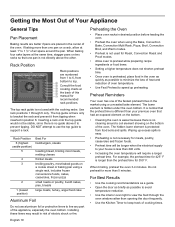
... up preheating. It is normal that the preheat time is different than one of oven temperature. • Use Fast Preheat to keep track of this manual for meats, poultry, casseroles and frozen foods. • Preheat time will require a longer preheat time. Do not preheat for Roast, Convection Roast and Proof modes... Results • Use the cooking recommendations as a guide. • Open the door as briefly as possible to prevent tipping. When broiling, preheat the oven 3-4 minutes. Installing these liners may result in position 6.
... up preheating. It is normal that the preheat time is different than one of oven temperature. • Use Fast Preheat to keep track of this manual for meats, poultry, casseroles and frozen foods. • Preheat time will require a longer preheat time. Do not preheat for Roast, Convection Roast and Proof modes... Results • Use the cooking recommendations as a guide. • Open the door as briefly as possible to prevent tipping. When broiling, preheat the oven 3-4 minutes. Installing these liners may result in position 6.


