Storm Series 2010 product brochure
Page 3
...individual's hand size. Standard flush magazines may be positioned for right-handed or left handed shooter, is pulled completely back. Disassembly latch does not remove from its proper operation at any forward movement until the trigger is spring loaded so it's either ...positively "on ergonomics and the renowned Beretta reliability and performance, the Px4 Storm emphasizes power, ease of handling, performance and reliability. PX4 STORM The new Beretta Px4 Storm pistol is depressed. Built around a modular concept that , in three calibers,...
...individual's hand size. Standard flush magazines may be positioned for right-handed or left handed shooter, is pulled completely back. Disassembly latch does not remove from its proper operation at any forward movement until the trigger is spring loaded so it's either ...positively "on ergonomics and the renowned Beretta reliability and performance, the Px4 Storm emphasizes power, ease of handling, performance and reliability. PX4 STORM The new Beretta Px4 Storm pistol is depressed. Built around a modular concept that , in three calibers,...

Beretta CX4 Storm User Manual
Page 4
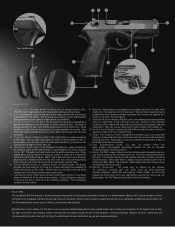
..., there are other influences beyond manufacturer's direct and immediate control. * See paragraph "Ammunition". ! In addition to the loading, unloading, disassembly, assembly and use of this firearm, located throughout this manual. ! The use of other manufacturer's spare parts and accessories could cause malfunctions... and/or breakages that will not be covered by the Beretta Warranty. 46 WARNING: READ THE ENTIRE MANUAL CAREFULLY BEFORE USING THIS FIREARM. We recommend the use of original Beretta spare parts and accessories. INCLUDE IT WITH THE CARBINE WHEN IT ...
..., there are other influences beyond manufacturer's direct and immediate control. * See paragraph "Ammunition". ! In addition to the loading, unloading, disassembly, assembly and use of this firearm, located throughout this manual. ! The use of other manufacturer's spare parts and accessories could cause malfunctions... and/or breakages that will not be covered by the Beretta Warranty. 46 WARNING: READ THE ENTIRE MANUAL CAREFULLY BEFORE USING THIS FIREARM. We recommend the use of original Beretta spare parts and accessories. INCLUDE IT WITH THE CARBINE WHEN IT ...

Beretta CX4 Storm User Manual
Page 5
Page 48 54 56 56 58 60 61 61 63 63 65 66 68 71 72 74 77 77 79 81 84 47 CONTENTS BASIC SAFETY RULES NOMENCLATURE DESCRIPTION SAFETY FEATURES OPERATIONAL AND ANATOMICAL FEATURES SPECIFICATIONS GENERAL OPERATION LOAD CHECK OBSTRUCTION CHECK DISASSEMBLY REASSEMBLY AMMUNITION LOADING AND FIRING UNLOADING ADJUSTING THE SIGHTS AND SIGHTING FIRING PICATINNY RAILS MOUNTING THE STOCK SPACERS REVERSING THE CONTROLS MAINTENANCE STORAGE This instruction manual consisting of 171 pages.
Page 48 54 56 56 58 60 61 61 63 63 65 66 68 71 72 74 77 77 79 81 84 47 CONTENTS BASIC SAFETY RULES NOMENCLATURE DESCRIPTION SAFETY FEATURES OPERATIONAL AND ANATOMICAL FEATURES SPECIFICATIONS GENERAL OPERATION LOAD CHECK OBSTRUCTION CHECK DISASSEMBLY REASSEMBLY AMMUNITION LOADING AND FIRING UNLOADING ADJUSTING THE SIGHTS AND SIGHTING FIRING PICATINNY RAILS MOUNTING THE STOCK SPACERS REVERSING THE CONTROLS MAINTENANCE STORAGE This instruction manual consisting of 171 pages.
Beretta CX4 Storm User Manual
Page 12
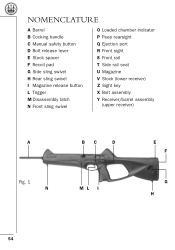
NOMENCLATURE A Barrel B Cocking handle C Manual safety button D Bolt release lever E Stock spacer F Recoil pad G Side sling swivel H Rear sling swivel I Magazine release button L Trigger M Disassembly latch N Front sling swivel O Loaded chamber indicator P Peep rearsight Q Ejection port R Front sight S Front rail T Side rail seat U Magazine V Stock (lower receiver) Z Sight key X Bolt assembly Y Receiver/barrel assembly (upper receiver) A BC D Fig. 1 N ML I E F G H 54
NOMENCLATURE A Barrel B Cocking handle C Manual safety button D Bolt release lever E Stock spacer F Recoil pad G Side sling swivel H Rear sling swivel I Magazine release button L Trigger M Disassembly latch N Front sling swivel O Loaded chamber indicator P Peep rearsight Q Ejection port R Front sight S Front rail T Side rail seat U Magazine V Stock (lower receiver) Z Sight key X Bolt assembly Y Receiver/barrel assembly (upper receiver) A BC D Fig. 1 N ML I E F G H 54
Beretta CX4 Storm User Manual
Page 17
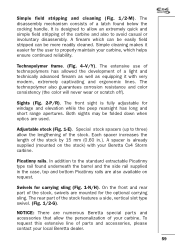
...as equipping it easier for the optional carrying sling. Sights (Fig. 2-P/R). Both sights may be more readily cleaned. The disassembly mechanism consists of parts and accessories, please contact your carbine. It is designed to three) allow an extremely quick and ...mounted for the user to the standard extractable Picatinny type rail found below the cocking handle. In addition to properly maintain your Beretta Cx4 Storm carbine. Adjustable stock (Fig. 1-E). Picatinny rails. The technopolymer also guarantees corrosion resistance and color consistency (the color will never ...
...as equipping it easier for the optional carrying sling. Sights (Fig. 2-P/R). Both sights may be more readily cleaned. The disassembly mechanism consists of parts and accessories, please contact your carbine. It is designed to three) allow an extremely quick and ...mounted for the user to the standard extractable Picatinny type rail found below the cocking handle. In addition to properly maintain your Beretta Cx4 Storm carbine. Adjustable stock (Fig. 1-E). Picatinny rails. The technopolymer also guarantees corrosion resistance and color consistency (the color will never ...
Beretta CX4 Storm User Manual
Page 21
... the field stripping operations over a table to catch components should they drop. magazine is advisable to cock the hammer. CAUTION: Before disassembling the parts, carefully observe and memorize the position of the components to facilitate their correct reassembly. • Remove the magazine by means... of the carbine. (Fig. 9) The disassembly latch can result. To close the bolt press the bolt release lever downwards. Please refer to the closed position. (Fig. 7) WARNING: By...
... the field stripping operations over a table to catch components should they drop. magazine is advisable to cock the hammer. CAUTION: Before disassembling the parts, carefully observe and memorize the position of the components to facilitate their correct reassembly. • Remove the magazine by means... of the carbine. (Fig. 9) The disassembly latch can result. To close the bolt press the bolt release lever downwards. Please refer to the closed position. (Fig. 7) WARNING: By...
Beretta CX4 Storm User Manual
Page 22
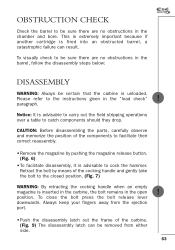
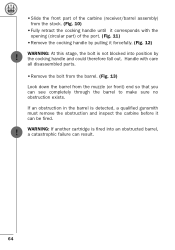
... front part of the carbine (receiver/barrel assembly) from the stock. (Fig. 10) • Fully retract the cocking handle until it corresponds with care all disassembled parts. • Remove the bolt from the barrel. (Fig. 13) Look down the barrel from the muzzle (or front) end so that you can see...
... front part of the carbine (receiver/barrel assembly) from the stock. (Fig. 10) • Fully retract the cocking handle until it corresponds with care all disassembled parts. • Remove the bolt from the barrel. (Fig. 13) Look down the barrel from the muzzle (or front) end so that you can see...

Beretta CX4 Storm User Manual
Page 23
... together. • Pull the trigger to decock the hammer. 65 If not, completely pull the trigger and keep it stops. • Insert and push the disassembly latch in the cocked position (fully retracted). (Fig. 14 and 15) • Reassemble the bolt on the barrel corresponding the lower guides of the bolt...
... together. • Pull the trigger to decock the hammer. 65 If not, completely pull the trigger and keep it stops. • Insert and push the disassembly latch in the cocked position (fully retracted). (Fig. 14 and 15) • Reassemble the bolt on the barrel corresponding the lower guides of the bolt...

Beretta CX4 Storm User Manual
Page 34
... detect any other irregularity: CEASE FIRING IMMEDIATELY! • Keep the firearm pointed in a dangerous bore obstruction. ! ! ! ! 76 • Using the disassembly instructions in the beginning of this manual. •Using the disassembly instructions remove the framebarrel/bolt assembly from the stock and visually check to be sure there are no obstructions in...
... detect any other irregularity: CEASE FIRING IMMEDIATELY! • Keep the firearm pointed in a dangerous bore obstruction. ! ! ! ! 76 • Using the disassembly instructions in the beginning of this manual. •Using the disassembly instructions remove the framebarrel/bolt assembly from the stock and visually check to be sure there are no obstructions in...
Beretta CX4 Storm User Manual
Page 35
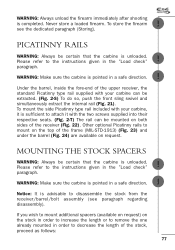
Please refer to disassemble the stock from the receiver/barrel/bolt assembly (see the dedicated paragraph (Storing). Notice: It is advisable to the instructions given in the "Load check" ... Picatinny type rail supplied with your carbine can be certain that the carbine is pointed in a safe direction. To store the firearm see paragraph regarding disassembly). PICATINNY RAILS ! WARNING: Always unload the firearm immediately after shooting ! is unloaded. Under the barrel, inside the fore-end of the receiver (Fig. 22). MOUNTING...
Please refer to disassemble the stock from the receiver/barrel/bolt assembly (see the dedicated paragraph (Storing). Notice: It is advisable to the instructions given in the "Load check" ... Picatinny type rail supplied with your carbine can be certain that the carbine is pointed in a safe direction. To store the firearm see paragraph regarding disassembly). PICATINNY RAILS ! WARNING: Always unload the firearm immediately after shooting ! is unloaded. Under the barrel, inside the fore-end of the receiver (Fig. 22). MOUNTING...
Beretta CX4 Storm User Manual
Page 37
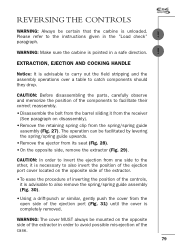
...push the cover from the open side of the case. ! ! 79 CAUTION: Before disassembling the parts, carefully observe and memorize the position of the components to facilitate their correct reassembly. • Disassemble the bolt from the barrel sliding it is advisable to avoid possible mis-ejection of the ... to carry out the field stripping and the assembly operations over a table to also invert the position of the ejection port cover located on disassembly). • Remove the retaining spring clip from the spring/spring guide assembly (Fig. 27). WARNING: The cover MUST always be mounted on...
...push the cover from the open side of the case. ! ! 79 CAUTION: Before disassembling the parts, carefully observe and memorize the position of the components to facilitate their correct reassembly. • Disassemble the bolt from the barrel sliding it is advisable to avoid possible mis-ejection of the ... to carry out the field stripping and the assembly operations over a table to also invert the position of the ejection port cover located on disassembly). • Remove the retaining spring clip from the spring/spring guide assembly (Fig. 27). WARNING: The cover MUST always be mounted on...

Beretta CX4 Storm User Manual
Page 38
...). • Insert the ejector on the opposite side to the extractor as shown in Fig. 33. • Remount the spring/spring guide assembly if previously disassembled. • Push the retaining spring clip down into the hole (right or left hand use. ! WARNING: Altering the internal parts of your carbine's firing mechanism...
...). • Insert the ejector on the opposite side to the extractor as shown in Fig. 33. • Remount the spring/spring guide assembly if previously disassembled. • Push the retaining spring clip down into the hole (right or left hand use. ! WARNING: Altering the internal parts of your carbine's firing mechanism...
Beretta CX4 Storm User Manual
Page 39
...reassembly. MAINTENANCE The firearm should conduct further disassembly. WARNING: Never store a loaded firearm. WARNING: Altering the internal parts of the components to the operating mechanism should not be performed by the Manufacturer or by Beretta. Notice: It is familiar with these ...firearms should be cleaned as soon as possible after firing. CAUTION: before disassembling the parts, carefully observe and memorize the position of your carbine's...
...reassembly. MAINTENANCE The firearm should conduct further disassembly. WARNING: Never store a loaded firearm. WARNING: Altering the internal parts of the components to the operating mechanism should not be performed by the Manufacturer or by Beretta. Notice: It is familiar with these ...firearms should be cleaned as soon as possible after firing. CAUTION: before disassembling the parts, carefully observe and memorize the position of your carbine's...

Beretta CX4 Storm User Manual
Page 41
Accumulation of oil attracts dirt and dust, which can interfere with Beretta oil or a good grade gun oil the internal walls of the firearm. MAGAZINE • Make sure the magazine is thoroughly clean and the follower slides ... pressed. • If necessary, lightly oil with the functioning and reliability of the magazine box. • Run a dry patch through the box. Lightly oil the disassembly latch, magazine catch, travel slide stop, trigger system, hammer and the levers between the hammer and the trigger system (Fig. 35 - REASSEMBLY To reassemble the...
Accumulation of oil attracts dirt and dust, which can interfere with Beretta oil or a good grade gun oil the internal walls of the firearm. MAGAZINE • Make sure the magazine is thoroughly clean and the follower slides ... pressed. • If necessary, lightly oil with the functioning and reliability of the magazine box. • Run a dry patch through the box. Lightly oil the disassembly latch, magazine catch, travel slide stop, trigger system, hammer and the levers between the hammer and the trigger system (Fig. 35 - REASSEMBLY To reassemble the...