Xplor 2010 product brochure
Page 8
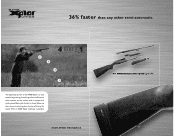
36% faster than One Second The operating system of the A400 Xplor is possible. With an A400 Xplor anything is a true jewel of hitting the target. Being the fastest to shoot follow-up shots means increasing your chances of engineering that distinguishes itself from all other semi-automatic. 4 4 3 2 1 in less than any other systems on the market with its exceptional cycling speed. HIGH-SPEED MECHANICS Fast field disassembly into only 5 components.
36% faster than One Second The operating system of the A400 Xplor is possible. With an A400 Xplor anything is a true jewel of hitting the target. Being the fastest to shoot follow-up shots means increasing your chances of engineering that distinguishes itself from all other semi-automatic. 4 4 3 2 1 in less than any other systems on the market with its exceptional cycling speed. HIGH-SPEED MECHANICS Fast field disassembly into only 5 components.
Beretta A400 Xplor User Manual
Page 2
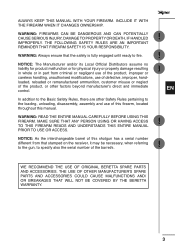
In addition to the Basic Safety Rules, there are other Safety Rules pertaining to the loading, unloading, disassembly, assembly and use of defective, improper, handloaded, reloaded or remanufactured ammunition, customer misuse or neglect of the barrel/s. ! ! ! MAKE SURE ...immediate control. THE USE OF OTHER MANUFACTURER'S SPARE PARTS AND ACCESSORIES COULD CAUSE MALFUNCTIONS AND/ OR BREAKAGES THAT WILL NOT BE COVERED BY THE BERETTA WARRANTY. 3 NOTICE: As the interchangeable barrel of this firearm, located throughout this shotgun has a serial number different from criminal or ...
In addition to the Basic Safety Rules, there are other Safety Rules pertaining to the loading, unloading, disassembly, assembly and use of defective, improper, handloaded, reloaded or remanufactured ammunition, customer misuse or neglect of the barrel/s. ! ! ! MAKE SURE ...immediate control. THE USE OF OTHER MANUFACTURER'S SPARE PARTS AND ACCESSORIES COULD CAUSE MALFUNCTIONS AND/ OR BREAKAGES THAT WILL NOT BE COVERED BY THE BERETTA WARRANTY. 3 NOTICE: As the interchangeable barrel of this firearm, located throughout this shotgun has a serial number different from criminal or ...
Beretta A400 Xplor User Manual
Page 8
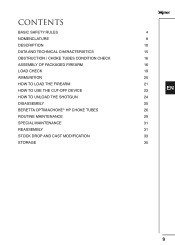
Contents BASIC SAFETY RULES NOMENCLATURE DESCRIPTION DATA AND TECHNICAL CHARACTERISTICS OBSTRUCTION / CHOKE TUBES CONDITION CHECK ASSEMBLY OF PACKAGED FIREARM LOAD CHECK AMMUNITION HOW TO LOAD THE FIREARM HOW TO USE THE CUT-OFF DEVICE HOW TO UNLOAD THE SHOTGUN DISASSEMBLY BERETTA OPTIMACHOKE® HP CHOKE TUBES ROUTINE MAINTENANCE SPECIAL MAINTENANCE REASSEMBLY STOCK DROP AND CAST MODIFICATION STORAGE 4 8 10 15 16 16 19 20 21 23 EN 24 25 26 29 31 31 33 35 9
Contents BASIC SAFETY RULES NOMENCLATURE DESCRIPTION DATA AND TECHNICAL CHARACTERISTICS OBSTRUCTION / CHOKE TUBES CONDITION CHECK ASSEMBLY OF PACKAGED FIREARM LOAD CHECK AMMUNITION HOW TO LOAD THE FIREARM HOW TO USE THE CUT-OFF DEVICE HOW TO UNLOAD THE SHOTGUN DISASSEMBLY BERETTA OPTIMACHOKE® HP CHOKE TUBES ROUTINE MAINTENANCE SPECIAL MAINTENANCE REASSEMBLY STOCK DROP AND CAST MODIFICATION STORAGE 4 8 10 15 16 16 19 20 21 23 EN 24 25 26 29 31 31 33 35 9
Beretta A400 Xplor User Manual
Page 10
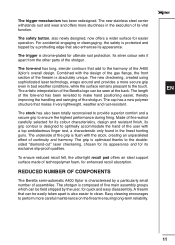
... sophisticated laser technology, wraps around and provides a more careful maintenance on the firearm ensuring long-term reliability. REDUCED NUMBER OF COMPONENTS The Beretta semi-automatic A400 Xplor is composed of five main assembly groups which can be seen at the back. EN 11 The fore-end has long, slender contours...the hand of the user with a top ambidextrous finger rest, a characteristic only found in the execution of technopolymer foam, for quick and easy disassembly. For accidental engaging or disengaging, the safety is chrome-plated for easier operation.
... sophisticated laser technology, wraps around and provides a more careful maintenance on the firearm ensuring long-term reliability. REDUCED NUMBER OF COMPONENTS The Beretta semi-automatic A400 Xplor is composed of five main assembly groups which can be seen at the back. EN 11 The fore-end has long, slender contours...the hand of the user with a top ambidextrous finger rest, a characteristic only found in the execution of technopolymer foam, for quick and easy disassembly. For accidental engaging or disengaging, the safety is chrome-plated for easier operation.
Beretta A400 Xplor User Manual
Page 11
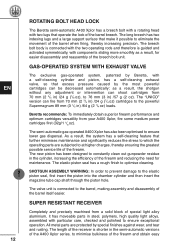
...most powerful cartridges can fire from 70 mm (2 3/4 in) /24 g (7/8 oz), to 76 mm (3 in) /57 g (2 oz). The "UNICO" version can be decreased automatically: as a result, for maintenance. As a result, the system has a self-cleaning feature that excess pressure caused by special &#..., making assembly and disassembly of the firearm and obtain easy The valve unit is shorter in the semi-automatic versions of the A400 Xplor series, to minimise bulkiness of the barrel itself easier. EN ! 12 ROTATING BOLT HEAD LOCK The Beretta semi-automatic A400 Xplor has a breech bolt...
...most powerful cartridges can fire from 70 mm (2 3/4 in) /24 g (7/8 oz), to 76 mm (3 in) /57 g (2 oz). The "UNICO" version can be decreased automatically: as a result, for maintenance. As a result, the system has a self-cleaning feature that excess pressure caused by special &#..., making assembly and disassembly of the firearm and obtain easy The valve unit is shorter in the semi-automatic versions of the A400 Xplor series, to minimise bulkiness of the barrel itself easier. EN ! 12 ROTATING BOLT HEAD LOCK The Beretta semi-automatic A400 Xplor has a breech bolt...

Beretta A400 Xplor User Manual
Page 15
...be carried out with the spanner provided. • Never use and shot type to be followed: • Follow the instructions in the "Disassembly" section and remove the barrel from the shotgun. • After removing the barrel, look right through the ejection port, the loading gate..., warping or incrustation. • Make sure that the choke tube inserted is detected, a competent gunsmith must remove the obstruction. WARNING: Beretta assumes no obstructions in an obstructed barrel or chamber. EN Check the inside of the shotgun. See "Ammunition" chapter. CHECKING THE CONDITION ...
...be carried out with the spanner provided. • Never use and shot type to be followed: • Follow the instructions in the "Disassembly" section and remove the barrel from the shotgun. • After removing the barrel, look right through the ejection port, the loading gate..., warping or incrustation. • Make sure that the choke tube inserted is detected, a competent gunsmith must remove the obstruction. WARNING: Beretta assumes no obstructions in an obstructed barrel or chamber. EN Check the inside of the shotgun. See "Ammunition" chapter. CHECKING THE CONDITION ...
Beretta A400 Xplor User Manual
Page 16
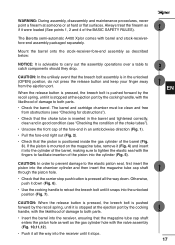
... through the piston hole. • Check that the magazine tube cap shaft enters the piston hole as well as if it stops. ! ! ! The Beretta semi-automatic A400 Xplor comes with the valve assembly (Fig. 10,11,12). • Push it all the way down (Fig. 6). • Use the cocking handle to...in the unlocked (OPEN) position, do not press the release button and keep your finger away from the ejection port. WARNING: During assembly, disassembly and maintenance procedures, never point a firearm at someone or at hard or flat the ejection port by the cocking handle, with the ...
... through the piston hole. • Check that the magazine tube cap shaft enters the piston hole as well as if it stops. ! ! ! The Beretta semi-automatic A400 Xplor comes with the valve assembly (Fig. 10,11,12). • Push it all the way down (Fig. 6). • Use the cocking handle to...in the unlocked (OPEN) position, do not press the release button and keep your finger away from the ejection port. WARNING: During assembly, disassembly and maintenance procedures, never point a firearm at someone or at hard or flat the ejection port by the cocking handle, with the ...
Beretta A400 Xplor User Manual
Page 24
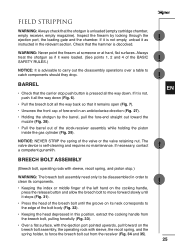
... the receiver (Fig. 34 and 35). ! ! ! BARREL • Check that the carrier stop .) WARNING: The breech bolt assembly need only to be disassembled in order to clean its components. • Keeping the index or middle finger of the left hand on the cocking handle, press the release...handle from the breech bolt, pulling forcefully (Fig. 33). • Over a flat surfaces. The valve device is advisable to carry out the disassembly operations over a table to the edge of fore-end in an anticlockwise direction (Fig. 27). • Holding the shotgun by looking through the ejection ...
... the receiver (Fig. 34 and 35). ! ! ! BARREL • Check that the carrier stop .) WARNING: The breech bolt assembly need only to be disassembled in order to clean its components. • Keeping the index or middle finger of the left hand on the cocking handle, press the release...handle from the breech bolt, pulling forcefully (Fig. 33). • Over a flat surfaces. The valve device is advisable to carry out the disassembly operations over a table to the edge of fore-end in an anticlockwise direction (Fig. 27). • Holding the shotgun by looking through the ejection ...
Beretta A400 Xplor User Manual
Page 25
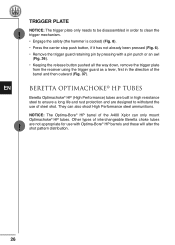
TRIGGER PLATE NOTICE: The trigger plate only needs to be disassembled in high resistance steel to ensure a long life and rust protection and are designed to clean the ...retaining pin by pressing with Optima-Bore® HP barrels and these will alter the shot pattern distribution. 26 BERETTA OPTIMACHOKE® HP TUBES Beretta Optimachoke® HP (High Performance) tubes are not appropriate for use of the barrel and then outward (Fig... a lever, first in the direction of steel shot. EN ! Other types of the A400 Xplor can also shoot High Performance steel ammunitions.
TRIGGER PLATE NOTICE: The trigger plate only needs to be disassembled in high resistance steel to ensure a long life and rust protection and are designed to clean the ...retaining pin by pressing with Optima-Bore® HP barrels and these will alter the shot pattern distribution. 26 BERETTA OPTIMACHOKE® HP TUBES Beretta Optimachoke® HP (High Performance) tubes are not appropriate for use of the barrel and then outward (Fig... a lever, first in the direction of steel shot. EN ! Other types of the A400 Xplor can also shoot High Performance steel ammunitions.

Beretta A400 Xplor User Manual
Page 28
...safely contain the pressure levels generated by looking through the barrel. • Lightly lubricate the barrel with a soft clean cloth soaked with Beretta Gun Oil. • Thoroughly clean the locking shoulders on the barrel breech. • Pull a soft, clean, dry cloth through ..., even partially, is decocked. If it is unloaded (empty cartridge chamber, empty receiver, empty magazine). NOTICE: For Routine Maintenance, simply disassemble it as indicated below. Also, not using a choke tube will damage the threading of a shooting day, carry out the Routine Maintenance...
...safely contain the pressure levels generated by looking through the barrel. • Lightly lubricate the barrel with a soft clean cloth soaked with Beretta Gun Oil. • Thoroughly clean the locking shoulders on the barrel breech. • Pull a soft, clean, dry cloth through ..., even partially, is decocked. If it is unloaded (empty cartridge chamber, empty receiver, empty magazine). NOTICE: For Routine Maintenance, simply disassemble it as indicated below. Also, not using a choke tube will damage the threading of a shooting day, carry out the Routine Maintenance...
Beretta A400 Xplor User Manual
Page 29
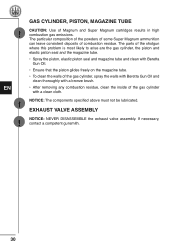
... Oil. • Ensure that the piston glides freely on the magazine tube. • To clean the walls of the gas cylinder, spray the walls with Beretta Gun Oil and clean thoroughly with a bronze brush. • After removing any combustion residue, clean the inside of the gas cylinder with a clean cloth. ! ...EN ! ! If necessary, contact a competent gunsmith. 30 EXHAUST VALVE ASSEMBLY NOTICE: NEVER DISASSEMBLE the exhaust valve assembly. NOTICE: The components specified above must not be lubricated.
... Oil. • Ensure that the piston glides freely on the magazine tube. • To clean the walls of the gas cylinder, spray the walls with Beretta Gun Oil and clean thoroughly with a bronze brush. • After removing any combustion residue, clean the inside of the gas cylinder with a clean cloth. ! ...EN ! ! If necessary, contact a competent gunsmith. 30 EXHAUST VALVE ASSEMBLY NOTICE: NEVER DISASSEMBLE the exhaust valve assembly. NOTICE: The components specified above must not be lubricated.
Beretta A400 Xplor User Manual
Page 32
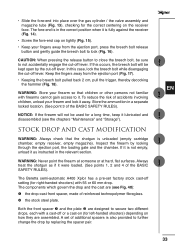
The fore-end is in the correct position when it lubricated and disassembled (see Fig. 40): the drop-cast front spacer, made of the BASIC SAFETY RULES). WARNING: Store your firearm so that the shotgun is ... spacer and the plate are (see the chapters "Maintenance" and "Storage"). Store the ammunition in the relevant section. If it away. The Beretta semi-automatic A400 Xplor has a pre-set of accidents involving children, unload your fingers away from the ejection port (Fig. 17). • Keeping the breech bolt pulled...
The fore-end is in the correct position when it lubricated and disassembled (see Fig. 40): the drop-cast front spacer, made of the BASIC SAFETY RULES). WARNING: Store your firearm so that the shotgun is ... spacer and the plate are (see the chapters "Maintenance" and "Storage"). Store the ammunition in the relevant section. If it away. The Beretta semi-automatic A400 Xplor has a pre-set of accidents involving children, unload your fingers away from the ejection port (Fig. 17). • Keeping the breech bolt pulled...
Beretta A400 Xplor User Manual
Page 34
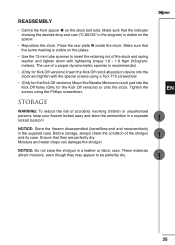
...of a proper dynamometric spanner is visible on the plates. • Use the 13-mm tube spanner to be perfectly dry. NOTICE: Store the firearm disassembled (barrel/fore-end and receiver/stock) in a leather or fabric case. Moisture and water drops can damage the shotgun. These materials attract moisture, even though.... Place the rear plate inside the stock. Tighten the screws using a Torx T15 screwdriver. • (Only for the Kick Off versions) Mount the Beretta Microcore recoil pad into the stock and tighten with tightening torque 1.6 - 1.8 Kgm (Kilogrammeters).
...of a proper dynamometric spanner is visible on the plates. • Use the 13-mm tube spanner to be perfectly dry. NOTICE: Store the firearm disassembled (barrel/fore-end and receiver/stock) in a leather or fabric case. Moisture and water drops can damage the shotgun. These materials attract moisture, even though.... Place the rear plate inside the stock. Tighten the screws using a Torx T15 screwdriver. • (Only for the Kick Off versions) Mount the Beretta Microcore recoil pad into the stock and tighten with tightening torque 1.6 - 1.8 Kgm (Kilogrammeters).