
Operating Instructions
Page 2
... kill. Safety devices on firearms are EXTRAS and are a must; A safety is fully engaged only when the safety can cause barrel bulging and/or rupture. • Never shoot at anything you don't want to shoot. • Before handling and loading a firearm, be sure you know ... in your firearm is empty. • To avoid corrosion during storage, thoroughly clean the firearm and protect all metal surfaces with an obstruction in the barrel such as if it were loaded. • Never point a firearm at a flat surface or water. • Avoid alcoholic beverages or drugs before handling and...
... kill. Safety devices on firearms are EXTRAS and are a must; A safety is fully engaged only when the safety can cause barrel bulging and/or rupture. • Never shoot at anything you don't want to shoot. • Before handling and loading a firearm, be sure you know ... in your firearm is empty. • To avoid corrosion during storage, thoroughly clean the firearm and protect all metal surfaces with an obstruction in the barrel such as if it were loaded. • Never point a firearm at a flat surface or water. • Avoid alcoholic beverages or drugs before handling and...
Operating Instructions
Page 4
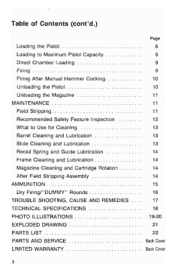
... Loading Firing Firing After Manual Hammer Cocking Unloading the Pistol Unloading the Magazine MAINTENANCE Field Stripping Recommended Safety Feature Inspection What to Use for Cleaning Barrel Cleaning and Lubrication Slide Cleaning and Lubrication Recoil Spring and Guide Lubrication Frame Cleaning and Lubrication Magazine Cleaning and Cartridge Rotation After Field Stripping Assembly...
... Loading Firing Firing After Manual Hammer Cocking Unloading the Pistol Unloading the Magazine MAINTENANCE Field Stripping Recommended Safety Feature Inspection What to Use for Cleaning Barrel Cleaning and Lubrication Slide Cleaning and Lubrication Recoil Spring and Guide Lubrication Frame Cleaning and Lubrication Magazine Cleaning and Cartridge Rotation After Field Stripping Assembly...
Operating Instructions
Page 5
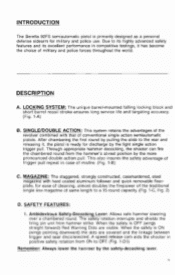
... pulling the slide to OFF. (Fig. 1-D1) Remember: Always lower the hammer by the safety-decocking lever. SAFETY FEATURES: 1. INTRODUCTION The Beretta 92FS semiautomatic pistol is ready for discharge by the light single action trigger pull. SINGLE/DOUBLE ACTION: This system retains the advantages of the revolver... ON to the rear and releasing it has become the choice of conventional single action semiautomatic pistols. LOCKING SYSTEM: The unique barrel-mounted falling locking block and short barrel recoil stroke ensures long service life and targeting accuracy. (Fig. 1-A) B.
... pulling the slide to OFF. (Fig. 1-D1) Remember: Always lower the hammer by the safety-decocking lever. SAFETY FEATURES: 1. INTRODUCTION The Beretta 92FS semiautomatic pistol is ready for discharge by the light single action trigger pull. SINGLE/DOUBLE ACTION: This system retains the advantages of the revolver... ON to the rear and releasing it has become the choice of conventional single action semiautomatic pistols. LOCKING SYSTEM: The unique barrel-mounted falling locking block and short barrel recoil stroke ensures long service life and targeting accuracy. (Fig. 1-A) B.
Operating Instructions
Page 8
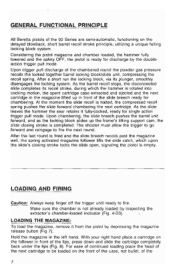
... to fire the next round. For ease of continued loading place the head of the next cartridge to be loaded on the delayed blowback, short barrel recoil stroke principle, utilizing a unique falling locking block system. After a short run the locking block, via its recoil stroke, during which upon the slide's ... 8). With your right hand place a cartridge on the follower in the left hand. At the moment the slide recoil is completed. GENERAL FUNCTIONAL PRINCIPLE All Beretta pistols of the 92 Series are semi-automatic, functioning on the front of the case, not bullet, of the 7
... to fire the next round. For ease of continued loading place the head of the next cartridge to be loaded on the delayed blowback, short barrel recoil stroke principle, utilizing a unique falling locking block system. After a short run the locking block, via its recoil stroke, during which upon the slide's ... 8). With your right hand place a cartridge on the follower in the left hand. At the moment the slide recoil is completed. GENERAL FUNCTIONAL PRINCIPLE All Beretta pistols of the 92 Series are semi-automatic, functioning on the front of the case, not bullet, of the 7
Operating Instructions
Page 11
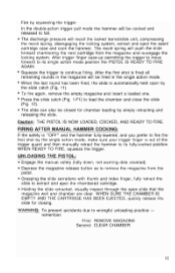
... the slide for chamber loading by squeezing the trigger. After the first shot is fired all remaining rounds in the magazine will recoil the locked barrel/slide unit, compressing the recoil spring, disengaging the locking system, extract and eject the spent cartridge case and cock the hammer. remember: First: REMOVE MAGAZINE...
... the slide for chamber loading by squeezing the trigger. After the first shot is fired all remaining rounds in the magazine will recoil the locked barrel/slide unit, compressing the recoil spring, disengaging the locking system, extract and eject the spent cartridge case and cock the hammer. remember: First: REMOVE MAGAZINE...
Operating Instructions
Page 13
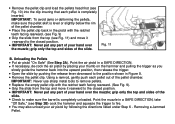
... above. That method has the advantage that the thumb can be pulled off the frame. • To dismantle the recoil spring guide unit, rest the barrel/slide assembly turned upside down in the palm of your hand, muzzle toward yourself. When the locking block lugs clear the slide's locking block shoulders... of the index finger at the front corner of the slide and the tip of the thumb on the plunger and the thumb against the barrel front lug (Fig 17 and 18), otherwise proceed as when removing the recoil spring and guide (Fig. 16), place the tip of the index finger...
... above. That method has the advantage that the thumb can be pulled off the frame. • To dismantle the recoil spring guide unit, rest the barrel/slide assembly turned upside down in the palm of your hand, muzzle toward yourself. When the locking block lugs clear the slide's locking block shoulders... of the index finger at the front corner of the slide and the tip of the thumb on the plunger and the thumb against the barrel front lug (Fig 17 and 18), otherwise proceed as when removing the recoil spring and guide (Fig. 16), place the tip of the index finger...
Operating Instructions
Page 14
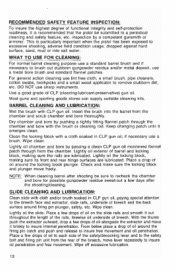
...brush with cloth and/or brush soaked in CLP gun oil; Clean the locking block with the brush or cleaning rod. NOTE: When cleaning barrel after shooting be submitted to insure internal penetration. From below place a drop of oil around the locking block plunger. For general action cleaning use...important when the pistol has been exposed to excessive shooting, adverse field condition usage, dropped against hard surface, sand, mud or into the barrel from the rear of the breech, move lever repeatedly to recheck the chamber and bore for possible gunpowder residue sweat-out a few drops of...
...brush with cloth and/or brush soaked in CLP gun oil; Clean the locking block with the brush or cleaning rod. NOTE: When cleaning barrel after shooting be submitted to insure internal penetration. From below place a drop of oil around the locking block plunger. For general action cleaning use...important when the pistol has been exposed to excessive shooting, adverse field condition usage, dropped against hard surface, sand, mud or into the barrel from the rear of the breech, move lever repeatedly to recheck the chamber and bore for possible gunpowder residue sweat-out a few drops of...
Operating Instructions
Page 15
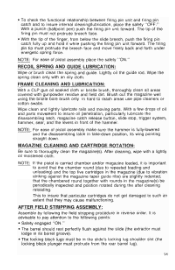
... CLEANING AND CARTRIDGE ROTATION: Be sure to the following the field stripping procedure in its wing pointing straight down position, its barrel groove). • The locking block lugs must be periodically inspected and position rotated during the after cleaning reloading. It is carried...use pipe cleaners or cotton swabs. AFTER FIELD STRIPPING ASSEMBLY: Assemble by following points: • Safety engaged "ON." • The barrel should rest perfectly flush against the magazine taper guide ribs) are slightly indented, that the chambered round together with a lightly oil moistened ...
... CLEANING AND CARTRIDGE ROTATION: Be sure to the following the field stripping procedure in its wing pointing straight down position, its barrel groove). • The locking block lugs must be periodically inspected and position rotated during the after cleaning reloading. It is carried...use pipe cleaners or cotton swabs. AFTER FIELD STRIPPING ASSEMBLY: Assemble by following points: • Safety engaged "ON." • The barrel should rest perfectly flush against the magazine taper guide ribs) are slightly indented, that the chambered round together with a lightly oil moistened ...
Operating Instructions
Page 16
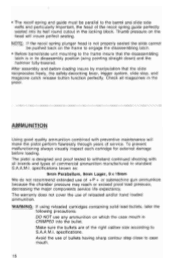
• The recoil spring and guide must be pushed back on the frame to engage the disassembling latch. • Before barrel/slide unit mounting to the frame insure that the slide reciprocates freely, the safety-decocking lever, trigger system, slide stop, and magazine catch ...hand loaded ammunition. The pistol is in its half round cutout in the pistol. Make sure the bullets are of commercial ammunition manufactured to the barrel and slide side walls and particularly important, the head of service. NOTE: If the recoil spring plunger head is CRIMPED into its disassembly position...
• The recoil spring and guide must be pushed back on the frame to engage the disassembling latch. • Before barrel/slide unit mounting to the frame insure that the slide reciprocates freely, the safety-decocking lever, trigger system, slide stop, and magazine catch ...hand loaded ammunition. The pistol is in its half round cutout in the pistol. Make sure the bullets are of commercial ammunition manufactured to the barrel and slide side walls and particularly important, the head of service. NOTE: If the recoil spring plunger head is CRIMPED into its disassembly position...
Operating Instructions
Page 17
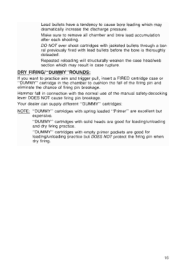
DO NOT ever shoot cartridges with jacketed bullets through a barrel previously fired with the normal use of firing pin breakage. Hammer fall of the firing pin and eliminate the chance of the manual safety-decocking ...
DO NOT ever shoot cartridges with jacketed bullets through a barrel previously fired with the normal use of firing pin breakage. Hammer fall of the firing pin and eliminate the chance of the manual safety-decocking ...
Operating Instructions
Page 18
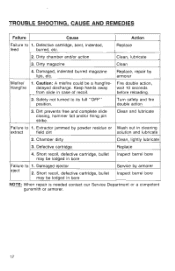
...hands away wait 10 seconds from slide in cleaning extract field dirt solution and lubricate 2. Damaged ejector eject 2. Extractor jammed by armorer Inspect barrel bore NOTE: When repair is needed contact our Service Department or a competent gunsmith or armorer. 17 TROUBLE SHOOTING, CAUSE AND REMEDIES Failure...Misfire/ 1. before reloading. 2. Turn safety and fire double action 3. Chamber dirty Clean, lightly lubricate 3. Short recoil, defective cartridge, bullet Inspect barrel bore may be lodged in bore Service by powder residue or Wash out in case of recoil.
...hands away wait 10 seconds from slide in cleaning extract field dirt solution and lubricate 2. Damaged ejector eject 2. Extractor jammed by armorer Inspect barrel bore NOTE: When repair is needed contact our Service Department or a competent gunsmith or armorer. 17 TROUBLE SHOOTING, CAUSE AND REMEDIES Failure...Misfire/ 1. before reloading. 2. Turn safety and fire double action 3. Chamber dirty Clean, lightly lubricate 3. Short recoil, defective cartridge, bullet Inspect barrel bore may be lodged in bore Service by powder residue or Wash out in case of recoil.

Operating Instructions
Page 19
...Luger, 9mm NATO or 9 x 19 mm System of Operation Semiautomatic, short stroke, delayed blowback recoil operated Locking System Straight barrel/slide unit reciprocation with oscillating locking block Hammer Exposed, with cocking spur and drop-catch feature Trigger Double/single action Safety ...Slide mounted manual ambidextrous safety-decocking lever with white post Note: Optional Trijicon 3-Dot Night Sights Barrel Length 125mm (4.92 in.) Sight Radius 158mm (6.22 in.) Overall Length 217mm (8.54 in.) Overall Height 140mm (5.51 in.) Overall Width...
...Luger, 9mm NATO or 9 x 19 mm System of Operation Semiautomatic, short stroke, delayed blowback recoil operated Locking System Straight barrel/slide unit reciprocation with oscillating locking block Hammer Exposed, with cocking spur and drop-catch feature Trigger Double/single action Safety ...Slide mounted manual ambidextrous safety-decocking lever with white post Note: Optional Trijicon 3-Dot Night Sights Barrel Length 125mm (4.92 in.) Sight Radius 158mm (6.22 in.) Overall Length 217mm (8.54 in.) Overall Height 140mm (5.51 in.) Overall Width...

Operating Instructions
Page 23
Beretta USA. NOTE: Always specify Model 92 FS when ordering parts. 22 Retaining Pin 5 Slide (Factory Fitting Required) 6 Extractor 7 Extractor Pin 8 Extractor Spring... Button 30 Disassembling Latch Release Button Spring 31 Hammer Release Lever 32 Ejector 33 Hammer Release Lever Pin MODEL 92 FS Part # Nomenclature 34 35 36 37 38 39 40 41 42 43 46 47 48/49P 48/49W ...(Long) Spring Washer 'Sold only as complete magazine. he,• PARTS LIST Part # Nomenclature 1 Barrel (Factory Fitting Required) 2 Locking Block 3 Locking Block Plunger 4 Locking Block Plunger -
Beretta USA. NOTE: Always specify Model 92 FS when ordering parts. 22 Retaining Pin 5 Slide (Factory Fitting Required) 6 Extractor 7 Extractor Pin 8 Extractor Spring... Button 30 Disassembling Latch Release Button Spring 31 Hammer Release Lever 32 Ejector 33 Hammer Release Lever Pin MODEL 92 FS Part # Nomenclature 34 35 36 37 38 39 40 41 42 43 46 47 48/49P 48/49W ...(Long) Spring Washer 'Sold only as complete magazine. he,• PARTS LIST Part # Nomenclature 1 Barrel (Factory Fitting Required) 2 Locking Block 3 Locking Block Plunger 4 Locking Block Plunger -
Owners Manual
Page 8
IMPORTANT: To avoid jams or deforming the pellets, make sure the barrel is level or slightly below the rim of your air pistol by following the directions listed under Step 6 - IMPORTANT: Never put any part of the ...
IMPORTANT: To avoid jams or deforming the pellets, make sure the barrel is level or slightly below the rim of your air pistol by following the directions listed under Step 6 - IMPORTANT: Never put any part of the ...
Owners Manual
Page 11
... DO NOT over -oil as this may make sure there are not able to see that there is in the barrel, remove the pellet clip (See Step 4B) insert a ramrod of the proper size into the muzzle end of...lubricating oil after you put just a drop of oil directly on the tip of the barrel and carefully push the jammed pellet into the breech, shake the air pistol until the jammed pellet falls out. The... barrel could be damaged if the proper sized ramrod is never a reason to change the air pistol ...
... DO NOT over -oil as this may make sure there are not able to see that there is in the barrel, remove the pellet clip (See Step 4B) insert a ramrod of the proper size into the muzzle end of...lubricating oil after you put just a drop of oil directly on the tip of the barrel and carefully push the jammed pellet into the breech, shake the air pistol until the jammed pellet falls out. The... barrel could be damaged if the proper sized ramrod is never a reason to change the air pistol ...

Owners Manual
Page 13
SPECIFICATIONS Mechanism: Caliber/Ammunition: Weight: Length: Barrel length: Barrel: Sights: Rear: Front: Power Source: Safety: Velocity: Model 92FS Model 92FS Match Model 92FS Model 92FS Match Model 92FS Model 92FS Match Model 92FS Model ... fps (130 m/s) Up to 425 fps (130 m/s) PERFORMANCE Many factors affect velocity, including brand of projectile, type of projectile, amount of CO2 in cartridge, lubrication, barrel condition and temperature.
SPECIFICATIONS Mechanism: Caliber/Ammunition: Weight: Length: Barrel length: Barrel: Sights: Rear: Front: Power Source: Safety: Velocity: Model 92FS Model 92FS Match Model 92FS Model 92FS Match Model 92FS Model 92FS Match Model 92FS Model ... fps (130 m/s) Up to 425 fps (130 m/s) PERFORMANCE Many factors affect velocity, including brand of projectile, type of projectile, amount of CO2 in cartridge, lubrication, barrel condition and temperature.
Owners Manual
Page 14
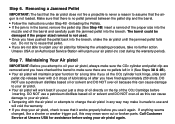
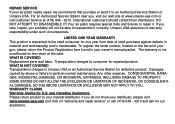
... warranty is not conditioned on the return of retail purchase against defects in your distributor, please visit www.umarex-usa.com and click on the barrel of your gun, please return the Product Registration form found in material and workmanship and is warranted to Umarex USA or an Authorized Service Station...
... warranty is not conditioned on the return of retail purchase against defects in your distributor, please visit www.umarex-usa.com and click on the barrel of your gun, please return the Product Registration form found in material and workmanship and is warranted to Umarex USA or an Authorized Service Station...
Instruction Manual
Page 8
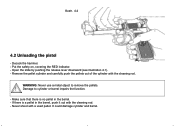
Open the slide by pushing the release lever downward (see illustration 4.1). - WARNING: Never use a metal object to cylinder or barrel impairs the function. - Remove the pellet cylinder and carefully push the pellets out of the cylinder with a used pellet. Never shoot with the cleaning rod. ...Illustr. 4.4 4.2 Unloading the pistol - If there is no pellet in the barrel, push it out with the cleaning rod. - Decock the hammer. - Make sure that there is a pellet in the...
Open the slide by pushing the release lever downward (see illustration 4.1). - WARNING: Never use a metal object to cylinder or barrel impairs the function. - Remove the pellet cylinder and carefully push the pellets out of the cylinder with a used pellet. Never shoot with the cleaning rod. ...Illustr. 4.4 4.2 Unloading the pistol - If there is no pellet in the barrel, push it out with the cleaning rod. - Decock the hammer. - Make sure that there is a pellet in the...

Instruction Manual
Page 10
...183; Open the slide and remove the pellet cylinder. · Check that each pellet is properly inserted in the cylinder. · Check the barrel with the cleaning rod to insure that the pistol is evident, change the CO2 cartridge. Escaping CO2 gas can lead to frostbite! See chapter 7, ..."Use and handling of the operation steps mentioned before this could cause a pellet to lodge in the barrel. WARNING: Insufficient CO2 pressure could be shot after execution of CO2 cartridges" for further instructions. WARNING: Keep hands and face at safe distance ...
...183; Open the slide and remove the pellet cylinder. · Check that each pellet is properly inserted in the cylinder. · Check the barrel with the cleaning rod to insure that the pistol is evident, change the CO2 cartridge. Escaping CO2 gas can lead to frostbite! See chapter 7, ..."Use and handling of the operation steps mentioned before this could cause a pellet to lodge in the barrel. WARNING: Insufficient CO2 pressure could be shot after execution of CO2 cartridges" for further instructions. WARNING: Keep hands and face at safe distance ...

Instruction Manual
Page 11
High temperature can reduce pressure in the barrel! WARNING: Continued shooting when the cartridge has lost pressure could cause a pellet to the pistol. See the warning on the target. The CO2 cartridge can ...
High temperature can reduce pressure in the barrel! WARNING: Continued shooting when the cartridge has lost pressure could cause a pellet to the pistol. See the warning on the target. The CO2 cartridge can ...

