
User Manual
Page 2
All rights reserved. Clean the LCD monitor surface with respect to service this product. Your monitor should be blocked or covered. iv Care And Cleaning • Cleaning. They must not be operated from the AC supply. •... any means, electronic, mechanical, magnetic, optical, chemical, manual or otherwise, without obligation of BenQ Corporation to dangerous voltages or other accident such as a power disconnect device for pluggable equipment. Always unplug your monitor from time to time in installation unless proper ventilation is provided. • Never push objects ...
All rights reserved. Clean the LCD monitor surface with respect to service this product. Your monitor should be blocked or covered. iv Care And Cleaning • Cleaning. They must not be operated from the AC supply. •... any means, electronic, mechanical, magnetic, optical, chemical, manual or otherwise, without obligation of BenQ Corporation to dangerous voltages or other accident such as a power disconnect device for pluggable equipment. Always unplug your monitor from time to time in installation unless proper ventilation is provided. • Never push objects ...

User Manual
Page 3
... ...7 Back View (2): Locations of plugs & sockets 8 How to install your monitor hardware 9 Adjusting Your Monitor 11 Getting the most from your BenQ monitor 13 How to install the monitor on a new computer 14 How to upgrade the monitor on an existing computer 15 How to install on Windows XP systems 16 How to...screen resolution 20 How to adjust the screen refresh rate 21 How to set the picture optimization 22 How to adjust your Monitor 23 A Look at the Control Panel 23 Hot Key Mode ...24 Main Menu Mode ...24 Troubleshooting ...33 Frequently Asked Questions (FAQ 33 Need More Help? ......
... ...7 Back View (2): Locations of plugs & sockets 8 How to install your monitor hardware 9 Adjusting Your Monitor 11 Getting the most from your BenQ monitor 13 How to install the monitor on a new computer 14 How to upgrade the monitor on an existing computer 15 How to install on Windows XP systems 16 How to...screen resolution 20 How to adjust the screen refresh rate 21 How to set the picture optimization 22 How to adjust your Monitor 23 A Look at the Control Panel 23 Hot Key Mode ...24 Main Menu Mode ...24 Troubleshooting ...33 Frequently Asked Questions (FAQ 33 Need More Help? ......
User Manual
Page 5
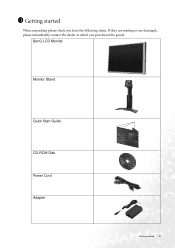
1 Getting started 5 BenQ LCD Monitor Monitor Stand Quick Start Guide CD-ROM Disk Power Cord Adapter FP231w Getting started When unpacking please check you have the following items. If they are missing or are damaged, please immediately contact the dealer at which you purchased the goods.
1 Getting started 5 BenQ LCD Monitor Monitor Stand Quick Start Guide CD-ROM Disk Power Cord Adapter FP231w Getting started When unpacking please check you have the following items. If they are missing or are damaged, please immediately contact the dealer at which you purchased the goods.

User Manual
Page 8
Power AC Input Jack 2. DVI-D Connector 5. S-Video Input 4. USB Connectors 8 Getting to know your Monitor D-Sub Connector 6. Back View (2): Locations of plugs & sockets 1 2 3 4 5 6 7 1. Audio Connector 7. Composite Video Input 3.
Power AC Input Jack 2. DVI-D Connector 5. S-Video Input 4. USB Connectors 8 Getting to know your Monitor D-Sub Connector 6. Back View (2): Locations of plugs & sockets 1 2 3 4 5 6 7 1. Audio Connector 7. Composite Video Input 3.

User Manual
Page 9
Place the monitor on the monitor stand. 3. 3 How to install your LCD monitor. 1. Please go along with the following steps to install your monitor hardware 9 Unpack the package and place the monitor stand firmly. 2. Align the slots on the monitor against the notches on the monitor stand and push it forward until you hear a clicking sound. How to install your monitor hardware Make sure that the computer and monitor's power are both turned off.
Place the monitor on the monitor stand. 3. 3 How to install your LCD monitor. 1. Please go along with the following steps to install your monitor hardware 9 Unpack the package and place the monitor stand firmly. 2. Align the slots on the monitor against the notches on the monitor stand and push it forward until you hear a clicking sound. How to install your monitor hardware Make sure that the computer and monitor's power are both turned off.

User Manual
Page 10
Connect the power plug to your computer. 7. Connect one end of the USB cable into the second plug (from right to left) of the monitor and the other end to your monitor hardware Connect one end of your computer. 5. Routing the cables in the Cable Bracket as shown. 10 How to your computer. (Optional). 6. Connect one end of the D-Sub cable to the monitor and the other end to the signal connector of the DVI-D cable to the monitor and the other end to install your monitor. 8. 4.
Connect the power plug to your computer. 7. Connect one end of the USB cable into the second plug (from right to left) of the monitor and the other end to your monitor hardware Connect one end of your computer. 5. Routing the cables in the Cable Bracket as shown. 10 How to your computer. (Optional). 6. Connect one end of the D-Sub cable to the monitor and the other end to the signal connector of the DVI-D cable to the monitor and the other end to install your monitor. 8. 4.
User Manual
Page 11
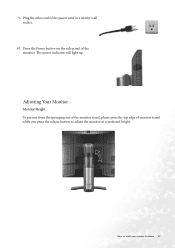
Adjusting Your Monitor Monitor Height To prevent from the springing out of the monitor stand, please press the top edge of the power cord in a nearby wall socket. 10. 9. Plug the other end of monitor stand while you press the release button to install your monitor hardware 11 Press the Power button on the side panel of the monitor. How to adjust the monitor at a preferred height. The power indicator will light up.
Adjusting Your Monitor Monitor Height To prevent from the springing out of the monitor stand, please press the top edge of the power cord in a nearby wall socket. 10. 9. Plug the other end of monitor stand while you press the release button to install your monitor hardware 11 Press the Power button on the side panel of the monitor. How to adjust the monitor at a preferred height. The power indicator will light up.

User Manual
Page 12
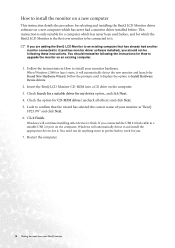
Monitor Angle 12 How to install your monitor hardware
Monitor Angle 12 How to install your monitor hardware

User Manual
Page 13
... login to your Windows computer, you turn on your BenQ LCD Monitor will launch its Found New Hardware wizard. 4 Getting the most from your BenQ monitor 13 Follow the wizard instructions until it asks you need to select a monitor model. Further details and step-by-step instructions for ...In either case however, the very next time you must be logged on the BenQ LCD Monitor CD-ROM. At that point, click the Have Disk button, insert the BenQ LCD Monitor CD-ROM and select the appropriate monitor model. Furthermore, if your computer), Windows will automatically recognise the new (or ...
... login to your Windows computer, you turn on your BenQ LCD Monitor will launch its Found New Hardware wizard. 4 Getting the most from your BenQ monitor 13 Follow the wizard instructions until it asks you need to select a monitor model. Further details and step-by-step instructions for ...In either case however, the very next time you must be logged on the BenQ LCD Monitor CD-ROM. At that point, click the Have Disk button, insert the BenQ LCD Monitor CD-ROM and select the appropriate monitor model. Furthermore, if your computer), Windows will automatically recognise the new (or ...
User Manual
Page 14
... computer that the wizard has selected the correct name of your monitor as "BenQ FP231W" and click Next. 6. How to install the monitor on a new computer This instruction details the procedure for selecting and installing the BenQ LCD Monitor driver software on a new computer which the BenQ LCD Monitor is only suitable for a computer which has never been used before...
... computer that the wizard has selected the correct name of your monitor as "BenQ FP231W" and click Next. 6. How to install the monitor on a new computer This instruction details the procedure for selecting and installing the BenQ LCD Monitor driver software on a new computer which the BenQ LCD Monitor is only suitable for a computer which has never been used before...
User Manual
Page 15
... Windows 98, Windows ME, Windows 2000, and Windows XP Operating System (OS). The BenQ LCD Monitor driver for your model may well function perfectly with other versions of Windows, however, as compatible (and recommended only) for manually updating the existing monitor driver software on Windows 2000, ME, & 98 systems. Getting the most from the...
... Windows 98, Windows ME, Windows 2000, and Windows XP Operating System (OS). The BenQ LCD Monitor driver for your model may well function perfectly with other versions of Windows, however, as compatible (and recommended only) for manually updating the existing monitor driver software on Windows 2000, ME, & 98 systems. Getting the most from the...
User Manual
Page 16
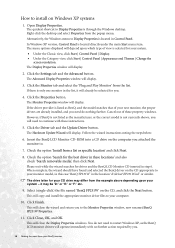
...(single-click) the file named 'BenQ FP231W' on Windows XP systems 1. The menu options displayed will display. 3. The Monitor Properties window will close the Display Properties windows. In Windows XP version, Control Panel is not listed as the BenQ LCD monitor drivers will close the wizard and... model is not currently shown, you . 4. This will need to the Monitor Properties window, now renamed BenQ FP231W Properties. 11. Follow the wizard instructions noting the steps below: 6. However, if BenQ is located directly under the main Start menu item. The drive letter for ...
...(single-click) the file named 'BenQ FP231W' on Windows XP systems 1. The menu options displayed will display. 3. The Monitor Properties window will close the Display Properties windows. In Windows XP version, Control Panel is not listed as the BenQ LCD monitor drivers will close the wizard and... model is not currently shown, you . 4. This will need to the Monitor Properties window, now renamed BenQ FP231W Properties. 11. Follow the wizard instructions noting the steps below: 6. However, if BenQ is located directly under the main Start menu item. The drive letter for ...
User Manual
Page 17
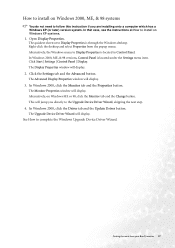
... installing onto a computer which has a Windows XP (or later) version system. See How to install on Windows ME or 98, click the Monitor tab and the Change button. The quickest shortcut to Display Properties is located in Control Panel. Click Start | Settings | Control Panel | Display....window will display. 2. Open Display Properties. In Windows 2000, click the Monitor tab and the Properties button. The Display Properties window will display. 3. Right-click the desktop and select Properties from your BenQ monitor 17 In that case, see the instructions at How to complete the Windows ...
... installing onto a computer which has a Windows XP (or later) version system. See How to install on Windows ME or 98, click the Monitor tab and the Change button. The quickest shortcut to Display Properties is located in Control Panel. Click Start | Settings | Control Panel | Display....window will display. 2. Open Display Properties. In Windows 2000, click the Monitor tab and the Properties button. The Display Properties window will display. 3. Right-click the desktop and select Properties from your BenQ monitor 17 In that case, see the instructions at How to complete the Windows ...
User Manual
Page 18
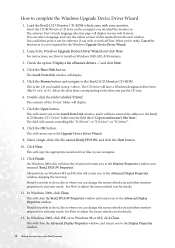
...'. Click the Open button. This will copy the appropriate monitor driver files to the Monitor Properties window, now renamed 'BenQ FP231W Properties'. Select (single-click) the file named BenQ FP231W, and click the Next button. 10. On Windows 2000, this will have entered the address to the BenQ LCD Monitor CD 'Driver' folder into a CD drive on the computer...
...'. Click the Open button. This will copy the appropriate monitor driver files to the Monitor Properties window, now renamed 'BenQ FP231W Properties'. Select (single-click) the file named BenQ FP231W, and click the Next button. 10. On Windows 2000, this will have entered the address to the BenQ LCD Monitor CD 'Driver' folder into a CD drive on the computer...

User Manual
Page 19
..., and if you made any changes to the screen resolution, Windows 2000 will ask you for details. 14. Click OK. Getting the most from your BenQ monitor 19 See How to adjust the screen resolution for confirmation to effect the changes, and further confirmation to accept the changes. Should you wish to...
..., and if you made any changes to the screen resolution, Windows 2000 will ask you for details. 14. Click OK. Getting the most from your BenQ monitor 19 See How to adjust the screen resolution for confirmation to effect the changes, and further confirmation to accept the changes. Should you wish to...
User Manual
Page 22
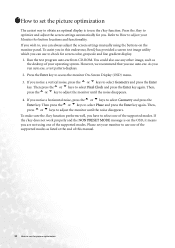
.... You could also use the i key function. Then, press thet or u key to adjust the monitor until the noise disappears. If you can use one of the supported modes as the desktop of your operating...is to use any other image, such as listed at the end of this endeavour, BenQ has provided a screen test image utility which you in this manual. 22 How to select one of...again. 1711How to set the picture optimization The easiest way to obtain an optimal display is on the monitor panel. Press the i key to optimize and adjust the screen settings automatically for screen color, grayscale and...
.... You could also use the i key function. Then, press thet or u key to adjust the monitor until the noise disappears. If you can use one of the supported modes as the desktop of your operating...is to use any other image, such as listed at the end of this endeavour, BenQ has provided a screen test image utility which you in this manual. 22 How to select one of...again. 1711How to set the picture optimization The easiest way to obtain an optimal display is on the monitor panel. Press the i key to optimize and adjust the screen settings automatically for screen color, grayscale and...

User Manual
Page 23
... sub menu, select items, confirm selection. 3. u (Down) key: For Down/Decrease adjustment. How to adjust your Monitor 23 The key is also the hot key for Contrast. 5. "Input" key: Switch the input signal. 7. 8 How to adjust your Monitor A Look at the Control Panel 1 2 3 4 5 6 7 There are the introduction of these keys & switch. 1. The key...
... sub menu, select items, confirm selection. 3. u (Down) key: For Down/Decrease adjustment. How to adjust your Monitor 23 The key is also the hot key for Contrast. 5. "Input" key: Switch the input signal. 7. 8 How to adjust your Monitor A Look at the Control Panel 1 2 3 4 5 6 7 There are the introduction of these keys & switch. 1. The key...

User Manual
Page 24
When done, press "Exit" to indicate the input source and press "Enter." Input hot key Press the "Input" key to enter Input menu, and press t or u key to exit OSD. Main Menu Mode Control Functions Available in Main Menu Main Menu 24 How to adjust your Monitor Press uto enter Contrast menu, press t or u key to adjust the degree of brightness and press "Exit" to exit OSD. Hot Key Mode Brightness and Contrast hot key Press t to enter Brightness menu, press t or u key to adjust the degree of Contrast and press "Exit" to exit OSD.
When done, press "Exit" to indicate the input source and press "Enter." Input hot key Press the "Input" key to enter Input menu, and press t or u key to exit OSD. Main Menu Mode Control Functions Available in Main Menu Main Menu 24 How to adjust your Monitor Press uto enter Contrast menu, press t or u key to adjust the degree of brightness and press "Exit" to exit OSD. Hot Key Mode Brightness and Contrast hot key Press t to enter Brightness menu, press t or u key to adjust the degree of Contrast and press "Exit" to exit OSD.

User Manual
Page 25
Press t or u key to adjust the degree of Brightness, press "Exit" to return to the previous menu. How to adjust your Monitor 25 Luminance sub menu Press t or u key to adjust the degree of Contrast, press "Exit" to return to the previous menu.
Press t or u key to adjust the degree of Brightness, press "Exit" to return to the previous menu. How to adjust your Monitor 25 Luminance sub menu Press t or u key to adjust the degree of Contrast, press "Exit" to return to the previous menu.

User Manual
Page 26
Press t or u key to adjust the Vertical Position, press "Exit" key to return to adjust your Monitor Press t or u key to adjust the degree of the Pixel Clock, press "Exit" to return to previous menu. Geometry sub menu Press t or u key to adjust the Horizontal Position, press "Exit" to return to previous menu. Press t or u key to adjust the value of Phase, press "Exit" to return to previous menu. 26 How to previous menu.
Press t or u key to adjust the Vertical Position, press "Exit" key to return to adjust your Monitor Press t or u key to adjust the degree of the Pixel Clock, press "Exit" to return to previous menu. Geometry sub menu Press t or u key to adjust the Horizontal Position, press "Exit" to return to previous menu. Press t or u key to adjust the value of Phase, press "Exit" to return to previous menu. 26 How to previous menu.

