

Tutorial
Page 5
... Exercise 4: Setting Survey Styles 134 Exercise 5: Setting Up a Linework Code Set 135 Tutorial: Importing Survey Data 136 Exercise 1: Importing Field-Coded Survey Data 136 Exercise 2: Updating Imported Survey Data 139 Tutorial: Viewing and Editing Survey Data 144 Exercise 1: Viewing Survey Data 144 Exercise 2: Editing a Figure 146 Tutorial: Analyzing and Reducing Survey...
... Exercise 4: Setting Survey Styles 134 Exercise 5: Setting Up a Linework Code Set 135 Tutorial: Importing Survey Data 136 Exercise 1: Importing Field-Coded Survey Data 136 Exercise 2: Updating Imported Survey Data 139 Tutorial: Viewing and Editing Survey Data 144 Exercise 1: Viewing Survey Data 144 Exercise 2: Editing a Figure 146 Tutorial: Analyzing and Reducing Survey...

Tutorial
Page 6
... Exercise 2: Creating Data Shortcuts 186 Exercise 3: Referencing Data Shortcuts 188 Tutorial: Vault Setup 195 Exercise 1: Logging In to Autodesk Vault 195 Exercise 2: Creating User Accounts and Groups 197 Exercise 3: Creating a Project 199 Tutorial: Creating, Referencing, and ...Project Object 202 Exercise 3: Checking Out and Modifying a Project Object . . . . 204 Exercise 4: Checking In a Project Object 205 Exercise 5: Updating a Project Object 206 Tutorial: Creating and Modifying Project Point Data 207 Exercise 1: Adding Points to a Project 207 Exercise 2: Checking Out and Modifying...
... Exercise 2: Creating Data Shortcuts 186 Exercise 3: Referencing Data Shortcuts 188 Tutorial: Vault Setup 195 Exercise 1: Logging In to Autodesk Vault 195 Exercise 2: Creating User Accounts and Groups 197 Exercise 3: Creating a Project 199 Tutorial: Creating, Referencing, and ...Project Object 202 Exercise 3: Checking Out and Modifying a Project Object . . . . 204 Exercise 4: Checking In a Project Object 205 Exercise 5: Updating a Project Object 206 Tutorial: Creating and Modifying Project Point Data 207 Exercise 1: Adding Points to a Project 207 Exercise 2: Checking Out and Modifying...
Tutorial
Page 18
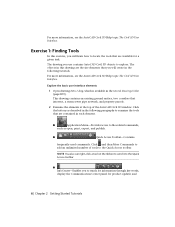
... available in the following tutorials. Click and then More Commands to the Quick Access toolbar. Exercise 1: Finding Tools In this drawing are available for product updates and 6 | Chapter 2 Getting Started Tutorials
... available in the following tutorials. Click and then More Commands to the Quick Access toolbar. Exercise 1: Finding Tools In this drawing are available for product updates and 6 | Chapter 2 Getting Started Tutorials

Tutorial
Page 42
... 1 Right-click the Point Groups collection. Click OK. Now, you can right-click the Point Groups collection and click Update. The points are listed here according to their points in the list view and zoom to change their new content. To continue to the ...dialog box is prepared to add to the Storm Manholes and Detention Pond point groups. 3 In the Point Group Changes dialog box, click Close. 4 To update the point groups, click . Point groups are displayed in the Point Editor table. Alternatively, you can display their display order, with their attributes. Click Properties...
... 1 Right-click the Point Groups collection. Click OK. Now, you can right-click the Point Groups collection and click Update. The points are listed here according to their points in the list view and zoom to change their new content. To continue to the ...dialog box is prepared to add to the Storm Manholes and Detention Pond point groups. 3 In the Point Group Changes dialog box, click Close. 4 To update the point groups, click . Point groups are displayed in the Point Editor table. Alternatively, you can display their display order, with their attributes. Click Properties...

Tutorial
Page 68
... use crossing selection. 7 Draw a window around a group of cyan points. The brown point cloud points are still present because they are removed, and the contours update. The cyan surface points are stored in to deselect the point cloud object. 2 In Toolspace, on the Prospector tab, expand the Surfaces collection. Press Enter...
... use crossing selection. 7 Draw a window around a group of cyan points. The brown point cloud points are still present because they are removed, and the contours update. The cyan surface points are stored in to deselect the point cloud object. 2 In Toolspace, on the Prospector tab, expand the Surfaces collection. Press Enter...

Tutorial
Page 69
..., select the polygon that you used to create the surface. 10 Select one of the grips, and drag it to place the grip. The surface updates to prevent triangulation outside that side of the polygon.
..., select the polygon that you used to create the surface. 10 Select one of the grips, and drag it to place the grip. The surface updates to prevent triangulation outside that side of the polygon.

Tutorial
Page 96
... to Standard. For more information, see the vertical relief of labels automatically, using AutoCAD polylines as a guide. Right-click the XGND surface. The surface representation updates to display the TIN triangles and border. 4 Click View tab ➤ Navigate panel ➤ Orbit drop-down ➤ Top. 7 Follow steps 1 to 3 to return the...
... to Standard. For more information, see the vertical relief of labels automatically, using AutoCAD polylines as a guide. Right-click the XGND surface. The surface representation updates to display the TIN triangles and border. 4 Click View tab ➤ Navigate panel ➤ Orbit drop-down ➤ Top. 7 Follow steps 1 to 3 to return the...

Tutorial
Page 97
.... 4 Click in the upper left . Grips appear on which the surface labels were drawn. Exercise 3: Labeling a Surface | 85 It turns red, indicating that the labels update automatically to end the PLine command. Label surface contours along the path you specified with the modifications you would click Annotate tab ➤ Labels & Tables...
.... 4 Click in the upper left . Grips appear on which the surface labels were drawn. Exercise 3: Labeling a Surface | 85 It turns red, indicating that the labels update automatically to end the PLine command. Label surface contours along the path you specified with the modifications you would click Annotate tab ➤ Labels & Tables...

Tutorial
Page 112
For more information, see the AutoCAD Civil 3D Help topic Extracting Surface Data. The legend table is automatically updated. 8 Click a location in the drawing where you made to the surface and the watershed analysis is regenerated, the legend is displayed in ...tutorial, go to Exercise 4: Extracting Objects from a surface NOTE This exercise uses Surface-5B.dwg with the modifications you want the table to automatically update if the analysis information changes. Extract objects from a Surface (page 100). To continue this exercise, you want to place the upper-left corner of...
For more information, see the AutoCAD Civil 3D Help topic Extracting Surface Data. The legend table is automatically updated. 8 Click a location in the drawing where you made to the surface and the watershed analysis is regenerated, the legend is displayed in ...tutorial, go to Exercise 4: Extracting Objects from a surface NOTE This exercise uses Surface-5B.dwg with the modifications you want the table to automatically update if the analysis information changes. Extract objects from a Surface (page 100). To continue this exercise, you want to place the upper-left corner of...

Tutorial
Page 120
... surface, expand the Definition collection. To continue this tutorial, go to the surface as breaklines. The previously selected 3D polylines are selected in the drawing updates. The polylines are inserted into the drawing.
... surface, expand the Definition collection. To continue this tutorial, go to the surface as breaklines. The previously selected 3D polylines are selected in the drawing updates. The polylines are inserted into the drawing.

Tutorial
Page 151
... how the survey data was originally imported and the individual points and figures that were imported during that was imported into the survey database. Exercise 2: Updating Imported Survey Data | 139 For File Name, enter Survey-2B.dwg. Import events provide a convenient way to apply the changes. Exercise... 2: Updating Imported Survey Data In this tutorial, go to the My Civil Tutorial Data folder (page 819). For more information, see the AutoCAD Civil 3D Help ...
... how the survey data was originally imported and the individual points and figures that were imported during that was imported into the survey database. Exercise 2: Updating Imported Survey Data | 139 For File Name, enter Survey-2B.dwg. Import events provide a convenient way to apply the changes. Exercise... 2: Updating Imported Survey Data In this tutorial, go to the My Civil Tutorial Data folder (page 819). For more information, see the AutoCAD Civil 3D Help ...

Tutorial
Page 152
...Assign Offset To Point Identifiers check box. 6 Click OK. You will get duplicate objects when you are re-imported, and the linework is reprocessed. Update and reprocess a survey figure 1 In Toolspace, on the Survey tab, expand the Survey Databases ➤ Survey 1 ➤ Import Events collection....the values in the Number column with the values in the following steps. 3 Under the Survey-1.fbk import event, select Survey Points. NOTE If you update the survey data. 1 In Toolspace, on the Survey tab, select the Survey Databases ➤ Survey 1 ➤ Figures collection. 2 In the...
...Assign Offset To Point Identifiers check box. 6 Click OK. You will get duplicate objects when you are re-imported, and the linework is reprocessed. Update and reprocess a survey figure 1 In Toolspace, on the Survey tab, expand the Survey Databases ➤ Survey 1 ➤ Import Events collection....the values in the Number column with the values in the following steps. 3 Under the Survey-1.fbk import event, select Survey Points. NOTE If you update the survey data. 1 In Toolspace, on the Survey tab, select the Survey Databases ➤ Survey 1 ➤ Figures collection. 2 In the...

Tutorial
Page 153
Exercise 2: Updating Imported Survey Data | 141 The ending line segments are incorrect, and the figure is displayed in the drawing. The BLDG7 figure is not closed. You will edit the survey point to correct the figure. 3 In the drawing, select survey point 804.
Exercise 2: Updating Imported Survey Data | 141 The ending line segments are incorrect, and the figure is displayed in the drawing. The BLDG7 figure is not closed. You will edit the survey point to correct the figure. 3 In the drawing, select survey point 804.

Tutorial
Page 154
... values, which caused the line to extend in the linework code set is CLS. 5 In the Survey Point Properties dialog box, change the Description to update the linework associated with the survey points. 142 | Chapter 6 Survey Tutorials Second, the close code is CLO, while the close code specified in the wrong...
... values, which caused the line to extend in the linework code set is CLS. 5 In the Survey Point Properties dialog box, change the Description to update the linework associated with the survey points. 142 | Chapter 6 Survey Tutorials Second, the close code is CLO, while the close code specified in the wrong...

Tutorial
Page 155
... is reprocessed, and the survey figure is only necessary to Viewing and Editing Survey Data (page 144). Exercise 2: Updating Imported Survey Data | 143 Click Save. To continue to the next tutorial, go to update the figure linework. For File Name, enter Survey-3.dwg. The point coordinates did not change. 10 Click OK...
... is reprocessed, and the survey figure is only necessary to Viewing and Editing Survey Data (page 144). Exercise 2: Updating Imported Survey Data | 143 Click Save. To continue to the next tutorial, go to update the figure linework. For File Name, enter Survey-3.dwg. The point coordinates did not change. 10 Click OK...

Tutorial
Page 156
You will get duplicate objects when you update the survey data. 1 In Toolspace, on the Survey tab, expand Survey Databases ➤ Survey 1 ➤ Networks ➤ Survey Network 1 to display the collections of survey ...
You will get duplicate objects when you update the survey data. 1 In Toolspace, on the Survey tab, expand Survey Databases ➤ Survey 1 ➤ Networks ➤ Survey Network 1 to display the collections of survey ...

Tutorial
Page 163
... linework in the list view, right-click Traverse 1. Reprocessing the survey linework is updated following a traverse analysis, the following adjustments to the data that you make corrections to update the figures with no angular error. ■ Traverse 1.lso: Displays the adjusted station coordinates... Exercise 2: Performing Traverse Analysis | 151 Run a traverse analysis 1 On the Survey tab, in the following steps. 5 In the Survey Network Updated dialog box, click Close. 6 In Toolspace, on the Horizontal Adjustment Type setting (Compass Rule). 4 Close all the text files. A dialog ...
... linework in the list view, right-click Traverse 1. Reprocessing the survey linework is updated following a traverse analysis, the following adjustments to the data that you make corrections to update the figures with no angular error. ■ Traverse 1.lso: Displays the adjusted station coordinates... Exercise 2: Performing Traverse Analysis | 151 Run a traverse analysis 1 On the Survey tab, in the following steps. 5 In the Survey Network Updated dialog box, click Close. 6 In Toolspace, on the Horizontal Adjustment Type setting (Compass Rule). 4 Close all the text files. A dialog ...

Tutorial
Page 164
...the linework. 7 Click Cancel. 8 In Toolspace, on the Settings tab, expand the Survey ➤ Network Styles collection. The values are updated. ■ Any of the above data that the sum of the squares of the observations simultaneously so that is at a minimum. For ... AutoCAD Civil 3D Help topic Least Squares Analysis. Click Reset Adjusted Coordinates. This exercise continues from adjusted setups within the traverse are updated. ■ All figures that reference points within the traverse are calculated by adjusting each observation. To continue this survey database to ...
...the linework. 7 Click Cancel. 8 In Toolspace, on the Settings tab, expand the Survey ➤ Network Styles collection. The values are updated. ■ Any of the above data that the sum of the squares of the observations simultaneously so that is at a minimum. For ... AutoCAD Civil 3D Help topic Least Squares Analysis. Click Reset Adjusted Coordinates. This exercise continues from adjusted setups within the traverse are updated. ■ All figures that reference points within the traverse are calculated by adjusting each observation. To continue this survey database to ...

Tutorial
Page 165
... analysis 1 In Toolspace, on the Survey tab, select the Survey Network 1 ➤ Control Points collection. Click Zoom To. The analysis runs, the network and drawing updates, and the following parameters: ■ Create Input File: Selected ■ Input File Name: Survey Network 1 ■ Network Adjustment Type: 3-Dimensional Use the default values for...
... analysis 1 In Toolspace, on the Survey tab, select the Survey Network 1 ➤ Control Points collection. Click Zoom To. The analysis runs, the network and drawing updates, and the following parameters: ■ Create Input File: Selected ■ Input File Name: Survey Network 1 ■ Network Adjustment Type: 3-Dimensional Use the default values for...

Tutorial
Page 196
... drawing, changes are referenced through data shortcuts. Access the project management tools in Prospector 1 Open drawing Project Management-1.dwg, which to store objects that are updated in a new drawing. 184 | Chapter 7 Project Management Tutorials Exercise 1: Setting Up a Data Shortcut Folder In this drawing, and then reference them in any drawings that...
... drawing, changes are referenced through data shortcuts. Access the project management tools in Prospector 1 Open drawing Project Management-1.dwg, which to store objects that are updated in a new drawing. 184 | Chapter 7 Project Management Tutorials Exercise 1: Setting Up a Data Shortcut Folder In this drawing, and then reference them in any drawings that...