

Tutorial
Page 3
...5 Exercise 1: Finding Tools 6 Exercise 2: Understanding the Toolspace 9 Exercise 3: Using the Panorama Window 12 Tutorial: Using Basic Functionality 15 Tutorial: Viewing AutoCAD Civil 3D Objects 17 Exercise 1: Setting Up the Drawing Window 17 Exercise 2: Changing the ...Exercise 3: Viewing a Drawing in Model 21 Chapter 3 Points Tutorials 25 Tutorial: Creating Point Data 25 Exercise 1: Creating Description Keys 26 Exercise 2: Creating Point Groups 27 Exercise 3: Importing Points from a Database 29 Tutorial: Displaying and Editing Points 30 Exercise 1: Displaying an Externally ...
...5 Exercise 1: Finding Tools 6 Exercise 2: Understanding the Toolspace 9 Exercise 3: Using the Panorama Window 12 Tutorial: Using Basic Functionality 15 Tutorial: Viewing AutoCAD Civil 3D Objects 17 Exercise 1: Setting Up the Drawing Window 17 Exercise 2: Changing the ...Exercise 3: Viewing a Drawing in Model 21 Chapter 3 Points Tutorials 25 Tutorial: Creating Point Data 25 Exercise 1: Creating Description Keys 26 Exercise 2: Creating Point Groups 27 Exercise 3: Importing Points from a Database 29 Tutorial: Displaying and Editing Points 30 Exercise 1: Displaying an Externally ...

Tutorial
Page 4
...with User-Defined Properties . . . . 42 Exercise 5: Querying User-Defined Property Information . . . . . 44 Chapter 4 Point Cloud Tutorials 47 Tutorial: Working with Point Clouds 47 Exercise 1: Importing Point Cloud Data 47 Exercise 2: Working with Point Cloud Styles 50 Exercise 3: Adding Point Cloud Data... to a Surface 53 Chapter 5 Surfaces Tutorials 59 Tutorial: Creating and Adding Data to a Surface 59 Exercise 1: Creating a TIN Surface 63 Exercise 2: Adding Point Data to a Surface 64...
...with User-Defined Properties . . . . 42 Exercise 5: Querying User-Defined Property Information . . . . . 44 Chapter 4 Point Cloud Tutorials 47 Tutorial: Working with Point Clouds 47 Exercise 1: Importing Point Cloud Data 47 Exercise 2: Working with Point Cloud Styles 50 Exercise 3: Adding Point Cloud Data... to a Surface 53 Chapter 5 Surfaces Tutorials 59 Tutorial: Creating and Adding Data to a Surface 59 Exercise 1: Creating a TIN Surface 63 Exercise 2: Adding Point Data to a Surface 64...

Tutorial
Page 5
... Google Earth 117 Exercise 2: Importing a Google Earth Image 121 Exercise 3: Draping an Image on a Surface 124 Chapter 6 Survey Tutorials 129 Tutorial: Survey Setup 129 Exercise 1: Creating a Survey Database 130 Exercise 2: Setting the Equipment and Figure Prefix Databases 130 Exercise 3: Adjusting...Command Window 164 Exercise 4: Calculating an Azimuth in The Astronomic Direction Calculator 167 Exercise 5: Creating Figures from Parcels 170 Tutorial: Outputting Survey Information 171 Exercise 1: Viewing Inverse and Mapcheck Information on a Survey Figure 171 Exercise 2: Performing a...
... Google Earth 117 Exercise 2: Importing a Google Earth Image 121 Exercise 3: Draping an Image on a Surface 124 Chapter 6 Survey Tutorials 129 Tutorial: Survey Setup 129 Exercise 1: Creating a Survey Database 130 Exercise 2: Setting the Equipment and Figure Prefix Databases 130 Exercise 3: Adjusting...Command Window 164 Exercise 4: Calculating an Azimuth in The Astronomic Direction Calculator 167 Exercise 5: Creating Figures from Parcels 170 Tutorial: Outputting Survey Information 171 Exercise 1: Viewing Inverse and Mapcheck Information on a Survey Figure 171 Exercise 2: Performing a...

Tutorial
Page 6
...Data Shortcuts 186 Exercise 3: Referencing Data Shortcuts 188 Tutorial: Vault Setup 195 Exercise 1: Logging In to Autodesk Vault 195 Exercise 2: Creating User Accounts and Groups 197 Exercise 3: Creating a Project 199 Tutorial: Creating, Referencing, and Modifying Project Object Data ...Checking Out and Modifying a Project Object . . . . 204 Exercise 4: Checking In a Project Object 205 Exercise 5: Updating a Project Object 206 Tutorial: Creating and Modifying Project Point Data 207 Exercise 1: Adding Points to a Project 207 Exercise 2: Checking Out and Modifying Project Points . . . ...
...Data Shortcuts 186 Exercise 3: Referencing Data Shortcuts 188 Tutorial: Vault Setup 195 Exercise 1: Logging In to Autodesk Vault 195 Exercise 2: Creating User Accounts and Groups 197 Exercise 3: Creating a Project 199 Tutorial: Creating, Referencing, and Modifying Project Object Data ...Checking Out and Modifying a Project Object . . . . 204 Exercise 4: Checking In a Project Object 205 Exercise 5: Updating a Project Object 206 Tutorial: Creating and Modifying Project Point Data 207 Exercise 1: Adding Points to a Project 207 Exercise 2: Checking Out and Modifying Project Points . . . ...

Tutorial
Page 7
...Stations . . . . 269 Exercise 5: Editing Superelevation Parameters Graphically . . . . 272 Chapter 9 Profiles Tutorials 275 Tutorial: Designing Simple Profiles 275 Tutorial: Using Surface Profiles 279 Exercise 1: Creating and Displaying Surface Profiles with Offsets 280 Exercise 2: Changing the Profile Style... View 331 Exercise 2: Moving Labels in a Data Band 336 Exercise 3: Modifying a Data Band Style 339 Chapter 10 Parcels Tutorials 341 Tutorial: Creating Parcels 341 Exercise 1: Creating Parcels from AutoCAD Objects 341 Exercise 2: Subdividing a Parcel with a Free-Form Segment ....
...Stations . . . . 269 Exercise 5: Editing Superelevation Parameters Graphically . . . . 272 Chapter 9 Profiles Tutorials 275 Tutorial: Designing Simple Profiles 275 Tutorial: Using Surface Profiles 279 Exercise 1: Creating and Displaying Surface Profiles with Offsets 280 Exercise 2: Changing the Profile Style... View 331 Exercise 2: Moving Labels in a Data Band 336 Exercise 3: Modifying a Data Band Style 339 Chapter 10 Parcels Tutorials 341 Tutorial: Creating Parcels 341 Exercise 1: Creating Parcels from AutoCAD Objects 341 Exercise 2: Subdividing a Parcel with a Free-Form Segment ....

Tutorial
Page 8
...Footprint 405 Exercise 2: Grading from a Building Footprint to a Surface . . . . 408 Exercise 3: Filling Holes in a Grading 410 Tutorial: Using Feature Lines to Modify a Grading 412 Exercise 1: Smoothing Feature Line Arcs 412 Exercise 2: Adjusting Grading Triangulation with a Feature Line... 414 Exercise 3: Working with Crossing Feature Lines 415 Chapter 12 Corridor Assembly Tutorials 421 Tutorial: Working with Assemblies 421 Exercise 1: Creating an Assembly 422 Exercise 2: Modifying the Subassembly Name Template . . . . ....
...Footprint 405 Exercise 2: Grading from a Building Footprint to a Surface . . . . 408 Exercise 3: Filling Holes in a Grading 410 Tutorial: Using Feature Lines to Modify a Grading 412 Exercise 1: Smoothing Feature Line Arcs 412 Exercise 2: Adjusting Grading Triangulation with a Feature Line... 414 Exercise 3: Working with Crossing Feature Lines 415 Chapter 12 Corridor Assembly Tutorials 421 Tutorial: Working with Assemblies 421 Exercise 1: Creating an Assembly 422 Exercise 2: Modifying the Subassembly Name Template . . . . ....

Tutorial
Page 9
... Catalog 454 Exercise 5: Moving Assemblies from a Tool Catalog to a Tool Palette or Drawing 455 Chapter 13 Corridors Tutorials 459 Tutorial: Creating a Basic Corridor Model 459 Tutorial: Creating a Corridor with a Transition Lane 463 Exercise 1: Creating an Assembly with a Transition Lane . . ....483 Exercise 2: Creating Corridor Surface Boundaries 486 Exercise 3: Visualizing a Corridor 490 Chapter 14 Intersection and Roundabout Tutorials 495 Tutorial: Creating Intersections 496 Exercise 1: Creating a Peer Road Intersection 496 Exercise 2: Creating a Primary Road Intersection with...
... Catalog 454 Exercise 5: Moving Assemblies from a Tool Catalog to a Tool Palette or Drawing 455 Chapter 13 Corridors Tutorials 459 Tutorial: Creating a Basic Corridor Model 459 Tutorial: Creating a Corridor with a Transition Lane 463 Exercise 1: Creating an Assembly with a Transition Lane . . ....483 Exercise 2: Creating Corridor Surface Boundaries 486 Exercise 3: Visualizing a Corridor 490 Chapter 14 Intersection and Roundabout Tutorials 495 Tutorial: Creating Intersections 496 Exercise 1: Creating a Peer Road Intersection 496 Exercise 2: Creating a Primary Road Intersection with...

Tutorial
Page 10
...Exercise 2: Adding a Section View Grade Label 586 Exercise 3: Adding a Data Band to a Section View 587 Chapter 16 Material Calculation Tutorials 589 Tutorial: Calculating Earthwork Volumes from Corridor Models . . . . 589 Exercise 1: Reviewing Quantity Takeoff Criteria and Report Settings 590 Exercise 2: Creating... Reports 619 Exercise 6: Working with Pay Item Formulas 622 Exercise 7: Creating a Pay Item List 625 Chapter 17 Pipe Network Tutorials 629 Tutorial: Creating a Pipe Network 629 Exercise 1: Creating a Pipe Network from a Polyline 630 Exercise 2: Creating a Pipe Network by...
...Exercise 2: Adding a Section View Grade Label 586 Exercise 3: Adding a Data Band to a Section View 587 Chapter 16 Material Calculation Tutorials 589 Tutorial: Calculating Earthwork Volumes from Corridor Models . . . . 589 Exercise 1: Reviewing Quantity Takeoff Criteria and Report Settings 590 Exercise 2: Creating... Reports 619 Exercise 6: Working with Pay Item Formulas 622 Exercise 7: Creating a Pay Item List 625 Chapter 17 Pipe Network Tutorials 629 Tutorial: Creating a Pipe Network 629 Exercise 1: Creating a Pipe Network from a Polyline 630 Exercise 2: Creating a Pipe Network by...

Tutorial
Page 11
...Viewing Pipe Network Parts in a Section View . . . . 652 Exercise 6: Creating Pipe and Structure Tables 653 Chapter 18 Part Builder Tutorials 657 Tutorial: Creating a Cylindrical Manhole Structure 657 Exercise 1: Defining the New Part in the Structure Catalog . . . . 657 Exercise 2: Defining the...the Structure Catalog . . . . 676 Exercise 2: Defining the Manhole Geometry 678 Exercise 3: Creating Profiles and Establishing Parameters . . . . 688 Tutorial: Creating a Vault Structure 705 Exercise 1: Defining the New Part in the Structure Catalog . . . . 706 Exercise 2: Defining the Vault Top ...
...Viewing Pipe Network Parts in a Section View . . . . 652 Exercise 6: Creating Pipe and Structure Tables 653 Chapter 18 Part Builder Tutorials 657 Tutorial: Creating a Cylindrical Manhole Structure 657 Exercise 1: Defining the New Part in the Structure Catalog . . . . 657 Exercise 2: Defining the...the Structure Catalog . . . . 676 Exercise 2: Defining the Manhole Geometry 678 Exercise 3: Creating Profiles and Establishing Parameters . . . . 688 Tutorial: Creating a Vault Structure 705 Exercise 1: Defining the New Part in the Structure Catalog . . . . 706 Exercise 2: Defining the Vault Top ...

Tutorial
Page 12
... 1: Creating an Expression 802 Exercise 2: Inserting an Expression Into a Label Style 803 Chapter 20 Plan Production Tutorials 805 Tutorial: Preparing a Drawing for Plan and Profile Sheet Layout . . . . 805 Exercise 1: Configuring Viewports 806 Exercise 2: Creating View Frames 807 Tutorial: Generating Sheets for Plotting 811 Exercise 1: Creating Plan and Profile Sheets 811 Exercise 2: Creating Section...
... 1: Creating an Expression 802 Exercise 2: Inserting an Expression Into a Label Style 803 Chapter 20 Plan Production Tutorials 805 Tutorial: Preparing a Drawing for Plan and Profile Sheet Layout . . . . 805 Exercise 1: Configuring Viewports 806 Exercise 2: Creating View Frames 807 Tutorial: Generating Sheets for Plotting 811 Exercise 1: Creating Plan and Profile Sheets 811 Exercise 2: Creating Section...
Tutorial
Page 13
...about creating and working with land surfaces. ■ Survey Tutorials (page 129). Learn how to use the AutoCAD Civil 3D project management features, including data shortcuts and Autodesk Vault. ■ Alignments Tutorials (page 213). Learn how to build and manage assemblies, ...which are placed incrementally along an alignment. ■ Parcels Tutorials (page 341). Learn how to work with AutoCAD ...
...about creating and working with land surfaces. ■ Survey Tutorials (page 129). Learn how to use the AutoCAD Civil 3D project management features, including data shortcuts and Autodesk Vault. ■ Alignments Tutorials (page 213). Learn how to build and manage assemblies, ...which are placed incrementally along an alignment. ■ Parcels Tutorials (page 341). Learn how to work with AutoCAD ...

Tutorial
Page 14
...for plotting or publishing. Learn how to annotate AutoCAD Civil 3D objects using the specialized layout tools. ■ Part Builder Tutorials (page 657). Learn how to calculate material quantities and generate reports, including pay item reports, earthworks reports, and mass haul ...diagrams. ■ Pipe Network Tutorials (page 629). Each tutorial set contains exercises that you work with each 2 | Chapter 1 Welcome to create cross sections of features. After you begin...
...for plotting or publishing. Learn how to annotate AutoCAD Civil 3D objects using the specialized layout tools. ■ Part Builder Tutorials (page 657). Learn how to calculate material quantities and generate reports, including pay item reports, earthworks reports, and mass haul ...diagrams. ■ Pipe Network Tutorials (page 629). Each tutorial set contains exercises that you work with each 2 | Chapter 1 Welcome to create cross sections of features. After you begin...

Tutorial
Page 15
... 2011 Help ■ AutoCAD Civil 3D 2011 Best Practices Guide Setting Up the Workspace Before you start the tutorials, you must create a folder in which to save your changes to the Autodesk Documents folder (page 819). 3 Click File menu ➤ New ➤ Folder. Workspaces are sets of... the commands that you begin the tutorials: 1 Open Windows Explorer. 2 Navigate to the tutorial drawings as you work in the ribbon, enter their ...
... 2011 Help ■ AutoCAD Civil 3D 2011 Best Practices Guide Setting Up the Workspace Before you start the tutorials, you must create a folder in which to save your changes to the Autodesk Documents folder (page 819). 3 Click File menu ➤ New ➤ Folder. Workspaces are sets of... the commands that you begin the tutorials: 1 Open Windows Explorer. 2 Navigate to the tutorial drawings as you work in the ribbon, enter their ...

Tutorial
Page 16
4 Change the name of the new folder to My Civil Tutorial Data. 4 | Chapter 1 Welcome to the AutoCAD Civil 3D Tutorials
4 Change the name of the new folder to My Civil Tutorial Data. 4 | Chapter 1 Welcome to the AutoCAD Civil 3D Tutorials

Tutorial
Page 17
...information, see many ways to save your work the same way in a horizontally oriented grid, which makes it easier to the My Civil Tutorial Data folder (page 819) so that data type. The AutoCAD Civil 3D user interface enhances the standard AutoCAD environment with the application workspace and.... The Panorama window displays data in AutoCAD Civil 3D as the command line and ribbon, work from these tutorials are many columns at once. If you do in the tutorial drawings folder (page 819). Standard AutoCAD features, such as they do not overwrite the original drawings. There ...
...information, see many ways to save your work the same way in a horizontally oriented grid, which makes it easier to the My Civil Tutorial Data folder (page 819) so that data type. The AutoCAD Civil 3D user interface enhances the standard AutoCAD environment with the application workspace and.... The Panorama window displays data in AutoCAD Civil 3D as the command line and ribbon, work from these tutorials are many columns at once. If you do in the tutorial drawings folder (page 819). Standard AutoCAD features, such as they do not overwrite the original drawings. There ...
Tutorial
Page 18
The drawing you will learn how to locate the tools that are available for product updates and 6 | Chapter 2 Getting Started Tutorials Explore the basic user interface elements 1 Open drawing Intro-1.dwg, which is available in each element. ■ Application Menu-Provides access to ...the Quick Access toolbar. The objects in this exercise, you to the Quick Access toolbar. ■ InfoCenter-Enables you will create in the following tutorials. For more information, see the AutoCAD Civil 3D Help topic The Civil 3D User Interface. NOTE You also can right-click a tool on ...
The drawing you will learn how to locate the tools that are available for product updates and 6 | Chapter 2 Getting Started Tutorials Explore the basic user interface elements 1 Open drawing Intro-1.dwg, which is available in each element. ■ Application Menu-Provides access to ...the Quick Access toolbar. The objects in this exercise, you to the Quick Access toolbar. ■ InfoCenter-Enables you will create in the following tutorials. For more information, see the AutoCAD Civil 3D Help topic The Civil 3D User Interface. NOTE You also can right-click a tool on ...

Tutorial
Page 20
This is known as a contextual tab, and it contains all AutoCAD Civil 3D contextual tabs are displayed on the contextual tab. The TIN Surface tab is selected, different tools are arranged in a similar series of object that is displayed on the type of panels: ■ Labels and Tables ■ General Tools ■ Modify ■ Analyze ■ Object Tools ■ Launch Pad 5 Press Esc. 6 Select the corridor. 8 | Chapter 2 Getting Started Tutorials The tools on all the tools related to surfaces. Depending on the ribbon.
This is known as a contextual tab, and it contains all AutoCAD Civil 3D contextual tabs are displayed on the contextual tab. The TIN Surface tab is selected, different tools are arranged in a similar series of object that is displayed on the type of panels: ■ Labels and Tables ■ General Tools ■ Modify ■ Analyze ■ Object Tools ■ Launch Pad 5 Press Esc. 6 Select the corridor. 8 | Chapter 2 Getting Started Tutorials The tools on all the tools related to surfaces. Depending on the ribbon.

Tutorial
Page 21
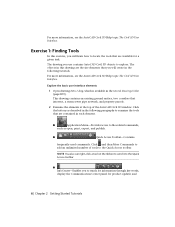
When an object is selected, the appropriate object contextual tab is removed. Exercise 2: Understanding the Toolspace | 9 Exercise 2: Understanding the Toolspace In this tutorial, go to use the AutoCAD Civil 3D Toolspace, which provides an object-oriented view of your engineering data. This exercise continues from Exercise 1: Finding Tools (...
When an object is selected, the appropriate object contextual tab is removed. Exercise 2: Understanding the Toolspace | 9 Exercise 2: Understanding the Toolspace In this tutorial, go to use the AutoCAD Civil 3D Toolspace, which provides an object-oriented view of your engineering data. This exercise continues from Exercise 1: Finding Tools (...

Tutorial
Page 22
...are otherwise related. The command line is not visible, enter ShowTS on the command line. Explore the Prospector tab NOTE This tutorial uses Intro-1.dwg from the previous tutorial. 1 In Toolspace, click the Prospector tab. Notice that the Site 1 collection includes sub-collections for the following objects:... site provides a logical grouping of objects that the drawing includes different types of the Prospector tab. 10 | Chapter 2 Getting Started Tutorials The Prospector tab provides you with a categorized view of the same design project, or are written in the drawing.
...are otherwise related. The command line is not visible, enter ShowTS on the command line. Explore the Prospector tab NOTE This tutorial uses Intro-1.dwg from the previous tutorial. 1 In Toolspace, click the Prospector tab. Notice that the Site 1 collection includes sub-collections for the following objects:... site provides a logical grouping of objects that the drawing includes different types of the Prospector tab. 10 | Chapter 2 Getting Started Tutorials The Prospector tab provides you with a categorized view of the same design project, or are written in the drawing.

Tutorial
Page 24
...can use and customize the Panorama window. This tutorial continues from the previous tutorial. 1 Use the Pan and Zoom controls to Exercise 3: Using the Panorama Window (page 12). Display object data in the Panorama window NOTE This tutorial uses Intro-1.dwg from Exercise 2: Understanding the Toolspace... (page 9). Exercise 3: Using the Panorama Window In this tutorial, go to locate the beginning of the alignment and pipe network on the...
...can use and customize the Panorama window. This tutorial continues from the previous tutorial. 1 Use the Pan and Zoom controls to Exercise 3: Using the Panorama Window (page 12). Display object data in the Panorama window NOTE This tutorial uses Intro-1.dwg from Exercise 2: Understanding the Toolspace... (page 9). Exercise 3: Using the Panorama Window In this tutorial, go to locate the beginning of the alignment and pipe network on the...