Users Manual
Page 44
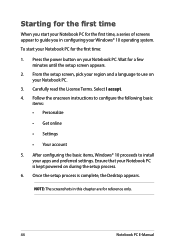
... screenshots in configuring your Windows® 10 operating system. Wait for a few minutes until the setup screen appears. 2. Ensure that your apps and preferred settings. From the setup screen, pick your region and a language to install your Notebook PC is complete, the Desktop appears. To... start your Notebook PC for the first time, a series of screens appear to configure the following basic items: • Personalize • Get online • Settings • Your account 5. Press the power...
... screenshots in configuring your Windows® 10 operating system. Wait for a few minutes until the setup screen appears. 2. Ensure that your apps and preferred settings. From the setup screen, pick your region and a language to install your Notebook PC is complete, the Desktop appears. To... start your Notebook PC for the first time, a series of screens appear to configure the following basic items: • Personalize • Get online • Settings • Your account 5. Press the power...

Users Manual
Page 45
... gateway to a different user account Notebook PC E-Manual 45 Change account settings, lock, or sign out from your account Launch an app from the Start screen Launch Taskview Launch an app from the taskbar Launch Search Launch the Start menu Launch All apps Shut down, restart, or put your Notebook PC...
... gateway to a different user account Notebook PC E-Manual 45 Change account settings, lock, or sign out from your account Launch an app from the Start screen Launch Taskview Launch an app from the taskbar Launch Search Launch the Start menu Launch All apps Shut down, restart, or put your Notebook PC...

Users Manual
Page 53
Launch another app. Launch the app you wish to snap the app. 3. Drag the title bar of your app and drop the app to the edge of the screen to snap another app and repeat the above steps to snap. 2. Using Snap 1. 2. 3. Launch another app. 1. Press and hold the key, then use the arrow keys to snap. Launch the app you wish to snap another app and repeat the above steps to snap. Notebook PC E-Manual 53
Launch another app. Launch the app you wish to snap the app. 3. Drag the title bar of your app and drop the app to the edge of the screen to snap another app and repeat the above steps to snap. 2. Using Snap 1. 2. 3. Launch another app. 1. Press and hold the key, then use the arrow keys to snap. Launch the app you wish to snap another app and repeat the above steps to snap. Notebook PC E-Manual 53

Users Manual
Page 55
Launches Start menu \ Launches Action Center Launches the desktop Launches the File Explorer Opens the Share panel Launches Settings Launches Connect panel Activates the Lock screen Minimizes all currently active windows Notebook PC E-Manual 55 Other keyboard shortcuts Using the keyboard, you can also use the following shortcuts to help you launch applications and navigate Windows® 10.
Launches Start menu \ Launches Action Center Launches the desktop Launches the File Explorer Opens the Share panel Launches Settings Launches Connect panel Activates the Lock screen Minimizes all currently active windows Notebook PC E-Manual 55 Other keyboard shortcuts Using the keyboard, you can also use the following shortcuts to help you launch applications and navigate Windows® 10.

Users Manual
Page 56
Launches Search Launches Project panel Opens the Run window Opens Ease of Access Center Opens the context menu of the Start button Launches the magnifier icon and zooms in your screen Zooms out your screen Opens Narrator Settings 56 Notebook PC E-Manual
Launches Search Launches Project panel Opens the Run window Opens Ease of Access Center Opens the context menu of the Start button Launches the magnifier icon and zooms in your screen Zooms out your screen Opens Narrator Settings 56 Notebook PC E-Manual

Users Manual
Page 60
Select Shut down from the drop-down Windows. Turning your Notebook PC off You can turn off your Notebook PC by doing either of the following procedures: • Launch the Start menu, then select > Shut down to do a normal shutdown. • From the log-in screen, select > Shut down. • Press to launch Shut down list then select OK. • If your Notebook PC is unresponsive, press and hold the power button for at least four (4) seconds until your Notebook PC turns off. 60 Notebook PC E-Manual
Select Shut down from the drop-down Windows. Turning your Notebook PC off You can turn off your Notebook PC by doing either of the following procedures: • Launch the Start menu, then select > Shut down to do a normal shutdown. • From the log-in screen, select > Shut down. • Press to launch Shut down list then select OK. • If your Notebook PC is unresponsive, press and hold the power button for at least four (4) seconds until your Notebook PC turns off. 60 Notebook PC E-Manual

Users Manual
Page 61
Notebook PC E-Manual 61 Press to launch Shut down list then select OK. Putting your Notebook PC to sleep To put your Notebook PC to Sleep mode: • Launch the Start menu, then select > Sleep to put your Notebook PC to Sleep mode by pressing the power button once. Select Sleep from the drop-down Windows. NOTE: You can also put your Notebook PC to sleep. • From the log-in screen, select > Sleep.
Notebook PC E-Manual 61 Press to launch Shut down list then select OK. Putting your Notebook PC to sleep To put your Notebook PC to Sleep mode: • Launch the Start menu, then select > Sleep to put your Notebook PC to Sleep mode by pressing the power button once. Select Sleep from the drop-down Windows. NOTE: You can also put your Notebook PC to sleep. • From the log-in screen, select > Sleep.
Users Manual
Page 65
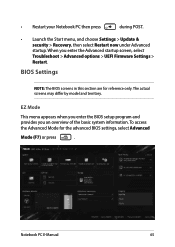
...This menu appears when you enter the BIOS setup program and provides you enter the Advanced startup screen, select Troubleshoot > Advanced options > UEFI Firmware Settings > Restart. BIOS Settings NOTE: The BIOS screens in this section are for the advanced BIOS settings, select Advanced Mode (F7) or press... . Notebook PC E-Manual 65 When you an overview of the basic system information. The actual screens may differ by model and territory. To access the Advanced Mode for reference only. • Restart your Notebook PC then press during POST...
...This menu appears when you enter the BIOS setup program and provides you enter the Advanced startup screen, select Troubleshoot > Advanced options > UEFI Firmware Settings > Restart. BIOS Settings NOTE: The BIOS screens in this section are for the advanced BIOS settings, select Advanced Mode (F7) or press... . Notebook PC E-Manual 65 When you an overview of the basic system information. The actual screens may differ by model and territory. To access the Advanced Mode for reference only. • Restart your Notebook PC then press during POST...

Users Manual
Page 66
Boot This menu allows you to the following procedures when setting your boot option priorities. On the Boot screen, select Boot Option #1. 2. Press and select a device as the Boot Option #1. 66 Notebook PC E-Manual You may refer to set your boot priority. 1.
Boot This menu allows you to the following procedures when setting your boot option priorities. On the Boot screen, select Boot Option #1. 2. Press and select a device as the Boot Option #1. 66 Notebook PC E-Manual You may refer to set your boot priority. 1.

Users Manual
Page 68
To set the password: 1. To clear the password: 1. On the Security screen, select Setup Administrator Password or User Password. 2. Select OK to confirm the password then select OK. Type in the current password then press . 3. Re-type to clear the old password. Leave other fields blank then select OK to type in the password. 68 Notebook PC E-Manual NOTE: A keyboard is required to continue. 4. Type in a password then press . 3. On the Security screen, select Setup Administrator Password or User Password. 2.
To set the password: 1. To clear the password: 1. On the Security screen, select Setup Administrator Password or User Password. 2. Select OK to confirm the password then select OK. Type in the current password then press . 3. Re-type to clear the old password. Leave other fields blank then select OK to type in the password. 68 Notebook PC E-Manual NOTE: A keyboard is required to continue. 4. Type in a password then press . 3. On the Security screen, select Setup Administrator Password or User Password. 2.
Users Manual
Page 80
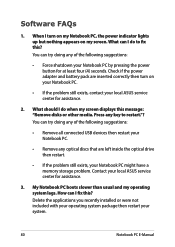
.... • If the problem still exists, your Notebook PC. • Remove any of the following suggestions: • Force shutdown your local ASUS service center for assistance. 3. You can I fix this? Contact your Notebook PC by pressing the power button for assistance. 2. You can I do... when my screen displays this ? Press any of the following suggestions: • Remove all connected USB devices then restart your Notebook PC might have a memory ...
.... • If the problem still exists, your Notebook PC. • Remove any of the following suggestions: • Force shutdown your local ASUS service center for assistance. 3. You can I fix this? Contact your Notebook PC by pressing the power button for assistance. 2. You can I do... when my screen displays this ? Press any of the following suggestions: • Remove all connected USB devices then restart your Notebook PC might have a memory ...

Users Manual
Page 94
... of certain U.S.A. REACH Complying with ANSI/NFPA 70, the National Electrical Code (NEC), in our products at ASUS REACH website at http://csr.asus.com/english/REACH.htm. patents and other intellectual property rights owned by Macrovision Corporation and other limited viewing uses... only unless otherwise authorized by Macrovision Corporation. TV Notices Note to CATV System Installer-Cable distribution system should include bonding the screen of...
... of certain U.S.A. REACH Complying with ANSI/NFPA 70, the National Electrical Code (NEC), in our products at ASUS REACH website at http://csr.asus.com/english/REACH.htm. patents and other intellectual property rights owned by Macrovision Corporation and other limited viewing uses... only unless otherwise authorized by Macrovision Corporation. TV Notices Note to CATV System Installer-Cable distribution system should include bonding the screen of...


