
User Manual
Page 15
... wall socket before you proceed Take note of the following precautions before touching any motherboard settings. • Unplug the power cord from the power supply. ASUS WS Z390 PRO 1-1
... wall socket before you proceed Take note of the following precautions before touching any motherboard settings. • Unplug the power cord from the power supply. ASUS WS Z390 PRO 1-1

User Manual
Page 17
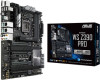
...-1 pin COM1) 19. Thunderbolt header (5-pin TB_HEADER) Page 1-20 1-4 1-19 1-5 1-10 1-15 1-17 1-11 1-14 1-24 1-21 1-16 1-22 1-18 1-9 1-9 1-13 1-16 1-15 1-23 1-22 ASUS WS Z390 PRO 1-3 LGA1151 CPU socket 3. Clear CMOS button (CLR_CMOS) 9. TPM connector (14-1 pin TPM) 14. MemOK! M.2 sockets (M2X4_1; USB 3.1 Gen 1 connector (20-1 pin U31G1_E12) 8. RGB header (4-pin...
...-1 pin COM1) 19. Thunderbolt header (5-pin TB_HEADER) Page 1-20 1-4 1-19 1-5 1-10 1-15 1-17 1-11 1-14 1-24 1-21 1-16 1-22 1-18 1-9 1-9 1-13 1-16 1-15 1-23 1-22 ASUS WS Z390 PRO 1-3 LGA1151 CPU socket 3. Clear CMOS button (CLR_CMOS) 9. TPM connector (14-1 pin TPM) 14. MemOK! M.2 sockets (M2X4_1; USB 3.1 Gen 1 connector (20-1 pin U31G1_E12) 8. RGB header (4-pin...

User Manual
Page 19
Recommended memory configurations ASUS WS Z390 PRO 1-5 DO NOT install a DDR, DDR2, or DDR3 memory module to the DDR4 slot. Chapter 1 1.1.4 System memory The motherboard comes with four DDR4 (Double Data Rate 4) Dual Inline Memory Modules (DIMM) slots. A DDR4 module is notched differently from a DDR, DDR2, or DDR3 module.
Recommended memory configurations ASUS WS Z390 PRO 1-5 DO NOT install a DDR, DDR2, or DDR3 memory module to the DDR4 slot. Chapter 1 1.1.4 System memory The motherboard comes with four DDR4 (Double Data Rate 4) Dual Inline Memory Modules (DIMM) slots. A DDR4 module is notched differently from a DDR, DDR2, or DDR3 module.

User Manual
Page 21
Chapter 1 Slot No. 1 2 3 4 5 Slot Description PCIE 3.0 x16_1 slot PCIE 3.0 x16_2 slot (max. at x4 mode) PCIE 3.0 x16_3 slot PCIE 3.0 x16_4 slot (max. 1.1.5 Expansion slots Unplug the power cord before adding or removing expansion cards. at x8 mode) PCIE 3.0 x4_1 slot (max. Failure to do so may cause you physical injury and damage motherboard components. at x8 mode) ASUS WS Z390 PRO 1-7
Chapter 1 Slot No. 1 2 3 4 5 Slot Description PCIE 3.0 x16_1 slot PCIE 3.0 x16_2 slot (max. at x4 mode) PCIE 3.0 x16_3 slot PCIE 3.0 x16_4 slot (max. 1.1.5 Expansion slots Unplug the power cord before adding or removing expansion cards. at x8 mode) PCIE 3.0 x4_1 slot (max. Failure to do so may cause you physical injury and damage motherboard components. at x8 mode) ASUS WS Z390 PRO 1-7

User Manual
Page 23
ASUS WS Z390 PRO 1-9 The button also lights up when the system is ideal for overclockers and gamers who continually change settings to a power source indicating that allows you ...
ASUS WS Z390 PRO 1-9 The button also lights up when the system is ideal for overclockers and gamers who continually change settings to a power source indicating that allows you ...

User Manual
Page 25
Clear CMOS button (CLR_CMOS) Press this button to clear the BIOS setup information only when the systems hangs due to overclocking. 4. Chapter 1 ASUS WS Z390 PRO 1-11
Clear CMOS button (CLR_CMOS) Press this button to clear the BIOS setup information only when the systems hangs due to overclocking. 4. Chapter 1 ASUS WS Z390 PRO 1-11

User Manual
Page 27
3. Chapter 1 4. Refer to the Q-Code table in the Appendix section for troubleshooting. The actual cause may vary from the hard disk drive. ASUS WS Z390 PRO 1-13 Q-Code LED The Q-Code LED design provides you with a 2-digit error code that displays the system status. The LED does not light up when ...
3. Chapter 1 4. Refer to the Q-Code table in the Appendix section for troubleshooting. The actual cause may vary from the hard disk drive. ASUS WS Z390 PRO 1-13 Q-Code LED The Q-Code LED design provides you with a 2-digit error code that displays the system status. The LED does not light up when ...

User Manual
Page 29
ASUS WS Z390 PRO 1-15 Chapter 1 We recommend that supports HD Audio. Connect one end of the motherboard's high-definition audio capability. 3. U.2 connectors (U.2_1-2) This motherboard comes with U.2 connectors ...
ASUS WS Z390 PRO 1-15 Chapter 1 We recommend that supports HD Audio. Connect one end of the motherboard's high-definition audio capability. 3. U.2 connectors (U.2_1-2) This motherboard comes with U.2 connectors ...

User Manual
Page 31
ASUS WS Z390 PRO 1-17 The USB 3.1 Gen 1 module is purchased separately. Chapter 1 6. USB 3.1 Gen 1 connector (20-1 pin U31G1_E12) This connector allows you can enjoy all the benefits of USB 3.1 Gen 1 including faster data transfer speeds of up to connect a USB 3.1 Gen 1 module for USB-chargeable devices, optimized power efficiency, and backward compatibility with USB 2.0. With an installed USB 3.1 Gen 1 module, you to 5 Gb/s, faster charging time for additional USB 3.1 Gen 1 front or rear panel ports.
ASUS WS Z390 PRO 1-17 The USB 3.1 Gen 1 module is purchased separately. Chapter 1 6. USB 3.1 Gen 1 connector (20-1 pin U31G1_E12) This connector allows you can enjoy all the benefits of USB 3.1 Gen 1 including faster data transfer speeds of up to connect a USB 3.1 Gen 1 module for USB-chargeable devices, optimized power efficiency, and backward compatibility with USB 2.0. With an installed USB 3.1 Gen 1 module, you to 5 Gb/s, faster charging time for additional USB 3.1 Gen 1 front or rear panel ports.

User Manual
Page 33
... card is purchased separately. • W_PUMP function support depends on the fan connectors! • Ensure to fully insert the fan cable to the fan connectors. ASUS WS Z390 PRO 1-19 Insufficient air flow inside the system may damage the motherboard components. These are not jumpers!
... card is purchased separately. • W_PUMP function support depends on the fan connectors! • Ensure to fully insert the fan cable to the fan connectors. ASUS WS Z390 PRO 1-19 Insufficient air flow inside the system may damage the motherboard components. These are not jumpers!

User Manual
Page 35
... system reboot without turning off the system power. • Chassis intrusion connector (2-pin CHASSIS) This connector is for a chassis-mounted intrusion detection sensor or switch. ASUS WS Z390 PRO 1-21 Chapter 1 • System power LED (2-pin or 3-1 pin PLED) The 2-pin or 3-1 pin connector is for the system power LED. The HDD LED lights...
... system reboot without turning off the system power. • Chassis intrusion connector (2-pin CHASSIS) This connector is for a chassis-mounted intrusion detection sensor or switch. ASUS WS Z390 PRO 1-21 Chapter 1 • System power LED (2-pin or 3-1 pin PLED) The 2-pin or 3-1 pin connector is for the system power LED. The HDD LED lights...

User Manual
Page 37
M2X4_2) These sockets allow you to the M2X4_2 socket. • These sockets support IRST (Intel® Rapid Storage Technology). ASUS WS Z390 PRO 1-23 Chapter 1 • M2X4_1 and M2X4_2 sockets support PCIe 3.0 x4 and SATA mode M Key design and type 2242 / 2260 / 2280 / 22110 storage devices. • When ...
M2X4_2) These sockets allow you to the M2X4_2 socket. • These sockets support IRST (Intel® Rapid Storage Technology). ASUS WS Z390 PRO 1-23 Chapter 1 • M2X4_1 and M2X4_2 sockets support PCIe 3.0 x4 and SATA mode M Key design and type 2242 / 2260 / 2280 / 22110 storage devices. • When ...

User Manual
Page 39
CPU installation Chapter 2 Top of CPU Bottom of CPU ASUS WS Z390 PRO Bottom of CPU 2-1 Chapter 2: Basic Installation Basic Installation 2.1 Building your PC system 2 2.1.1 The diagrams in this section are the same for reference only. The motherboard layout may vary with models, but the installation steps are for all models.
CPU installation Chapter 2 Top of CPU Bottom of CPU ASUS WS Z390 PRO Bottom of CPU 2-1 Chapter 2: Basic Installation Basic Installation 2.1 Building your PC system 2 2.1.1 The diagrams in this section are the same for reference only. The motherboard layout may vary with models, but the installation steps are for all models.

User Manual
Page 41
2.1.2 Cooling system installation Apply Thermal Interface Material to the CPU cooling system and CPU before you install the cooling system, if necessary. To install a CPU heatsink and fan assembly Chapter 2 ASUS WS Z390 PRO 2-3
2.1.2 Cooling system installation Apply Thermal Interface Material to the CPU cooling system and CPU before you install the cooling system, if necessary. To install a CPU heatsink and fan assembly Chapter 2 ASUS WS Z390 PRO 2-3

User Manual
Page 43
2.1.4 DIMM installation Chapter 2 To remove a DIMM ASUS WS Z390 PRO 2-5
2.1.4 DIMM installation Chapter 2 To remove a DIMM ASUS WS Z390 PRO 2-5

User Manual
Page 45
2.1.6 SATA device connection OR Chapter 2 ASUS WS Z390 PRO 2-7
2.1.6 SATA device connection OR Chapter 2 ASUS WS Z390 PRO 2-7

User Manual
Page 47
2.1.8 Expansion card installation To install PCIe x16 cards To install PCIe x4 cards Chapter 2 ASUS WS Z390 PRO 2-9
2.1.8 Expansion card installation To install PCIe x16 cards To install PCIe x4 cards Chapter 2 ASUS WS Z390 PRO 2-9

User Manual
Page 49
To install ThunderboltEX 3 card THUUSNBD3E.R1 BTOYLPTE 3C USB 3.1 TYPE A MINI DisplayPort IN Chapter 2 THUUSNBD3E.R1 BTOYLPTE 3C USB 3.1 TYPE A MINI DisplayPort IN • The illustrations in this section are the same for reference only. The motherboard layout may vary with models, but the installation steps are for all models. • The ThunderboltEX 3 card is purchased separately. ASUS WS Z390 PRO 2-11
To install ThunderboltEX 3 card THUUSNBD3E.R1 BTOYLPTE 3C USB 3.1 TYPE A MINI DisplayPort IN Chapter 2 THUUSNBD3E.R1 BTOYLPTE 3C USB 3.1 TYPE A MINI DisplayPort IN • The illustrations in this section are the same for reference only. The motherboard layout may vary with models, but the installation steps are for all models. • The ThunderboltEX 3 card is purchased separately. ASUS WS Z390 PRO 2-11

User Manual
Page 51
... port USB BIOS Flashback button 6. To use a USB 2.0 storage device to save the latest BIOS version for better compatibility and stability. 2. ASUS WS Z390 PRO 2-13 Shut down your USB storage device. 4. This may have risks. 2.2 BIOS update utility USB BIOS Flashback USB BIOS Flashback allows you to...system's failure to the USB Flashback port. Insert a USB storage device to boot up, please contact your local ASUS Service Center. Visit https://www.asus.com/support/ and download the latest BIOS version for three seconds until the light goes out, indicating that the...
... port USB BIOS Flashback button 6. To use a USB 2.0 storage device to save the latest BIOS version for better compatibility and stability. 2. ASUS WS Z390 PRO 2-13 Shut down your USB storage device. 4. This may have risks. 2.2 BIOS update utility USB BIOS Flashback USB BIOS Flashback allows you to...system's failure to the USB Flashback port. Insert a USB storage device to boot up, please contact your local ASUS Service Center. Visit https://www.asus.com/support/ and download the latest BIOS version for three seconds until the light goes out, indicating that the...

User Manual
Page 53
... Speaker Out Mic In Center/Sub woofer Rear Speaker Out Side Speaker Out Front Speaker Out Mic In Center/Sub woofer Rear Speaker Out Chapter 2 ASUS WS Z390 PRO 2-15 Black - 4-channel 5.1-channel 7.1-channel Line In Front Speaker Out Mic In - * LAN ports LED indications Activity Link LED Status Description OFF No link ORANGE...
... Speaker Out Mic In Center/Sub woofer Rear Speaker Out Side Speaker Out Front Speaker Out Mic In Center/Sub woofer Rear Speaker Out Chapter 2 ASUS WS Z390 PRO 2-15 Black - 4-channel 5.1-channel 7.1-channel Line In Front Speaker Out Mic In - * LAN ports LED indications Activity Link LED Status Description OFF No link ORANGE...


