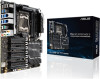
Users Manual English
Page 15
ASUS Pro WS X299 SAGE II 1-1 Failure to do so may cause severe damage to avoid touching the ICs on them. • Whenever you uninstall any component, place it on a grounded ...
Users Manual English
Page 17
... LED connectors 17. Thunderbolt header Page 1-5 1-18 1-4 1-17 1-20 1-21 1-14 1-16 1-15 1-19 1-22 1-25 1-11 1-25 1-11 1-24 1-23 1-22 1-10 1-9 1-9 1-9 1-15 1-20 ASUS Pro WS X299 SAGE II 1-3 CPU socket 4. System panel connector 11. Clear CMOS button 20. SATA 6 Gb/s connectors 8. U.2 LED SW jumper 14. Power-on button 23. Front panel audio connector...
Users Manual English
Page 19
Chapter 1 1.1.4 System memory The motherboard comes with eight DDR4 (Double Data Rate 4) Dual Inline Memory Modules (DIMM) slots. DO NOT install a DDR, DDR2, or DDR3 memory module to the DDR4 slot. A DDR4 module is notched differently from a DDR, DDR2, or DDR3 module. Recommended memory configurations Intel® Core™ X-series Processors (6-core or above) ASUS Pro WS X299 SAGE II 1-5
Users Manual English
Page 21
Chapter 1 ASUS Pro WS X299 SAGE II 1-7 Failure to do so may cause you physical injury and damage motherboard components. 1.1.5 Expansion slots Unplug the power cord before adding or removing expansion cards.
Users Manual English
Page 23
... before removing or installing any motherboard component. This button is plugged to power up or wake up when the system is set to the button. ASUS Pro WS X299 SAGE II 1-9
Users Manual English
Page 25
To gain more CPU voltage setting, insert the jumper to pins 1-2 for normal storage device LED mode. Set to pins 2-3. Set to pins 1-2. 2. To go back to its default CPU voltage setting, insert the jumper to pins 2-3 for NVMe device LED mode. U.2 LED SW jumper The U.2 LED SW jumper allows you to select the LED mode for a flexible overclocking system, depending on the type of the installed CPU. ASUS Pro WS X299 SAGE II 1-11 CPU Over Voltage jumper The CPU Over Voltage jumper allows you to set a higher CPU voltage for storage devices. Chapter 1 1.1.7 Onboard jumpers 1.
Users Manual English
Page 27
Chapter 1 3. The actual cause may vary from case to case. The POST State LEDs provide the most probable cause of these key components during POST (Power-On Self-Test): CPU, memory modules, VGA card, and hard disk drives. ASUS Pro WS X299 SAGE II 1-13 POST State LEDs The POST State LEDs provide the status of an error code as a starting point for troubleshooting. If an error is found, the critical component's LED stays lit up until the problem is solved.
Users Manual English
Page 29
... I /O module that you to connect a USB 3.2 Gen 2 module for a chassis-mounted front panel audio I /O module cable to avail of the motherboard's high-definition audio capability. 3. ASUS Pro WS X299 SAGE II 1-15 Front panel audio connector This connector is for additional USB 3.2 Gen 2 ports.
Users Manual English
Page 31
.... Insufficient air flow inside the system may damage the motherboard components. Chapter 1 • DO NOT forget to connect the fan cables to the fan connectors. ASUS Pro WS X299 SAGE II 1-17 Current 1A 1A 1A 1A 1A 3A 1A Max.
Users Manual English
Page 33
... system, or put the system into sleep or soft-off Button connector (PWRSW) The 3-1 pin connector allows you to connect the Storage Device Activity LED. ASUS Pro WS X299 SAGE II 1-19 The System Power LED lights up when the system is in sleep mode. • Storage Device Activity LED connector (HDD_LED) The 2-pin connector allows...
Users Manual English
Page 35
.... • M.2_2 socket supports PCIe 3.0 x4 mode M Key design and type 2242 / 2260 / 2280 PCIe storage devices. • M.2_1 socket shares bandwidth with SATA6G_1 port. ASUS Pro WS X299 SAGE II 1-21 Chapter 1 10. M.2 slot These sockets allow you to section Onboard LEDs for the exact location of the M.2 LED. When M.2_1 socket runs in SATA...
Users Manual English
Page 37
ASUS Pro WS X299 SAGE II 1-23 The AURA RGB LED connector supports 5050 RGB multi-color LED strips (12V/G/R/B), with the 12V header on the motherboard. • The LED strip ...
Users Manual English
Page 39
... CPU RAID functions with Intel® CPU RSTe only supports Intel® Core™ X-series Processors (6-core or above) and Intel® SSD modules. 16. ASUS Pro WS X299 SAGE II 1-25 15. VROC Key connector This connector allows you to connect a KEY module to CPU behavior, CPU RAID functions with Intel® CPU RSTe.
Users Manual English
Page 41
The motherboard layout may vary with models, but the installation steps are aligned to the chassis rear I /O ports are the same for reference only. Place the motherboard into the chassis, ensuring that its rear I /O panel. 2. Chapter 2 ASUS Pro WS X299 SAGE II 2-1 Chapter 2: Basic Installation Basic Installation 2.1 Building your PC system 2 The diagrams in this section are for all models. 2.1.1 Motherboard installation 1. Install the ASUS Q-Shield to the chassis' rear I/O panel.
Users Manual English
Page 43
The plastic cap will pop up automatically once the CPU is in opening/closing the double latch. 2.1.2 CPU installation Please note the order in place and the hatch properly sealed down. Follow the instructions printed on the metal sealing hatch or the illustrations shown below in this manual. Chapter 2 ASUS Pro WS X299 SAGE II 2-3
Users Manual English
Page 45
To install the CPU heatsink and fan assembly Chapter 2 ASUS Pro WS X299 SAGE II 2-5 2.1.3 CPU heatsink and fan assembly installation Apply the Thermal Interface Material to the CPU heatsink and CPU before you install the heatsink and fan, if necessary.
Users Manual English
Page 47
ASUS Pro WS X299 SAGE II 2-7 2.1.5 ATX power connection Chapter 2 OR AND • DO NOT connect the 6-pin power plug only, the motherboard may overheat under heavy usage. • Ensure to connect the 8-pin power plug, or connect both the 8-pin and 6-pin power plugs.
Users Manual English
Page 49
Chapter 2 2.1.7 Front I/O connector To install ASUS Q-Connector To install USB 3.2 Gen 2 connector USB 3.2 Gen 2 This connector will only fit in one orientation. To install USB 3.2 Gen 1 connector To install front panel audio connector USB 3.2 Gen 1 AAFP ASUS Pro WS X299 SAGE II 2-9 Push the connector until it clicks into place.
Users Manual English
Page 51
ASUS Pro WS X299 SAGE II 2-11 2.1.9 M.2 installation 1 2 OR 1 3 4 Chapter 2 6 5 8 7 8 Supported M.2 type varies per motherboard.
Users Manual English
Page 53
Visit https://www.asus.com/support/ and download the latest BIOS version for three seconds until the light goes out, indicating that supports BIOS FlashBack™. 2. Wait until the ... it to your BIOS file when you download a BIOS file for a BIOS FlashBack™ compatible motherboard. 4. Press the BIOS FlashBack™ button for this motherboard. 3. ASUS Pro WS X299 SAGE II 2-13 Simply insert a USB storage device to the USB port (the USB port hole marked in green on the I /O connection for three seconds to automatically...