
Users Manual English
Page 15
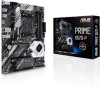
... you install or remove any component, ensure that the ATX power supply is switched off or the power cord is detached from the power supply. ASUS PRIME X570-P 1-1 Chapter 1 Chapter 1: Product Introduction Product Introduction 1 1.1 Motherboard overview 1.1.1 Before you proceed Take note of the following precautions before you install motherboard components or change any...
... you install or remove any component, ensure that the ATX power supply is switched off or the power cord is detached from the power supply. ASUS PRIME X570-P 1-1 Chapter 1 Chapter 1: Product Introduction Product Introduction 1 1.1 Motherboard overview 1.1.1 Before you proceed Take note of the following precautions before you install motherboard components or change any...

Users Manual English
Page 17
...) 15. Addressable Gen 2 header (4-1pin ADD_GEN 2) 8. Digital audio connector (4-1 pin SPDIF_OUT) Page 1-17 1-16 1-11 1-4 1-9 1-4 1-10 1-13 1-17 1-12 1-19 1-8 1-15 1-14 1-18 1-11 1-18 ASUS PRIME X570-P 1-3 Chapter 1 Layout contents Connectors/Jumpers/Buttons and switches/Slots 1. Serial port connector (10-1 pin COM) 16. ATX power connectors (24-pin EATXPWR; 8-pin EATX12V; 4-pin...
...) 15. Addressable Gen 2 header (4-1pin ADD_GEN 2) 8. Digital audio connector (4-1 pin SPDIF_OUT) Page 1-17 1-16 1-11 1-4 1-9 1-4 1-10 1-13 1-17 1-12 1-19 1-8 1-15 1-14 1-18 1-11 1-18 ASUS PRIME X570-P 1-3 Chapter 1 Layout contents Connectors/Jumpers/Buttons and switches/Slots 1. Serial port connector (10-1 pin COM) 16. ATX power connectors (24-pin EATXPWR; 8-pin EATX12V; 4-pin...

Users Manual English
Page 19
... optimum compatibility, we recommend that you install memory modules of accessing information from the same vendor. Check with the same CAS Latency. ASUS PRIME X570-P 1-5 Chapter 1 Recommended memory configurations Memory configurations You may operate at a lower frequency than the vendor-marked value. • For... (4 DIMMs) or overclocking condition. • Always install the DIMMS with the vendor to get the correct memory modules. • Visit the ASUS website for overclocking may install 2 GB, 4 GB, 8 GB, 16 GB and 32 GB unbuffered DDR4 DIMMs into the DIMM sockets. &#...
... optimum compatibility, we recommend that you install memory modules of accessing information from the same vendor. Check with the same CAS Latency. ASUS PRIME X570-P 1-5 Chapter 1 Recommended memory configurations Memory configurations You may operate at a lower frequency than the vendor-marked value. • For... (4 DIMMs) or overclocking condition. • Always install the DIMMS with the vendor to get the correct memory modules. • Visit the ASUS website for overclocking may install 2 GB, 4 GB, 8 GB, 16 GB and 32 GB unbuffered DDR4 DIMMs into the DIMM sockets. &#...

Users Manual English
Page 21
ASUS PRIME X570-P 1-7 Chapter 1 3rd Gen AMD Ryzen™ Processors VGA Configuration Single VGA/PCIe card PCIe operating mode PCIe 4.0 x16_1 PCIe 4.0 x16_2 x16 N/A Dual VGA/PCIe card ...
ASUS PRIME X570-P 1-7 Chapter 1 3rd Gen AMD Ryzen™ Processors VGA Configuration Single VGA/PCIe card PCIe operating mode PCIe 4.0 x16_1 PCIe 4.0 x16_2 x16 N/A Dual VGA/PCIe card ...

Users Manual English
Page 23
A RGB_HEADER1 A PIN 1 +12V G R B B RGB_HEADER2 PIN 1 +12V G R B B PRIME X570-P RGB_HEADER connectors The RGB header supports 5050 RGB multi-color LED strips (12V/G/R/B), with LED strip. • If your LED strip does not light up ... aligned with the 12V header on the motherboard. • The LED strip will vary with a maximum power rating of 3A (12V), and no longer than 3 m. ASUS PRIME X570-P 1-9 Chapter 1 2.
A RGB_HEADER1 A PIN 1 +12V G R B B RGB_HEADER2 PIN 1 +12V G R B B PRIME X570-P RGB_HEADER connectors The RGB header supports 5050 RGB multi-color LED strips (12V/G/R/B), with LED strip. • If your LED strip does not light up ... aligned with the 12V header on the motherboard. • The LED strip will vary with a maximum power rating of 3A (12V), and no longer than 3 m. ASUS PRIME X570-P 1-9 Chapter 1 2.

Users Manual English
Page 25
...1 +1.8V TPM PLTRST# +18V SPI SPI CS# SPI MISO SPI HOLD# SPI TPM IRQ# SPI TPM CS# SPI FLASH WP# GND SPI CLK SPI MOSI PRIME X570-P SPI_TPM connector The SPI_TPM module is for a chassis-mounted front panel audio I /O module cable to this connector to avail of the front panel audio I /O ...module that you to this connector. Chapter 1 AGND NC SENSE1_RETUR SENSE2_RETUR PORT1 L PORT1 R PORT2 R SENSE_SEND PORT2 L AAFP HD-audio-compliant pin definition PRIME X570-P front panel audio connector We recommend that supports HD Audio. ASUS PRIME X570-P 1-11
...1 +1.8V TPM PLTRST# +18V SPI SPI CS# SPI MISO SPI HOLD# SPI TPM IRQ# SPI TPM CS# SPI FLASH WP# GND SPI CLK SPI MOSI PRIME X570-P SPI_TPM connector The SPI_TPM module is for a chassis-mounted front panel audio I /O module cable to this connector to avail of the front panel audio I /O ...module that you to this connector. Chapter 1 AGND NC SENSE1_RETUR SENSE2_RETUR PORT1 L PORT1 R PORT2 R SENSE_SEND PORT2 L AAFP HD-audio-compliant pin definition PRIME X570-P front panel audio connector We recommend that supports HD Audio. ASUS PRIME X570-P 1-11

Users Manual English
Page 27
... IntA_P2_SSRXVbus PIN 1 USB3+5V A USB3+5V IntA_P2_SSRX- PIN 1 IntA_P2_DIntA_P2_D+ IntA_P1_D+ GND GND IntA_P1_D+ IntA_P1_D- GND IntA_P1_SSRX+ IntA_P1_SSRX- GND IntA_P1_SSTX+ IntA_P1_SSTX- IntA_P2_SSTX- Vbus B PRIME X570-P USB 3.2 Gen 1 connectors The USB 3.2 Gen 1 module is purchased separately. IntA_P1_SSRXIntA_P1_SSRX+ IntA_P2_SSRX+ GND GND IntA_P1_SSTX- Chapter 1 4. The plugged USB 3.2 Gen 1 device... U32G1_34) These connectors allow you to 5 Gb/s, faster charging time for additional USB 3.2 Gen 1 front or rear panel ports. ASUS PRIME X570-P 1-13
... IntA_P2_SSRXVbus PIN 1 USB3+5V A USB3+5V IntA_P2_SSRX- PIN 1 IntA_P2_DIntA_P2_D+ IntA_P1_D+ GND GND IntA_P1_D+ IntA_P1_D- GND IntA_P1_SSRX+ IntA_P1_SSRX- GND IntA_P1_SSTX+ IntA_P1_SSTX- IntA_P2_SSTX- Vbus B PRIME X570-P USB 3.2 Gen 1 connectors The USB 3.2 Gen 1 module is purchased separately. IntA_P1_SSRXIntA_P1_SSRX+ IntA_P2_SSRX+ GND GND IntA_P1_SSTX- Chapter 1 4. The plugged USB 3.2 Gen 1 device... U32G1_34) These connectors allow you to 5 Gb/s, faster charging time for additional USB 3.2 Gen 1 front or rear panel ports. ASUS PRIME X570-P 1-13

Users Manual English
Page 29
PLED PWRSW SPEAKER PANEL PIN 1 HDD_LED RESET PLED PRIME X570-P System panel connector • System power LED (2-pin or 3-1 pin PLED) The 2-pin or 3-1 pin connector is for the HDD Activity LED. The system power ...; Reset button (2-pin RESET) This 2-pin connector is in sleep or soft-off the system power. Connect the chassis power LED cable to this connector. ASUS PRIME X570-P 1-15 System panel connector (20-5 pin PANEL) This connector supports several chassis-mounted functions. Chapter 1 PLED+ PLEDPWRBTN# GND +5V Ground Ground Speaker HDD_LED+ HDD_LED- Connect...
PLED PWRSW SPEAKER PANEL PIN 1 HDD_LED RESET PLED PRIME X570-P System panel connector • System power LED (2-pin or 3-1 pin PLED) The 2-pin or 3-1 pin connector is for the HDD Activity LED. The system power ...; Reset button (2-pin RESET) This 2-pin connector is in sleep or soft-off the system power. Connect the chassis power LED cable to this connector. ASUS PRIME X570-P 1-15 System panel connector (20-5 pin PANEL) This connector supports several chassis-mounted functions. Chapter 1 PLED+ PLEDPWRBTN# GND +5V Ground Ground Speaker HDD_LED+ HDD_LED- Connect...

Users Manual English
Page 31
... boot up if the power is for ATX power supply plugs. The system may become unstable or may overheat under PCH cover. PCH_FAN PIN 1 PRIME X570-P PCH FAN header ASUS PRIME X570-P 1-17 The power supply plugs are for connecting PCH FAN under heavy usage. • Ensure to connect the 8-pin power plug, or both...
... boot up if the power is for ATX power supply plugs. The system may become unstable or may overheat under PCH cover. PCH_FAN PIN 1 PRIME X570-P PCH FAN header ASUS PRIME X570-P 1-17 The power supply plugs are for connecting PCH FAN under heavy usage. • Ensure to connect the 8-pin power plug, or both...

Users Manual English
Page 33
A M.2_1(SOCKET3) 2280 2260 2242 B M.2_2(SOCKET3) A B 22110 2280 2260 2242 PRIME X570-P M.2 sockets • For 3rd Gen AMD Ryzen™ Processors, the M.2_1 socket supports PCIe 4.0 x4 mode and SATA mode M Key design and type 2242 / 2260 / ... and type 2242 / 2260 / 2280 / 22110 storage devices. M.2_2) These sockets allow you to install M.2 SSD modules. Chapter 1 12. The M.2 SSD module is purchased separately. ASUS PRIME X570-P 1-19 M.2 sockets (M.2_1;
A M.2_1(SOCKET3) 2280 2260 2242 B M.2_2(SOCKET3) A B 22110 2280 2260 2242 PRIME X570-P M.2 sockets • For 3rd Gen AMD Ryzen™ Processors, the M.2_1 socket supports PCIe 4.0 x4 mode and SATA mode M Key design and type 2242 / 2260 / ... and type 2242 / 2260 / 2280 / 22110 storage devices. M.2_2) These sockets allow you to install M.2 SSD modules. Chapter 1 12. The M.2 SSD module is purchased separately. ASUS PRIME X570-P 1-19 M.2 sockets (M.2_1;

Users Manual English
Page 35
The motherboard layout may vary with models, but the installation steps are the same for reference only. Motherboard installation 1. Place the motherboard into the chassis, ensuring that its rear I/O ports are aligned to the chassis rear I /O panel. Install the ASUS I/O Shield to the chassis' rear I /O panel. 2. Chapter 2: Basic Installation Basic Installation 2.1 Building your PC system 2 2.1.1 The diagrams in this section are for all models. Chapter 2 ASUS PRIME X570-P 2-1
The motherboard layout may vary with models, but the installation steps are the same for reference only. Motherboard installation 1. Place the motherboard into the chassis, ensuring that its rear I/O ports are aligned to the chassis rear I /O panel. Install the ASUS I/O Shield to the chassis' rear I /O panel. 2. Chapter 2: Basic Installation Basic Installation 2.1 Building your PC system 2 2.1.1 The diagrams in this section are for all models. Chapter 2 ASUS PRIME X570-P 2-1

Users Manual English
Page 37
The CPU fits in only one correct orientation. Ensure you use a CPU designed for the AM4 socket. 2.1.2 CPU installation The AMD AM4 socket is compatible with AMD AM4 processors. DO NOT force the CPU into the socket to prevent bending the connectors on the socket and damaging the CPU! 1 2 3 Chapter 2 ASUS PRIME X570-P 2-3
The CPU fits in only one correct orientation. Ensure you use a CPU designed for the AM4 socket. 2.1.2 CPU installation The AMD AM4 socket is compatible with AMD AM4 processors. DO NOT force the CPU into the socket to prevent bending the connectors on the socket and damaging the CPU! 1 2 3 Chapter 2 ASUS PRIME X570-P 2-3

Users Manual English
Page 39
Do not remove the plate on the bottom. ASUS PRIME X570-P 2-5 CPU heatsink and fan assembly Type 2 Chapter 2 When using this type of CPU fan, remove the screws and the retention module only.
Do not remove the plate on the bottom. ASUS PRIME X570-P 2-5 CPU heatsink and fan assembly Type 2 Chapter 2 When using this type of CPU fan, remove the screws and the retention module only.

Users Manual English
Page 41
2.1.4 DIMM installation Chapter 2 To remove a DIMM ASUS PRIME X570-P 2-7
2.1.4 DIMM installation Chapter 2 To remove a DIMM ASUS PRIME X570-P 2-7

Users Manual English
Page 43
2.1.6 SATA device connection OR OR Chapter 2 ASUS PRIME X570-P 2-9
2.1.6 SATA device connection OR OR Chapter 2 ASUS PRIME X570-P 2-9

Users Manual English
Page 45
2.1.8 Expansion card installation To install PCIe x16 cards To install PCIe x1 cards Chapter 2 ASUS PRIME X570-P 2-11
2.1.8 Expansion card installation To install PCIe x16 cards To install PCIe x1 cards Chapter 2 ASUS PRIME X570-P 2-11

Users Manual English
Page 47
PS/2 keyboard/ mouse combo port 2. LAN (RJ-45) port* 6. Audio I /O connection 1 2 3 4 5 7 Rear panel connectors 1. USB 3.2 Gen 2 (up to 5Gbps) ports 3. ASUS PRIME X570-P 2-13 HDMI port 5. USB 2.0 ports 3 6 * and ** : Refer to the tables on the next page for LAN port LEDs, and audio port definitions. • The USB ...
PS/2 keyboard/ mouse combo port 2. LAN (RJ-45) port* 6. Audio I /O connection 1 2 3 4 5 7 Rear panel connectors 1. USB 3.2 Gen 2 (up to 5Gbps) ports 3. ASUS PRIME X570-P 2-13 HDMI port 5. USB 2.0 ports 3 6 * and ** : Refer to the tables on the next page for LAN port LEDs, and audio port definitions. • The USB ...

Users Manual English
Page 49
Chapter 2 2.2.2 Audio I/O connections Audio I/O ports Connect to Headphone and Mic Connect to Stereo Speakers Connect to 2-channel Speakers ASUS PRIME X570-P 2-15
Chapter 2 2.2.2 Audio I/O connections Audio I/O ports Connect to Headphone and Mic Connect to Stereo Speakers Connect to 2-channel Speakers ASUS PRIME X570-P 2-15

Users Manual English
Page 51
... Quick boot set to green after the system LED turns on self tests (POST). If you turned on the power, the system may light up . ASUS PRIME X570-P 2-17 External SCSI devices (starting with ATX power supplies, the system LED lights up for less than four seconds to let the system enter the...
... Quick boot set to green after the system LED turns on self tests (POST). If you turned on the power, the system may light up . ASUS PRIME X570-P 2-17 External SCSI devices (starting with ATX power supplies, the system LED lights up for less than four seconds to let the system enter the...

Users Manual English
Page 53
...storage device configuration, overclocking settings, advanced power management, and boot device configuration that requires further BIOS settings or update. Chapter 3 ASUS PRIME X570-P 3-1 DO NOT change the default BIOS settings except in the following circumstances: • An error message appears on the screen...most conditions to the latest BIOS version for settings and options. Chapter 3: BIOS Setup BIOS Setup 3.1 Knowing BIOS 3 The new ASUS UEFI BIOS is a Unified Extensible Interface that complies with UEFI architecture, offering a user-friendly interface that you to run the BIOS ...
...storage device configuration, overclocking settings, advanced power management, and boot device configuration that requires further BIOS settings or update. Chapter 3 ASUS PRIME X570-P 3-1 DO NOT change the default BIOS settings except in the following circumstances: • An error message appears on the screen...most conditions to the latest BIOS version for settings and options. Chapter 3: BIOS Setup BIOS Setup 3.1 Knowing BIOS 3 The new ASUS UEFI BIOS is a Unified Extensible Interface that complies with UEFI architecture, offering a user-friendly interface that you to run the BIOS ...


