User manual 8092831 Asko T754 EN
Page 1
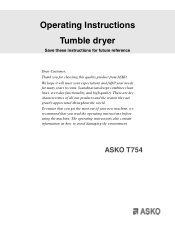
... ensure that you get the most out of all our products and the reason they are greatly appreciated throughout the world. ASKO T754 We hope it will meet your expectations and fulfill your new machine, we recommend that you for choosing this quality product from... ASKO. The operating instructions also contain information on how to come. Operating Instructions Tumble dryer Save these instructions for future reference Dear Customer, Thank you read the operating instructions before using ...
... ensure that you get the most out of all our products and the reason they are greatly appreciated throughout the world. ASKO T754 We hope it will meet your expectations and fulfill your new machine, we recommend that you for choosing this quality product from... ASKO. The operating instructions also contain information on how to come. Operating Instructions Tumble dryer Save these instructions for future reference Dear Customer, Thank you read the operating instructions before using ...
User manual 8092831 Asko T754 EN
Page 2
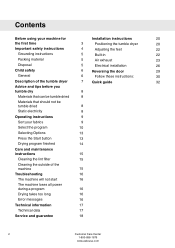
Contents Before using your machine for Installation instructions 20 the first time 3 Positioning the tumble dryer 20 Important safety instructions 4 Adjusting the feet 22 Grounding instructions 5 Built-in 22 Packing material 5 Air exhaust 23 Disposal 5 ...Electrical installation 26 Child safety 6 Reversing the door 29 General 6 Follow these instructions: 30 Description of the tumble dryer 7 Quick guide 32 Advice and tips before you tumble dry 8 Materials that can be tumble dried 8 Materials that should not be tumble dried ...
Contents Before using your machine for Installation instructions 20 the first time 3 Positioning the tumble dryer 20 Important safety instructions 4 Adjusting the feet 22 Grounding instructions 5 Built-in 22 Packing material 5 Air exhaust 23 Disposal 5 ...Electrical installation 26 Child safety 6 Reversing the door 29 General 6 Follow these instructions: 30 Description of the tumble dryer 7 Quick guide 32 Advice and tips before you tumble dry 8 Materials that can be tumble dried 8 Materials that should not be tumble dried ...

User manual 8092831 Asko T754 EN
Page 3
... en español? You can find more information in Spanish? Entre en www.askousa.com/customer-care y descárguesela. When starting the tumble dryer for the first time or after a few loads. Laundry labels Certain materials are not suitable for the first time Do you need this Use&Care...
... en español? You can find more information in Spanish? Entre en www.askousa.com/customer-care y descárguesela. When starting the tumble dryer for the first time or after a few loads. Laundry labels Certain materials are not suitable for the first time Do you need this Use&Care...
User manual 8092831 Asko T754 EN
Page 4
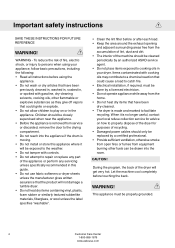
...could ignite or explode. • Do not allow children to play on how to facilitate recycling. Children should be cleaned periodically by an authorized ASKO service agent. • Do not place items exposed to catch fire. • Electrical installation, if required, must be done by a licensed ..., otherwise smoke from open fires or fumes from the accumulation of lint, dust and dirt. • The interior of the dryer will not damage a tumble dryer. • Do not heat dry items containing vinyl, plastic, foam rubber or similarly textured rubberlike materials, fiberglass, or wool unless...
...could ignite or explode. • Do not allow children to play on how to facilitate recycling. Children should be cleaned periodically by an authorized ASKO service agent. • Do not place items exposed to catch fire. • Electrical installation, if required, must be done by a licensed ..., otherwise smoke from open fires or fumes from the accumulation of lint, dust and dirt. • The interior of the dryer will not damage a tumble dryer. • Do not heat dry items containing vinyl, plastic, foam rubber or similarly textured rubberlike materials, fiberglass, or wool unless...

User manual 8092831 Asko T754 EN
Page 6
Child safety General WARNING! Do not allow children to play with the tumble dryer. • If the door is opened when a program is running, the garments may be very hot, with a risk of burn injuries. • The tumble dryer does not start automatically when the door is closed (if a child pulls the door shut from the inside, for example). 6 Customer Care Center 1-800-898-1879 www.askousa.com
Child safety General WARNING! Do not allow children to play with the tumble dryer. • If the door is opened when a program is running, the garments may be very hot, with a risk of burn injuries. • The tumble dryer does not start automatically when the door is closed (if a child pulls the door shut from the inside, for example). 6 Customer Care Center 1-800-898-1879 www.askousa.com

User manual 8092831 Asko T754 EN
Page 7
Description of the tumble dryer 1 2 3 4 5 1. Main power switch 2. Serial number tag and rating plate 4. Lint filter 5. Panel 3. Outer door Customer Care Center 7 1-800-898-1879 www.askousa.com
Description of the tumble dryer 1 2 3 4 5 1. Main power switch 2. Serial number tag and rating plate 4. Lint filter 5. Panel 3. Outer door Customer Care Center 7 1-800-898-1879 www.askousa.com
User manual 8092831 Asko T754 EN
Page 8
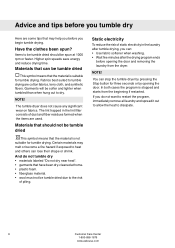
...do not tumble dry • materials labeled "Do not dry near heat". • garments that the material is stopped and starts from the dryer. Fabrics best suited to the risk of static electricity in the lint filter consists of dust and fiber residues formed when the items are cotton... fabrics, terry cloth, and synthetic fibers. The tumble dryer does not cause any significant wear on fabrics. If you begin tumble drying. NOTE! Static electricity To reduce the risk of piling. Garments will...
...do not tumble dry • materials labeled "Do not dry near heat". • garments that the material is stopped and starts from the dryer. Fabrics best suited to the risk of static electricity in the lint filter consists of dust and fiber residues formed when the items are cotton... fabrics, terry cloth, and synthetic fibers. The tumble dryer does not cause any significant wear on fabrics. If you begin tumble drying. NOTE! Static electricity To reduce the risk of piling. Garments will...

User manual 8092831 Asko T754 EN
Page 12
... as follows: Temperature of intake air: 73 °F (23 °C) Moisture content of using different spin speeds when washing the load. During testing, the tumble dryer must be set to 16A and Time Saver must be activated. Consumption can vary depending on room temperature, humidity, load, variations in accordance with EN61121...
... as follows: Temperature of intake air: 73 °F (23 °C) Moisture content of using different spin speeds when washing the load. During testing, the tumble dryer must be set to 16A and Time Saver must be activated. Consumption can vary depending on room temperature, humidity, load, variations in accordance with EN61121...
User manual 8092831 Asko T754 EN
Page 13
Temperature Low You can stop the tumble dryer by pressing the Stop button or by pressing the button next to the symbol. • The lamp next to the button lights when Anti Wrinkle ...
Temperature Low You can stop the tumble dryer by pressing the Stop button or by pressing the button next to the symbol. • The lamp next to the button lights when Anti Wrinkle ...
User manual 8092831 Asko T754 EN
Page 15
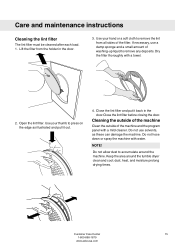
... after each load. 1. If necessary, use solvents, as illustrated and pull it back in the door. 3. NOTE! Use your thumb to accumulate around the tumble dryer clean and cool; Customer Care Center 15 1-800-898-1879 www.askousa.com Do not use a damp sponge and a small amount of the filter. Open...
... after each load. 1. If necessary, use solvents, as illustrated and pull it back in the door. 3. NOTE! Use your thumb to accumulate around the tumble dryer clean and cool; Customer Care Center 15 1-800-898-1879 www.askousa.com Do not use a damp sponge and a small amount of the filter. Open...
User manual 8092831 Asko T754 EN
Page 16
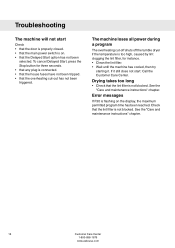
... that the lint filter is connected. • that the house fuses have not been tripped. • that the overheating cut -off shuts off the tumble dryer if the temperature is on the display, the maximum permitted program time has been reached. See the "Care and maintenance instructions" chapter. If it . Error...
... that the lint filter is connected. • that the house fuses have not been tripped. • that the overheating cut -off shuts off the tumble dryer if the temperature is on the display, the maximum permitted program time has been reached. See the "Care and maintenance instructions" chapter. If it . Error...
User manual 8092831 Asko T754 EN
Page 20
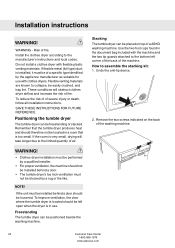
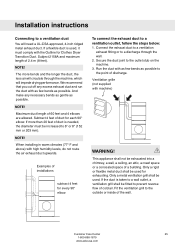
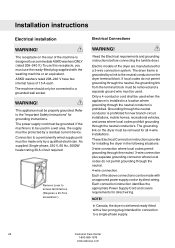
... to the limited quantity of a ASKO washing machine. To reduce the risk of of fire. WARNING! • Clothes dryer installation must be performed by a qualified installer. • For proper ventilation, the machine should be placed on the back of fire. NOTE!... is located should not be installed behind a door should therefore not be located in use with flexible plastic venting materials. Positioning the tumble dryer The tumble dryer can be left corner of the back of a specific type identified by a rug or the like. Installation instructions WARNING! Remember that the...
... to the limited quantity of a ASKO washing machine. To reduce the risk of of fire. WARNING! • Clothes dryer installation must be performed by a qualified installer. • For proper ventilation, the machine should be placed on the back of fire. NOTE!... is located should not be installed behind a door should therefore not be located in use with flexible plastic venting materials. Positioning the tumble dryer The tumble dryer can be left corner of the back of a specific type identified by a rug or the like. Installation instructions WARNING! Remember that the...
User manual 8092831 Asko T754 EN
Page 21
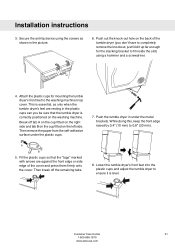
... plastic cups for the stacking bracket to fit inside the slot) using the screws as only when the tumble dryer's feet are against the front edge or side edge of the tumble dryer (you be sure that the "tags" marked with arrows are resting in the plastic cups can you don't have... feet to 0,8" (20 mm). AA BB 5. Push out the knock-out hole on the left side. Push the tumble dryer in the picture. 6. While doing this, keep the front edge raised by 0,4" (10 mm) to the washing machine's top cover. This is essential, as shown ...
... plastic cups for the stacking bracket to fit inside the slot) using the screws as only when the tumble dryer's feet are against the front edge or side edge of the tumble dryer (you be sure that the "tags" marked with arrows are resting in the plastic cups can you don't have... feet to 0,8" (20 mm). AA BB 5. Push out the knock-out hole on the left side. Push the tumble dryer in the picture. 6. While doing this, keep the front edge raised by 0,4" (10 mm) to the washing machine's top cover. This is essential, as shown ...
User manual 8092831 Asko T754 EN
Page 22
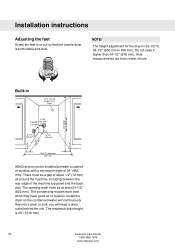
...(876 mm). Hole measurements are from center of 34" (864 mm). The condensing models work best when they have good air circulation. Install the dryer so the condensed water will continuously flow into a drain or sink, you will need a drain outlet behind the unit. The maximum drain height is ...both stable and level. NOTE! Installation instructions Adjusting the feet Screw the feet in ASKO dryers can be a gap of about 1/2" (12 mm) all around the machine, including between the rear edge of the machine top panel and the ...
...(876 mm). Hole measurements are from center of 34" (864 mm). The condensing models work best when they have good air circulation. Install the dryer so the condensed water will continuously flow into a drain or sink, you will need a drain outlet behind the unit. The maximum drain height is ...both stable and level. NOTE! Installation instructions Adjusting the feet Screw the feet in ASKO dryers can be a gap of about 1/2" (12 mm) all around the machine, including between the rear edge of the machine top panel and the ...

User manual 8092831 Asko T754 EN
Page 23
See illustration for condenser dryers. Asko dryers have a "T-style" Asko dryersehxahvaeuast vent that extend into the duct and catch lint. Customer Care Center 23 1-800-898-1879 www.askousa.com VeVnetnt TT--tutubbee RReeaarrEExxhhaauusstt ... a ½" (12mm) minimum clearance between units and cabinet or wall. Installation instructions Install in a closet ASKO's front panel controls make it possible to install the washers and dryers in the door. Make sure there is delivered with screws or other fasteners that allows you to purchase a UL-CSA-approved 4" ridged metal...
See illustration for condenser dryers. Asko dryers have a "T-style" Asko dryersehxahvaeuast vent that extend into the duct and catch lint. Customer Care Center 23 1-800-898-1879 www.askousa.com VeVnetnt TT--tutubbee RReeaarrEExxhhaauusstt ... a ½" (12mm) minimum clearance between units and cabinet or wall. Installation instructions Install in a closet ASKO's front panel controls make it possible to install the washers and dryers in the door. Make sure there is delivered with screws or other fasteners that allows you to purchase a UL-CSA-approved 4" ridged metal...
User manual 8092831 Asko T754 EN
Page 24
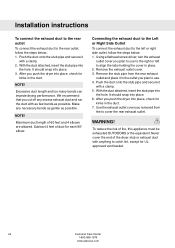
After you push the dryer into place, check for kinks in the outlet you plan to use to the right or left or ... exhaust duct to the left to align the tabs holding the cover in the duct. 7. We recommend that you push the dryer into place, check for kinks in place. 2. Remove the stub pipe from the to cover the rear exhaust outlet. After...and place it in the duct. With the duct attached, insert the stub pipe into the hole. Subtract 4 feet of the dryer stub or exhaust duct with a clamp. 5. Push the duct onto the stub pipe and secure it with anything to catch lint...
After you push the dryer into place, check for kinks in the outlet you plan to use to the right or left or ... exhaust duct to the left to align the tabs holding the cover in the duct. 7. We recommend that you push the dryer into place, check for kinks in place. 2. Remove the stub pipe from the to cover the rear exhaust outlet. After...and place it in the duct. With the duct attached, insert the stub pipe into the hole. Subtract 4 feet of the dryer stub or exhaust duct with a clamp. 5. Push the duct onto the stub pipe and secure it with anything to catch lint...
User manual 8092831 Asko T754 EN
Page 25
... humidity levels, do not route the air exhaust duct upwards. Customer Care Center 25 1-800-898-1879 www.askousa.com Examples of duct for Clothes Dryer Transition Duct. Connect the exhaust duct to a ventilation exhaust fitting or to a ventilation outlet, follow the steps below: 1. If the duct is used, it must...
... humidity levels, do not route the air exhaust duct upwards. Customer Care Center 25 1-800-898-1879 www.askousa.com Examples of duct for Clothes Dryer Transition Duct. Connect the exhaust duct to a ventilation exhaust fitting or to a ventilation outlet, follow the steps below: 1. If the duct is used, it must...
User manual 8092831 Asko T754 EN
Page 26
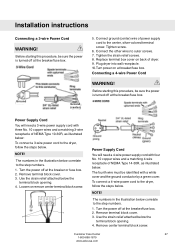
... WARNING! Grounding through the neutral conductor is grounded by a residual current device. Each of the machine is prohibited. The receptacle on the dryer terminal block. As supplied: Single-phase, 230 V, 60 Hz, 3000W heater rating 30 A circuit required Remove cover to the "Important..." for connection to a grounded wall socket. This appliance must be made only by direct wiring. ASKO washers rated 208-240 V have two internal fuses of the dryer are manufactured for direct wiring. If local codes do not permit grounding through the neutral conductors. Electric...
... WARNING! Grounding through the neutral conductor is grounded by a residual current device. Each of the machine is prohibited. The receptacle on the dryer terminal block. As supplied: Single-phase, 230 V, 60 Hz, 3000W heater rating 30 A circuit required Remove cover to the "Important..." for connection to a grounded wall socket. This appliance must be made only by direct wiring. ASKO washers rated 208-240 V have two internal fuses of the dryer are manufactured for direct wiring. If local codes do not permit grounding through the neutral conductors. Electric...
User manual 8092831 Asko T754 EN
Page 27
.... Remove terminal block cover. 3. Turn the power off at the breaker/fuse box. Customer Care Center 27 1-800-898-1879 www.askousa.com Plug dryer into wall receptacle. 10. Connecting a 4-wire Power Cord WARNING! Turn the power off at the breaker/fuse box. 2. NOTE! Use the strain... (center) wire of NEMA Type 14-30R, as illustrated below the terminal block opening . 4. The numbers in the illustration below correlate to the dryer, follow the steps below correlate to outer screws. 7. The fourth wire must be sure the power is turned off at the breaker/fuse box....
.... Remove terminal block cover. 3. Turn the power off at the breaker/fuse box. Customer Care Center 27 1-800-898-1879 www.askousa.com Plug dryer into wall receptacle. 10. Connecting a 4-wire Power Cord WARNING! Turn the power off at the breaker/fuse box. 2. NOTE! Use the strain... (center) wire of NEMA Type 14-30R, as illustrated below the terminal block opening . 4. The numbers in the illustration below correlate to the dryer, follow the steps below correlate to outer screws. 7. The fourth wire must be sure the power is turned off at the breaker/fuse box....
User manual 8092831 Asko T754 EN
Page 28
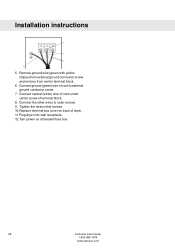
Connect neutral (white) wire of cord under center screw of dryer. 11. Tighten the strain relief screws. 10. Turn power on back of terminal block. 8. Remove ground wire (green with yellow stripes) from external ground connector screw and remove from center terminal block. 6. Replace terminal box cover on at breaker/fuse box. 28 Customer Care Center 1-800-898-1879 www.askousa.com Connect ground (green) wire of cord to outer screws. 9. Installation instructions 4 7 8 6 5. Plug dryer into wall receptacle. 12. Connect the other wires to external ground conductor screw. 7.
Connect neutral (white) wire of cord under center screw of dryer. 11. Tighten the strain relief screws. 10. Turn power on back of terminal block. 8. Remove ground wire (green with yellow stripes) from external ground connector screw and remove from center terminal block. 6. Replace terminal box cover on at breaker/fuse box. 28 Customer Care Center 1-800-898-1879 www.askousa.com Connect ground (green) wire of cord to outer screws. 9. Installation instructions 4 7 8 6 5. Plug dryer into wall receptacle. 12. Connect the other wires to external ground conductor screw. 7.


