
User Guide
Page 3
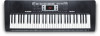
For additional product support, visit alesis.com/support. User Guide (English) Introduction Box Contents Melody 61 MKII Microphone Headphones Music Rest Keyboard Stand Bench Power Adapter User Guide Safety & Warranty Manual Support For the latest information about this product (system requirements, compatibility information, etc.) and product registration, visit alesis.com. Setup Bench 1 2 3 Stand 1 2 3 4 Keyboard Strap x2 3
For additional product support, visit alesis.com/support. User Guide (English) Introduction Box Contents Melody 61 MKII Microphone Headphones Music Rest Keyboard Stand Bench Power Adapter User Guide Safety & Warranty Manual Support For the latest information about this product (system requirements, compatibility information, etc.) and product registration, visit alesis.com. Setup Bench 1 2 3 Stand 1 2 3 4 Keyboard Strap x2 3

User Guide
Page 5
... Master Vol + or Master Vol - Tempo: Press the Tempo + or Tempo - Use the number buttons or + or - LED Display: Shows the various keyboard functions and numerical values. 10. Program: Press this button to have a temporary rhythm play -along with the demo songs by a half-step. Rhythm: Press ... and chord accompaniment, demo song and/or metronome. Transpose: Press the Transpose + or Transpose - button to increase or decrease the pitch of the keyboard by pressing any key to start or stop the playback. 8. One-Key: Press this button to start it. 17. Record: Press this button...
... Master Vol + or Master Vol - Tempo: Press the Tempo + or Tempo - Use the number buttons or + or - LED Display: Shows the various keyboard functions and numerical values. 10. Program: Press this button to have a temporary rhythm play -along with the demo songs by a half-step. Rhythm: Press ... and chord accompaniment, demo song and/or metronome. Transpose: Press the Transpose + or Transpose - button to increase or decrease the pitch of the keyboard by pressing any key to start or stop the playback. 8. One-Key: Press this button to start it. 17. Record: Press this button...

User Guide
Page 6
...feature. Beat: Press this function are described in Operation > Accompaniment Rhythm. MIC PHONES DDCC192VV 3. The available chords for one part of the keyboard. Power Input: Connect the included power adapter here. 12 3 Bottom Panel 1. Single Chord: Press this function are described in Operation > ...for this button to start playback of an accompaniment rhythm. 28. The available chords for the accompaniment rhythms based on the keyboard. The sound that you play that you were using the keys. Split: Press this button again or press the Chord ...
...feature. Beat: Press this function are described in Operation > Accompaniment Rhythm. MIC PHONES DDCC192VV 3. The available chords for one part of the keyboard. Power Input: Connect the included power adapter here. 12 3 Bottom Panel 1. Single Chord: Press this function are described in Operation > ...for this button to start playback of an accompaniment rhythm. 28. The available chords for the accompaniment rhythms based on the keyboard. The sound that you play that you were using the keys. Split: Press this button again or press the Chord ...

User Guide
Page 7
...buttons. To select the other sound for the layer, enter a number for the sound or use the full chord shapes shown below starting on the keyboard. Press the Split button again to disable the dual-tone function. Single Chord: When using the Single Chord feature you can use the + and ...- Fingered Chord: When using the Single Chord feature you can use the + and - To split the keyboard into two zones, press the Split button. To start or stop an accompaniment rhythm, press the Start/Stop button. These features will generate chords ...
...buttons. To select the other sound for the layer, enter a number for the sound or use the full chord shapes shown below starting on the keyboard. Press the Split button again to disable the dual-tone function. Single Chord: When using the Single Chord feature you can use the + and ...- Fingered Chord: When using the Single Chord feature you can use the + and - To split the keyboard into two zones, press the Split button. To start or stop an accompaniment rhythm, press the Start/Stop button. These features will generate chords ...

User Guide
Page 8
...one at a time. 2. When the memory is turned off. Auto-power Off After 5 minutes of inactivity, Melody 61 MKII will be erased when recording is started again or when the keyboard is turned off . To record your playing, press the Record button to stop . Note: The programmed rhythm .... During the recording process, press Play to stop recording. Note: The recorded song will be erased when programming is performed again or if the keyboard is full, the screen will display "FUL", and recording will turn back on. 8 Recording Function 1. Press the Program button and start recording ...
...one at a time. 2. When the memory is turned off. Auto-power Off After 5 minutes of inactivity, Melody 61 MKII will be erased when recording is started again or when the keyboard is turned off . To record your playing, press the Record button to stop . Note: The programmed rhythm .... During the recording process, press Play to stop recording. Note: The recorded song will be erased when programming is performed again or if the keyboard is full, the screen will display "FUL", and recording will turn back on. 8 Recording Function 1. Press the Program button and start recording ...


