
Service Manual
Page 2
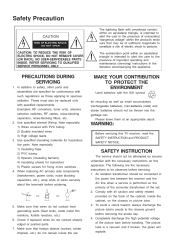
... explode. The exclamation point within the product's enclo sure that may be of sufficient magnitude to constitute a risk of the picture tube before handling. REFER SERVICING TO QUALIFIED SERVICE PERSONNEL ONLY. When replacing AC primary side components (transformers, power cords, noise...live parts. An isolation transformer should be connected in the literature accompanying the appliance. To avoid a shock hazard, always discharge the picture tube's anode to the chassis ground before removing the anode cap. 4. Examples: RF converters, tuner units, antenna selection switches, RF...
... explode. The exclamation point within the product's enclo sure that may be of sufficient magnitude to constitute a risk of the picture tube before handling. REFER SERVICING TO QUALIFIED SERVICE PERSONNEL ONLY. When replacing AC primary side components (transformers, power cords, noise...live parts. An isolation transformer should be connected in the literature accompanying the appliance. To avoid a shock hazard, always discharge the picture tube's anode to the chassis ground before removing the anode cap. 4. Examples: RF converters, tuner units, antenna selection switches, RF...
Service Manual
Page 8
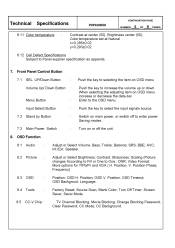
...; Turn Off Timer; CC Background. 8.3 8.4 8.5 OSD Tools : : CC-V Chip : OSD V. OSD Timeout; Technical Specifications : CONTINUATION PAGE PDP4206EM NUMBER 5 OF 9 PAGES 6.11 Color temperature Contrast at Natural x=0.285±0.02 y=0.293±0.02 6.12 Cell Defect Specifications Subject to One.; ...Brightness center (50); Color temperature set at center (50); Enter to enter power Saving modes. OSD Function 8.1 8.2 Audio Picture : : Adjust or Select Volume; SRS; AVC; Adjust or Select Brightness; Sharpness; DNR; Video Format; More options for Y/Pb/Pr...
...; Turn Off Timer; CC Background. 8.3 8.4 8.5 OSD Tools : : CC-V Chip : OSD V. OSD Timeout; Technical Specifications : CONTINUATION PAGE PDP4206EM NUMBER 5 OF 9 PAGES 6.11 Color temperature Contrast at Natural x=0.285±0.02 y=0.293±0.02 6.12 Cell Defect Specifications Subject to One.; ...Brightness center (50); Color temperature set at center (50); Enter to enter power Saving modes. OSD Function 8.1 8.2 Audio Picture : : Adjust or Select Volume; SRS; AVC; Adjust or Select Brightness; Sharpness; DNR; Video Format; More options for Y/Pb/Pr...

Service Manual
Page 39
...: The component working temperature is about 55oC. b. No voice. b. PCB failure analysis 1. CONTROL: a. MAIN (VIDEO): a. d. Flash on screen. 3. Noise 7. Lacking color, Bad color scale. No picture but with signals. 6. If the temperature rises abnormal, this may be a error point. No...
...: The component working temperature is about 55oC. b. No voice. b. PCB failure analysis 1. CONTROL: a. MAIN (VIDEO): a. d. Flash on screen. 3. Noise 7. Lacking color, Bad color scale. No picture but with signals. 6. If the temperature rises abnormal, this may be a error point. No...
Service Manual
Page 42
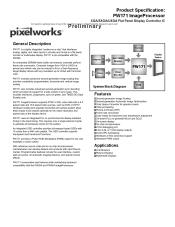
... 10-bit display outputs !24-bit CPU Addressing !Hardware 2-Wire serial bus support !Hardware PWM output Applications !LCD Monitors !Plasma Displays !Multimedia Displays PW171 incorporates new features while maintaining backward compatibility with full 24-bit color. d to result in a ...device. Features !Second-generation Image Scaling !Second-generation Automatic Image Optimization !Color Space Converter for graphics inputs !Video processing !Picture-In-Picture (PIP) !Frame rate conversion !Color matrix for low cost backlight or audio control. This includes interlaced, progressive, sync...
... 10-bit display outputs !24-bit CPU Addressing !Hardware 2-Wire serial bus support !Hardware PWM output Applications !LCD Monitors !Plasma Displays !Multimedia Displays PW171 incorporates new features while maintaining backward compatibility with full 24-bit color. d to result in a ...device. Features !Second-generation Image Scaling !Second-generation Automatic Image Optimization !Color Space Converter for graphics inputs !Video processing !Picture-In-Picture (PIP) !Frame rate conversion !Color matrix for low cost backlight or audio control. This includes interlaced, progressive, sync...
Service Manual
Page 46
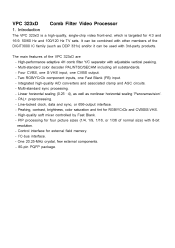
.../120 Hz TV sets. Introduction Comb Filter Video Processor The VPC 323xD is a high-quality, single-chip video front-end, which is targeted for four picture sizes (1/4, 1/9, 1/16, or 1/36 of normal size) with adjustable vertical peaking. - I2C-bus interface. - VPC 323xD 1. It can be combined with other members of the...
.../120 Hz TV sets. Introduction Comb Filter Video Processor The VPC 323xD is a high-quality, single-chip video front-end, which is targeted for four picture sizes (1/4, 1/9, 1/16, or 1/36 of normal size) with adjustable vertical peaking. - I2C-bus interface. - VPC 323xD 1. It can be combined with other members of the...

Service Manual
Page 48
4'.+/+0#4; 41&7%6 #2'%+(+%#6+10
4'.+/+0#4; 41&7%6 #2'%+(+%#6+10

Service Manual
Page 52
... is recommended to malfunction. Take a break at user's office or plant. This product is made from various materials such as glass, metal, and plastic. The picture is dimmer with a neutral detergent. In this case, it with a soft cloth moistened with surrounding light and better for a long time. Immediately after it may...
... is recommended to malfunction. Take a break at user's office or plant. This product is made from various materials such as glass, metal, and plastic. The picture is dimmer with a neutral detergent. In this case, it with a soft cloth moistened with surrounding light and better for a long time. Immediately after it may...
Service Manual
Page 103
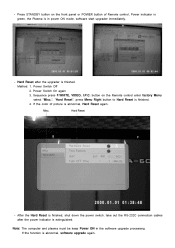
... the upgrader is in the software upgrade processing. Power Switch Off 2. Sequence press F.WHITE, VIDEO, I.P.C. Method: 1. Note: The computer and plasma must be keep Power ON in power ON mode, software start upgrader immediately. - Power Switch On again 3. button on the front panel or ...POWER button of picture is abnormal, software upgrade again. Hard Reset after the power indicator is finished. 4. Press STANDBY button on the Remote control enter factory ...
... the upgrader is in the software upgrade processing. Power Switch Off 2. Sequence press F.WHITE, VIDEO, I.P.C. Method: 1. Note: The computer and plasma must be keep Power ON in power ON mode, software start upgrader immediately. - Power Switch On again 3. button on the front panel or ...POWER button of picture is abnormal, software upgrade again. Hard Reset after the power indicator is finished. 4. Press STANDBY button on the Remote control enter factory ...

