
RAID Installation Guide
Page 1
Guide to RAID Configurations 3 2.1 Introduction of RAID 3 2.2 RAID Configuration Precautions 5 2.3 Installing Windows® XP / XP 64-bit / VistaTM / VistaTM 64-bit With RAID Functions 6 2.4 Setting the BIOS RAID Items 11 2.5 Configuring the Intel RAID BIOS 11 2.6 Deleting RAID Volume 15 1 Guide to SATA Hard Disks Installation 2 1.1 Serial ATA (SATA) Hard Disks Installation 2 2. Guide to SATA Hard Disks Installation and RAID Configuration 1.
Guide to RAID Configurations 3 2.1 Introduction of RAID 3 2.2 RAID Configuration Precautions 5 2.3 Installing Windows® XP / XP 64-bit / VistaTM / VistaTM 64-bit With RAID Functions 6 2.4 Setting the BIOS RAID Items 11 2.5 Configuring the Intel RAID BIOS 11 2.6 Deleting RAID Volume 15 1 Guide to SATA Hard Disks Installation 2 1.1 Serial ATA (SATA) Hard Disks Installation 2 2. Guide to SATA Hard Disks Installation and RAID Configuration 1.
RAID Installation Guide
Page 6
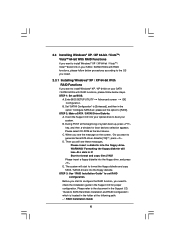
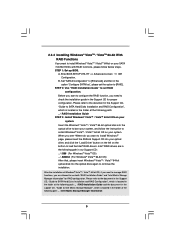
...diskette into your optical drive to boot your SATA / SATAII HDDs with RAID functions, please follow below procedures according to the OS you install. 2.3.1 Installing Windows® XP / XP 64-bit With RAID Functions If you want to generate Serial ATA driver diskette [YN]?", press . E. Before you start to ... . B. Please select CD-ROM as ", please set RAID configuration. Then you will see the message on the screen, "Do you want to install Windows® XP / XP 64-bit on your SATA / SATAII HDDs with RAID functions, please follow below steps. Please refer to the document in the ...
...diskette into your optical drive to boot your SATA / SATAII HDDs with RAID functions, please follow below procedures according to the OS you install. 2.3.1 Installing Windows® XP / XP 64-bit With RAID Functions If you want to generate Serial ATA driver diskette [YN]?", press . E. Before you start to ... . B. Please select CD-ROM as ", please set RAID configuration. Then you will see the message on the screen, "Do you want to install Windows® XP / XP 64-bit on your SATA / SATAII HDDs with RAID functions, please follow below steps. Please refer to the document in the ...
RAID Installation Guide
Page 7
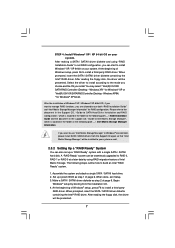
...After reading the floppy disk, the driver will be seamlessly upgraded to RAID 0, RAID 1 or RAID 5 at the following steps outline how to install Windows® XP / XP 64-bit on your system. The following path: .. \ Intel Matrix Storage Manager Information If you can start to build ... with a single SATA / SATAII hard disk. When prompted, insert the SATA / SATAII driver diskette containing the Intel® RAID driver. STEP 4: Install Windows® XP / XP 64-bit OS on your system. When prompted, insert the SATA / SATAII driver diskette containing the Intel® RAID driver. You...
...After reading the floppy disk, the driver will be seamlessly upgraded to RAID 0, RAID 1 or RAID 5 at the following steps outline how to install Windows® XP / XP 64-bit on your system. The following path: .. \ Intel Matrix Storage Manager Information If you can start to build ... with a single SATA / SATAII hard disk. When prompted, insert the SATA / SATAII driver diskette containing the Intel® RAID driver. STEP 4: Install Windows® XP / XP 64-bit OS on your system. When prompted, insert the SATA / SATAII driver diskette containing the Intel® RAID driver. You...
RAID Installation Guide
Page 8
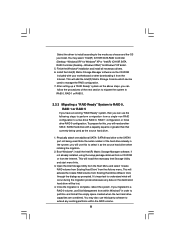
... the migration is complete, reboot the system. You may select: "Intel(R) ICH10R SATA RAID Controller (Desktop - Windows XP)" for Windows® XP 64-bit. 5. Finish the Windows® installation and install all necessary drivers. 6. This will need another SATA / SATAII hard drive with your ...will add the Intel(R) Matrix Storage Console which can use this , you will activate the Create RAID volume from the Internet. Windows XP64)" for Windows® XP or "Intel(R) ICH10R SATA RAID Controller (Desktop - Install the Intel(R) Matrix Storage Manager software via the CD-ROM...
... the migration is complete, reboot the system. You may select: "Intel(R) ICH10R SATA RAID Controller (Desktop - Windows XP)" for Windows® XP 64-bit. 5. Finish the Windows® installation and install all necessary drivers. 6. This will need another SATA / SATAII hard drive with your ...will add the Intel(R) Matrix Storage Console which can use this , you will activate the Create RAID volume from the Internet. Windows XP64)" for Windows® XP or "Intel(R) ICH10R SATA RAID Controller (Desktop - Install the Intel(R) Matrix Storage Manager software via the CD-ROM...
RAID Installation Guide
Page 9
...) After that, please insert Windows® VistaTM / VistaTM 64-bit optical disk into your optical drive, and click the "Load Driver" button on the left on your system. When you see "Where do you want to continue the installation. page, please insert the ASRock Support CD into the optical... drive again to install Windows?" Please refer to the document in the Support CD, "Guide to SATA Hard Disks Installation and RAID Configuration", which ...
...) After that, please insert Windows® VistaTM / VistaTM 64-bit optical disk into your optical drive, and click the "Load Driver" button on the left on your system. When you see "Where do you want to continue the installation. page, please insert the ASRock Support CD into the optical... drive again to install Windows?" Please refer to the document in the Support CD, "Guide to SATA Hard Disks Installation and RAID Configuration", which ...

RAID Installation Guide
Page 10
If you want to use "Intel Matrix Storage Manager" in Windows® environment, please install SATA / SATAII drivers from the Support CD again so that "Intel Matrix Storage Manager" will be installed to your system as well. 10
If you want to use "Intel Matrix Storage Manager" in Windows® environment, please install SATA / SATAII drivers from the Support CD again so that "Intel Matrix Storage Manager" will be installed to your system as well. 10
RAID Installation Guide
Page 11
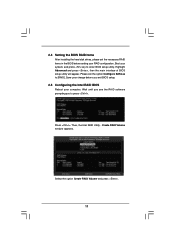
... software prompting you exit BIOS setup. 2.5 Configuring the Intel RAID BIOS Reboot your system, and press key to enter BIOS setup utility. Create RAID Volume window appears. Then, the Intel RAID Utility - Highlight Advanced and press , then the main interface of BIOS setup utility will appear.
... software prompting you exit BIOS setup. 2.5 Configuring the Intel RAID BIOS Reboot your system, and press key to enter BIOS setup utility. Create RAID Volume window appears. Then, the Intel RAID Utility - Highlight Advanced and press , then the main interface of BIOS setup utility will appear.
RAID Installation Guide
Page 15
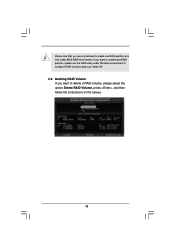
If you want to create extra RAID partition, please use the RAID utility under BIOS RAID environment. Please note that you are only allowed to create one RAID partition at a time under Windows environment to configure RAID functions after you install OS. 2.6 Deleting RAID Volume If you want to delete a RAID volume, please select the option Delete RAID Volume, press , and then follow the instructions on the screen. 15
If you want to create extra RAID partition, please use the RAID utility under BIOS RAID environment. Please note that you are only allowed to create one RAID partition at a time under Windows environment to configure RAID functions after you install OS. 2.6 Deleting RAID Volume If you want to delete a RAID volume, please select the option Delete RAID Volume, press , and then follow the instructions on the screen. 15

User Manual
Page 3
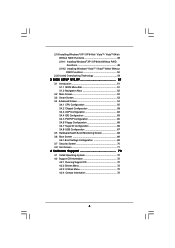
...SATA / SATAII HDD Hot Plug Feature and Operation Guide 43 2.17 Driver Installation Guide 45 2.18 Installing Windows® XP / XP 64-bit / VistaTM / VistaTM 64-bit With RAID Functions 45 2.18.1 Installing Windows® XP / XP 64-bit With RAID Functions 45 2.18.2 Setting Up a "RAID Ready"... System 46 2.18.3 Migrating a "RAID Ready" System to RAID 0, RAID 1 or RAID 5 47 2.18.4 Installing Windows® VistaTM / VistaTM 64-bit With RAID Functions 48 ...
...SATA / SATAII HDD Hot Plug Feature and Operation Guide 43 2.17 Driver Installation Guide 45 2.18 Installing Windows® XP / XP 64-bit / VistaTM / VistaTM 64-bit With RAID Functions 45 2.18.1 Installing Windows® XP / XP 64-bit With RAID Functions 45 2.18.2 Setting Up a "RAID Ready"... System 46 2.18.3 Migrating a "RAID Ready" System to RAID 0, RAID 1 or RAID 5 47 2.18.4 Installing Windows® VistaTM / VistaTM 64-bit With RAID Functions 48 ...
User Manual
Page 4
...; XP / XP 64-bit / VistaTM / VistaTM 64-bit Without RAID Functions 49 2.19.1 Installing Windows® XP / XP 64-bit Without RAID Functions 49 2.19.2 Installing Windows® VistaTM / VistaTM 64-bit Without RAID Functions 50 2.20 Untied Overclocking Technology 50 3 BIOS SETUP UTILITY 51 3.1 Introduction 51 3.1.1 BIOS Menu Bar 51 3.1.2 Navigation...
...; XP / XP 64-bit / VistaTM / VistaTM 64-bit Without RAID Functions 49 2.19.1 Installing Windows® XP / XP 64-bit Without RAID Functions 49 2.19.2 Installing Windows® VistaTM / VistaTM 64-bit Without RAID Functions 50 2.20 Untied Overclocking Technology 50 3 BIOS SETUP UTILITY 51 3.1 Introduction 51 3.1.1 BIOS Menu Bar 51 3.1.2 Navigation...

User Manual
Page 6
...of system memory: 24GB (see CAUTION 3) - 6 x DDR3 DIMM slots - Supports NVIDIA® Quad SLITM, 3-Way SLITM and SLITM - 7.1 CH Windows® VistaTM Premium Level HD Audio with LED (ACT/LINK LED and SPEED LED) 6 Realtek RTL8111DL - Supports Hyper-Threading Technology (see CAUTION 2) - ... CrossFireXTM, Quad CrossFireXTM - Supports DDR3 ECC, un-buffered memory with 110dB dynamic range (ALC890 Audio Codec) - Northbridge: Intel® X58 - Intel® Socket 1366 CoreTM i7 Processor Extreme Edition / CoreTM i7 Processor Supports Intel® Dynamic Speed Technology - Supports Intel®...
...of system memory: 24GB (see CAUTION 3) - 6 x DDR3 DIMM slots - Supports NVIDIA® Quad SLITM, 3-Way SLITM and SLITM - 7.1 CH Windows® VistaTM Premium Level HD Audio with LED (ACT/LINK LED and SPEED LED) 6 Realtek RTL8111DL - Supports Hyper-Threading Technology (see CAUTION 2) - ... CrossFireXTM, Quad CrossFireXTM - Supports DDR3 ECC, un-buffered memory with 110dB dynamic range (ALC890 Audio Codec) - Northbridge: Intel® X58 - Intel® Socket 1366 CoreTM i7 Processor Extreme Edition / CoreTM i7 Processor Supports Intel® Dynamic Speed Technology - Supports Intel®...

User Manual
Page 8
...Certifications - About the setting of ASRock OC Tuner. You can also connect SATA hard disk to SATAII mode. Overclocking may be done at your own risk and expense. It should be less than 4GB for the reservation for system usage under Windows® XP and Windows® VistaTM. Due to the... devices of memory modules on page 40 to adjust your system stability, or even cause damage to get the best system performance under Microsoft® Windows® VistaTM 64-bit / VistaTM / XP 64-bit / XP SP1 or SP2. 8. We are not responsible for proper installation. 4. Before you to ...
...Certifications - About the setting of ASRock OC Tuner. You can also connect SATA hard disk to SATAII mode. Overclocking may be done at your own risk and expense. It should be less than 4GB for the reservation for system usage under Windows® XP and Windows® VistaTM. Due to the... devices of memory modules on page 40 to adjust your system stability, or even cause damage to get the best system performance under Microsoft® Windows® VistaTM 64-bit / VistaTM / XP 64-bit / XP SP1 or SP2. 8. We are not responsible for proper installation. 4. Before you to ...

User Manual
Page 10
ASRock website: http://www.asrock.com/support/index.htm 10 1 . 3 Two SLITM Graphics Card Support List (for Windows® XP / XP 64-bit / VistaTM / VistaTM 64-bit) Chipset Vendor NVIDIA Model Name Gigabyte GV-NX88T256H Gigabyte GV-NX88S512H-B LEADTEK PX8800 GTX TDH ... of the supported PCI Express VGA card list for 3-Way SLITM Mode, please visit our website for details. ASRock website: http://www.asrock.com/support/index.htm 1.4 Three SLITM Graphics Card Support List (for Windows® VistaTM / VistaTM 64-bit) Chipset Vendor NVIDIA Model Name LEADTEK PX9800 GTX+ GIGABYTE GV-N26-896H-B...
ASRock website: http://www.asrock.com/support/index.htm 10 1 . 3 Two SLITM Graphics Card Support List (for Windows® XP / XP 64-bit / VistaTM / VistaTM 64-bit) Chipset Vendor NVIDIA Model Name Gigabyte GV-NX88T256H Gigabyte GV-NX88S512H-B LEADTEK PX8800 GTX TDH ... of the supported PCI Express VGA card list for 3-Way SLITM Mode, please visit our website for details. ASRock website: http://www.asrock.com/support/index.htm 1.4 Three SLITM Graphics Card Support List (for Windows® VistaTM / VistaTM 64-bit) Chipset Vendor NVIDIA Model Name LEADTEK PX9800 GTX+ GIGABYTE GV-N26-896H-B...

User Manual
Page 11
... PCI Express VGA card list for CrossFireXTM Mode, please visit our website for details. ASRock website: http://www.asrock.com/support/index.htm 1.6 Three CrossFireXTM Graphics Card Support List (for Windows® VistaTM / VistaTM 64-bit) Chipset Vendor ATI Model Name Gecube GC-HD485PG3-...supported PCI Express VGA card list for CrossFireXTM Mode, please visit our website for details. ASRock website: http://www.asrock.com/support/index.htm 1.7 Four CrossFireXTM Graphics Card Support List (for Windows® VistaTM / VistaTM 64-bit) Chipset Vendor ATI Model Name Gecube GC-HD485PG3-...
... PCI Express VGA card list for CrossFireXTM Mode, please visit our website for details. ASRock website: http://www.asrock.com/support/index.htm 1.6 Three CrossFireXTM Graphics Card Support List (for Windows® VistaTM / VistaTM 64-bit) Chipset Vendor ATI Model Name Gecube GC-HD485PG3-...supported PCI Express VGA card list for CrossFireXTM Mode, please visit our website for details. ASRock website: http://www.asrock.com/support/index.htm 1.7 Four CrossFireXTM Graphics Card Support List (for Windows® VistaTM / VistaTM 64-bit) Chipset Vendor ATI Model Name Gecube GC-HD485PG3-...

User Manual
Page 22
... that your system. Requirements 1. Download the driver version 181.20 or later from NVIDIA® website (www.nvidia.com). 3. Currently, NVIDIA® SLITM technology supports Windows® XP, XP 64-bit, VistaTM and VistaTM 64-bit OS. NVIDIA® 3-Way SLITM and Quad SLITM technology support... Windows® VistaTM and VistaTM 64-bit OS only. If required, connect the auxiliary power source to NVIDIA® website for details. 2.7.1 Graphics Card Setup 2.7.1.1 Installing ...
... that your system. Requirements 1. Download the driver version 181.20 or later from NVIDIA® website (www.nvidia.com). 3. Currently, NVIDIA® SLITM technology supports Windows® XP, XP 64-bit, VistaTM and VistaTM 64-bit OS. NVIDIA® 3-Way SLITM and Quad SLITM technology support... Windows® VistaTM and VistaTM 64-bit OS only. If required, connect the auxiliary power source to NVIDIA® website for details. 2.7.1 Graphics Card Setup 2.7.1.1 Installing ...

User Manual
Page 25
2.7.2 Driver Installation and Setup Install the graphics card drivers to enable the multi-GPU feature. For Windows® XP / XP 64-bit OS: (For SLITM mode only) A. Double-click NVIDIA Settings icon on your system. Reboot your system. D. After that, you can ... Enabled. B. C. You can enable the MultiGraphics Processing Unit (GPU) feature in the NVIDIA® nView system tray utility. Please follow the below procedures to your Windows® taskbar. And click Apply. In Select an SLI configuration item, please select Enable SLI.
2.7.2 Driver Installation and Setup Install the graphics card drivers to enable the multi-GPU feature. For Windows® XP / XP 64-bit OS: (For SLITM mode only) A. Double-click NVIDIA Settings icon on your system. Reboot your system. D. After that, you can ... Enabled. B. C. You can enable the MultiGraphics Processing Unit (GPU) feature in the NVIDIA® nView system tray utility. Please follow the below procedures to your Windows® taskbar. And click Apply. In Select an SLI configuration item, please select Enable SLI.

User Manual
Page 26
For Windows® VistaTM / VistaTM 64-bit OS: (For SLITM and Quad SLITM mode) A. From the pop-up menu, select Set SLI and PhysX configuration. Select NVIDIA ... select Enable SLI. Select Control Panel tab. You can freely enjoy the benefit of SLITM or Quad SLITM feature. 26 B. E. And click Apply. G. Reboot your Windows taskbar. In Set PhysX GPU acceleration item, please select Enabled. D. Click the Start icon on your system.
For Windows® VistaTM / VistaTM 64-bit OS: (For SLITM and Quad SLITM mode) A. From the pop-up menu, select Set SLI and PhysX configuration. Select NVIDIA ... select Enable SLI. Select Control Panel tab. You can freely enjoy the benefit of SLITM or Quad SLITM feature. 26 B. E. And click Apply. G. Reboot your Windows taskbar. In Set PhysX GPU acceleration item, please select Enabled. D. Click the Start icon on your system.

User Manual
Page 27
... owners' benefit, without intent to D on page 26. Follow step A to infringe. 27 From the pop-up menu, select Set SLI and PhysX configuration. For Windows® VistaTM / VistaTM 64-bit OS: (For 3-Way SLITM mode) A. B. Reboot your system. You can freely enjoy the benefit of 3-Way SLITM feature. * SLITM appearing...
... owners' benefit, without intent to D on page 26. Follow step A to infringe. 27 From the pop-up menu, select Set SLI and PhysX configuration. For Windows® VistaTM / VistaTM 64-bit OS: (For 3-Way SLITM mode) A. B. Reboot your system. You can freely enjoy the benefit of 3-Way SLITM feature. * SLITM appearing...
User Manual
Page 28
... is supported with Service Pack 2 and VistaTM OS. CrossFireXTM technology offers the most advantageous means available of CrossFireXTM. Quad CrossFireXTM feature is supported with Windows® XP with Windows® VistaTM OS only. For other Radeon graphics card to enable CrossFireXTM feature. All three CrossFireXTM components, a CrossFireXTM Ready graphics card, a CrossFireXTM Ready...
... is supported with Service Pack 2 and VistaTM OS. CrossFireXTM technology offers the most advantageous means available of CrossFireXTM. Quad CrossFireXTM feature is supported with Windows® XP with Windows® VistaTM OS only. For other Radeon graphics card to enable CrossFireXTM feature. All three CrossFireXTM components, a CrossFireXTM Ready graphics card, a CrossFireXTM Ready...

User Manual
Page 31
... and boot into OS. CrossFireXTM 31 Quad CrossFireXTM Step 2. You must have any previously installed Catalyst drivers prior to your Windows® taskbar. (Driver Version: 8-12_vista32_dd_ccc_wdm_enu_72275.exe) ATI Catalyst Control Center Step 6. Then you have Microsoft .NET Framework installed.../windowsxp/sp2/default.mspx B. Click "View", select "CrossFireXTM", and then check the item "Enable CrossFireXTM". Step 4. For Windows® VistaTM OS: Install the CATALYST Control Center. Restart your computer. The Catalyst Uninstaller is no need to downloading and ...
... and boot into OS. CrossFireXTM 31 Quad CrossFireXTM Step 2. You must have any previously installed Catalyst drivers prior to your Windows® taskbar. (Driver Version: 8-12_vista32_dd_ccc_wdm_enu_72275.exe) ATI Catalyst Control Center Step 6. Then you have Microsoft .NET Framework installed.../windowsxp/sp2/default.mspx B. Click "View", select "CrossFireXTM", and then check the item "Enable CrossFireXTM". Step 4. For Windows® VistaTM OS: Install the CATALYST Control Center. Restart your computer. The Catalyst Uninstaller is no need to downloading and ...


