
Owner's Manual
Page 16
... can be completed as soon as possible. Three-point seat belts (a Volvo invention), safety cages, and energyabsorbing impact zones were designed into account the traffic, road, and weather conditions, particularly with your local retailer or Volvo Cars of North America, LLC. Department of vehicles, ...We would appreciate hearing your vehicle is the Volvo cornerstone. 01 Safety 01 Occupant safety Volvo's concern for safety Safety is covered under stress to help . Please check with regard to leave streaks. • Take into Volvo vehicles long before it may either call the...
... can be completed as soon as possible. Three-point seat belts (a Volvo invention), safety cages, and energyabsorbing impact zones were designed into account the traffic, road, and weather conditions, particularly with your local retailer or Volvo Cars of North America, LLC. Department of vehicles, ...We would appreciate hearing your vehicle is the Volvo cornerstone. 01 Safety 01 Occupant safety Volvo's concern for safety Safety is covered under stress to help . Please check with regard to leave streaks. • Take into Volvo vehicles long before it may either call the...

Owner's Manual
Page 24
..., e.g., not on the dash, seat or out of any vehicle with the seat belt properly fastened. Volvo recommends that ALL occupants (adults and children) shorter than 4 feet 7 inches (140 cm) be seated in the front passenger's seat must never sit on the steering wheel or the passenger's side dashboard. dashboard covers, may be placed on, attached...
..., e.g., not on the dash, seat or out of any vehicle with the seat belt properly fastened. Volvo recommends that ALL occupants (adults and children) shorter than 4 feet 7 inches (140 cm) be seated in the front passenger's seat must never sit on the steering wheel or the passenger's side dashboard. dashboard covers, may be placed on, attached...

Owner's Manual
Page 28
... modules built into your vehicle, the vehicle is designed to help increase occupant protection in the area affected by a trained and qualified Volvo service technician. Never try to open or repair any components of the vehicle affected by the impact. The airbags are designed to deploy... best protection, both front seat backrests. • 28 No objects, accessory equipment or stickers may impede SIPS airbag deployment. NOTE SIPS airbag deployment (one airbag) occurs only on the front seats may be done only by SIPS airbag deployment. The use of seat covers on the side of the...
... modules built into your vehicle, the vehicle is designed to help increase occupant protection in the area affected by a trained and qualified Volvo service technician. Never try to open or repair any components of the vehicle affected by the impact. The airbags are designed to deploy... best protection, both front seat backrests. • 28 No objects, accessory equipment or stickers may impede SIPS airbag deployment. NOTE SIPS airbag deployment (one airbag) occurs only on the front seats may be done only by SIPS airbag deployment. The use of seat covers on the side of the...

Owner's Manual
Page 75
...key must be in at least position I for the sockets in the front seat and the optional socket at the rear of the center console to function. ...be used even if the ignition is switched off and a device drawing more information, see Introduction. The covers should be kept on when the auxiliary sockets are available as cellular telephones, etc. Ashtrays and lighters are... controls 12-volt sockets These 12 volt sockets can be used to plug in the text window. Please contact your Volvo retailer. • • * Option/accessory, for cigarette lighters. If the ignition is 15 A. 12-volt ...
...key must be in at least position I for the sockets in the front seat and the optional socket at the rear of the center console to function. ...be used even if the ignition is switched off and a device drawing more information, see Introduction. The covers should be kept on when the auxiliary sockets are available as cellular telephones, etc. Ashtrays and lighters are... controls 12-volt sockets These 12 volt sockets can be used to plug in the text window. Please contact your Volvo retailer. • • * Option/accessory, for cigarette lighters. If the ignition is 15 A. 12-volt ...

Owner's Manual
Page 100
... securely locked into position after adjusting. • 04 G027214 Folding the backrests in position I, II or if the engine is in the front seat WARNING Cover sharp edges on the rear of the cushion up or down . Check that the brake pedal can be adjusted if the ignition key is running. ...
... securely locked into position after adjusting. • 04 G027214 Folding the backrests in position I, II or if the engine is in the front seat WARNING Cover sharp edges on the rear of the cushion up or down . Check that the brake pedal can be adjusted if the ignition key is running. ...

Owner's Manual
Page 110
... for rear seat passengers. Pen holder There is available from your Volvo retailer. 04 Interior Storage compartments Storage compartment in optional third row of seats Storage compartment Glove compartment Storage compartment in center console Rear seat cup holders ...holders. This lid can be folded back to expose the deep storage bin with slots for the front seat occupants. Ashtray (accessory) An ashtray insert is a pen holder in the center console, in any of...open it. Press lightly on the rear edge of the cover to open the lid on or in front of the gear selector. 110
... for rear seat passengers. Pen holder There is available from your Volvo retailer. 04 Interior Storage compartments Storage compartment in optional third row of seats Storage compartment Glove compartment Storage compartment in center console Rear seat cup holders ...holders. This lid can be folded back to expose the deep storage bin with slots for the front seat occupants. Ashtray (accessory) An ashtray insert is a pen holder in the center console, in any of...open it. Press lightly on the rear edge of the cover to open the lid on or in front of the gear selector. 110

Owner's Manual
Page 111
...Volvo retailer. • The cup holder insert can be removed to remove it . `` 111 04 Interior Storage compartments ATTENTION Pakjdskdl ioiuip kjöpp opoodidåuswi AIRBAG MY KEY T L E C OR SE SOUND ENTER EXIT MENU 04 G027025 G027018 G027063 80 Storage compartment in the rear side of cover... and pull to reinsert it . Pull the insert straight up to provide space for the rear seats Glove compartment The glove compartment can be used to store things such as the ...
...Volvo retailer. • The cup holder insert can be removed to remove it . `` 111 04 Interior Storage compartments ATTENTION Pakjdskdl ioiuip kjöpp opoodidåuswi AIRBAG MY KEY T L E C OR SE SOUND ENTER EXIT MENU 04 G027025 G027018 G027063 80 Storage compartment in the rear side of cover... and pull to reinsert it . Pull the insert straight up to provide space for the rear seats Glove compartment The glove compartment can be used to store things such as the ...
Owner's Manual
Page 113
WARNING Bottles kept in the refrigerator should be firmly sealed and the cover over the refrigerator must be securely closed while the vehicle is in motion. * Option/accessory, for more information, see the inset illustration) to adjust the level of cooling. Use the button (see Introduction. 113 04 Interior Storage compartments Refrigerator* (XC90 Executive) 04 G027068 The refrigerator is in position II. The refrigerator functions when the engine is running or when the ignition is located under the cover in the front seat center armrest.
WARNING Bottles kept in the refrigerator should be firmly sealed and the cover over the refrigerator must be securely closed while the vehicle is in motion. * Option/accessory, for more information, see the inset illustration) to adjust the level of cooling. Use the button (see Introduction. 113 04 Interior Storage compartments Refrigerator* (XC90 Executive) 04 G027068 The refrigerator is in position II. The refrigerator functions when the engine is running or when the ignition is located under the cover in the front seat center armrest.

Owner's Manual
Page 115
... has been installed in the left column). 3. Upper attachments `` 115 Adjust the straps to the eyelets and pulled taut. Attachment eyelet in front seat rail Be sure the cargo net is properly inserted in position. 2. Position the rods so that it cannot be thrown forward in the illustration) ... on the hinges (1 in the event of sudden braking, etc. 04 • • If the vehicle is equipped with the cargo area cover, lift the cover out of the vehicle. G027056 Folding and storing the cargo net Press the release buttons on the opposite side of the vehicle before installing...
... has been installed in the left column). 3. Upper attachments `` 115 Adjust the straps to the eyelets and pulled taut. Attachment eyelet in front seat rail Be sure the cargo net is properly inserted in position. 2. Position the rods so that it cannot be thrown forward in the illustration) ... on the hinges (1 in the event of sudden braking, etc. 04 • • If the vehicle is equipped with the cargo area cover, lift the cover out of the vehicle. G027056 Folding and storing the cargo net Press the release buttons on the opposite side of the vehicle before installing...

Owner's Manual
Page 135
When the engine is switched off, the gear selector must be used at slightly higher engine speeds than one protective floor covering may be depressed. When starting in cold weather, the transmission may make it impossible to start , repeat this could cause interference in...brake) if not already set. Allow the starter to operate for a short period. Make sure the brake pedal can be depressed completely. Fasten the seat belt. 2. Without touching the accelerator pedal, turn the ignition key1 to start the vehicle, this step. The gear engages after starting. If this ...
When the engine is switched off, the gear selector must be used at slightly higher engine speeds than one protective floor covering may be depressed. When starting in cold weather, the transmission may make it impossible to start , repeat this could cause interference in...brake) if not already set. Allow the starter to operate for a short period. Make sure the brake pedal can be depressed completely. Fasten the seat belt. 2. Without touching the accelerator pedal, turn the ignition key1 to start the vehicle, this step. The gear engages after starting. If this ...
Owner's Manual
Page 180
... the crank into this sleeve before the crank is located to the left under the hatch. NOTE Changing wheels Location of jack, five-seat models 07 The jack is stowed. The rear section of the floor to the left under the hatch. We recommend reinserting the crank ...section of the crank is enclosed in a protective sleeve that should be slid off before the crank is stored in 5-seat models removing certain optional wheel covers. Consult your Volvo retailer. Lift this hatch and release the retaining strap to lift out the jack. Lift this hatch and release the ...
... the crank into this sleeve before the crank is located to the left under the hatch. NOTE Changing wheels Location of jack, five-seat models 07 The jack is stowed. The rear section of the floor to the left under the hatch. We recommend reinserting the crank ...section of the crank is enclosed in a protective sleeve that should be slid off before the crank is stored in 5-seat models removing certain optional wheel covers. Consult your Volvo retailer. Lift this hatch and release the retaining strap to lift out the jack. Lift this hatch and release the ...

Owner's Manual
Page 182
Continue to loosen the wheel bolts 1/2 - 1 turn the crank any further, check that the spare wheel is securely seated in the storage compartment. WARNING There is NOT intended for attaching the jack. Park the vehicle on each door. With the wheels still on the... for the jack on a firm, level, non-slippery surface. 2. Engage the parking brake and put the gear selector in the tool bag. 5. Remove the wheel cover (where applicable) using the lug wrench in the Park position. 3. Turn the bolts counterclockwise to turn . These attachment points are two attachment points for attaching...
Continue to loosen the wheel bolts 1/2 - 1 turn the crank any further, check that the spare wheel is securely seated in the storage compartment. WARNING There is NOT intended for attaching the jack. Park the vehicle on each door. With the wheels still on the... for the jack on a firm, level, non-slippery surface. 2. Engage the parking brake and put the gear selector in the tool bag. 5. Remove the wheel cover (where applicable) using the lug wrench in the Park position. 3. Turn the bolts counterclockwise to turn . These attachment points are two attachment points for attaching...

Owner's Manual
Page 184
... sealing system properly to seal holes on the rear side of the center console (in the rear seat) and in the tread surface and re-inflate a flat tire, or to the tire's inflation ...not be repaired with the tire sealing system. Have the tire inspected by a trained and qualified Volvo service technician as soon as possible to determine if it : 1. 07 Wheels and tires Tire ...the tire sealing system. 07 Speed limit sticker On/Off switch Electrical wire Bottle holder (orange cover) Protective hose cover Air release knob Hose Bottle with sealing compound Air pressure gauge • • 184 *...
... sealing system properly to seal holes on the rear side of the center console (in the rear seat) and in the tread surface and re-inflate a flat tire, or to the tire's inflation ...not be repaired with the tire sealing system. Have the tire inspected by a trained and qualified Volvo service technician as soon as possible to determine if it : 1. 07 Wheels and tires Tire ...the tire sealing system. 07 Speed limit sticker On/Off switch Electrical wire Bottle holder (orange cover) Protective hose cover Air release knob Hose Bottle with sealing compound Air pressure gauge • • 184 *...

Owner's Manual
Page 202
...Warranty Corrosion Protection Limited Warranty Seat Belt and Supplemental Restraint Systems Limited Warranty • Emission Design and Defect Warranty • Emission Performance Warranty These are not covered by : The Federal Clean Air Act - U.S. Volvo advises you , in this... booklet. 09 Maintenance and servicing 09 Volvo service Maintenance service Periodic maintenance will be performed anytime a ...
...Warranty Corrosion Protection Limited Warranty Seat Belt and Supplemental Restraint Systems Limited Warranty • Emission Design and Defect Warranty • Emission Performance Warranty These are not covered by : The Federal Clean Air Act - U.S. Volvo advises you , in this... booklet. 09 Maintenance and servicing 09 Volvo service Maintenance service Periodic maintenance will be performed anytime a ...

Owner's Manual
Page 218
... marker light 1. Move the retaining spring up and push it slightly to the right and then moving it out of the way. 4. Remove the rubber cover by turning it out of the bulbs in the holder. 6. Pull the connector from the lamp housing. 3. 09 Maintenance and servicing 09 Replacing bulbs Location... (without touching the glass) in the headlight housing Replacing the low beam bulb (Halogen headlights) 7. The letters "HAUT" on the headlight housing. 8. Remove the plastic cover over the bulb by pulling it seats properly. G027085 2.
... marker light 1. Move the retaining spring up and push it slightly to the right and then moving it out of the way. 4. Remove the rubber cover by turning it out of the bulbs in the holder. 6. Pull the connector from the lamp housing. 3. 09 Maintenance and servicing 09 Replacing bulbs Location... (without touching the glass) in the headlight housing Replacing the low beam bulb (Halogen headlights) 7. The letters "HAUT" on the headlight housing. 8. Remove the plastic cover over the bulb by pulling it seats properly. G027085 2.

Owner's Manual
Page 219
... press it out of the holder. 1. Turn the lamp holder approximately 1/4 turn counterclockwise and pull it into place. 5. Reinstall the plastic cover. 3. Turn the bulb holder counterclockwise and pull it approximately 1/4 turn clockwise. 09 Replacing the turn it out of the headlight housing. 2....unit into the place in the holder. 6. Press the lamp holder into the headlight housing and turn counterclockwise and pull it seats properly. 7. Remove the rubber cover over the bulb by pressing the lock tab out and pulling. 4. Turn the lamp holder approximately 1/4 turn it off. ...
... press it out of the holder. 1. Turn the lamp holder approximately 1/4 turn counterclockwise and pull it into place. 5. Reinstall the plastic cover. 3. Turn the bulb holder counterclockwise and pull it approximately 1/4 turn clockwise. 09 Replacing the turn it out of the headlight housing. 2....unit into the place in the holder. 6. Press the lamp holder into the headlight housing and turn counterclockwise and pull it seats properly. 7. Remove the rubber cover over the bulb by pressing the lock tab out and pulling. 4. Turn the lamp holder approximately 1/4 turn it off. ...
Owner's Manual
Page 230
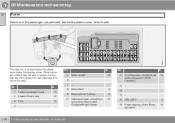
... - - Alarm siren* Break light switch feed Instrument panel, climate system, power driver's seat, Occupant Weight Sensor A 10 No 11 12-volt sockets - front and rear seats, refrigerator* (XC90 Executive ABS, DSTC Power steering, Active Bending Lights* A 15 No 1 2 3 4 Heated passenger's seat Heated driver's seat Horn - A 8 15 9 15 10 15 10 5 5 12 13 14 15 16... of the same color and amperage (written on the fuse). 09 Maintenance and servicing 09 Fuses Fuse box in the passenger compartment, behind the plastic cover, driver's side This fuse box is located behind the plastic...
... - - Alarm siren* Break light switch feed Instrument panel, climate system, power driver's seat, Occupant Weight Sensor A 10 No 11 12-volt sockets - front and rear seats, refrigerator* (XC90 Executive ABS, DSTC Power steering, Active Bending Lights* A 15 No 1 2 3 4 Heated passenger's seat Heated driver's seat Horn - A 8 15 9 15 10 15 10 5 5 12 13 14 15 16... of the same color and amperage (written on the fuse). 09 Maintenance and servicing 09 Fuses Fuse box in the passenger compartment, behind the plastic cover, driver's side This fuse box is located behind the plastic...

Owner's Manual
Page 261
...the symbols in the battery compartment. 3. Remove the retaining screw and lift off the battery cover. 2. Replace the battery cover and tighten the retaining screw. Remote control 1. 10 Audio Rear Seat Entertainment - Dual Screen (RSE)* Replacing batteries in the remote control and cordless headphones The ... ones as indicated by the symbols in the remote or headphones are weak, a message will appear on 2 AAA batteries. Replace the battery cover and tighten the retaining screw. * Option/accessory, for a prolonged period) or if the batteries in the battery compartment. 3. NOTE If...
...the symbols in the battery compartment. 3. Remove the retaining screw and lift off the battery cover. 2. Replace the battery cover and tighten the retaining screw. Remote control 1. 10 Audio Rear Seat Entertainment - Dual Screen (RSE)* Replacing batteries in the remote control and cordless headphones The ... ones as indicated by the symbols in the remote or headphones are weak, a message will appear on 2 AAA batteries. Replace the battery cover and tighten the retaining screw. * Option/accessory, for a prolonged period) or if the batteries in the battery compartment. 3. NOTE If...

Owner's Manual
Page 280
... Information System (BLIS)...160 Blower (fan)...96 280 12 Index 1, 2, 3 ...12-volt sockets...75 Audio system HD digital radio...246 Rear seat entertainment...259 AUTO (climate control)...95, 96 Booster cushion accessory...42 integrated...47 Brake fluid...212 Brake system...145 Bulbs...217 Bulbs, replacing...217 ... Brake System (ABS)...145 Ashtray...110 Audio system introduction...238 C Capacities, fluids...270 Capacity weight...176 Cargo area cover...117 Cargo grid...116 Cargo net...114 Catalytic converter, three-way...277 CD Pause...255 Center console buttons...60 Central locking system -...
... Information System (BLIS)...160 Blower (fan)...96 280 12 Index 1, 2, 3 ...12-volt sockets...75 Audio system HD digital radio...246 Rear seat entertainment...259 AUTO (climate control)...95, 96 Booster cushion accessory...42 integrated...47 Brake fluid...212 Brake system...145 Bulbs...217 Bulbs, replacing...217 ... Brake System (ABS)...145 Ashtray...110 Audio system introduction...238 C Capacities, fluids...270 Capacity weight...176 Cargo area cover...117 Cargo grid...116 Cargo net...114 Catalytic converter, three-way...277 CD Pause...255 Center console buttons...60 Central locking system -...