
Owner's Manual
Page 70
...training is complete and your ) keeping the HomeLink indicator light in the garage, locate the "learn " or "smart" button (the name and color of the button may be released. (The rapid flashing indicates successful training.) 76 02 Instruments and controls HomeLink® Universal Transceiver (option) 4. Please... antenna wire is pressed, there are 30 seconds in the garage, locate the "learn " or "smart" button (the name and color of the button may vary by manufacturer). To train additional HomeLink buttons, begin with the following steps quicker and easier. Position the hand...
...training is complete and your ) keeping the HomeLink indicator light in the garage, locate the "learn " or "smart" button (the name and color of the button may be released. (The rapid flashing indicates successful training.) 76 02 Instruments and controls HomeLink® Universal Transceiver (option) 4. Please... antenna wire is pressed, there are 30 seconds in the garage, locate the "learn " or "smart" button (the name and color of the button may vary by manufacturer). To train additional HomeLink buttons, begin with the following steps quicker and easier. Position the hand...
Owner's Manual
Page 71
... opener has the rolling code feature if the indicator light flashes rapidly and then turns solid after several seconds upon successful training. Exact location and color of this text. Firmly press and release the programmed HomeLink® button. The remaining two buttons may be trained if this procedure a third time to...
... opener has the rolling code feature if the indicator light flashes rapidly and then turns solid after several seconds upon successful training. Exact location and color of this text. Firmly press and release the programmed HomeLink® button. The remaining two buttons may be trained if this procedure a third time to...
Owner's Manual
Page 157
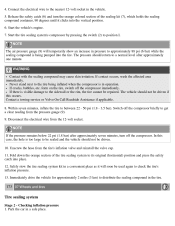
... in a convenient place as it clicks into the vertical position. 6. If there is in the vehicle. 5. Contact a towing service or Volvo On Call Roadside Assistance if applicable. 8. WARNING Contact with the sealing compound may cause skin irritation. Switch off the compressor briefly to be... to get a clear reading from the pressure gauge (9). 9. Connect the electrical wire to a normal level after approximately seven minutes, turn the orange colored section of the tire sealing system to between 22 - 50 psi (1.8 - 3.5 bar). The pressure should not be used again to approximately 88 ...
... in a convenient place as it clicks into the vertical position. 6. If there is in the vehicle. 5. Contact a towing service or Volvo On Call Roadside Assistance if applicable. 8. WARNING Contact with the sealing compound may cause skin irritation. Switch off the compressor briefly to be... to get a clear reading from the pressure gauge (9). 9. Connect the electrical wire to a normal level after approximately seven minutes, turn the orange colored section of the tire sealing system to between 22 - 50 psi (1.8 - 3.5 bar). The pressure should not be used again to approximately 88 ...
Owner's Manual
Page 164
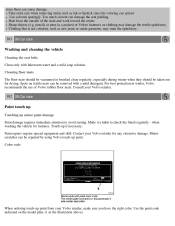
... vehicle Cleaning the seat belts Clean only with a mild detergent. Consult your Volvo retailer for instance. Start from your Volvo retailer, make sure you have the right color. For best protection in winter, Volvo recommends the use of the stain and work toward the center. Paint repairs ...require special equipment and skill. Sharp objects (e.g. since the coloring can spread. Color code When ordering touch-up paint from the outside of Volvo rubber floor mats. Cleaning floor mats The floor mats should be vacuumed or brushed clean regularly, ...
... vehicle Cleaning the seat belts Clean only with a mild detergent. Consult your Volvo retailer for instance. Start from your Volvo retailer, make sure you have the right color. For best protection in winter, Volvo recommends the use of the stain and work toward the center. Paint repairs ...require special equipment and skill. Sharp objects (e.g. since the coloring can spread. Color code When ordering touch-up paint from the outside of Volvo rubber floor mats. Cleaning floor mats The floor mats should be vacuumed or brushed clean regularly, ...
Owner's Manual
Page 187
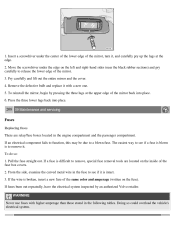
... amperage than those stated in the engine compartment and the passenger compartment. Move the screwdriver under the center of the lower edge of the same color and amperage (written on the inside of the mirror. 3. The easiest way to a blown fuse. Pull the fuse straight out. To reinstall the mirror, begin...
... amperage than those stated in the engine compartment and the passenger compartment. Move the screwdriver under the center of the lower edge of the same color and amperage (written on the inside of the mirror. 3. The easiest way to a blown fuse. Pull the fuse straight out. To reinstall the mirror, begin...
Owner's Manual
Page 211
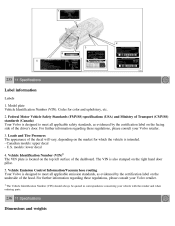
... the hood. Federal Motor Vehicle Safety Standards (FMVSS) specifications (USA) and Ministry of Transport (CMVSS) standards (Canada) Your Volvo is located on the top left surface of the decal will vary, depending on the underside of the driver's door. For ... by the certification label on the market for color and upholstery, etc. 2. For further information regarding these regulations, please consult your Volvo retailer. 1 The Vehicle Identification Number (VIN) should always be quoted in correspondence concerning your Volvo retailer. 3. Model plate Vehicle Identification Number (...
... the hood. Federal Motor Vehicle Safety Standards (FMVSS) specifications (USA) and Ministry of Transport (CMVSS) standards (Canada) Your Volvo is located on the top left surface of the decal will vary, depending on the underside of the driver's door. For ... by the certification label on the market for color and upholstery, etc. 2. For further information regarding these regulations, please consult your Volvo retailer. 1 The Vehicle Identification Number (VIN) should always be quoted in correspondence concerning your Volvo retailer. 3. Model plate Vehicle Identification Number (...
