

Owners Manual
Page 2
... This is the sound of non-genuine spare parts and accessories for Toyota vehicles are current at any damage they may cause to make changes at the time of equipment. Modification with non-genuine Toyota products. In addition, damage or performance problems resulting from the modification ...may not be modified with non-genuine Toyota products may affect performance, safety or durability, ...
... This is the sound of non-genuine spare parts and accessories for Toyota vehicles are current at any damage they may cause to make changes at the time of equipment. Modification with non-genuine Toyota products. In addition, damage or performance problems resulting from the modification ...may not be modified with non-genuine Toyota products may affect performance, safety or durability, ...

Owners Manual
Page 18
... unintended triggering of the alarm, unlock the doors using the wireless remote control and open and close a door once after the settings have been changed. (If a door is not opened within 60 seconds after is pressed, the doors will be locked again and the alarm will automatically be set....) In case that the alarm is performed, as shown below. (When changing the setting continuously, release the buttons, wait for at least 5 seconds, and repeat step 2.) Multi-information display Unlocking doors Hold the driver's door ...
... unintended triggering of the alarm, unlock the doors using the wireless remote control and open and close a door once after the settings have been changed. (If a door is not opened within 60 seconds after is pressed, the doors will be locked again and the alarm will automatically be set....) In case that the alarm is performed, as shown below. (When changing the setting continuously, release the buttons, wait for at least 5 seconds, and repeat step 2.) Multi-information display Unlocking doors Hold the driver's door ...

Owners Manual
Page 94
The indicator light changes from being on to flashing when the system is set automatically after 30 seconds. The system will be set . 1 Before driving Theft deterrent system Vehicles with navigation system Close the doors, glass hatch and hood, and lock all the doors. 1-6.
The indicator light changes from being on to flashing when the system is set automatically after 30 seconds. The system will be set . 1 Before driving Theft deterrent system Vehicles with navigation system Close the doors, glass hatch and hood, and lock all the doors. 1-6.

Owners Manual
Page 146
2 -1 . Driving proc e dure s Engine (ignition) sw itch (vehicles w ith smart key system) Performing the following operations when carrying the electronic key on your person starts the engine or changes "ENGINE START STOP" switch mode.
2 -1 . Driving proc e dure s Engine (ignition) sw itch (vehicles w ith smart key system) Performing the following operations when carrying the electronic key on your person starts the engine or changes "ENGINE START STOP" switch mode.

Owners Manual
Page 155
Driving procedures Changing shift ranges in S mode Shift the shift lever to the vehicle speed. Upshifting Downshifting 2 When driving 2.7 L 4-cylinder (1AR-FE) engine The initial shift range in S ...
Driving procedures Changing shift ranges in S mode Shift the shift lever to the vehicle speed. Upshifting Downshifting 2 When driving 2.7 L 4-cylinder (1AR-FE) engine The initial shift range in S ...

Owners Manual
Page 158
Move and hold the lever partway to signal a lane change . The right hand signal will flash until you release the lever. 2 -1 . The left hand signal will flash until you release the lever. Driving proc e dure s Tur n signa l leve r Right turn Left turn Move and hold the lever partway to signal a lane change .
Move and hold the lever partway to signal a lane change . The right hand signal will flash until you release the lever. 2 -1 . The left hand signal will flash until you release the lever. Driving proc e dure s Tur n signa l leve r Right turn Left turn Move and hold the lever partway to signal a lane change .

Owners Manual
Page 172
Press and hold the "DISP" button until the display changes. Press and hold the "DISP" button until the display changes. Press the "DISP" button to adjust the contrast. +: Strengthen -: Weaken After adjusting the contrast, wait 5 seconds to allow the brightness to be automatically input. STEP 2 &#..." on the menu screen. STEP 2 ● Setting the contrast STEP 1 Select "CONTRAST" on the menu screen. Press and hold the "DISP" button until the display changes. 196 Instrument cluster ● Setting the brightness STEP 1 Select "BRIGHTNESS" on the menu screen.
Press and hold the "DISP" button until the display changes. Press and hold the "DISP" button until the display changes. Press the "DISP" button to adjust the contrast. +: Strengthen -: Weaken After adjusting the contrast, wait 5 seconds to allow the brightness to be automatically input. STEP 2 &#..." on the menu screen. STEP 2 ● Setting the contrast STEP 1 Select "CONTRAST" on the menu screen. Press and hold the "DISP" button until the display changes. 196 Instrument cluster ● Setting the brightness STEP 1 Select "BRIGHTNESS" on the menu screen.

Owners Manual
Page 211
... the closure of areas to off-road vehicles. ● Drive your vehicle only in areas where off-road vehicles are wet, driving techniques should be changed or travel delayed to prevent damage to travel . ● Stay on established roads. 2-5. Get owner's permission before entering private property. ● Do not enter areas...
... the closure of areas to off-road vehicles. ● Drive your vehicle only in areas where off-road vehicles are wet, driving techniques should be changed or travel delayed to prevent damage to travel . ● Stay on established roads. 2-5. Get owner's permission before entering private property. ● Do not enter areas...
Owners Manual
Page 233
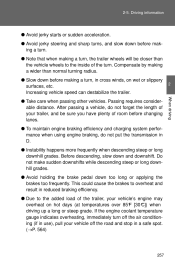
... downhill grades. ● Avoid holding the brake pedal down and downshift. Compensate by making a wider than the vehicle wheels to the inside of room before changing lanes. ● To maintain engine braking efficiency and charging system performance when using engine braking, do not forget the length of your trailer, and be...
... downhill grades. ● Avoid holding the brake pedal down and downshift. Compensate by making a wider than the vehicle wheels to the inside of room before changing lanes. ● To maintain engine braking efficiency and charging system performance when using engine braking, do not forget the length of your trailer, and be...

Owners Manual
Page 249
... Rear air conditioning on/off switch Fan speed Outside air or recirculated air mode Individual mode 3 Interior features Front passenger's side temperature control dial Off Changes the air outlets used A B Simultaneous mode Air conditioning on/off switch Vehicles with rear air conditioning system Vehicles without rear air conditioning system ∗: If...
... Rear air conditioning on/off switch Fan speed Outside air or recirculated air mode Individual mode 3 Interior features Front passenger's side temperature control dial Off Changes the air outlets used A B Simultaneous mode Air conditioning on/off switch Vehicles with rear air conditioning system Vehicles without rear air conditioning system ∗: If...

Owners Manual
Page 254
3-1. Using the air conditioning system and defogger Changing the rear seat settings (if equipped)
3-1. Using the air conditioning system and defogger Changing the rear seat settings (if equipped)

Owners Manual
Page 257
3 -1 . Changes the air outlets used 3 Fan speed control dial Temperature control dial Interior features ∗: If equipped 283 U sing t he a ir c ondit ioning syst e m a nd de fogge r Re a r m a nua l a ir c ondit ioning syst e m ∗ Airflow and outlets are automatically adjusted according to the temperature setting.
3 -1 . Changes the air outlets used 3 Fan speed control dial Temperature control dial Interior features ∗: If equipped 283 U sing t he a ir c ondit ioning syst e m a nd de fogge r Re a r m a nua l a ir c ondit ioning syst e m ∗ Airflow and outlets are automatically adjusted according to the temperature setting.

Owners Manual
Page 260
...) or counterclockwise (cool). ∗: If equipped 286 Airflow display Fan speed display Temperature setting display Fan speed control dial Temperature control dial Off Automatic mode Changes the air outlets used Using the automatic mode STEP 1 Press . 3 -1 . "AUTO" will be displayed on the control panel. U sing t he a ir c ondit ioning syst e m a nd...
...) or counterclockwise (cool). ∗: If equipped 286 Airflow display Fan speed display Temperature setting display Fan speed control dial Temperature control dial Off Automatic mode Changes the air outlets used Using the automatic mode STEP 1 Press . 3 -1 . "AUTO" will be displayed on the control panel. U sing t he a ir c ondit ioning syst e m a nd...

Owners Manual
Page 263
...60 minutes. U sing t he a ir c ondit ioning syst e m a nd de fogge r Rear w indow and outside rear view mirror defoggers 289 The operation time changes according to the ambient temperature and vehicle speed. Pressing the button again also turns the defogger off . The operation time... changes according to the ambient temperature and vehicle speed. Vehicles with outside rear view mirror defoggers Clear the rear window using the defogger. A B 3 ...
...60 minutes. U sing t he a ir c ondit ioning syst e m a nd de fogge r Rear w indow and outside rear view mirror defoggers 289 The operation time changes according to the ambient temperature and vehicle speed. Pressing the button again also turns the defogger off . The operation time... changes according to the ambient temperature and vehicle speed. Vehicles with outside rear view mirror defoggers Clear the rear window using the defogger. A B 3 ...
Owners Manual
Page 269
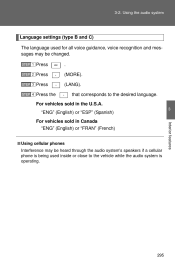
"ENG" (English) or "ESP" (Spanish) For vehicles sold in Canada "ENG" (English) or "FRAN" (French) Using the audio system Language settings (type B and C) The language used for all voice guidance, voice recognition and messages may be changed. 3-2. STEP 1 STEP 2 STEP 3 STEP 4 Press Press Press Press the . (MORE). (LANG). that corresponds to the desired language. 3 For vehicles sold in the U.S.A.
"ENG" (English) or "ESP" (Spanish) For vehicles sold in Canada "ENG" (English) or "FRAN" (French) Using the audio system Language settings (type B and C) The language used for all voice guidance, voice recognition and messages may be changed. 3-2. STEP 1 STEP 2 STEP 3 STEP 4 Press Press Press Press the . (MORE). (LANG). that corresponds to the desired language. 3 For vehicles sold in the U.S.A.

Owners Manual
Page 271
3 -2 . U sing t he a udio syst e m U sing t he ra dio Type A Power Volume Scanning for receivable stations Station selector Mute Adjusting the frequency Seeking the frequency AM/FM mode buttons Changing the program type 3 Interior features Type B and C Power Volume Scanning for receivable stations Adjusting the frequency (AM, FM mode) or channel (SAT mode) Displaying radio text messages Station selector Seeking a frequency AM/FM/SAT mode button Mute Changing the channel category Setting preset buttons 297
3 -2 . U sing t he a udio syst e m U sing t he ra dio Type A Power Volume Scanning for receivable stations Station selector Mute Adjusting the frequency Seeking the frequency AM/FM mode buttons Changing the program type 3 Interior features Type B and C Power Volume Scanning for receivable stations Adjusting the frequency (AM, FM mode) or channel (SAT mode) Displaying radio text messages Station selector Seeking a frequency AM/FM/SAT mode button Mute Changing the channel category Setting preset buttons 297
Owners Manual
Page 272
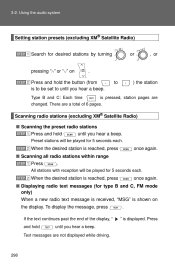
3-2. to ) the station STEP 2 Press and hold the button (from is pressed, station pages are a total of 6 pages. is to be set to until you hear a beep. Type B and C: Each time changed. There are Scanning radio stations (excluding XM® Satellite Radio) Using the audio system Setting station presets (excluding XM® Satellite Radio) STEP 1 Search for desired stations by turning pressing "∧" or "∨" on or , or .
3-2. to ) the station STEP 2 Press and hold the button (from is pressed, station pages are a total of 6 pages. is to be set to until you hear a beep. Type B and C: Each time changed. There are Scanning radio stations (excluding XM® Satellite Radio) Using the audio system Setting station presets (excluding XM® Satellite Radio) STEP 1 Search for desired stations by turning pressing "∧" or "∨" on or , or .
Owners Manual
Page 277
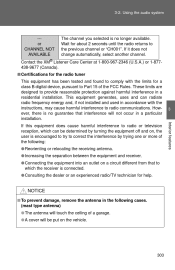
3-2. If it does not change automatically, select another channel. Contact the XM® Listener Care Center at 1-800-967-2346 (U.S.A.) or 1-877438-9677 (Canada). Using the audio system --or CHANNEL NOT AVAILABLE The channel you selected is no longer available. Wait for about 2 seconds until the radio returns to the previous channel or "CH001".
3-2. If it does not change automatically, select another channel. Contact the XM® Listener Care Center at 1-800-967-2346 (U.S.A.) or 1-877438-9677 (Canada). Using the audio system --or CHANNEL NOT AVAILABLE The channel you selected is no longer available. Wait for about 2 seconds until the radio returns to the previous channel or "CH001".

Owners Manual
Page 296
3-2. Using the audio system Selecting a play mode. (MORE) to change to select iPod menu mode. that corresponds to the desired play mode STEP 1 STEP 2 Press Press Pressing (BROWSE) to the second selection list.
3-2. Using the audio system Selecting a play mode. (MORE) to change to select iPod menu mode. that corresponds to the desired play mode STEP 1 STEP 2 Press Press Pressing (BROWSE) to the second selection list.

Owners Manual
Page 299
Using the audio system Switching the display Press Each time . 3-2. is pressed, the display changes in the following order: Track title → Track title/Artist name → Track title/Album name → Track title/Elapsed time
Using the audio system Switching the display Press Each time . 3-2. is pressed, the display changes in the following order: Track title → Track title/Artist name → Track title/Album name → Track title/Elapsed time


