
Owners Manual
Page 2
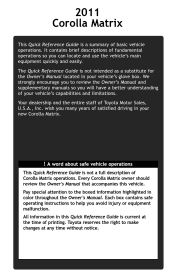
...to help you can locate and use the vehicle's main equipment quickly and easily. Pay special attention to make changes at the time of printing. Toyota reserves the right to the boxed information highlighted in this vehicle. wish you will have a better understanding of ... and supplementary manuals so you many years of satisfied driving in your new Corolla Matrix. ! 2011 Corolla Matrix This Quick Reference Guide is not a full description of Corolla Matrix operations. Every Corolla Matrix owner should review the Owner's Manual that accompanies this Quick Reference Guide is not...
...to help you can locate and use the vehicle's main equipment quickly and easily. Pay special attention to make changes at the time of printing. Toyota reserves the right to the boxed information highlighted in this vehicle. wish you will have a better understanding of ... and supplementary manuals so you many years of satisfied driving in your new Corolla Matrix. ! 2011 Corolla Matrix This Quick Reference Guide is not a full description of Corolla Matrix operations. Every Corolla Matrix owner should review the Owner's Manual that accompanies this Quick Reference Guide is not...

Owners Manual
Page 9
Hood release OVERVIEW Pull Pull up latch and raise hood Engine maintenance 4 cylinder (2AZ-FE) engine 4 cylinder (2ZR-FE) engine FEATURES/OPERATIONS Engine coolant reservoir Engine oil filler cap Engine oil level dipstick Windshield washer fluid tank NOTE: Regularly scheduled maintenance, including oil changes, will help extend the life of your vehicle and maintain performance. Please refer to the "Warranty Maintenance Guide." SAFETY AND EMERGENCY FEATURES 7
Hood release OVERVIEW Pull Pull up latch and raise hood Engine maintenance 4 cylinder (2AZ-FE) engine 4 cylinder (2ZR-FE) engine FEATURES/OPERATIONS Engine coolant reservoir Engine oil filler cap Engine oil level dipstick Windshield washer fluid tank NOTE: Regularly scheduled maintenance, including oil changes, will help extend the life of your vehicle and maintain performance. Please refer to the "Warranty Maintenance Guide." SAFETY AND EMERGENCY FEATURES 7

Owners Manual
Page 13
Front fog lights (if equipped) Turn Front fog lights come on only when the headlights are on automatically upon starting engine. Turn signals Right turn Lane change SAFETY AND EMERGENCY FEATURES Lane change depending on the darkness of the headlights will automatically change Left turn on low beam. Lights & turn signals Headlights OVERVIEW Headlights Parking lights High beam Low beam High beam flasher FEATURES/OPERATIONS Daytime Running Light system (DRL) Headlights turn 11 The brightness of the surroundings.
Front fog lights (if equipped) Turn Front fog lights come on only when the headlights are on automatically upon starting engine. Turn signals Right turn Lane change SAFETY AND EMERGENCY FEATURES Lane change depending on the darkness of the headlights will automatically change Left turn on low beam. Lights & turn signals Headlights OVERVIEW Headlights Parking lights High beam Low beam High beam flasher FEATURES/OPERATIONS Daytime Running Light system (DRL) Headlights turn 11 The brightness of the surroundings.

Owners Manual
Page 22
.... Refer to the load label on the door jamb or the Owner's Manual for more than 60 seconds and then remains on due to temperature changes or changes in tire pressure from the outside. After adjusting tire pressures, or after tires have been rotated or replaced, turn off the light. If the..., or squeeze lock release to be opened only from natural air leakage. NOTE: The warning light may come on , take the vehicle to your local Toyota dealer. Let the vehicle sit for a few minutes to allow the door to lower 20 Push and hold the " SET" button until the indicator blinks...
.... Refer to the load label on the door jamb or the Owner's Manual for more than 60 seconds and then remains on due to temperature changes or changes in tire pressure from the outside. After adjusting tire pressures, or after tires have been rotated or replaced, turn off the light. If the..., or squeeze lock release to be opened only from natural air leakage. NOTE: The warning light may come on , take the vehicle to your local Toyota dealer. Let the vehicle sit for a few minutes to allow the door to lower 20 Push and hold the " SET" button until the indicator blinks...

Owners Manual
Page 23
... to the Owner's Manual. To find more information about seat belts, and how to install a child restraint system, refer to the Owner's Manual for tire changing and jack positioning procedures. 21 Seat belts OVERVIEW Take up slack Too high Keep as low on hips as possible If belt is used to...
... to the Owner's Manual. To find more information about seat belts, and how to install a child restraint system, refer to the Owner's Manual for tire changing and jack positioning procedures. 21 Seat belts OVERVIEW Take up slack Too high Keep as low on hips as possible If belt is used to...

Owners Manual
Page 42
..., repair, or replacement, or for any time without notice. However, because of the Toyota policy of continual product improvement, we reserve the right to , or adverse effect they may cause to make changes at the time of printing. This vehicle should know that these parts are not covered ...by Toyota warranty and that this manual are currently available on your vehicle. In addition, damage or performance...
..., repair, or replacement, or for any time without notice. However, because of the Toyota policy of continual product improvement, we reserve the right to , or adverse effect they may cause to make changes at the time of printing. This vehicle should know that these parts are not covered ...by Toyota warranty and that this manual are currently available on your vehicle. In addition, damage or performance...

Owners Manual
Page 143
2-1. However, the initial shift range may be set to 3 if AI-SHIFT has operated while the shift lever was in the D position. (→P. 123) When the shift range is automatically set to 4 or 5. Upshifting Downshifting 2 When driving The initial shift range in S mode (multi-mode type) Shift the shift lever to "5". 121 Driving procedures Changing shift ranges in S mode is "4" or lower, holding the shift lever toward "+" sets the shift range to the S position and operate the shift lever.
2-1. However, the initial shift range may be set to 3 if AI-SHIFT has operated while the shift lever was in the D position. (→P. 123) When the shift range is automatically set to 4 or 5. Upshifting Downshifting 2 When driving The initial shift range in S mode (multi-mode type) Shift the shift lever to "5". 121 Driving procedures Changing shift ranges in S mode is "4" or lower, holding the shift lever toward "+" sets the shift range to the S position and operate the shift lever.

Owners Manual
Page 148
Move and hold the lever partway to signal a lane change . The left hand signal will flash until you release the lever. Driving procedures Turn signal lever Right turn Left turn Move and hold the lever partway to signal a lane change . 2-1. The right hand signal will flash until you release the lever.
Move and hold the lever partway to signal a lane change . The left hand signal will flash until you release the lever. Driving procedures Turn signal lever Right turn Left turn Move and hold the lever partway to signal a lane change . 2-1. The right hand signal will flash until you release the lever.

Owners Manual
Page 186
... especially true on wet or slippery surfaces. ● Avoid jerky starts or sudden acceleration. ● Avoid jerky steering and sharp turns, and slow down before changing lanes. 164 This is increased when towing a trailer, vehicle-tovehicle distance should be closer than the vehicle wheels to prepare for being passed by making...
... especially true on wet or slippery surfaces. ● Avoid jerky starts or sudden acceleration. ● Avoid jerky steering and sharp turns, and slow down before changing lanes. 164 This is increased when towing a trailer, vehicle-tovehicle distance should be closer than the vehicle wheels to prepare for being passed by making...

Owners Manual
Page 201
... P. 197 P. 206 P. 213 P. 221 P. 225 P. 227 3 Interior features Language settings (type B only) The language used for all voice guidance, voice recognition and messages may be changed. "ENG" (English) or "ESP" (Spanish) For vehicles sold in Canada "ENG" (English) or "FRAN" (French) 3-2.
... P. 197 P. 206 P. 213 P. 221 P. 225 P. 227 3 Interior features Language settings (type B only) The language used for all voice guidance, voice recognition and messages may be changed. "ENG" (English) or "ESP" (Spanish) For vehicles sold in Canada "ENG" (English) or "FRAN" (French) 3-2.

Owners Manual
Page 203
Using the audio system Using the radio Type A Power Volume Adjusting the frequency Station selector 3 Interior features Seeking a frequency AM/FM mode buttons Scanning for receivable stations Type B Power Volume Adjusting the frequency (AM, FM mode) or channel (SAT mode) Station selector Seeking a frequency Scanning for receivable stations Changing the channel category AM/FM/SAT mode button Setting preset buttons Mute Displaying radio text messages 183 3-2.
Using the audio system Using the radio Type A Power Volume Adjusting the frequency Station selector 3 Interior features Seeking a frequency AM/FM mode buttons Scanning for receivable stations Type B Power Volume Adjusting the frequency (AM, FM mode) or channel (SAT mode) Station selector Seeking a frequency Scanning for receivable stations Changing the channel category AM/FM/SAT mode button Setting preset buttons Mute Displaying radio text messages 183 3-2.

Owners Manual
Page 204
STEP 2 Press and hold the button (from to until you hear a beep. There are changed. Type B: Each time is pressed, station pages are a total of ) the station is to be set to or one of 6 pages. Using the audio system Setting station presets (excluding XM® Satellite Radio) STEP 1 Search for desired stations by turning "∨" on or pressing "∧" or . 3-2. Scanning radio stations (excluding XM® Satellite Radio)
STEP 2 Press and hold the button (from to until you hear a beep. There are changed. Type B: Each time is pressed, station pages are a total of ) the station is to be set to or one of 6 pages. Using the audio system Setting station presets (excluding XM® Satellite Radio) STEP 1 Search for desired stations by turning "∨" on or pressing "∧" or . 3-2. Scanning radio stations (excluding XM® Satellite Radio)

Owners Manual
Page 209
Wait for about 2 seconds until the radio returns to the previous channel or "CH001". Contact the XM® Listener Care Center at 1-800-967-2346 (U.S.A.) or 1-877438-9677 (Canada). 3-2. If it does not change automatically, select another channel. Using the audio system --or CHANNEL NOT AVAILABLE The channel you selected is no longer available.
Wait for about 2 seconds until the radio returns to the previous channel or "CH001". Contact the XM® Listener Care Center at 1-800-967-2346 (U.S.A.) or 1-877438-9677 (Canada). 3-2. If it does not change automatically, select another channel. Using the audio system --or CHANNEL NOT AVAILABLE The channel you selected is no longer available.

Owners Manual
Page 228
3-2. Using the audio system Selecting a play mode. (MORE) to change to select iPod menu mode. that corresponds to the desired play mode STEP 1 STEP 2 Press Press Pressing (BROWSE) to the second selection list.
3-2. Using the audio system Selecting a play mode. (MORE) to change to select iPod menu mode. that corresponds to the desired play mode STEP 1 STEP 2 Press Press Pressing (BROWSE) to the second selection list.

Owners Manual
Page 231
Using the audio system Switching the display Press Each time . 3-2. is pressed, the display changes in the following order: Track title → Track title/Artist name → Track title/Album name → Track title/Elapsed time
Using the audio system Switching the display Press Each time . 3-2. is pressed, the display changes in the following order: Track title → Track title/Artist name → Track title/Album name → Track title/Elapsed time

Owners Manual
Page 248
Press and hold beep. 228 to select the radio mode. The audio source changes as follows each time is turned on ume. Selecting a radio station STEP 1 Press Press to select a preset station. to increase the volume and "-" to continue ... Adjusting the volume Press "+" on . 3-2. until you hear a STEP 2 To scan for receivable stations, press and hold to decrease the vol- Using the audio system Changing the audio source Press when the audio system is pressed.
Press and hold beep. 228 to select the radio mode. The audio source changes as follows each time is turned on ume. Selecting a radio station STEP 1 Press Press to select a preset station. to increase the volume and "-" to continue ... Adjusting the volume Press "+" on . 3-2. until you hear a STEP 2 To scan for receivable stations, press and hold to decrease the vol- Using the audio system Changing the audio source Press when the audio system is pressed.

Owners Manual
Page 257
... registered name of the portable player. Guidance for the operation of a portable player Listing the registered portable players Changing the passkey Deleting a registered portable player Setting voice guidance volume Displaying the Bluetooth® device address and name Initializing the... Second menu Third menu Pair Audio Players (Pair audio player) Select Audio Player BT Audio Setup (BT audio setup) Setup (Setup) Change Name List Audio Players Set Passkey Delete Audio Player Guidance Volume System Setup Device Name Reset Setting Operation details 3 Registering a portable player Interior...
... registered name of the portable player. Guidance for the operation of a portable player Listing the registered portable players Changing the passkey Deleting a registered portable player Setting voice guidance volume Displaying the Bluetooth® device address and name Initializing the... Second menu Third menu Pair Audio Players (Pair audio player) Select Audio Player BT Audio Setup (BT audio setup) Setup (Setup) Change Name List Audio Players Set Passkey Delete Audio Player Guidance Volume System Setup Device Name Reset Setting Operation details 3 Registering a portable player Interior...

Owners Manual
Page 260
3-3. Using the Bluetooth® audio system Fast-forwarding and reversing tracks Press and hold "∧" or "∨" on Switching the display Press . . Each time is pressed, the display changes in the following order: Track title → Track title/Artist name → Track title/Album name → Track title/Elapsed time Using the steering wheel audio switches →P. 227
3-3. Using the Bluetooth® audio system Fast-forwarding and reversing tracks Press and hold "∧" or "∨" on Switching the display Press . . Each time is pressed, the display changes in the following order: Track title → Track title/Artist name → Track title/Album name → Track title/Elapsed time Using the steering wheel audio switches →P. 227
Owners Manual
Page 263
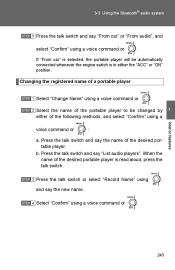
If "From car" is selected, the portable player will be changed by either the "ACC" or "ON" position. Press the talk switch and say the name of the desired portable player. When the name of the ... Bluetooth® audio system STEP 3 Press the talk switch and say the new name. , STEP 4 Select "Confirm" using a voice command or . Changing the registered name of a portable player STEP 1 Select "Change Name" using a voice command or . 3 STEP 2 Select the name of the following methods, and select "Confirm" using a voice command or : Interior...
If "From car" is selected, the portable player will be changed by either the "ACC" or "ON" position. Press the talk switch and say the name of the desired portable player. When the name of the ... Bluetooth® audio system STEP 3 Press the talk switch and say the new name. , STEP 4 Select "Confirm" using a voice command or . Changing the registered name of a portable player STEP 1 Select "Change Name" using a voice command or . 3 STEP 2 Select the name of the following methods, and select "Confirm" using a voice command or : Interior...

Owners Manual
Page 264
... talk switch while the name of registered portable players will become available: ● Selecting a portable player: "Select Audio Player" ● Changing a registered name: "Change Name" ● Deleting a portable player: "Delete Audio Player" Changing the passkey STEP 1 Select "Set Passkey" using a voice command or . STEP 3 When the entire number to "BT Audio Setup". When...
... talk switch while the name of registered portable players will become available: ● Selecting a portable player: "Select Audio Player" ● Changing a registered name: "Change Name" ● Deleting a portable player: "Delete Audio Player" Changing the passkey STEP 1 Select "Set Passkey" using a voice command or . STEP 3 When the entire number to "BT Audio Setup". When...


