

Owners Manual
Page 2
... in this vehicle. Trunk-Internal release Pull up FEATURES/OPERATIONS Spare tire & tools Tool location Transport eyelet (if equipped) Jack handle Wheel nut wrench ! All information in your vehicle's glove box. 2010 Camry Hybrid This Quick Reference Guide is current at any time without notice... the Owner's Manual. Remove the jack tray. Toyota reserves the right to the boxed information highlighted in your vehicle's capabilities and limitations. It contains brief descriptions of fundamental operations so you many years of Camry Hybrid operations. Refer to help you will have...
... in this vehicle. Trunk-Internal release Pull up FEATURES/OPERATIONS Spare tire & tools Tool location Transport eyelet (if equipped) Jack handle Wheel nut wrench ! All information in your vehicle's glove box. 2010 Camry Hybrid This Quick Reference Guide is current at any time without notice... the Owner's Manual. Remove the jack tray. Toyota reserves the right to the boxed information highlighted in your vehicle's capabilities and limitations. It contains brief descriptions of fundamental operations so you many years of Camry Hybrid operations. Refer to help you will have...
Owners Manual
Page 3
...Parking brake Power outlets Seat adjustments-Front Seat heaters Seats-Folding rear seats Seats-Head restraints Steering lock release Steering wheel switches Telephone controls (Bluetooth®) Tilt and telescopic steering wheel Transmission Windows-Power Windshield wipers & washers 9 8 9 5 4 2-3 6 8 7 20-21 18-...-Internal release 23 Seatbelts 23 Seatbelts-Shoulder belt anchor 24 Spare tire & tools 25 Tire Pressure Monitoring (warning) System 24 Trunk-Internal release 25 SAFETY AND EMERGENCY FEATURES 1 2 Visit your Toyota dealer for instructions and more information. Refer to the Owner's ...
...Parking brake Power outlets Seat adjustments-Front Seat heaters Seats-Folding rear seats Seats-Head restraints Steering lock release Steering wheel switches Telephone controls (Bluetooth®) Tilt and telescopic steering wheel Transmission Windows-Power Windshield wipers & washers 9 8 9 5 4 2-3 6 8 7 20-21 18-...-Internal release 23 Seatbelts 23 Seatbelts-Shoulder belt anchor 24 Spare tire & tools 25 Tire Pressure Monitoring (warning) System 24 Trunk-Internal release 25 SAFETY AND EMERGENCY FEATURES 1 2 Visit your Toyota dealer for instructions and more information. Refer to the Owner's ...

Owners Manual
Page 4
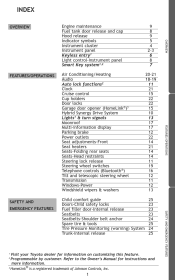
OVERVIEW Instrument panel Steering wheel controls Steering wheel audio controls Steering wheel climate controls Multi-information display button Voice command button1,2 Telephone controls1,2 Headlight,turn signal and front fog light1 controls Wiper and washer controls Emergency flasher button Audio system or navigation system with integrated audio system1,2 Air Conditioning controls Tire Pressure Monitoring (warning) System (in glove box) Rear window and outside rearview mirror defogger switch1 12V DC Power outlet 2
OVERVIEW Instrument panel Steering wheel controls Steering wheel audio controls Steering wheel climate controls Multi-information display button Voice command button1,2 Telephone controls1,2 Headlight,turn signal and front fog light1 controls Wiper and washer controls Emergency flasher button Audio system or navigation system with integrated audio system1,2 Air Conditioning controls Tire Pressure Monitoring (warning) System (in glove box) Rear window and outside rearview mirror defogger switch1 12V DC Power outlet 2
Owners Manual
Page 30
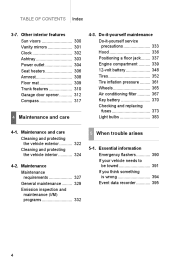
... data recorder ...390 391 394 395 4 Do-it-yourself maintenance Do-it-yourself service precautions ...Hood ...Positioning a floor jack...Engine compartment ...12-volt battery...Tires...Tire inflation pressure ...Wheels...Air conditioning filter ...Key battery ...Checking and replacing fuses ...Light bulbs ...333 336 337 339 348 352 361 365 367 370 373 383 4 Maintenance...
... data recorder ...390 391 394 395 4 Do-it-yourself maintenance Do-it-yourself service precautions ...Hood ...Positioning a floor jack...Engine compartment ...12-volt battery...Tires...Tire inflation pressure ...Wheels...Air conditioning filter ...Key battery ...Checking and replacing fuses ...Light bulbs ...333 336 337 339 348 352 361 365 367 370 373 383 4 Maintenance...

Owners Manual
Page 153
... damage to maintain a safe speed when driving down a steep hill. Have the vehicle inspected by your Toyota dealer immediately. ● Do not under any circumstances shift the shift lever to an accident. ●...and lose effectiveness. (→P. 140) ● When stopped on your vehicle has highspeed capability tires. The power steering and brake systems will not operate properly if the hybrid system is off ... or forward and causing an accident. ● Do not adjust the position of the steering wheel, the seat, or the inside the vehicle, open the windows and check that may result ...
... damage to maintain a safe speed when driving down a steep hill. Have the vehicle inspected by your Toyota dealer immediately. ● Do not under any circumstances shift the shift lever to an accident. ●...and lose effectiveness. (→P. 140) ● When stopped on your vehicle has highspeed capability tires. The power steering and brake systems will not operate properly if the hybrid system is off ... or forward and causing an accident. ● Do not adjust the position of the steering wheel, the seat, or the inside the vehicle, open the windows and check that may result ...

Owners Manual
Page 353
Maintenance Vehicle exterior Items Door/trunk Engine hood Fluid leaks Check points • Operate smoothly? • The lock system works properly? • Is there any leakage after parking? CAUTION 4 Tires • Inflation pressure is correct? • Tire surfaces not worn or damaged? • Tires rotated according to the maintenance schedule? • Wheel nuts are not loose? 4-2.
Maintenance Vehicle exterior Items Door/trunk Engine hood Fluid leaks Check points • Operate smoothly? • The lock system works properly? • Is there any leakage after parking? CAUTION 4 Tires • Inflation pressure is correct? • Tire surfaces not worn or damaged? • Tires rotated according to the maintenance schedule? • Wheel nuts are not loose? 4-2.

Owners Manual
Page 375
When new tire pressure warning valves and transmitters are installed, new tire pressure warning valve and transmitter ID codes must be registered in the tire pressure warning computer and tire pressure warning system must also be initialized. Have tire pressure warning valve and transmitter ID codes registered by your Toyota dealer. (→P. 354) Initializing the tire pressure warning system Do-it-yourself maintenance Installing tire pressure warning valves and transmitters When replacing tires or wheels, tire pressure warning valves and transmitters must be installed. 4-3.
When new tire pressure warning valves and transmitters are installed, new tire pressure warning valve and transmitter ID codes must be registered in the tire pressure warning computer and tire pressure warning system must also be initialized. Have tire pressure warning valve and transmitter ID codes registered by your Toyota dealer. (→P. 354) Initializing the tire pressure warning system Do-it-yourself maintenance Installing tire pressure warning valves and transmitters When replacing tires or wheels, tire pressure warning valves and transmitters must be installed. 4-3.

Owners Manual
Page 387
Otherwise, the tire may separate from the wheel or cause loss of handling control. 4-3. Do-it-yourself maintenance Wheels If a wheel is bent, cracked or heavily corroded, it should be replaced.
Otherwise, the tire may separate from the wheel or cause loss of handling control. 4-3. Do-it-yourself maintenance Wheels If a wheel is bent, cracked or heavily corroded, it should be replaced.

Owners Manual
Page 426
... the system is illuminated, the system may occur for approximately one or more tires or wheels on the vehicle that the replacement or alternate tires and wheels allow the TPMS (tire pressure warning system) to continue to ensure that prevent the TPMS (tire pressure warning system) from functioning properly. This sequence will flash for a variety of...
... the system is illuminated, the system may occur for approximately one or more tires or wheels on the vehicle that the replacement or alternate tires and wheels allow the TPMS (tire pressure warning system) to continue to ensure that prevent the TPMS (tire pressure warning system) from functioning properly. This sequence will flash for a variety of...

Owners Manual
Page 440
Steps to take in an emergency Replacing a flat tire STEP 1 Chock the tires. 5-2. Wheel chock positions Behind the rear righthand side tire Behind the rear lefthand side tire In front of the front right-hand side tire In front of the front left-hand side tire 5 Flat tire Lefthand side Front Righthand side Lefthand side Rear Righthand side STEP 2 When trouble arises Slightly loosen the wheel nuts (one turn). 419
Steps to take in an emergency Replacing a flat tire STEP 1 Chock the tires. 5-2. Wheel chock positions Behind the rear righthand side tire Behind the rear lefthand side tire In front of the front right-hand side tire In front of the front left-hand side tire 5 Flat tire Lefthand side Front Righthand side Lefthand side Rear Righthand side STEP 2 When trouble arises Slightly loosen the wheel nuts (one turn). 419

Owners Manual
Page 441
Steps to avoid scratching the wheel surface. 420 5-2. STEP 5 Remove all the wheel nuts and the tire. STEP 4 Raise the vehicle until the notch of the jack is slightly raised off the ground. When resting the tire on the ground, place the tire so that the wheel design faces up to take in an emergency STEP 3 Turn the tire jack portion "A" by hand until the tire is in contact with the jack point.
Steps to avoid scratching the wheel surface. 420 5-2. STEP 5 Remove all the wheel nuts and the tire. STEP 4 Raise the vehicle until the notch of the jack is slightly raised off the ground. When resting the tire on the ground, place the tire so that the wheel design faces up to take in an emergency STEP 3 Turn the tire jack portion "A" by hand until the tire is in contact with the jack point.

Owners Manual
Page 442
... the vehicle. If foreign matter is on the wheel contact surface, the wheel nuts may come into loose contact with the disc wheel. Steps to take in motion, and the tire may loosen while the vehicle is in an emergency Installing the tire STEP 1 Remove any dirt or foreign matter from... the wheel contact surface. STEP 2 Install the tire and loosely tighten each wheel nut by hand by approximately...
... the vehicle. If foreign matter is on the wheel contact surface, the wheel nuts may come into loose contact with the disc wheel. Steps to take in motion, and the tire may loosen while the vehicle is in an emergency Installing the tire STEP 1 Remove any dirt or foreign matter from... the wheel contact surface. STEP 2 Install the tire and loosely tighten each wheel nut by hand by approximately...

Owners Manual
Page 473
.... 16 × 6 1/2 J, 17 × 4 T (compact spare) 76 ft•lbf (103 N•m, 10.5 kgf•m) Tire inflation pressure (Recommended cold tire inflation pressure) Wheel size Wheel nut torque 6 Vehicle specifications 453 6-1. Specifications Tires and wheels Tire size P215/60R16 94V, T155/70D17 110M Driving under normal conditions Front: 32 psi (220 kPa, 2.2 kgf/cm2 or bar)* Rear... above 100 mph (160 km/h), in countries where such speeds are permitted by law, add 3 psi (20 kPa, 0.2 kgf/cm2 or bar) to the front tires and rear...
.... 16 × 6 1/2 J, 17 × 4 T (compact spare) 76 ft•lbf (103 N•m, 10.5 kgf•m) Tire inflation pressure (Recommended cold tire inflation pressure) Wheel size Wheel nut torque 6 Vehicle specifications 453 6-1. Specifications Tires and wheels Tire size P215/60R16 94V, T155/70D17 110M Driving under normal conditions Front: 32 psi (220 kPa, 2.2 kgf/cm2 or bar)* Rear... above 100 mph (160 km/h), in countries where such speeds are permitted by law, add 3 psi (20 kPa, 0.2 kgf/cm2 or bar) to the front tires and rear...

Owners Manual
Page 485
... weight, including heavy duty brakes, ride levelers, roof rack, heavy duty battery, and special trim A metal support for a tire or a tire and tube assembly upon which the tire beads are seated Nominal diameter of the bead seat Rim diameter and width The industry manufacturer's designation for a rim by style... weight, and normal occupant weight (distributed in accordance with Table 1* below), and dividing by two Production options weight Rim Rim diameter (Wheel diameter) Rim size designation Rim type designation Rim width Vehicle capacity weight (Total load capacity) Vehicle maximum load on the...
... weight, including heavy duty brakes, ride levelers, roof rack, heavy duty battery, and special trim A metal support for a tire or a tire and tube assembly upon which the tire beads are seated Nominal diameter of the bead seat Rim diameter and width The industry manufacturer's designation for a rim by style... weight, and normal occupant weight (distributed in accordance with Table 1* below), and dividing by two Production options weight Rim Rim diameter (Wheel diameter) Rim size designation Rim type designation Rim width Vehicle capacity weight (Total load capacity) Vehicle maximum load on the...

Owners Manual
Page 488
... device made of rubber, chemicals, fabric and steel or other materials, that, when mounted on an automotive wheel, provides the traction and contains the gas or fluid that sustains the load A pneumatic tire in which the ply cords that extend to the beads are laid at substantially 90 degrees to the... traction index equal to or greater than 110, compared to the ASTM-E 1136 Standard Reference Test Tire, when using the snow traction test as described in ASTM F-1805-00, Standard Test Method for Single Wheel Driving Traction in a Straight Line on Snow-and Ice-Covered Surfaces, and which is marked with...
... device made of rubber, chemicals, fabric and steel or other materials, that, when mounted on an automotive wheel, provides the traction and contains the gas or fluid that sustains the load A pneumatic tire in which the ply cords that extend to the beads are laid at substantially 90 degrees to the... traction index equal to or greater than 110, compared to the ASTM-E 1136 Standard Reference Test Tire, when using the snow traction test as described in ASTM F-1805-00, Standard Test Method for Single Wheel Driving Traction in a Straight Line on Snow-and Ice-Covered Surfaces, and which is marked with...

Owners Manual
Page 489
...Tread Tread rib Tread separation Treadwear indicators (TWI) Wheel-holding fixture Meaning That portion of a tire that comes into contact with the road A tread section running circumferentially around a tire Pulling away of the tread from the tire carcass The projections within the principal grooves designed ...to give a visual indication of the degrees of wear of the tread The fixture used to hold the wheel and tire assembly securely during testing *: Table 1 ⎯ Occupant loading and distribution for vehicle normal load for various designated seating capacities ...
...Tread Tread rib Tread separation Treadwear indicators (TWI) Wheel-holding fixture Meaning That portion of a tire that comes into contact with the road A tread section running circumferentially around a tire Pulling away of the tread from the tire carcass The projections within the principal grooves designed ...to give a visual indication of the degrees of wear of the tread The fixture used to hold the wheel and tire assembly securely during testing *: Table 1 ⎯ Occupant loading and distribution for vehicle normal load for various designated seating capacities ...
Owners Manual
Page 508
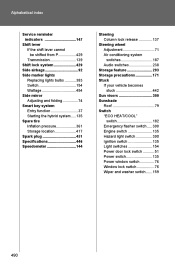
... Adjusting and folding...74 Smart key system Entry function ...37 Starting the hybrid system...135 Spare tire Inflation pressure...361 Storage location ...417 Spark plug ...451 Specifications...446 Speedometer ...144 Steering Column lock release ...137 Steering wheel Adjustment ...71 Air conditioning system switches...187 Audio switches ...238 Storage feature ...293 Storage precautions...
... Adjusting and folding...74 Smart key system Entry function ...37 Starting the hybrid system...135 Spare tire Inflation pressure...361 Storage location ...417 Spark plug ...451 Specifications...446 Speedometer ...144 Steering Column lock release ...137 Steering wheel Adjustment ...71 Air conditioning system switches...187 Audio switches ...238 Storage feature ...293 Storage precautions...
Owners Manual
Page 510
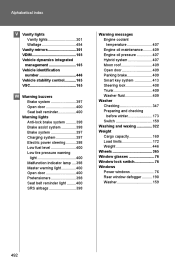
...-lock brake system ...398 Brake assist system ...398 Brake system ...397 Charging system ...397 Electric power steering...398 Low fuel level ...400 Low tire pressure warning light ...400 Malfunction indicator lamp ...398 Master warning light ...400 Open door ...400 Pretensioners ...398 Seat belt reminder light ...400 SRS... Preparing and checking before winter...173 Switch ...159 Washing and waxing ...322 Weight Cargo capacity ...169 Load limits...172 Weight...446 Wheels ...365 Window glasses ...76 Window lock switch...76 Windows Power windows ...76 Rear window defogger ...190 Washer...159 492
...-lock brake system ...398 Brake assist system ...398 Brake system ...397 Charging system ...397 Electric power steering...398 Low fuel level ...400 Low tire pressure warning light ...400 Malfunction indicator lamp ...398 Master warning light ...400 Open door ...400 Pretensioners ...398 Seat belt reminder light ...400 SRS... Preparing and checking before winter...173 Switch ...159 Washing and waxing ...322 Weight Cargo capacity ...169 Load limits...172 Weight...446 Wheels ...365 Window glasses ...76 Window lock switch...76 Windows Power windows ...76 Rear window defogger ...190 Washer...159 492

Warranty, Maitenance, Services Guide
Page 58
... Body Re-tighten the seat-mounting bolts and front/rear suspension member retaining bolts to the instructions in the steering wheel. Install new plugs of the same type as necessary. When rotating tires, check for corrosion, damage, cracks, and loose or leaking connections. Tighten connections or replace parts as originally equipped. If...
... Body Re-tighten the seat-mounting bolts and front/rear suspension member retaining bolts to the instructions in the steering wheel. Install new plugs of the same type as necessary. When rotating tires, check for corrosion, damage, cracks, and loose or leaking connections. Tighten connections or replace parts as originally equipped. If...

Owners Manual
Page 407
When new tire pressure warning valves and transmitters are installed, new tire pressure warning valve and transmitter ID codes must be registered in the tire pressure warning computer and the tire pressure warning system must also be initialized. 4-3. Do-it-yourself maintenance Installing tire pressure warning valves and transmitters When replacing tires or wheels, tire pressure warning valves and transmitters must be installed. Have tire pressure warning valve and transmitter ID codes registered by your Toyota dealer. (→P. 385) Initializing the tire pressure warning system
When new tire pressure warning valves and transmitters are installed, new tire pressure warning valve and transmitter ID codes must be registered in the tire pressure warning computer and the tire pressure warning system must also be initialized. 4-3. Do-it-yourself maintenance Installing tire pressure warning valves and transmitters When replacing tires or wheels, tire pressure warning valves and transmitters must be installed. Have tire pressure warning valve and transmitter ID codes registered by your Toyota dealer. (→P. 385) Initializing the tire pressure warning system


