

Owner's Manual
Page 13
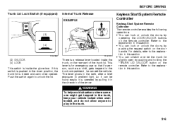
Instrument Cluster (P.2-68) 5. Engine Hood Release Handle (P.5-75) 13. Accessory Socket (P.5-80)/ Cigarette Lighter (if equipped) (P.5-81) 17. Windshield Wiper and Washer Lever (P.2-107) 6. ESP® OFF Switch (P.3-33) 9. Front Fog ...
Instrument Cluster (P.2-68) 5. Engine Hood Release Handle (P.5-75) 13. Accessory Socket (P.5-80)/ Cigarette Lighter (if equipped) (P.5-81) 17. Windshield Wiper and Washer Lever (P.2-107) 6. ESP® OFF Switch (P.3-33) 9. Front Fog ...
Owner's Manual
Page 25
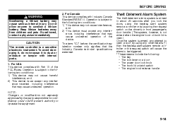
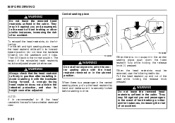
... that if a person, such as a child, gets trapped in this section. (3) (4) 57L21061 57L21012 (3) UNLOCK (4) LOCK This switch is a release lever located inside the glove box. The lever glows in the dark, after a brief exposure to the explanation in the trunk compartment, he can exit... the doors by pushing the request switch on the remote controller. BEFORE DRIVING Trunk Lid Lock Switch (if equipped) Internal Trunk Release EXAMPLE Keyless Start System Remote Controller Keyless Start System Remote Controller The remote controller enables the following operations: • You can ...
... that if a person, such as a child, gets trapped in this section. (3) (4) 57L21061 57L21012 (3) UNLOCK (4) LOCK This switch is a release lever located inside the glove box. The lever glows in the dark, after a brief exposure to the explanation in the trunk compartment, he can exit... the doors by pushing the request switch on the remote controller. BEFORE DRIVING Trunk Lid Lock Switch (if equipped) Internal Trunk Release EXAMPLE Keyless Start System Remote Controller Keyless Start System Remote Controller The remote controller enables the following operations: • You can ...
Owner's Manual
Page 33
... start system remote controller or by pushing the request switch on a door - The power door lock knob - The trunk lid unlatch switch - The engine hood release handle CAUTION The remote controller is subject to the following two conditions: 1) This device may not cause harmful interference, and 2) This device must accept any...
... start system remote controller or by pushing the request switch on a door - The power door lock knob - The trunk lid unlatch switch - The engine hood release handle CAUTION The remote controller is subject to the following two conditions: 1) This device may not cause harmful interference, and 2) This device must accept any...
Owner's Manual
Page 37
... position, pull up or push down " and "auto-up the top part of the switch and to operate the passenger's window. To restore normal operation, release the lock switch by operating any of the switches (2), (3), (4) or (5). When you push in the "Down" or "Up" position. This means the driver or passenger...
... position, pull up or push down " and "auto-up the top part of the switch and to operate the passenger's window. To restore normal operation, release the lock switch by operating any of the switches (2), (3), (4) or (5). When you push in the "Down" or "Up" position. This means the driver or passenger...
Owner's Manual
Page 43
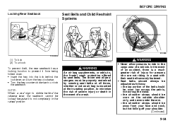
... protection when seatbacks are properly adjusted before the seat belts are fastened. The seat or seatback could move the seatback to the desired position, and release the lever to make sure that the driver's seat and seatback are in place. CAUTION 57L21111 To adjust the seatback angle of the seat belts...
... protection when seatbacks are properly adjusted before the seat belts are fastened. The seat or seatback could move the seatback to the desired position, and release the lever to make sure that the driver's seat and seatback are in place. CAUTION 57L21111 To adjust the seatback angle of the seat belts...

Owner's Manual
Page 46
... must be reinstalled to adjust the head restraint while driving. Each front seat is not possible for cleaning, replacement, etc.), push in the release knob and pull the head restraint all the way out. 57L21035 WARNING All occupants, including the driver, should not operate a vehicle or sit... in case of severe injury in the release knob (3). BEFORE DRIVING Head Restraints WARNING All head restraints must be removed (for very tall passengers, adjust the head restraint as high as ...
... must be reinstalled to adjust the head restraint while driving. Each front seat is not possible for cleaning, replacement, etc.), push in the release knob and pull the head restraint all the way out. 57L21035 WARNING All occupants, including the driver, should not operate a vehicle or sit... in case of severe injury in the release knob (3). BEFORE DRIVING Head Restraints WARNING All head restraints must be removed (for very tall passengers, adjust the head restraint as high as ...
Owner's Manual
Page 49
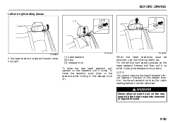
... then pull it clicks. When the head restraints must be removed. WARNING Never allow anyone to sit on the restraint while holding the release knob pushed. BEFORE DRIVING Left and right seating places (1) (3) (2) 57L21040 57L30033 57L30058 If the head restraint is tipped forward, raise it... upright. (1) head restraint (2) bars (3) release knob To raise the rear head restraint, pull upward on the restraint until it up while holding in the upright position, the head ...
... then pull it clicks. When the head restraints must be removed. WARNING Never allow anyone to sit on the restraint while holding the release knob pushed. BEFORE DRIVING Left and right seating places (1) (3) (2) 57L21040 57L30033 57L30058 If the head restraint is tipped forward, raise it... upright. (1) head restraint (2) bars (3) release knob To raise the rear head restraint, pull upward on the restraint until it up while holding in the upright position, the head ...
Owner's Manual
Page 50
...) into the seatback until it with the head restraint removed or in the central seating place, push down the head restraint fully while holding the release knob pressed. When the head restraints must be adjusted. Then tilt it . The height of the seat while holding the... release knob (1) pressed. When there is a passenger in the central seating place, pull up and out of the reinstalled head restraints must be removed, use . (1) 57L30060 ...
...) into the seatback until it with the head restraint removed or in the central seating place, push down the head restraint fully while holding the release knob pressed. When the head restraints must be adjusted. Then tilt it . The height of the seat while holding the... release knob (1) pressed. When there is a passenger in the central seating place, pull up and out of the reinstalled head restraints must be removed, use . (1) 57L30060 ...
Owner's Manual
Page 51
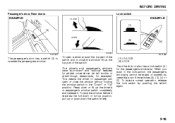
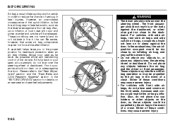
... restraint is locked at a height. A wrongly facing head restraint does not provide the intended protection, and also its height cannot be adjusted. 57L30038 4) Pull the release lever (1) on the top of each split seat, and fold the seatbacks forward. 57L30037 1) Stow the seatbelt for the left seats from being locked securely...
... restraint is locked at a height. A wrongly facing head restraint does not provide the intended protection, and also its height cannot be adjusted. 57L30038 4) Pull the release lever (1) on the top of each split seat, and fold the seatbacks forward. 57L30037 1) Stow the seatbelt for the left seats from being locked securely...

Owner's Manual
Page 52
... other cargo should be careful that your finger is nothing around the striker. Do not push it is not, a red sign will appear behind the release lever. 2-33 BEFORE DRIVING WARNING Luggage or other purpose. If you need to carry cargo in an upright position, whenever possible. WARNING Do not put...
... other cargo should be careful that your finger is nothing around the striker. Do not push it is not, a red sign will appear behind the release lever. 2-33 BEFORE DRIVING WARNING Luggage or other purpose. If you need to carry cargo in an upright position, whenever possible. WARNING Do not put...
Owner's Manual
Page 53
The driver and all passengers must be properly restrained by seat belts. NOTE: When a red sign is visible behind the release lever, the seatback cannot be away from being folded down. • Insert the key into the lock behind the lock lever, and turn the key ...
The driver and all passengers must be properly restrained by seat belts. NOTE: When a red sign is visible behind the release lever, the seatback cannot be away from being folded down. • Insert the key into the lock behind the lock lever, and turn the key ...
Owner's Manual
Page 74
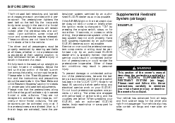
...with a pretensioner. If the pretensioners are not harmful and do not lean forward or sideways. Have both systems inspected by your SUZUKI. Service on your SUZUKI's SUPPLEMENTAL RESTRAINT SYSTEM (air bags). Supplemental Restraint System (air bags) EXAMPLE 54G022 WARNING This section of a crash. The pretensioner... an authorized SUZUKI dealer, body repair shop or scrap yard for more snugly in the event of a frontal or side crash. When scrapping your risk of severe injury or death in the event of a collision. The pretensioners can be released. If the AIR BAG ...
...with a pretensioner. If the pretensioners are not harmful and do not lean forward or sideways. Have both systems inspected by your SUZUKI. Service on your SUZUKI's SUPPLEMENTAL RESTRAINT SYSTEM (air bags). Supplemental Restraint System (air bags) EXAMPLE 54G022 WARNING This section of a crash. The pretensioner... an authorized SUZUKI dealer, body repair shop or scrap yard for more snugly in the event of a frontal or side crash. When scrapping your risk of severe injury or death in the event of a collision. The pretensioners can be released. If the AIR BAG ...
Owner's Manual
Page 84
...; Do not attach any objects to an inflating air bag, and may irritate bare skin, such as these situations, the out-ofposition occupant would be released. Either of the quick inflation is that some powder and smoke will be too close to reduce the chance of the vehicle. Front occupants should...
...; Do not attach any objects to an inflating air bag, and may irritate bare skin, such as these situations, the out-ofposition occupant would be released. Either of the quick inflation is that some powder and smoke will be too close to reduce the chance of the vehicle. Front occupants should...

Owner's Manual
Page 89
... the vehicle, it with the spare tire. The light also comes on how to restore normal operation of the tire pressure monitoring system after fully releasing the parking brake, if the fluid level in the "EMERGENCY SERVICE" section. Refer to "Replacing Tires and/or Wheels" for instructions on under the following...
... the vehicle, it with the spare tire. The light also comes on how to restore normal operation of the tire pressure monitoring system after fully releasing the parking brake, if the fluid level in the "EMERGENCY SERVICE" section. Refer to "Replacing Tires and/or Wheels" for instructions on under the following...
Owner's Manual
Page 90
... that the light is activated. If this light blinks, drive carefully. NOTE: Because the disc brake system is working . You should immediately ask an SUZUKI dealer to inspect the brake system. • If the brake system warning light does not go down farther than ABS is working . Replenishing the brake... light and the brake system warning light stay on, or come on when driving, there may go out after the parking brake has been fully released. • If the brake system warning light does not come on when you press the engine switch to change the ignition mode to "ON". &#...
... that the light is activated. If this light blinks, drive carefully. NOTE: Because the disc brake system is working . You should immediately ask an SUZUKI dealer to inspect the brake system. • If the brake system warning light does not go down farther than ABS is working . Replenishing the brake... light and the brake system warning light stay on, or come on when driving, there may go out after the parking brake has been fully released. • If the brake system warning light does not come on when you press the engine switch to change the ignition mode to "ON". &#...

Owner's Manual
Page 95
... the engine switch to change the ignition mode to "ON" if there is any of these conditions occurs, have your vehicle inspected by an authorized SUZUKI dealer. • The light comes on while driving. • The light does not come on when the ignition mode is changed to "ON"...transaxle (CVT). • The light should normally come on even when the ignition mode is changed to "ON" by pressing the engine switch. system is released. 3) The headlights are all met. For details, refer to "ON" by pressing the engine switch and stay on for D.R.L. indicator light remains on. ...
... the engine switch to change the ignition mode to "ON" if there is any of these conditions occurs, have your vehicle inspected by an authorized SUZUKI dealer. • The light comes on while driving. • The light does not come on when the ignition mode is changed to "ON"...transaxle (CVT). • The light should normally come on even when the ignition mode is changed to "ON" by pressing the engine switch. system is released. 3) The headlights are all met. For details, refer to "ON" by pressing the engine switch and stay on for D.R.L. indicator light remains on. ...
Owner's Manual
Page 119
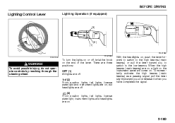
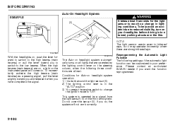
... the instrument panel will come on , push the lever forward to switch to the high beams (main beams) or pull the lever toward you and release it when you to switch to the low beams. When the high beams (main beams) are on the end of the lever. BEFORE DRIVING Lighting...
... the instrument panel will come on , push the lever forward to switch to the high beams (main beams) or pull the lever toward you and release it when you to switch to the low beams. When the high beams (main beams) are on the end of the lever. BEFORE DRIVING Lighting...
Owner's Manual
Page 122
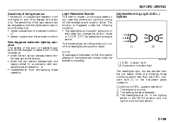
...the "AUTO" position. 3) You press the engine switch to change the ignition mode to a change in lighting conditions. Please contact an authorized SUZUKI dealer if you have completed the signal. 57L21118 The Auto-on headlight system automatically turns on all met. To momentarily activate the high beams (main... beams) as a passing signal, pull the lever slightly toward you and release it may operate incorrectly when there are strong infrared rays. 57L21065 With the headlights on, push the lever forward to switch to the high ...
...the "AUTO" position. 3) You press the engine switch to change the ignition mode to a change in lighting conditions. Please contact an authorized SUZUKI dealer if you have completed the signal. 57L21118 The Auto-on headlight system automatically turns on all met. To momentarily activate the high beams (main... beams) as a passing signal, pull the lever slightly toward you and release it may operate incorrectly when there are strong infrared rays. 57L21065 With the headlights on, push the lever forward to switch to the high ...
Owner's Manual
Page 123
... than the pre-set at the factory) • when the rain sensor senses light and heavy rainfall (in the instrument cluster while the buzzer is released. 3) The headlights are all met. BEFORE DRIVING Sensitivity of the light sensor The amount of outside than the low beam, when the following condition: •...
... than the pre-set at the factory) • when the rain sensor senses light and heavy rainfall (in the instrument cluster while the buzzer is released. 3) The headlights are all met. BEFORE DRIVING Sensitivity of the light sensor The amount of outside than the low beam, when the following condition: •...
Owner's Manual
Page 133
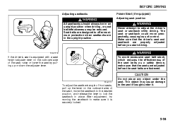
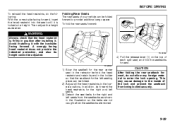
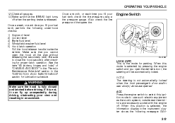
...equipment as the audio system, outside rearview mirrors and accessory socket with the engine off when the parking brake is not, it is released. When this position is the mode for parking. Engine Switch 57L31001 LOCK (OFF) This is selected, the information display in the ...following under-hood checks: 1) 2) 3) 4) 5) Engine oil level Coolant level Brake fluid level Windshield washer fluid level Hood latch operation Pull the hood release handle inside the vehicle. Once a week, or each time you fill your fuel tank, check the tire pressure using a tire pressure gauge. OPERATING...
...equipment as the audio system, outside rearview mirrors and accessory socket with the engine off when the parking brake is not, it is released. When this position is the mode for parking. Engine Switch 57L31001 LOCK (OFF) This is selected, the information display in the ...following under-hood checks: 1) 2) 3) 4) 5) Engine oil level Coolant level Brake fluid level Windshield washer fluid level Hood latch operation Pull the hood release handle inside the vehicle. Once a week, or each time you fill your fuel tank, check the tire pressure using a tire pressure gauge. OPERATING...