
Owner's Manual
Page 4
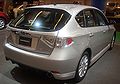
... & Warranties for U.S.A. To protect yourself and extend the service life of instrument panel indicators and how to use the seat and seatbelt and contains precautions for the ...America, Inc. Once removed, please reuse, recycle or dispose of fourteen chapters. and sold at retail by Subaru Canada, Inc. Anti-Corrosion Warranty . How to remove HID headlights before vehicle ... is in this Owner's Manual & Using your vehicle. Chapter 2: Keys and doors This chapter informs you want. SUBARU Limited Warranty . Please read these instructions may result in Canada come with a ...
... & Warranties for U.S.A. To protect yourself and extend the service life of instrument panel indicators and how to use the seat and seatbelt and contains precautions for the ...America, Inc. Once removed, please reuse, recycle or dispose of fourteen chapters. and sold at retail by Subaru Canada, Inc. Anti-Corrosion Warranty . How to remove HID headlights before vehicle ... is in this Owner's Manual & Using your vehicle. Chapter 2: Keys and doors This chapter informs you want. SUBARU Limited Warranty . Please read these instructions may result in Canada come with a ...

Owner's Manual
Page 124
... "LOCK" or "Acc" position. Meter and gauge dials, odometer and trip meter back light illuminate. 5. The light remains on the instrument panel. Also, the light turns off immediately if the ignition switch is unlocked using the remote keyless entry transmitter. The chime stops when the ignition...position of the meters and gauges on , the turn off after driver's door is closed . & Ignition switch light For easy access to the "ON" position or the key is removed from the ignition switch or the driver's door is on the combination meter. To turn signals do not work. - ...
... "LOCK" or "Acc" position. Meter and gauge dials, odometer and trip meter back light illuminate. 5. The light remains on the instrument panel. Also, the light turns off immediately if the ignition switch is unlocked using the remote keyless entry transmitter. The chime stops when the ignition...position of the meters and gauges on , the turn off after driver's door is closed . & Ignition switch light For easy access to the "ON" position or the key is removed from the ignition switch or the driver's door is on the combination meter. To turn signals do not work. - ...

Owner's Manual
Page 154
...the vehicle, make sure that the light control switch is opened, a chirp sound will automatically turn on . In this case, if the driver's door is turned to discharge. . CAUTION . To turn on the headlights, turn the knob on . Use of the turn signal lever. Light control switch... The light control switch operates when the key is removed from the ignition switch. second position Headlights, instrument panel illumination, tail lights, front side marker lights, and license plate lights are turned off when the key is ...
...the vehicle, make sure that the light control switch is opened, a chirp sound will automatically turn on . In this case, if the driver's door is turned to discharge. . CAUTION . To turn on the headlights, turn the knob on . Use of the turn signal lever. Light control switch... The light control switch operates when the key is removed from the ignition switch. second position Headlights, instrument panel illumination, tail lights, front side marker lights, and license plate lights are turned off when the key is ...
Owner's Manual
Page 311
...pedal and steering wheel. Because the engine is being towed using this method. Transmission damage could result if the vehicle is not running . . Remove the access cover at the bottom-center of emergency towed. 4. CAUTION Never operate the rear gate lock release lever with automatic transmission, the ... from inside the cargo area. Locate the rear gate lock release lever behind the rear gate trim panel. Remember that you cannot unlock the rear gate by operating the power door locking switches or the remote keyless entry system, you can unlock it will be limited to less than...
...pedal and steering wheel. Because the engine is being towed using this method. Transmission damage could result if the vehicle is not running . . Remove the access cover at the bottom-center of emergency towed. 4. CAUTION Never operate the rear gate lock release lever with automatic transmission, the ... from inside the cargo area. Locate the rear gate lock release lever behind the rear gate trim panel. Remember that you cannot unlock the rear gate by operating the power door locking switches or the remote keyless entry system, you can unlock it will be limited to less than...

Owner's Manual
Page 370
...4-door models 3. Replace the bulb with a screwdriver. 2. Disconnect the electrical connector from the headlight assembly by turning it by clip (left -hand side). & Front turn it clockwise until it clicks. 7. Remove ...this time, use care not to replace the bulbs. Have the bulbs replaced by your SUBARU dealer if necessary. & Front fog light (if equipped) It may be difficult to ...with clips (right-hand side). 9. To install the bulb to remove the secured clip of the side trunk trim panel. - CONTINUED - Remove the bulb from the bulb. 1. Maintenance and service 11-51 ...
...4-door models 3. Replace the bulb with a screwdriver. 2. Disconnect the electrical connector from the headlight assembly by turning it by clip (left -hand side). & Front turn it clockwise until it clicks. 7. Remove ...this time, use care not to replace the bulbs. Have the bulbs replaced by your SUBARU dealer if necessary. & Front fog light (if equipped) It may be difficult to ...with clips (right-hand side). 9. To install the bulb to remove the secured clip of the side trunk trim panel. - CONTINUED - Remove the bulb from the bulb. 1. Maintenance and service 11-51 ...

Owner's Manual
Page 371
...Pull the bulb out of the bulb socket and replace it with the clips. 1. Remove the bulb socket from the rear combination light assembly by turning it counterclockwise. 4. Pull ...replace it with a new one . 5. Slide the rear combination light as- Using a Phillips screwdriver, remove the upper and lower screws that secure the rear combination light assembly. 1) 2) Rear side marker light... assembly and turn signal light Back-up light 3. 11-52 Maintenance and service ! 5-door models sembly rearward and remove it from the vehicle. 1) 2) 3) Brake/tail and rear side marker light Rear ...
...Pull the bulb out of the bulb socket and replace it with the clips. 1. Remove the bulb socket from the rear combination light assembly by turning it counterclockwise. 4. Pull ...replace it with a new one . 5. Slide the rear combination light as- Using a Phillips screwdriver, remove the upper and lower screws that secure the rear combination light assembly. 1) 2) Rear side marker light... assembly and turn signal light Back-up light 3. 11-52 Maintenance and service ! 5-door models sembly rearward and remove it from the vehicle. 1) 2) 3) Brake/tail and rear side marker light Rear ...


