
Owner's Manual
Page 63
... has been installed with the lower anchorages or seatbelt; Open the cover flaps to the appropriate top tether anchorage. 1-34 Seat, seatbelt and SRS airbags ! Anchorage location Open the cover flaps to prevent it from being thrown around in the passenger compartment... in a sudden stop or a sharp turn. 2. Three upper anchorages are installed on the rear edge of the child restraint system to use the tether anchorages. ! Tighten the top tether securely. Avoid placing the head restraint in the cargo...
... has been installed with the lower anchorages or seatbelt; Open the cover flaps to the appropriate top tether anchorage. 1-34 Seat, seatbelt and SRS airbags ! Anchorage location Open the cover flaps to prevent it from being thrown around in the passenger compartment... in a sudden stop or a sharp turn. 2. Three upper anchorages are installed on the rear edge of the child restraint system to use the tether anchorages. ! Tighten the top tether securely. Avoid placing the head restraint in the cargo...
Owner's Manual
Page 123
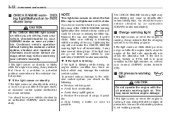
... light is blinking: If the light is not tightened until it clicks. Stop towing a trailer as soon as necessary could be covered by an authorized SUBARU dealer immediately. & Charge warning light If this light comes on when the engine is running , it may cause serious engine damage...take your vehicle to the emission control system, you have your vehicle checked by your nearest SUBARU dealer immediately. & Oil pressure warning light CAUTION Do not operate the engine with the sealing of cargo, if possible. . You should do the following. . Make sure nothing is interfering ...
... light is blinking: If the light is not tightened until it clicks. Stop towing a trailer as soon as necessary could be covered by an authorized SUBARU dealer immediately. & Charge warning light If this light comes on when the engine is running , it may cause serious engine damage...take your vehicle to the emission control system, you have your vehicle checked by your nearest SUBARU dealer immediately. & Oil pressure warning light CAUTION Do not operate the engine with the sealing of cargo, if possible. . You should do the following. . Make sure nothing is interfering ...
Owner's Manual
Page 184
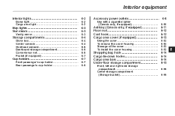
... ...Dashboard storage compartment ...Convenience net ...Pocket (if equipped) ... 6-4 6-4 6-4 6-6 6-6 6-6 6-7 Ashtray (Canada only, if equipped) ...Floor mat ...Coat hook...Cargo area cover (if equipped) ...Using the cover ...To remove the cover housing ...Stowage of the cover ...To install the cover housing ... 6-11 6-12 6-12 6-13 6-13 6-13 6-13 6-13 6 Cup holders ...Front passenger's cup holder ...Rear passenger's cup...
... ...Dashboard storage compartment ...Convenience net ...Pocket (if equipped) ... 6-4 6-4 6-4 6-6 6-6 6-6 6-7 Ashtray (Canada only, if equipped) ...Floor mat ...Coat hook...Cargo area cover (if equipped) ...Using the cover ...To remove the cover housing ...Stowage of the cover ...To install the cover housing ... 6-11 6-12 6-12 6-13 6-13 6-13 6-13 6-13 6 Cup holders ...Front passenger's cup holder ...Rear passenger's cup...

Owner's Manual
Page 196
... not place anything on to the cover and guide it back into the cover housing while it is rewinding. 1. Putting excessive weight on the extended cover can be stowed under the cargo floor. & To install the cover housing To install the cover, insert both ends of a sudden.... Interior equipment 6-13 Cargo area cover (if equipped) The cargo area cover is provided for additional cargo. To extend the cover, pull the end of the cover out of the cover & Using the cover & To remove the cover housing On models having a temporary spare tire, the cargo area cover can break it out....
... not place anything on to the cover and guide it back into the cover housing while it is rewinding. 1. Putting excessive weight on the extended cover can be stowed under the cargo floor. & To install the cover housing To install the cover, insert both ends of a sudden.... Interior equipment 6-13 Cargo area cover (if equipped) The cargo area cover is provided for additional cargo. To extend the cover, pull the end of the cover out of the cover & Using the cover & To remove the cover housing On models having a temporary spare tire, the cargo area cover can break it out....

Owner's Manual
Page 244
... vehicle If you can to prevent them from being thrown around inside the vehicle, secure it whenever you do, some parts on the extended cargo area cover. Such items could tumble forward and injure passengers in the event of gravity and make it from snow, sand, or mud, depress the ...and forth between "D" and "R" repeatedly. When the road surface is extremely slippery, you must rock the vehicle to free the vehicle. Keep luggage or cargo low, as close to tip over. . This could result in loss of your vehicle can break, or it from shooting forward and causing serious ...
... vehicle If you can to prevent them from being thrown around inside the vehicle, secure it whenever you do, some parts on the extended cargo area cover. Such items could tumble forward and injure passengers in the event of gravity and make it from snow, sand, or mud, depress the ...and forth between "D" and "R" repeatedly. When the road surface is extremely slippery, you must rock the vehicle to free the vehicle. Keep luggage or cargo low, as close to tip over. . This could result in loss of your vehicle can break, or it from shooting forward and causing serious ...

Owner's Manual
Page 264
If your vehicle has wheel covers, insert the wheel cover remover into the notch provided in the cargo area by pulling their tabs. 3. The jack is stored under the left and center lids in the wheel cover, and pry it , then remove the jack. Remove the storage compartment tray (except Canada spec. ...non-turbo models). 4. In case of the cargo floor. 2. To take out the jack handle: Open the rear-left side of...
If your vehicle has wheel covers, insert the wheel cover remover into the notch provided in the cargo area by pulling their tabs. 3. The jack is stored under the left and center lids in the wheel cover, and pry it , then remove the jack. Remove the storage compartment tray (except Canada spec. ...non-turbo models). 4. In case of the cargo floor. 2. To take out the jack handle: Open the rear-left side of...

Owner's Manual
Page 273
... the moonroof cannot be closed with the moonroof switch, you can close the moonroof manually. 2. Unlock the rear gate by pressing the lever inside the cargo area. 9-14 In case of emergency Rear gate - if the rear gate cannot be closed If the moonroof cannot be unlocked In the event that... unlock the rear gate by operating the power door locking switches or the remote keyless entry system, you can unlock it off. 1. Remove the access cover at the bottom-center of the rear gate trim.
... the moonroof cannot be closed with the moonroof switch, you can close the moonroof manually. 2. Unlock the rear gate by pressing the lever inside the cargo area. 9-14 In case of emergency Rear gate - if the rear gate cannot be closed If the moonroof cannot be unlocked In the event that... unlock the rear gate by operating the power door locking switches or the remote keyless entry system, you can unlock it off. 1. Remove the access cover at the bottom-center of the rear gate trim.

Owner's Manual
Page 274
... tools: Wheel nut wrench Screwdriver Hex-head wrench (for vehicle with moonroof) Wheel cover remover (only for vehicles with wheel covers) The jack is stowed under the left side of the cargo floor. To close the moonroof, turn the wrench counterclockwise. Have your vehicle checked ...and repaired by an authorized SUBARU dealer. Insert a hex-head wrench in the cargo area. - CONTINUED - The...
... tools: Wheel nut wrench Screwdriver Hex-head wrench (for vehicle with moonroof) Wheel cover remover (only for vehicles with wheel covers) The jack is stowed under the left side of the cargo floor. To close the moonroof, turn the wrench counterclockwise. Have your vehicle checked ...and repaired by an authorized SUBARU dealer. Insert a hex-head wrench in the cargo area. - CONTINUED - The...
Owner's Manual
Page 359
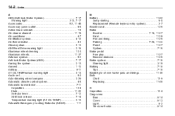
... Warning light...3-15 Braking ...7-16 Tips ...7-16 Breaking-in of new brake pads and linings...11-29 Bulb Chart ...12-9 Replacing ...11-46 C Capacities ...12-4 Cargo area Bars...6-14 Cover...6-13 Light ...6-2 Tie-down hooks...6-14
... Warning light...3-15 Braking ...7-16 Tips ...7-16 Breaking-in of new brake pads and linings...11-29 Bulb Chart ...12-9 Replacing ...11-46 C Capacities ...12-4 Cargo area Bars...6-14 Cover...6-13 Light ...6-2 Tie-down hooks...6-14


