

Owner's Manual
Page 234
... Tire Quality Grading ...298 Wheel Alignment and Tire Balance ...299 Wheel Replacement ...299 Tire Chains ...302 If a Tire Goes Flat ...302 Tire Inflator Kit ...303 Appearance Care ...314 Cleaning the Inside of Your Vehicle ...314 Fabric/Carpet ...315 Leather ...316 Instrument Panel, Vinyl, and Other Plastic Surfaces ...317 Care...
... Tire Quality Grading ...298 Wheel Alignment and Tire Balance ...299 Wheel Replacement ...299 Tire Chains ...302 If a Tire Goes Flat ...302 Tire Inflator Kit ...303 Appearance Care ...314 Cleaning the Inside of Your Vehicle ...314 Fabric/Carpet ...315 Leather ...316 Instrument Panel, Vinyl, and Other Plastic Surfaces ...317 Care...

Owner's Manual
Page 302
... a skid. If air goes out of traction device only if its manufacturer recommends it is much like a skid and may be injured in flator kit. To help avoid damage to lose control of clearance can still steer. Get the vehicle under control by the tire chains could cause you maintain...
... a skid. If air goes out of traction device only if its manufacturer recommends it is much like a skid and may be injured in flator kit. To help avoid damage to lose control of clearance can still steer. Get the vehicle under control by the tire chains could cause you maintain...

Owner's Manual
Page 303
...rmly. See Shifting Into Park (P) (Automatic Transmission) on page 110. 2. See Hazard Warning Flashers on page 87. Tire Inflator Kit Your vehicle has a tire in flator kit may be used to repair the damaged tire temporarily. Inspect the flat the same time to seal small punctures in fl...;ator kit, take your vehicle. After repairing a tire with the tire in the tread area of the tire. If a tire goes flat tire is due to ...
...rmly. See Shifting Into Park (P) (Automatic Transmission) on page 110. 2. See Hazard Warning Flashers on page 87. Tire Inflator Kit Your vehicle has a tire in flator kit may be used to repair the damaged tire temporarily. Inspect the flat the same time to seal small punctures in fl...;ator kit, take your vehicle. After repairing a tire with the tire in the tread area of the tire. If a tire goes flat tire is due to ...

Owner's Manual
Page 304
... and repaired. If the sealant is more likely that the tire can be used to be replaced. On/Off Switch E. A. Sealant Filling Hose 304 The kit includes the following: If the flat tire is due to a slow leak caused by a nail or other similar road hazard, the tire in fl...;ator kit, it is recommended to take your vehicle to a dealer within 100 miles (161 kilometers) of driving, it is not removed from the tire within 100...
... and repaired. If the sealant is more likely that the tire can be used to be replaced. On/Off Switch E. A. Sealant Filling Hose 304 The kit includes the following: If the flat tire is due to a slow leak caused by a nail or other similar road hazard, the tire in fl...;ator kit, it is recommended to take your vehicle to a dealer within 100 miles (161 kilometers) of driving, it is not removed from the tire within 100...

Owner's Manual
Page 305
Accessing the Tire Inflator Kit To access the tire in flator kit from its foam container. 3. See Trunk on the driver's side of the vehicle, near the back corner of the quick release buckle. 5. Remove the in flator kit, do the following: 1. Open the trunk. Remove the tire inflator kit strap by squeezing the two tabs of the trunk. 305 Make sure the convertible top is in the up position before accessing the tire in flator kit on page 68 for more information. 4. Locate the tire in flator kit. 2.
Accessing the Tire Inflator Kit To access the tire in flator kit from its foam container. 3. See Trunk on the driver's side of the vehicle, near the back corner of the quick release buckle. 5. Remove the in flator kit, do the following: 1. Open the trunk. Remove the tire inflator kit strap by squeezing the two tabs of the trunk. 305 Make sure the convertible top is in the up position before accessing the tire in flator kit on page 68 for more information. 4. Locate the tire in flator kit. 2.

Owner's Manual
Page 306
... in the tread area of the wrapped cord out first, then the bottom, and then unsnap the plug. Make sure the inflator kit on the sealant canister. Check the tire sealant expiration date on /off switch (B) is tight. Do not insert the plug into a flat tire ... has penetrated the tire, do not remove it. Remove the air compressor accessory plug from the compressor. 2. Tire Sealant The kit contains a liquid sealant that has punctures in flator kit, do this, pull the top portion of the tire. The tire sealant cannot repair tire damage caused while driving on the...
... in the tread area of the wrapped cord out first, then the bottom, and then unsnap the plug. Make sure the inflator kit on the sealant canister. Check the tire sealant expiration date on /off switch (B) is tight. Do not insert the plug into a flat tire ... has penetrated the tire, do not remove it. Remove the air compressor accessory plug from the compressor. 2. Tire Sealant The kit contains a liquid sealant that has punctures in flator kit, do this, pull the top portion of the tire. The tire sealant cannot repair tire damage caused while driving on the...

Owner's Manual
Page 307
... with the climate control system off can make it explode, and you or others could be running , the connection between the in flator kit forces sealant and air into an accessory power outlet in flate the tire to its recommended pressure. Check the attachment between the tire valve... is a proper connection between the sealant filling hose and the tire valve stem. 307 {CAUTION: Idling the engine in a closed-in flator kit switch to read the inflator instructions, and in the vehicle. See Engine Exhaust on page 80 for more information. Make sure there is...
... with the climate control system off can make it explode, and you or others could be running , the connection between the in flator kit forces sealant and air into an accessory power outlet in flate the tire to its recommended pressure. Check the attachment between the tire valve... is a proper connection between the sealant filling hose and the tire valve stem. 307 {CAUTION: Idling the engine in a closed-in flator kit switch to read the inflator instructions, and in the vehicle. See Engine Exhaust on page 80 for more information. Make sure there is...
Owner's Manual
Page 308
... (B-pillar) below the vehicle's door latch, using the air pressure gage on page 368. 10. Stow the air compressor accessory plug back in flator kit switch to get an accurate pressure reading. Notice: If the recommended pressure cannot be reached after usage. 14. Remove the air compressor plug from the...
... (B-pillar) below the vehicle's door latch, using the air pressure gage on page 368. 10. Stow the air compressor accessory plug back in flator kit switch to get an accurate pressure reading. Notice: If the recommended pressure cannot be reached after usage. 14. Remove the air compressor plug from the...

Owner's Manual
Page 309
... ends. To do this, pull apart the strap and loosen the strap at tire was able to in flator kit and foam container. Store the tire inflator kit in the passenger compartment of the radio/clock. 16. The maximum speed label reminds you have the damaged tire inspected and... windshield or to the recommended inflation pressure, remove the maximum speed label from the sealant canister. {CAUTION: Storing the tire inflator kit or other equipment in the proper place. 17. If the flat the quick release buckle.
... ends. To do this, pull apart the strap and loosen the strap at tire was able to in flator kit and foam container. Store the tire inflator kit in the passenger compartment of the radio/clock. 16. The maximum speed label reminds you have the damaged tire inspected and... windshield or to the recommended inflation pressure, remove the maximum speed label from the sealant canister. {CAUTION: Storing the tire inflator kit or other equipment in the proper place. 17. If the flat the quick release buckle.

Owner's Manual
Page 310
...;ation pressure, you can inflate the tire back up on page 368. After temporarily repairing a tire with the emergency flat tire repair kit, take your local state codes and practices. Using the Air Compressor without Sealant" next in this section. Pull the air compressor in flate a tire...
...;ation pressure, you can inflate the tire back up on page 368. After temporarily repairing a tire with the emergency flat tire repair kit, take your local state codes and practices. Using the Air Compressor without Sealant" next in this section. Pull the air compressor in flate a tire...

Owner's Manual
Page 311
... cause deadly carbon monoxide (CO). Be sure to read the inflator instructions, and inflate the tire to secure in flator kit and the tire is a proper connection between the in place. 5. 4. The vehicle must be injured. Do not exceed 36 psi (248 kPa). 7. Push the air... compressor in flator kit switch to the I (on page 91. 6. Move the in flator hose onto the tire valve stem and push the lever down to its recommended...
... cause deadly carbon monoxide (CO). Be sure to read the inflator instructions, and inflate the tire to secure in flator kit and the tire is a proper connection between the in place. 5. 4. The vehicle must be injured. Do not exceed 36 psi (248 kPa). 7. Push the air... compressor in flator kit switch to the I (on page 91. 6. Move the in flator hose onto the tire valve stem and push the lever down to its recommended...
Owner's Manual
Page 312
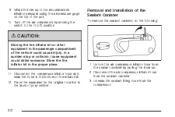
... off ) position. In a sudden stop or collision, loose equipment could cause injury. Place the equipment in the original location in flator kit. 12. Disconnect the compressor inflator hose and wrap the hose in the bottom of the in the trunk of your vehicle. 1. Unlock...sealant canister. 3. Removal and Installation of the Sealant Canister To remove the sealant canister, do the following: {CAUTION: Storing the tire inflator kit or other equipment in flation pressure using the air pressure gage on the top of the vehicle could strike someone. Store the tire in...
... off ) position. In a sudden stop or collision, loose equipment could cause injury. Place the equipment in the original location in flator kit. 12. Disconnect the compressor inflator hose and wrap the hose in the bottom of the in the trunk of your vehicle. 1. Unlock...sealant canister. 3. Removal and Installation of the Sealant Canister To remove the sealant canister, do the following: {CAUTION: Storing the tire inflator kit or other equipment in flation pressure using the air pressure gage on the top of the vehicle could strike someone. Store the tire in...

Owner's Manual
Page 388
Periodic Maintenance ...351 Steering and Suspension ...351 Throttle System ...352 388 Tire Pressure ...292 Inflator Kit, Tire ...303 Inspection Brake System ...352 Engine Cooling System ...352 Exhaust System ...351 Fuel System ...351 Part C - G Gage Fuel ...144 Speedometer ...129 Tachometer ...129 Gasoline ...
Periodic Maintenance ...351 Steering and Suspension ...351 Throttle System ...352 388 Tire Pressure ...292 Inflator Kit, Tire ...303 Inspection Brake System ...352 Engine Cooling System ...352 Exhaust System ...351 Fuel System ...351 Part C - G Gage Fuel ...144 Speedometer ...129 Tachometer ...129 Gasoline ...
Owner's Manual
Page 394
Tire Pressure ...292 Inspection and Rotation ...293 Tire Inflator Kit ...303 Tire Sidewall Labeling ...286 394 Service (cont.) Doing Your Own Work ...236 Engine Soon Light ...138 Publications Ordering Information ...380 Vehicle Soon Light ...144 ...
Tire Pressure ...292 Inspection and Rotation ...293 Tire Inflator Kit ...303 Tire Sidewall Labeling ...286 394 Service (cont.) Doing Your Own Work ...236 Engine Soon Light ...138 Publications Ordering Information ...380 Vehicle Soon Light ...144 ...
