

Owner's Manual
Page 1
2005 Pontiac GTO Owner Manual Seats and Restraint Systems ...1-1 Front Seats ...1-2 Safety Belts ...1-6 Child Restraints ...1-25 Airbag System ...1-44 Restraint System Check ...1-50 Features and Controls ...2-1... M Driving Your Vehicle ...4-1 Your Driving, the Road, and Your Vehicle ...4-2 Towing ...4-34 Service and Appearance Care ...5-1 Service ...5-3 Fuel ...5-5 Checking Things Under the Hood ...5-10 Headlamp Aiming ...5-45 Bulb Replacement ...5-47 Windshield Wiper Blade Replacement ...5-52 Tires ...5-52 Appearance Care ...5-76 Vehicle Identification ...5-85 Electrical System ...5-85...
2005 Pontiac GTO Owner Manual Seats and Restraint Systems ...1-1 Front Seats ...1-2 Safety Belts ...1-6 Child Restraints ...1-25 Airbag System ...1-44 Restraint System Check ...1-50 Features and Controls ...2-1... M Driving Your Vehicle ...4-1 Your Driving, the Road, and Your Vehicle ...4-2 Towing ...4-34 Service and Appearance Care ...5-1 Service ...5-3 Fuel ...5-5 Checking Things Under the Hood ...5-10 Headlamp Aiming ...5-45 Bulb Replacement ...5-47 Windshield Wiper Blade Replacement ...5-52 Tires ...5-52 Appearance Care ...5-76 Vehicle Identification ...5-85 Electrical System ...5-85...

Owner's Manual
Page 72
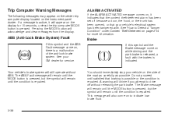
... after a short delay, also sets the alarm system. In an emergency, contact Roadside Assistance. When the alarm system is triggered when any of the doors, hood or trunk are ever driving and the security light comes on and stays on the key. Disarming the System To disarm the system, press UNLOCK...
... after a short delay, also sets the alarm system. In an emergency, contact Roadside Assistance. When the alarm system is triggered when any of the doors, hood or trunk are ever driving and the security light comes on and stays on the key. Disarming the System To disarm the system, press UNLOCK...

Owner's Manual
Page 73
... for the first 200 miles (322 km) or so. But it will perform better in guideline every time you get new brake linings. The hood has been opened . If you follow these guidelines: • Keep your vehicle and pressing UNLOCK on the key. The possible trigger points are not yet...
... for the first 200 miles (322 km) or so. But it will perform better in guideline every time you get new brake linings. The hood has been opened . If you follow these guidelines: • Keep your vehicle and pressing UNLOCK on the key. The possible trigger points are not yet...

Owner's Manual
Page 115
... rear window. The defogger can also be covered by turning off . Select the defrost mode. 2. Select the highest fan speed. 4. Use of non-GM approved hood deflectors may block the flow of the airflow. When an objectionable odor outside the vehicle is pressed. However, extended usage...
... rear window. The defogger can also be covered by turning off . Select the defrost mode. 2. Select the highest fan speed. 4. Use of non-GM approved hood deflectors may block the flow of the airflow. When an objectionable odor outside the vehicle is pressed. However, extended usage...
Owner's Manual
Page 132
.... The Brake message will remain until the MODE button is pressed, but the symbol will chime if you attempt to drive off because a door, the hood, or the trunk has been opened, or that braking is possible or the condition is active, it indicates that the content theft-deterrent alarm has...
.... The Brake message will remain until the MODE button is pressed, but the symbol will chime if you attempt to drive off because a door, the hood, or the trunk has been opened, or that braking is possible or the condition is active, it indicates that the content theft-deterrent alarm has...
Owner's Manual
Page 187
... Octane ...5-5 Gasoline Specifications ...5-5 California Fuel ...5-6 Additives ...5-6 Fuels in Foreign Countries ...5-7 Filling the Tank ...5-8 Filling a Portable Fuel Container ...5-10 Checking Things Under the Hood ...5-10 Hood Release ...5-11 Engine Compartment Overview ...5-12 Engine Oil ...5-13 Engine Oil Life System ...5-16 Engine Air Cleaner/Filter ...5-18 Automatic Transmission Fluid ...5-19 Manual Transmission...
... Octane ...5-5 Gasoline Specifications ...5-5 California Fuel ...5-6 Additives ...5-6 Fuels in Foreign Countries ...5-7 Filling the Tank ...5-8 Filling a Portable Fuel Container ...5-10 Checking Things Under the Hood ...5-10 Hood Release ...5-11 Engine Compartment Overview ...5-12 Engine Oil ...5-13 Engine Oil Life System ...5-16 Engine Air Cleaner/Filter ...5-18 Automatic Transmission Fluid ...5-19 Manual Transmission...

Owner's Manual
Page 196
... until the filling is complete. • Do not smoke while pumping gasoline. {CAUTION: An electric fan under the hood can be burned. Filling a Portable Fuel Container Checking Things Under the Hood {CAUTION: Never fill a portable fuel container while it is not running. Be careful not to you even when the...
... until the filling is complete. • Do not smoke while pumping gasoline. {CAUTION: An electric fan under the hood can be burned. Filling a Portable Fuel Container Checking Things Under the Hood {CAUTION: Never fill a portable fuel container while it is not running. Be careful not to you even when the...

Owner's Manual
Page 197
Pull the handle with this symbol on properly. Then pull the hood down and close it . Then go to lift and hold the hood in the fully open the hood, do the following: 1. Hood Release To open position. It is located under the instrument panel on the driver's side of the vehicle and pull up on the secondary hood release. 3. After you have partially lifted the hood, gas struts will automatically take over to the front of the vehicle. 2. Before closing the hood, be sure all the filler caps are on it firmly. 5-11
Pull the handle with this symbol on properly. Then pull the hood down and close it . Then go to lift and hold the hood in the fully open the hood, do the following: 1. Hood Release To open position. It is located under the instrument panel on the driver's side of the vehicle and pull up on the secondary hood release. 3. After you have partially lifted the hood, gas struts will automatically take over to the front of the vehicle. 2. Before closing the hood, be sure all the filler caps are on it firmly. 5-11

Owner's Manual
Page 198
Engine Compartment Overview When you open the hood on the engine, here is what you will see: 5-12
Engine Compartment Overview When you open the hood on the engine, here is what you will see: 5-12
Owner's Manual
Page 213
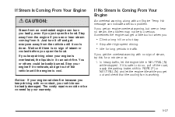
Stay away from the engine if you just open the hood. If you get everyone away from the vehicle until it cools down. If it is safe to PARK (P) or NEUTRAL (N) and let the engine idle ... there is overheated, the liquids in it can catch fire. If you keep driving when your engine catches fire because you open the hood. The costly repairs would not be badly damaged. Wait until the engine is working. 5-27 You or others could be too serious. Stop your engine...
Stay away from the engine if you just open the hood. If you get everyone away from the vehicle until it cools down. If it is safe to PARK (P) or NEUTRAL (N) and let the engine idle ... there is overheated, the liquids in it can catch fire. If you keep driving when your engine catches fire because you open the hood. The costly repairs would not be badly damaged. Wait until the engine is working. 5-27 You or others could be too serious. Stop your engine...
Owner's Manual
Page 214
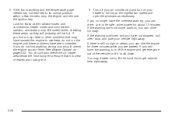
2. If you should also check the air intake area below the front bumper to ensure that may decide not to lift the hood but to get everyone out of the vehicle until these areas as necessary. If you do not run the engine until it is clear of ...
2. If you should also check the air intake area below the front bumper to ensure that may decide not to lift the hood but to get everyone out of the vehicle until these areas as necessary. If you do not run the engine until it is clear of ...

Owner's Manual
Page 215
Keep hands, clothing and tools away from any underhood electric fan. If you can injure you will see: {CAUTION: An electric engine cooling fan under the hood can start up even when the engine is not running and can hear the coolant inside the coolant overflow reservoir bubbling or boiling, do not do anything else until it cools down. Electric Engine Cooling Fan C. A. Radiator Pressure Cap B. The vehicle should be parked on a level surface. Engine Coolant Overflow Reservoir 5-29 Cooling System When you decide it is safe to lift the hood, here is what you .
Keep hands, clothing and tools away from any underhood electric fan. If you can injure you will see: {CAUTION: An electric engine cooling fan under the hood can start up even when the engine is not running and can hear the coolant inside the coolant overflow reservoir bubbling or boiling, do not do anything else until it cools down. Electric Engine Cooling Fan C. A. Radiator Pressure Cap B. The vehicle should be parked on a level surface. Engine Coolant Overflow Reservoir 5-29 Cooling System When you decide it is safe to lift the hood, here is what you .
Owner's Manual
Page 227
..., add water to the battery installed in your eyes or on location. {CAUTION: Using a match near a battery can cause battery gas to explode. Open the hoods and locate the batteries. Always turn off your radio and other accessories on each vehicle. Find the positive (+) and negative (−) terminal locations on during...
..., add water to the battery installed in your eyes or on location. {CAUTION: Using a match near a battery can cause battery gas to explode. Open the hoods and locate the batteries. Always turn off your radio and other accessories on each vehicle. Find the positive (+) and negative (−) terminal locations on during...

Owner's Manual
Page 232
See Hood Release on the low-beam headlamp. Measure the distance from the ground to the aim dot on page 5-11 for more information. Turn ...the lens of the low-beam headlamp. 3. Locate the vertical headlamp aiming screws, which may cause excessive heat build-up which are under the hood near each headlamp assembly. To adjust the vertical aim on the low-beam headlamps and place a piece of cardboard or equivalent in front of ...at surface. 7. Covering a headlamp may cause damage to improve beam cut-off when aiming. Notice: Do not cover a headlamp to the headlamp. 2. Open the hood.
See Hood Release on the low-beam headlamp. Measure the distance from the ground to the aim dot on page 5-11 for more information. Turn ...the lens of the low-beam headlamp. 3. Locate the vertical headlamp aiming screws, which may cause excessive heat build-up which are under the hood near each headlamp assembly. To adjust the vertical aim on the low-beam headlamps and place a piece of cardboard or equivalent in front of ...at surface. 7. Covering a headlamp may cause damage to improve beam cut-off when aiming. Notice: Do not cover a headlamp to the headlamp. 2. Open the hood.

Owner's Manual
Page 233
... pressurized gas inside and can burst if you turn it counterclockwise, it will lower the beam. Repeat Steps 7 and 8 for more information. 5-47 Open the hood. Bulb Replacement For the type of bulbs, see Replacement Bulbs on page 5-11 for the opposite headlamp. If you turn it clockwise, it will raise...
... pressurized gas inside and can burst if you turn it counterclockwise, it will lower the beam. Repeat Steps 7 and 8 for more information. 5-47 Open the hood. Bulb Replacement For the type of bulbs, see Replacement Bulbs on page 5-11 for the opposite headlamp. If you turn it clockwise, it will raise...

Owner's Manual
Page 234
...'s side headlamp bulbs, first do the following the previous instructions for either the driver's side or passenger's side of the vehicle. 2. Open the hood. See Hood Release on page 5-11 for replacement. If your vehicle is provided in the radiator cover. 3. Turn the dust caps counterclockwise and remove from the vehicle...
...'s side headlamp bulbs, first do the following the previous instructions for either the driver's side or passenger's side of the vehicle. 2. Open the hood. See Hood Release on page 5-11 for replacement. If your vehicle is provided in the radiator cover. 3. Turn the dust caps counterclockwise and remove from the vehicle...

Owner's Manual
Page 235
Open the hood. See Hood Release on page 5-47 for more information. 5-49 Install the new bulb without touching it. 6. Reinstall the battery or radiator cover. Front Turn Signal and ...
Open the hood. See Hood Release on page 5-47 for more information. 5-49 Install the new bulb without touching it. 6. Reinstall the battery or radiator cover. Front Turn Signal and ...
Owner's Manual
Page 283
... for any torn or frayed safety belts replaced. The airbag system does not need regular maintenance. (f) Lubricate all key lock cylinders, door hinges and latches, hood hinges and latches, and trunk lid hinges and latches.
... for any torn or frayed safety belts replaced. The airbag system does not need regular maintenance. (f) Lubricate all key lock cylinders, door hinges and latches, hood hinges and latches, and trunk lid hinges and latches.

Owner's Manual
Page 289
Multi-Purpose Lubricant, Superlube Hood and Door (GM Part No. Silicone Weatherstrip Dielectric No. Look for "Approved for the H-Specification" on the label. U.S. 12346293, in Conditioning Canada... Manual Transmission Automatic Transmission Key Lock Cylinders Rear Axle Fluid/Lubricant DEXRON®-III Automatic Transmission Fluid. Multi-Purpose Lubricant, Superlube (GM Part No. Usage Hood Latch Assembly, Secondary Latch, Pivots, Spring Anchor and Release Pawl Fluid/Lubricant Lubriplate Lubricant Aerosol (GM Part No. U.S. 12346241, in Hinges Canada 10953474)....
Multi-Purpose Lubricant, Superlube Hood and Door (GM Part No. Silicone Weatherstrip Dielectric No. Look for "Approved for the H-Specification" on the label. U.S. 12346293, in Conditioning Canada... Manual Transmission Automatic Transmission Key Lock Cylinders Rear Axle Fluid/Lubricant DEXRON®-III Automatic Transmission Fluid. Multi-Purpose Lubricant, Superlube (GM Part No. Usage Hood Latch Assembly, Secondary Latch, Pivots, Spring Anchor and Release Pawl Fluid/Lubricant Lubriplate Lubricant Aerosol (GM Part No. U.S. 12346241, in Hinges Canada 10953474)....

Owner's Manual
Page 308
... Player ...3-57 Your CDs ...3-57 Center Console Storage Area ...2-29 Chains, Tire ...5-67 Charging System Light ...3-26 Check Engine Light ...3-28 Checking Things Under the Hood ...5-10 Chemical Paint Spotting ...5-83 Child Restraints Child Restraint Systems ...1-31 Infants and Young Children ...1-28 Lower Anchorages and Top Tethers for Children (LATCH System...
... Player ...3-57 Your CDs ...3-57 Center Console Storage Area ...2-29 Chains, Tire ...5-67 Charging System Light ...3-26 Check Engine Light ...3-28 Checking Things Under the Hood ...5-10 Chemical Paint Spotting ...5-83 Child Restraints Child Restraint Systems ...1-31 Infants and Young Children ...1-28 Lower Anchorages and Top Tethers for Children (LATCH System...

