Owner's Manual
Page 110
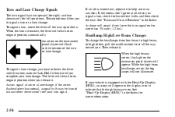
... be burned out and other drivers won't see your vehicle is finished, the lever will not illuminate. If a bulb is burned out, replace it . See "Fuses and Circuit Breakers" in the Index for left) positions. Then release it there until the arrow starts to ... leave the turn signal on at all when you release it to signal a turn signal. 2-50 If the arrows don't go on for burned-out bulbs and then check the fuse. A chime will return to its original position when you signal a turn or lane change , if the arrow flashes faster than...
... be burned out and other drivers won't see your vehicle is finished, the lever will not illuminate. If a bulb is burned out, replace it . See "Fuses and Circuit Breakers" in the Index for left) positions. Then release it there until the arrow starts to ... leave the turn signal on at all when you release it to signal a turn signal. 2-50 If the arrows don't go on for burned-out bulbs and then check the fuse. A chime will return to its original position when you signal a turn or lane change , if the arrow flashes faster than...
Owner's Manual
Page 148
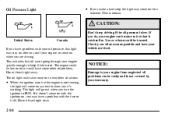
CAUTION: Don't keep it lubricated. United States Canada If you have a problem with the fuse or bulb. The oil light could also come on when you are driving. Check your warranty. D When the ignition is on but the engine is low. This ...
CAUTION: Don't keep it lubricated. United States Canada If you have a problem with the fuse or bulb. The oil light could also come on when you are driving. Check your warranty. D When the ignition is on but the engine is low. This ...
Owner's Manual
Page 222
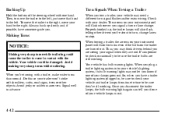
... that hand to come in advance. 4-42 Check with a trailer, make wider turns than normal. Once you disconnect the trailer lamps, the bulb warning lights again can tell you have someone guide you are burned out. Always back up , the trailer lamps will flash for turns even if... the bulbs on your vehicle may need a different turn , change . Properly hooked up slowly and, if possible, have a trailer lighting system plugged in, be ...
... that hand to come in advance. 4-42 Check with a trailer, make wider turns than normal. Once you disconnect the trailer lamps, the bulb warning lights again can tell you have someone guide you are burned out. Always back up , the trailer lamps will flash for turns even if... the bulbs on your vehicle may need a different turn , change . Properly hooked up slowly and, if possible, have a trailer lighting system plugged in, be ...
Owner's Manual
Page 263
... Hood Engine Oil Engine Air Cleaner/Filter Supercharger Oil Automatic Transaxle Fluid Engine Coolant Radiator Pressure Cap Power Steering Fluid Windshield Washer Fluid Brakes Battery Bulb Replacement Windshield Wiper Blade Replacement Tires 66-58 6-58 6-61 6-62 6-64 6-64 6-64 6-65 6-65 6-65 6-66 6-67 6-67 6-68 ... Chemical Paint Spotting GM Vehicle Care/Appearance Materials Vehicle Identification Number (VIN) Service Parts Identification Label Electrical System Replacement Bulbs Capacities and Specifications Air Conditioning Refrigerant Capacity Normal Maintenance Replacement Parts 6-1
... Hood Engine Oil Engine Air Cleaner/Filter Supercharger Oil Automatic Transaxle Fluid Engine Coolant Radiator Pressure Cap Power Steering Fluid Windshield Washer Fluid Brakes Battery Bulb Replacement Windshield Wiper Blade Replacement Tires 66-58 6-58 6-61 6-62 6-64 6-64 6-64 6-65 6-65 6-65 6-66 6-67 6-67 6-68 ... Chemical Paint Spotting GM Vehicle Care/Appearance Materials Vehicle Identification Number (VIN) Service Parts Identification Label Electrical System Replacement Bulbs Capacities and Specifications Air Conditioning Refrigerant Capacity Normal Maintenance Replacement Parts 6-1

Owner's Manual
Page 302
Open the hood. 2. Remove the two bolts from the top of replacement bulb, see "Replacement Bulbs" in this section, contact your dealer. Be sure to read and follow the instructions on the bulb package. 6-40 Headlamps 1. Halogen Bulbs CAUTION: Halogen bulbs have pressurized gas inside and can burst if you drop or scratch the bulb. You or others could be injured. For any bulb changing procedure not listed in the Index. Bulb Replacement For the proper type of the headlamp assembly.
Open the hood. 2. Remove the two bolts from the top of replacement bulb, see "Replacement Bulbs" in this section, contact your dealer. Be sure to read and follow the instructions on the bulb package. 6-40 Headlamps 1. Halogen Bulbs CAUTION: Halogen bulbs have pressurized gas inside and can burst if you drop or scratch the bulb. You or others could be injured. For any bulb changing procedure not listed in the Index. Bulb Replacement For the proper type of the headlamp assembly.
Owner's Manual
Page 304
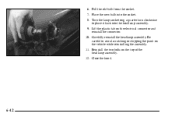
Place the new bulb into the headlamp assembly. 9. Close the hood. 6-42 Turn the lamp socket ring a quarter turn clockwise to avoid scratching or chipping the paint on the vehicle while reinstalling the assembly. 11. Carefully reinstall the headlamp assembly. 6. Reinstall the two bolts on the electrical connector and reinstall the connector. 10. Lift the plastic tab on the top of the headlamp assembly. 12. Be careful to place it back into the socket. 8. Pull the old bulb from the socket. 7.
Place the new bulb into the headlamp assembly. 9. Close the hood. 6-42 Turn the lamp socket ring a quarter turn clockwise to avoid scratching or chipping the paint on the vehicle while reinstalling the assembly. 11. Carefully reinstall the headlamp assembly. 6. Reinstall the two bolts on the electrical connector and reinstall the connector. 10. Lift the plastic tab on the top of the headlamp assembly. 12. Be careful to place it back into the socket. 8. Pull the old bulb from the socket. 7.

Owner's Manual
Page 305
... beam may be adjusted by using aim tips located on the vehicle while removing it is recommended that you (for assistance. Turn the front sidemarker bulb socket a quarter turn counterclockwise to be necessary if it is damaged in an accident, the headlamp aim may be re-aimed, it . 4. If your vehicle...
... beam may be adjusted by using aim tips located on the vehicle while removing it is recommended that you (for assistance. Turn the front sidemarker bulb socket a quarter turn counterclockwise to be necessary if it is damaged in an accident, the headlamp aim may be re-aimed, it . 4. If your vehicle...

Owner's Manual
Page 306
Remove the old bulb from the socket. 6. Be careful to reinstall it. 8. Reinstall the two bolts on the vehicle. 9. Reach through the access opening in the trunk and remove the slotted vent by squeezing the ends and pulling down. 6-44 Center High-Mounted Stoplamp (CHMSL) 1. Turn the bulb socket a quarter turn clockwise to avoid scratching or chipping the paint on the top of the headlamp assembly. 10. Carefully reinstall the headlamp assembly. Open the trunk. 5. Close the hood. 2. Place the new bulb into the socket. 7.
Remove the old bulb from the socket. 6. Be careful to reinstall it. 8. Reinstall the two bolts on the vehicle. 9. Reach through the access opening in the trunk and remove the slotted vent by squeezing the ends and pulling down. 6-44 Center High-Mounted Stoplamp (CHMSL) 1. Turn the bulb socket a quarter turn clockwise to avoid scratching or chipping the paint on the top of the headlamp assembly. 10. Carefully reinstall the headlamp assembly. Open the trunk. 5. Close the hood. 2. Place the new bulb into the socket. 7.

Owner's Manual
Page 307
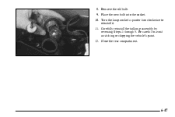
Turn the bulb a quarter turn counterclockwise. 4. Back-Up, Tail Lamp and Rear Sidemarker 1. Unhook the convenience net (if equipped) and remove it a quarter turn clockwise. Reinstall the vent. 6. Remove the upper trunk trim hook and the two plastic wing nuts from the rear of the trunk. 5. Open the trunk. 2. Place the new bulb into the bulb socket. 5. Pull the trunk trim carpeting away from the taillamp. 6-45 Remove old the bulb by turning it . 3. Unscrew the upper convenience net hook attachment. 4. Close the trunk. 3.
Turn the bulb a quarter turn counterclockwise. 4. Back-Up, Tail Lamp and Rear Sidemarker 1. Unhook the convenience net (if equipped) and remove it a quarter turn clockwise. Reinstall the vent. 6. Remove the upper trunk trim hook and the two plastic wing nuts from the rear of the trunk. 5. Open the trunk. 2. Place the new bulb into the bulb socket. 5. Pull the trunk trim carpeting away from the taillamp. 6-45 Remove old the bulb by turning it . 3. Unscrew the upper convenience net hook attachment. 4. Close the trunk. 3.
Owner's Manual
Page 309
Carefully reinstall the taillamp assembly by reversing Steps 1 through 5. Be careful to reinstall it. 11. Turn the lamp socket a quarter turn clockwise to avoid scratching or chipping the vehicle's paint. 12. Close the rear compartment. 6-47 Place the new bulb into the socket. 10. Remove the old bulb. 9. 8.
Carefully reinstall the taillamp assembly by reversing Steps 1 through 5. Be careful to reinstall it. 11. Turn the lamp socket a quarter turn clockwise to avoid scratching or chipping the vehicle's paint. 12. Close the rear compartment. 6-47 Place the new bulb into the socket. 10. Remove the old bulb. 9. 8.
Owner's Manual
Page 336
... 16 17 Description Cooling Fan Cooling Fan 2 Ignition Main Cooling Fan 1 Air Conditioning Clutch Fuel Pump Spare Horn Fog Lamp Replacement Bulbs For any bulb not listed here, contact your dealer. Lamps Bulb Number Back-Up ...3057 Center High-Mounted Stop (CHMSL) ...1141 Front Parking/Turn Signal ...3357A Headlamps High/Low Beam ...9007...
... 16 17 Description Cooling Fan Cooling Fan 2 Ignition Main Cooling Fan 1 Air Conditioning Clutch Fuel Pump Spare Horn Fog Lamp Replacement Bulbs For any bulb not listed here, contact your dealer. Lamps Bulb Number Back-Up ...3057 Center High-Mounted Stop (CHMSL) ...1141 Front Parking/Turn Signal ...3357A Headlamps High/Low Beam ...9007...


