Owner's Manual
Page 7
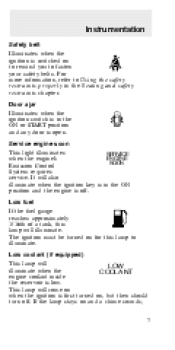
... SERVICE ENGINE when the engine's SOON Emission Control System requires service. If the lamp stays on for this lamp will also illuminate when the ignition key is off .
... SERVICE ENGINE when the engine's SOON Emission Control System requires service. If the lamp stays on for this lamp will also illuminate when the ignition key is off .
Owner's Manual
Page 9
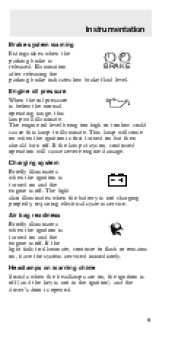
... off . Illumination BRAKE after releasing the parking brake indicates low brake fluid level. If the lamp stays on and the engine is off (and the key is not in the ignition) and the driver's door is off . Air bag readiness Briefly illuminates when the ignition is released.
... off . Illumination BRAKE after releasing the parking brake indicates low brake fluid level. If the lamp stays on and the engine is off (and the key is not in the ignition) and the driver's door is off . Air bag readiness Briefly illuminates when the ignition is released.
Owner's Manual
Page 10
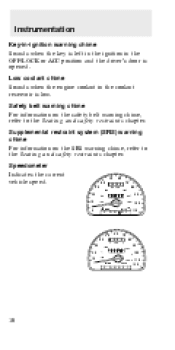
.../h P R N D 2 1 10 Safety belt warning chime For information on the SRS warning chime, refer to the Seating and safety restraints chapter. Instrumentation Key-in-ignition warning chime Sounds when the key is left in the ignition in the coolant reservoir is opened. Supplemental restraint system (SRS) warning chime For information on the safety...
.../h P R N D 2 1 10 Safety belt warning chime For information on the SRS warning chime, refer to the Seating and safety restraints chapter. Instrumentation Key-in-ignition warning chime Sounds when the key is left in the ignition in the coolant reservoir is opened. Supplemental restraint system (SRS) warning chime For information on the safety...
Owner's Manual
Page 12
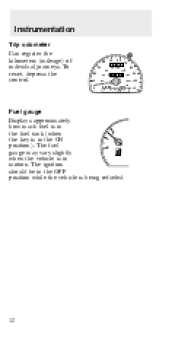
The fuel E gauge may vary slightly when the vehicle is in the ON position). To reset, depress the control. 40 30 60 50 60 0 1 2 2 70 80 100 120 80 140 160 20 10 0 40 20 0 00013 90 100 110 0 MPH km/h180 D P R N D 1 Fuel gauge Displays approximately how much fuel is in F the fuel tank (when the key is being refueled. 12 The ignition should be in the OFF position while the vehicle is in motion. Instrumentation Trip odometer Can register the kilometers (mileage) of individual journeys.
The fuel E gauge may vary slightly when the vehicle is in the ON position). To reset, depress the control. 40 30 60 50 60 0 1 2 2 70 80 100 120 80 140 160 20 10 0 40 20 0 00013 90 100 110 0 MPH km/h180 D P R N D 1 Fuel gauge Displays approximately how much fuel is in F the fuel tank (when the key is being refueled. 12 The ignition should be in the OFF position while the vehicle is in motion. Instrumentation Trip odometer Can register the kilometers (mileage) of individual journeys.
Owner's Manual
Page 13
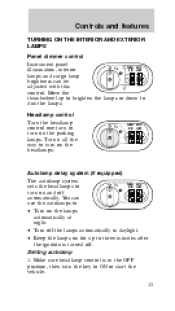
... use the autolamps to: • Turn on the lamps automatically at night. • Turn off the lamps automatically in the OFF position, then turn the key to turn on the parking lamps. P PANEL AUTO DIM LAMP Autolamp delay system (if equipped) The autolamp system PANEL AUTO P DIM LAMP sets the headlamps...
... use the autolamps to: • Turn on the lamps automatically at night. • Turn off the lamps automatically in the OFF position, then turn the key to turn on the parking lamps. P PANEL AUTO DIM LAMP Autolamp delay system (if equipped) The autolamp system PANEL AUTO P DIM LAMP sets the headlamps...
Owner's Manual
Page 21
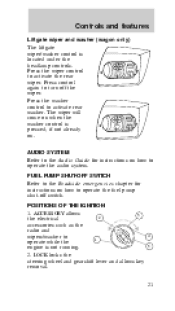
LOCK locks the steering wheel and gearshift lever and allows key removal. 4 5 21 POSITIONS OF THE IGNITION 1. The wiper will come on when the washer control is located under the headlamp controls. Controls and features Liftgate ...
LOCK locks the steering wheel and gearshift lever and allows key removal. 4 5 21 POSITIONS OF THE IGNITION 1. The wiper will come on when the washer control is located under the headlamp controls. Controls and features Liftgate ...

Owner's Manual
Page 22
... CONTROL To turn off the ignition and accessories and allows the gearshift and steering wheel to ON when running . 5. ON tests the warning lights. The key must return to move. 4. ON RESUME SET ACCEL OFF COAST Do not use the cruise control in heavy traffic or winding, slippery or unpaved roads...
... CONTROL To turn off the ignition and accessories and allows the gearshift and steering wheel to ON when running . 5. ON tests the warning lights. The key must return to move. 4. ON RESUME SET ACCEL OFF COAST Do not use the cruise control in heavy traffic or winding, slippery or unpaved roads...
Owner's Manual
Page 30
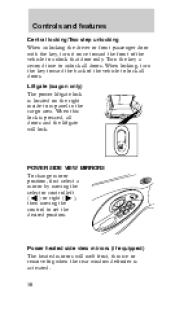
... power liftgate lock is activated. 30 Controls and features Central locking/Two step unlocking When unlocking the driver or front passenger door with the key, turn the key toward the front of the vehicle to set the desired position. When this lock is pressed, all doors and the liftgate will melt frost..., thin ice or remove fog when the rear window defroster is located on the right inside trim panel in the cargo area. Turn the key a second time to unlock that door only.
... power liftgate lock is activated. 30 Controls and features Central locking/Two step unlocking When unlocking the driver or front passenger door with the key, turn the key toward the front of the vehicle to set the desired position. When this lock is pressed, all doors and the liftgate will melt frost..., thin ice or remove fog when the rear window defroster is located on the right inside trim panel in the cargo area. Turn the key a second time to unlock that door only.

Owner's Manual
Page 34
... wheel. it does not lock automatically. The window can open the entire liftgate or just the liftgate window. You must lock the liftgate with the key or power lock control; Controls and features OPENING THE TRUNK WITH REMOTE CONTROL (IF EQUIPPED) Press the remote release control on the instrument panel to...
... wheel. it does not lock automatically. The window can open the entire liftgate or just the liftgate window. You must lock the liftgate with the key or power lock control; Controls and features OPENING THE TRUNK WITH REMOTE CONTROL (IF EQUIPPED) Press the remote release control on the instrument panel to...
Owner's Manual
Page 37
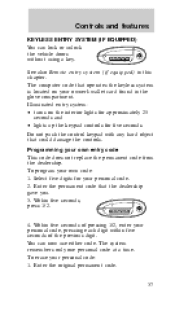
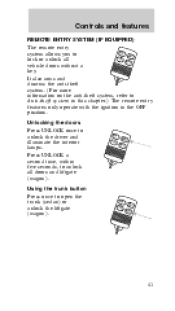
.... 37 Controls and features KEYLESS ENTRY SYSTEM (IF EQUIPPED) You can now use either code. You can lock or unlock the vehicle doors without using a key. 1 2 3 4 5 6 7 8 9 0 See also Remote entry system (if equipped) in the glove compartment. To program your owner's wallet card found in this chapter. The computer code that...
.... 37 Controls and features KEYLESS ENTRY SYSTEM (IF EQUIPPED) You can now use either code. You can lock or unlock the vehicle doors without using a key. 1 2 3 4 5 6 7 8 9 0 See also Remote entry system (if equipped) in the glove compartment. To program your owner's wallet card found in this chapter. The computer code that...
Owner's Manual
Page 38
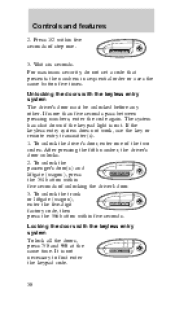
... between pressing numbers, enter the code again. Press 1/2 within five seconds of the two codes. If the keyless entry system does not work, use the key or remote entry transmitter(s). 1. To unlock the driver's door, enter one of step one. 1 2 3 4 5 6 7 8 9 0 3. Wait six seconds. To unlock the passenger's door(s) and liftgate (wagon...
... between pressing numbers, enter the code again. Press 1/2 within five seconds of the two codes. If the keyless entry system does not work, use the key or remote entry transmitter(s). 1. To unlock the driver's door, enter one of step one. 1 2 3 4 5 6 7 8 9 0 3. Wait six seconds. To unlock the passenger's door(s) and liftgate (wagon...
Owner's Manual
Page 39
... • the brake pedal is opened and then all vehicle doors are closed for more details. All doors must be fully closed • the ignition key is pressed • you may not lock automatically if the driver: • shifts through gears without pressing the brake • shifts through R (reverse) • one...
... • the brake pedal is opened and then all vehicle doors are closed for more details. All doors must be fully closed • the ignition key is pressed • you may not lock automatically if the driver: • shifts through gears without pressing the brake • shifts through R (reverse) • one...
Owner's Manual
Page 40
.... 5. If not, wait 30 seconds and repeat steps one short chirp followed by this method: 1. Turn the ignition key back to OFF. 12. Press the door power lock switch. 10. Turn the ignition key to ON within 30 seconds of step two. 7. To reactivate the system, repeat the system deactivating instructions. Press...
.... 5. If not, wait 30 seconds and repeat steps one short chirp followed by this method: 1. Turn the ignition key back to OFF. 12. Press the door power lock switch. 10. Turn the ignition key to ON within 30 seconds of step two. 7. To reactivate the system, repeat the system deactivating instructions. Press...
Owner's Manual
Page 41
... LOC K IC TRU NK LOC PAN K UN LOC K IC TRU NK 41 Press UNLOCK a second time, within five seconds, to unlock all vehicle doors without a key. It also arms and disarms the anti-theft system. (For more information on the anti-theft system, refer to Anti-theft system in this chapter...
... LOC K IC TRU NK LOC PAN K UN LOC K IC TRU NK 41 Press UNLOCK a second time, within five seconds, to unlock all vehicle doors without a key. It also arms and disarms the anti-theft system. (For more information on the anti-theft system, refer to Anti-theft system in this chapter...
Owner's Manual
Page 44
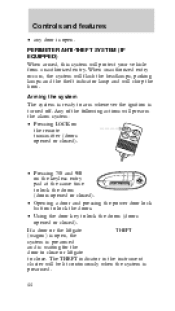
... lock the doors (doors opened or closed). • Opening a door and pressing the power door lock button to lock the doors. • Using the door key to lock the doors (doors opened or closed ). LOC K PAN UN LOC K IC TRU NK • Pressing 7/8 and 9/0 on the remote transmitter (doors opened or...
... lock the doors (doors opened or closed). • Opening a door and pressing the power door lock button to lock the doors. • Using the door key to lock the doors (doors opened or closed ). LOC K PAN UN LOC K IC TRU NK • Pressing 7/8 and 9/0 on the remote transmitter (doors opened or...
Owner's Manual
Page 45
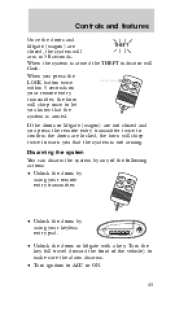
... travel (toward the front of the following actions: • Unlock the doors by using your keyless entry pad. 1 2 3 4 5 6 7 8 9 0 • Unlock the doors or liftgate with a key. When the system is armed the THEFT indicator will chirp once to let you know that the system is armed. LOC K PAN UN LOC K IC...
... travel (toward the front of the following actions: • Unlock the doors by using your keyless entry pad. 1 2 3 4 5 6 7 8 9 0 • Unlock the doors or liftgate with a key. When the system is armed the THEFT indicator will chirp once to let you know that the system is armed. LOC K PAN UN LOC K IC...
Owner's Manual
Page 46
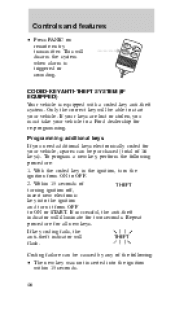
... the ignition within 15 seconds. 46 Repeat procedure for two seconds. If your keys are lost or stolen, you need additional keys electronically coded for re-programming. With the coded key in the ignition, turn it from ON to a Ford dealership for your vehicle, spares can be...of the following procedure: 1. Coding failure can be caused by any of 16 keys). Programming additional keys If you must take your vehicle. Only the correct key will flash. This will illuminate for all new keys. If successful, the anti-theft indicator will disarm the system when alarm is ...
... the ignition within 15 seconds. 46 Repeat procedure for two seconds. If your keys are lost or stolen, you need additional keys electronically coded for re-programming. With the coded key in the ignition, turn it from ON to a Ford dealership for your vehicle, spares can be...of the following procedure: 1. Coding failure can be caused by any of 16 keys). Programming additional keys If you must take your vehicle. Only the correct key will flash. This will illuminate for all new keys. If successful, the anti-theft indicator will disarm the system when alarm is ...

Owner's Manual
Page 47
Controls and features • 16 keys have already been programmed. • The new key does not have an electronic code. 47
Controls and features • 16 keys have already been programmed. • The new key does not have an electronic code. 47

Owner's Manual
Page 51
... notches, then lift the remote latch release and push the seat down until it latches. Seating and safety restraints 1. Unlock the floor panel with the key, then use the handle to fold the floor panel toward the front of the compartment and fold the remaining floor panel until it latches. The...
... notches, then lift the remote latch release and push the seat down until it latches. Seating and safety restraints 1. Unlock the floor panel with the key, then use the handle to fold the floor panel toward the front of the compartment and fold the remaining floor panel until it latches. The...

Owner's Manual
Page 56
... front seating position (if equipped) and center rear seating position (wagon) do not adjust automatically. Pull the connecting pin into the narrow end of the key slot until it is securely fastened to the lap belt, pull the shoulder belt out from the retractor in the center rear seating position (wagon... in use. Do not wear the lap belt around your waist. You must adjust them to tighten the belt, pull the loose end of the key slot on the shoulder belt. If you need to fit snugly and low as possible around your waist. 56 LAP BELTS The lap belt in...
... front seating position (if equipped) and center rear seating position (wagon) do not adjust automatically. Pull the connecting pin into the narrow end of the key slot until it is securely fastened to the lap belt, pull the shoulder belt out from the retractor in the center rear seating position (wagon... in use. Do not wear the lap belt around your waist. You must adjust them to tighten the belt, pull the loose end of the key slot on the shoulder belt. If you need to fit snugly and low as possible around your waist. 56 LAP BELTS The lap belt in...


