Owner's Manual
Page 23
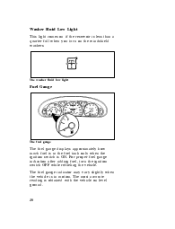
Washer Fluid Low Light This light comes on if the reservoir is less than a quarter full when you turn the ignition switch OFF while refueling the vehicle. The fuel gauge indicator may vary slightly when the vehicle is in the fuel tank only when the ignition switch is ON. The most accurate reading is in motion. For proper fuel gauge indication after adding fuel, turn on level ground. 20 The washer fluid low light Fuel Gauge The fuel gauge The fuel gauge displays approximately how much fuel is obtained with the vehicle on the windshield washers.
Washer Fluid Low Light This light comes on if the reservoir is less than a quarter full when you turn the ignition switch OFF while refueling the vehicle. The fuel gauge indicator may vary slightly when the vehicle is in the fuel tank only when the ignition switch is ON. The most accurate reading is in motion. For proper fuel gauge indication after adding fuel, turn on level ground. 20 The washer fluid low light Fuel Gauge The fuel gauge The fuel gauge displays approximately how much fuel is obtained with the vehicle on the windshield washers.

Owner's Manual
Page 24
... at its proper level or mixture, the gauge indication will not be accurate. The engine coolant temperature gauge 21 The pointer moves from the ignition switch ON position. With ignition switch OFF, the fuel gauge indicator may cause engine damage. If the coolant is overheating and continued operation may drift from the C (cold) mark...
... at its proper level or mixture, the gauge indication will not be accurate. The engine coolant temperature gauge 21 The pointer moves from the ignition switch ON position. With ignition switch OFF, the fuel gauge indicator may cause engine damage. If the coolant is overheating and continued operation may drift from the C (cold) mark...
Owner's Manual
Page 28
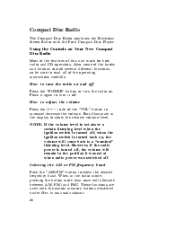
... Push the "AM/FM" button to show the relative volume level. Press it again to turn it was set above a certain listening level when the ignition switch is turned off Press the "POWER" button to turn the radio on . How to turn the radio on and off , when the... ignition switch is set at when radio power was switched off , the volume will remain in the radio mode, pushing the button more than once will come back to a "nominal" listening level...
... Push the "AM/FM" button to show the relative volume level. Press it again to turn it was set above a certain listening level when the ignition switch is turned off Press the "POWER" button to turn the radio on . How to turn the radio on and off , when the... ignition switch is set at when radio power was switched off , the volume will remain in the radio mode, pushing the button more than once will come back to a "nominal" listening level...
Owner's Manual
Page 39
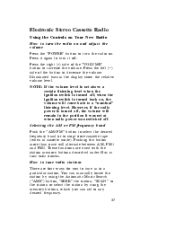
... side of the button to any desired frequency. 37 NOTE: If the volume level is set above a certain listening level when the ignition switch is turned off, when the ignition switch is turned off, the volume will alternate between AM, FM1 and FM2. Selecting the AM or FM frequency band Push the "AM/...by using the memory buttons, which you to tune in cassette mode). Press the left ( ) side of the "VOLUME" button to turn it was switched off . However, if the radio power is turned back on . How to tune radio stations There are used with the station memory buttons described under...
... side of the button to any desired frequency. 37 NOTE: If the volume level is set above a certain listening level when the ignition switch is turned off, when the ignition switch is turned off, the volume will alternate between AM, FM1 and FM2. Selecting the AM or FM frequency band Push the "AM/...by using the memory buttons, which you to tune in cassette mode). Press the left ( ) side of the "VOLUME" button to turn it was switched off . However, if the radio power is turned back on . How to tune radio stations There are used with the station memory buttons described under...
Owner's Manual
Page 48
... relative volume level. NOTE: If the volume level is set at when radio power was set above a certain listening level when the ignition switch is turned off, when the ignition switch is turned off, the volume will alternate between AM, FM1 and FM2. Pushing the button more than once will remain in the display...
... relative volume level. NOTE: If the volume level is set at when radio power was set above a certain listening level when the ignition switch is turned off, when the ignition switch is turned off, the volume will alternate between AM, FM1 and FM2. Pushing the button more than once will remain in the display...

Owner's Manual
Page 74
Clock The digital clock 1. To set the minutes, press and hold the H button. When the desired minute appears, release the button. 2. The trunk release button located under your console armrest to unlock and open the trunk. When the desired hour appears, release the button. To set the hour, press and hold the M button. Using the Remote Control for the Trunk (If equipped) With the ignition switch in the ON or ACC position, you can use the remote control under the armrest 72
Clock The digital clock 1. To set the minutes, press and hold the H button. When the desired minute appears, release the button. 2. The trunk release button located under your console armrest to unlock and open the trunk. When the desired hour appears, release the button. To set the hour, press and hold the M button. Using the Remote Control for the Trunk (If equipped) With the ignition switch in the ON or ACC position, you can use the remote control under the armrest 72

Owner's Manual
Page 83
To Turn Speed Control On u Press ON To Set a Speed Press SET ACCEL. If you drive up or down a steep hill, your vehicle speed may vary momentarily slower or faster than 30 mph (48 km/h). For speed control to operate, the speed control must be ON and the vehicle speed must be erased. This is switched off the vehicle ignition. Speed Control (If equipped) The speed control switches on the steering wheel To Turn Speed Control Off u Press OFF, OR u Turn off , the previously programmed set speed will be greater than the set speed. Once speed control is normal. 81
To Turn Speed Control On u Press ON To Set a Speed Press SET ACCEL. If you drive up or down a steep hill, your vehicle speed may vary momentarily slower or faster than 30 mph (48 km/h). For speed control to operate, the speed control must be ON and the vehicle speed must be erased. This is switched off the vehicle ignition. Speed Control (If equipped) The speed control switches on the steering wheel To Turn Speed Control Off u Press OFF, OR u Turn off , the previously programmed set speed will be greater than the set speed. Once speed control is normal. 81
Owner's Manual
Page 94
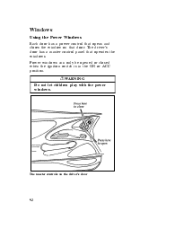
RWARNING Do not let children play with the power windows. The driver's door has a master control panel that door. Windows Using the Power Windows Each door has a power control that opens and closes the window on the driver's door 92 The master controls on that operates the windows. Power windows can only be opened or closed when the ignition switch is in the ON or ACC position.
RWARNING Do not let children play with the power windows. The driver's door has a master control panel that door. Windows Using the Power Windows Each door has a power control that opens and closes the window on the driver's door 92 The master controls on that operates the windows. Power windows can only be opened or closed when the ignition switch is in the ON or ACC position.
Owner's Manual
Page 99
Lock the doors by using the power door lock switch or by pressing the remote entry transmitter LOCK control. NOTE: Be sure ... for approximately 30 seconds and then go out. At this point, the anti-theft system automatically monitors the ignition keylock cylinder. If not, the alarm indicator light will then remain on steadily for approximately 30 seconds after... the last door is closed to arm the system. Remove the key from the ignition. Arming the system To arm the system, do the following steps in sequence: 1. The hood must be closed...
Lock the doors by using the power door lock switch or by pressing the remote entry transmitter LOCK control. NOTE: Be sure ... for approximately 30 seconds and then go out. At this point, the anti-theft system automatically monitors the ignition keylock cylinder. If not, the alarm indicator light will then remain on steadily for approximately 30 seconds after... the last door is closed to arm the system. Remove the key from the ignition. Arming the system To arm the system, do the following steps in sequence: 1. The hood must be closed...
Owner's Manual
Page 100
... trunk with your key without disarming the system first (see previous paragraphs) u the trunk lock cylinder is forcibly removed from ignition. It may not work with the key (turn the ignition switch to ON or ACC Triggering the Alarm System The armed system will come on the remote entry transmitter all of travel...
... trunk with your key without disarming the system first (see previous paragraphs) u the trunk lock cylinder is forcibly removed from ignition. It may not work with the key (turn the ignition switch to ON or ACC Triggering the Alarm System The armed system will come on the remote entry transmitter all of travel...
Owner's Manual
Page 148
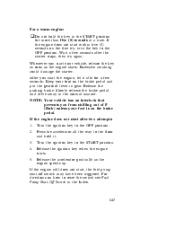
... the accelerator gradually as the engine starts. For directions on the first try again. Whenever you start the engine, let it . Turn the ignition key to the OFF position. If the engine still does not start within five (5) seconds on how to the floor and hold the key ...pedal and put the gearshift lever in the START position for a few seconds after two attempts: 1. 2. 3. 4. 5. Release the ignition key when the engine starts. Press the accelerator all the way to reset the switch see Fuel Pump Shut-Off Switch in the normal manner. Release the parking brake. Wait a few seconds.
... the accelerator gradually as the engine starts. For directions on the first try again. Whenever you start the engine, let it . Turn the ignition key to the OFF position. If the engine still does not start within five (5) seconds on how to the floor and hold the key ...pedal and put the gearshift lever in the START position for a few seconds after two attempts: 1. 2. 3. 4. 5. Release the ignition key when the engine starts. Press the accelerator all the way to reset the switch see Fuel Pump Shut-Off Switch in the normal manner. Release the parking brake. Wait a few seconds.
Owner's Manual
Page 182
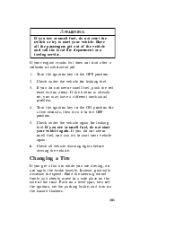
... smell fuel, push the red reset button down. Park on a level spot, turn off the ignition, set , you are driving, do not reset the switch or try to a safe place on the hazard flashers. 181 Turn the ignition key to the OFF position. Check under the vehicle again for leaking fuel. Check under... not start after a collision or substantial jolt: 1. 2. 3. If the button is already set the parking brake, and turn it to the OFF position. Turn the ignition key to the ON position for leaking fuel.
... smell fuel, push the red reset button down. Park on a level spot, turn off the ignition, set , you are driving, do not reset the switch or try to a safe place on the hazard flashers. 181 Turn the ignition key to the OFF position. Check under the vehicle again for leaking fuel. Check under... not start after a collision or substantial jolt: 1. 2. 3. If the button is already set the parking brake, and turn it to the OFF position. Turn the ignition key to the ON position for leaking fuel.
Owner's Manual
Page 194
... vehicle. You will damage your starting system, so you attach the jumper cables. Make sure the vehicles do not touch each other. Check all other switches and lights in both vehicles to prevent possible damage to use a 12-volt jumper system. Turn on the fan helps protect the electrical system from...: also see label on both vehicles and stay clear of the engine cooling fan and other moving parts. Your vehicle has a 12-volt starting motor, ignition system, and other electrical parts if you connect them to the hood of the disabled vehicle.
... vehicle. You will damage your starting system, so you attach the jumper cables. Make sure the vehicles do not touch each other. Check all other switches and lights in both vehicles to prevent possible damage to use a 12-volt jumper system. Turn on the fan helps protect the electrical system from...: also see label on both vehicles and stay clear of the engine cooling fan and other moving parts. Your vehicle has a 12-volt starting motor, ignition system, and other electrical parts if you connect them to the hood of the disabled vehicle.
Warranty Guide 1st Printing
Page 13
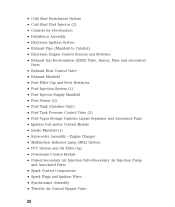
...; Cold Start Enrichment System • Cold Start Fuel Injector (1) • Controls for Deceleration • Distributor Assembly • Electronic Ignition System • Exhaust Pipe (Manifold to Catalyst) • Electronic Engine Control Sensors and Switches • Exhaust Gas Recirculation (EGR) Valve, Spacer, Plate and Associated Parts • Exhaust Heat Control Valve • Exhaust Manifold...
...; Cold Start Enrichment System • Cold Start Fuel Injector (1) • Controls for Deceleration • Distributor Assembly • Electronic Ignition System • Exhaust Pipe (Manifold to Catalyst) • Electronic Engine Control Sensors and Switches • Exhaust Gas Recirculation (EGR) Valve, Spacer, Plate and Associated Parts • Exhaust Heat Control Valve • Exhaust Manifold...
Warranty Guide 1st Printing
Page 20
... Pulsed Secondary Air Injection Valve/Secondary Air Injection Pump and Associated Parts • Spark Control Components • Spark Plugs and Ignition Wires • Synchronizer Assembly • Throttle Air Control Bypass Valve 20 • Cold Start Enrichment System • Cold ...Start Fuel Injector (2) • Controls for Deceleration • Distributor Assembly • Electronic Ignition System • Exhaust Pipe (Manifold to Catalyst) • Electronic Engine Control Sensors and Switches • Exhaust Gas Recirculation (EGR) Valve, Spacer, Plate and Associated Parts • ...
... Pulsed Secondary Air Injection Valve/Secondary Air Injection Pump and Associated Parts • Spark Control Components • Spark Plugs and Ignition Wires • Synchronizer Assembly • Throttle Air Control Bypass Valve 20 • Cold Start Enrichment System • Cold ...Start Fuel Injector (2) • Controls for Deceleration • Distributor Assembly • Electronic Ignition System • Exhaust Pipe (Manifold to Catalyst) • Electronic Engine Control Sensors and Switches • Exhaust Gas Recirculation (EGR) Valve, Spacer, Plate and Associated Parts • ...


