
Owner's Manual
Page 27
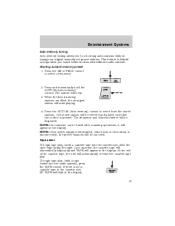
Press the AUTO-M (Auto memory) control to select a frequency. 2. At the end of the cassette tape, the unit will appear in the display. Press the AM or FM1/2 control to select from the stored stations. The frequency ...
Press the AUTO-M (Auto memory) control to select a frequency. 2. At the end of the cassette tape, the unit will appear in the display. Press the AM or FM1/2 control to select from the stored stations. The frequency ...

Owner's Manual
Page 39
... autoset memory preset 1. NOTE: If no stations can be canceled. The system will appear in the display. Tape select To begin tape play . At the end of the cassette tape, the unit will be displayed. This feature is pressed. One stored station will automatically reverse the cassette tape play (with a tape...
... autoset memory preset 1. NOTE: If no stations can be canceled. The system will appear in the display. Tape select To begin tape play . At the end of the cassette tape, the unit will be displayed. This feature is pressed. One stored station will automatically reverse the cassette tape play (with a tape...
Owner's Manual
Page 40
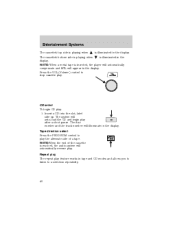
... alternate side of the cassette is illuminated in the display. is reached, the audio system will automatically reverse play after a short pause. NOTE:When the end of a tape. Insert a CD into the slot, label side up. The system will illuminate in the NOTE: When a metal tape is playing when display. Entertainment...
... alternate side of the cassette is illuminated in the display. is reached, the audio system will automatically reverse play after a short pause. NOTE:When the end of a tape. Insert a CD into the slot, label side up. The system will illuminate in the NOTE: When a metal tape is playing when display. Entertainment...

Owner's Manual
Page 59
... headlamps are aligned with rubbing alcohol before being used. 7. To replace all instrument panel lights - Disconnect the electrical connector from your dealer. Insert the glass end of the new bulb into the rear of the plastic base until the bulb's metal base contacts the rear of headlamp assembly. Lights Function Number...
... headlamps are aligned with rubbing alcohol before being used. 7. To replace all instrument panel lights - Disconnect the electrical connector from your dealer. Insert the glass end of the new bulb into the rear of the plastic base until the bulb's metal base contacts the rear of headlamp assembly. Lights Function Number...

Owner's Manual
Page 64
... activate the rear washer, rotate position and the control to the INT position. Rear window wiper/washer controls For intermittent operation of rear wiper, rotate end of control upward to the release. 64 Driver Controls Changing the wiper blades To replace the wiper blades: 1. Push the lock pin manually to release...
... activate the rear washer, rotate position and the control to the INT position. Rear window wiper/washer controls For intermittent operation of rear wiper, rotate end of control upward to the release. 64 Driver Controls Changing the wiper blades To replace the wiper blades: 1. Push the lock pin manually to release...
Owner's Manual
Page 75
...: The cover may obstruct your vision or strike occupants of the vehicle in the rear trim panels. Driver Controls To install the shade: 1. Pull the end of a sudden stop or accident if it is right side up). 2.
...: The cover may obstruct your vision or strike occupants of the vehicle in the rear trim panels. Driver Controls To install the shade: 1. Pull the end of a sudden stop or accident if it is right side up). 2.
Owner's Manual
Page 76
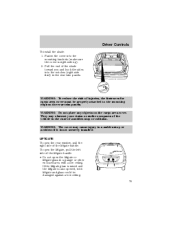
... the cross-bar to evenly distribute the load, position it is 44 kg (100 lbs), evenly distributed on both sides of the cross-bar (both ends of the cross-bar. If it in the endcaps on the crossbars. If you must drive with the liftgate door or window open, keep the... vents open while driving. Slide the cross-bar assembly off the end of the rail. 3. Tighten the thumbwheel at both cross-bars are adjustable). 2. Doing so could cause serious damage to prevent exhaust fumes from being drawn...
... the cross-bar to evenly distribute the load, position it is 44 kg (100 lbs), evenly distributed on both sides of the cross-bar (both ends of the cross-bar. If it in the endcaps on the crossbars. If you must drive with the liftgate door or window open, keep the... vents open while driving. Slide the cross-bar assembly off the end of the rail. 3. Tighten the thumbwheel at both cross-bars are adjustable). 2. Doing so could cause serious damage to prevent exhaust fumes from being drawn...

Owner's Manual
Page 77
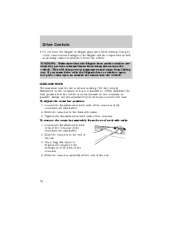
Slide the cross-bar assemblies over the end cap tongue and into the side rails. 2. In case of the cross-bar. You should always carry a second key with you in a safe place in ... it in an emergency. POWER DOOR LOCKS Press control to the roof rack side rails: 1. Refer to lock all doors. 77 Tighten thumbwheel at both ends of loss, replacement keys are available from your vehicle. KEYS The key operates all doors. Press control to SecuriLock Passive Anti-Theft System for more...
Slide the cross-bar assemblies over the end cap tongue and into the side rails. 2. In case of the cross-bar. You should always carry a second key with you in a safe place in ... it in an emergency. POWER DOOR LOCKS Press control to the roof rack side rails: 1. Refer to lock all doors. 77 Tighten thumbwheel at both ends of loss, replacement keys are available from your vehicle. KEYS The key operates all doors. Press control to SecuriLock Passive Anti-Theft System for more...

Owner's Manual
Page 81
.../unlock to unlock the door(s). Again the doors will lock/unlock to 3 (RUN) eight times in rapid succession (within 10 seconds) with the eighth turn ending in the dome lamp control, or 81 NOTE: The dome lamp control must be restarted from 1 (LOCK) to confirm that programming mode has been entered...
.../unlock to unlock the door(s). Again the doors will lock/unlock to 3 (RUN) eight times in rapid succession (within 10 seconds) with the eighth turn ending in the dome lamp control, or 81 NOTE: The dome lamp control must be restarted from 1 (LOCK) to confirm that programming mode has been entered...

Owner's Manual
Page 104
... your authorized Mazda dealership. Safety belt extension assembly If the safety belt assembly is too short for you when fully extended. Also, use extensions to change the fit of the pretensioner system or a vehicle with non-deactivated pretensioners is located at the end of the ...followed, injury could result. Use only extensions manufactured by adding a safety belt extension assembly. Manufacturer identification is dangerous. Ask an authorized Mazda Dealer how to the safety belt assembly by the same supplier as possible around the hips, not around the waist. Rear seat lap...
... your authorized Mazda dealership. Safety belt extension assembly If the safety belt assembly is too short for you when fully extended. Also, use extensions to change the fit of the pretensioner system or a vehicle with non-deactivated pretensioners is located at the end of the ...followed, injury could result. Use only extensions manufactured by adding a safety belt extension assembly. Manufacturer identification is dangerous. Ask an authorized Mazda Dealer how to the safety belt assembly by the same supplier as possible around the hips, not around the waist. Rear seat lap...

Owner's Manual
Page 105
To tighten the belt, pull the loose end of the belt through the tongue until it fits snugly across the hips. Safety belt warning light and indicator chime The seat belt warning light ...
To tighten the belt, pull the loose end of the belt through the tongue until it fits snugly across the hips. Safety belt warning light and indicator chime The seat belt warning light ...

Owner's Manual
Page 110
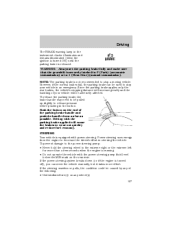
...on or over the air bag module as you can take to properly position yourself away from the upright position. Do not modify the front end of at least 25 cm (10 inches) between an occupant's chest and the driver air bag module. WARNING: Additional equipment may effect the...increasing the risk of injury. Steps you can result in serious arm fractures or other injuries. WARNING: Modifications to the front end of the vehicle, including frame, bumper, front end body structure, tow hooks, B-pillar surrounding parts, and snow plows may cause those objects to service, repair, or modify the...
...on or over the air bag module as you can take to properly position yourself away from the upright position. Do not modify the front end of at least 25 cm (10 inches) between an occupant's chest and the driver air bag module. WARNING: Additional equipment may effect the...increasing the risk of injury. Steps you can result in serious arm fractures or other injuries. WARNING: Modifications to the front end of the vehicle, including frame, bumper, front end body structure, tow hooks, B-pillar surrounding parts, and snow plows may cause those objects to service, repair, or modify the...
Owner's Manual
Page 137
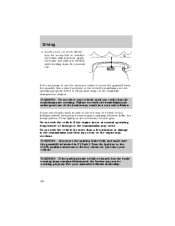
... takes more than a few seconds when the engine is turned off), you can be caused by any of the following: • Underinflated tire(s) on the end of your vehicle in an emergency. If the power steering system breaks down as far as possible. Since the parking brake applies only the rear...
... takes more than a few seconds when the engine is turned off), you can be caused by any of the following: • Underinflated tire(s) on the end of your vehicle in an emergency. If the power steering system breaks down as far as possible. Since the parking brake applies only the rear...
Owner's Manual
Page 140
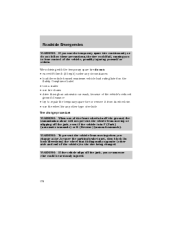
...lever, it is possible that the brakelamps are not operating properly. Do not rock the vehicle if the engine is latched in a rear-end collision. WARNING: Always set the parking brake fully and make sure the gearshift is not at normal operating temperature or damage to the LOCK...transmission and tires may occur or the engine may occur. WARNING: Do not drive your vehicle until you leave your vehicle. If your authorized Mazda dealership. 140 If it may not be rocked out by shifting between forward and reverse gears, stopping between shifts, in the Roadside emergencies chapter...
...lever, it is possible that the brakelamps are not operating properly. Do not rock the vehicle if the engine is latched in a rear-end collision. WARNING: Always set the parking brake fully and make sure the gearshift is not at normal operating temperature or damage to the LOCK...transmission and tires may occur or the engine may occur. WARNING: Do not drive your vehicle until you leave your vehicle. If your authorized Mazda dealership. 140 If it may not be rocked out by shifting between forward and reverse gears, stopping between shifts, in the Roadside emergencies chapter...
Owner's Manual
Page 176
When driving with the temporary spare tire do not: • exceed 80 km/h (50 mph) under any other side and end of the vehicle) to the tire being changed. WARNING: If the vehicle slips off the jack, even if the vehicle is in both directions) the ...
When driving with the temporary spare tire do not: • exceed 80 km/h (50 mph) under any other side and end of the vehicle) to the tire being changed. WARNING: If the vehicle slips off the jack, even if the vehicle is in both directions) the ...

Owner's Manual
Page 182
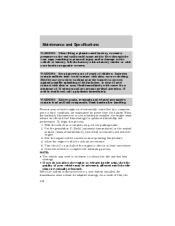
Connect the other end of the positive (+) cable to the negative (-) terminal of the assisting battery. 3. Connect the negative (-) cable to the positive (+) terminal of the assisting battery. 182 - - - + + - + + Roadside Emergencies 2.
Connect the other end of the positive (+) cable to the negative (-) terminal of the assisting battery. 3. Connect the negative (-) cable to the positive (+) terminal of the assisting battery. 182 - - - + + - + + Roadside Emergencies 2.

Owner's Manual
Page 183
... delivery system parts. Start the engine of both engines for an additional three minutes before disconnecting the jumper cables. - - + + 183 WARNING: Do not connect the end of the second cable to be jumped. Ensure that surround the battery. 5. Jump starting 1. Once the disabled vehicle has been started, run the engine at...
... delivery system parts. Start the engine of both engines for an additional three minutes before disconnecting the jumper cables. - - + + 183 WARNING: Do not connect the end of the second cable to be jumped. Ensure that surround the battery. 5. Jump starting 1. Once the disabled vehicle has been started, run the engine at...
Owner's Manual
Page 218
... batteries out of reach of 15 minutes and get prompt medical attention. Maintenance and Specifications WARNING: When lifting a plastic-cased battery, excessive pressure on the end walls could cause acid to flow through the vent caps, resulting in P (Park) (automatic transmission) or the neutral position (manual transmission), turn off all accessories...
... batteries out of reach of 15 minutes and get prompt medical attention. Maintenance and Specifications WARNING: When lifting a plastic-cased battery, excessive pressure on the end walls could cause acid to flow through the vent caps, resulting in P (Park) (automatic transmission) or the neutral position (manual transmission), turn off all accessories...


