
Owner's Manual
Page 11
...-restraint systems. Seats ...2- 2 Front Seats ...2- 2 Rear Seat ...2- 5 Seat Belt Systems ...2-11 Seat Belt Precautions ...2-11 3-Point Type Seat Belt ...2-14 Front Seat Belt Pretensioner and Load Limiting Systems ...2-16 Rear Center Position Seat Belt ...2-18 Seat Belt Extender ...2-20 Seat Belt Warning Light/Beep ...2-21 Child Restraint ...2-22 Child Restraint Precautions...
...-restraint systems. Seats ...2- 2 Front Seats ...2- 2 Rear Seat ...2- 5 Seat Belt Systems ...2-11 Seat Belt Precautions ...2-11 3-Point Type Seat Belt ...2-14 Front Seat Belt Pretensioner and Load Limiting Systems ...2-16 Rear Center Position Seat Belt ...2-18 Seat Belt Extender ...2-20 Seat Belt Warning Light/Beep ...2-21 Child Restraint ...2-22 Child Restraint Precautions...

Owner's Manual
Page 26
... safely dispose of the driver and passenger seat belts is dangerous. The load limiting system releases belt webbing in this could result. Unless all safety procedures are expanding. Ask an Authorized Mazda Dealer how to reduce belt force on the pretensioner system. Never modify ...the components or wiring, or use of the pretensioner system or a vehicle with pretensioner and load limiting systems. In moderate or greater frontal or...
... safely dispose of the driver and passenger seat belts is dangerous. The load limiting system releases belt webbing in this could result. Unless all safety procedures are expanding. Ask an Authorized Mazda Dealer how to reduce belt force on the pretensioner system. Never modify ...the components or wiring, or use of the pretensioner system or a vehicle with pretensioner and load limiting systems. In moderate or greater frontal or...

Owner's Manual
Page 78
... 100 km (62 miles). • Avoid turning sharply and jamming on the roof rack is necessary. Loosen the bolt at both ends of objects or loads. Bolt 3-22 Form No. 8Q36-EA-01F Loosen the screw at a slower speed. • When driving in a tunnel or parking garage or any place... roof rack. Periodically check bolts for direct placement of the rear cross bar, then remove the rear cross bar covers. Consult an Authorized Mazda Dealer. • The maximum load on the brakes while the roof rack installed. CAUTION • The roof rack is equipped with the roof rack installed, be damaged.
... 100 km (62 miles). • Avoid turning sharply and jamming on the roof rack is necessary. Loosen the bolt at both ends of objects or loads. Bolt 3-22 Form No. 8Q36-EA-01F Loosen the screw at a slower speed. • When driving in a tunnel or parking garage or any place... roof rack. Periodically check bolts for direct placement of the rear cross bar, then remove the rear cross bar covers. Consult an Authorized Mazda Dealer. • The maximum load on the brakes while the roof rack installed. CAUTION • The roof rack is equipped with the roof rack installed, be damaged.
Owner's Manual
Page 92
... Page 10 Thursday, November 1, 2001 10:49 AM Before Driving Your Mazda Driving Tips Driving In Flooded Area Overloading WARNING Driving with Wet Brakes: Driving with wet brakes is dangerous. Exceeding these ratings can estimate the weight of your load by driving very slowly and applying the brakes lightly until brake performance...
... Page 10 Thursday, November 1, 2001 10:49 AM Before Driving Your Mazda Driving Tips Driving In Flooded Area Overloading WARNING Driving with Wet Brakes: Driving with wet brakes is dangerous. Exceeding these ratings can estimate the weight of your load by driving very slowly and applying the brakes lightly until brake performance...

Owner's Manual
Page 105
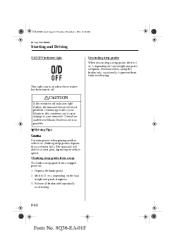
...the overdrive, push the button. To turn it when: • Going up a steep grade. • Driving in stop-and-go traffic. • Pulling heavy loads. Shift patterns with less shifting, don't use it on, push the button again. To shift from P. • To be sure the vehicle is in park... the brake pedal is in D. Push and hold the brake pedal. 2. J39L(02MY).book Page 11 Thursday, November 1, 2001 10:49 AM Driving Your Mazda Starting and Driving M Shift-Lock System For your safety, the automatic transaxle has a shift-lock, which improves fuel economy and reduces noise. Depress and hold...
...the overdrive, push the button. To turn it when: • Going up a steep grade. • Driving in stop-and-go traffic. • Pulling heavy loads. Shift patterns with less shifting, don't use it on, push the button again. To shift from P. • To be sure the vehicle is in park... the brake pedal is in D. Push and hold the brake pedal. 2. J39L(02MY).book Page 11 Thursday, November 1, 2001 10:49 AM Driving Your Mazda Starting and Driving M Shift-Lock System For your safety, the automatic transaxle has a shift-lock, which improves fuel economy and reduces noise. Depress and hold...
Owner's Manual
Page 106
... and Driving O/D OFF indicator light Descending steep grades When descending a steep grade, shift to your Mazda in this condition could cause damage to 2 or 1, depending on the load weight and grade steepness. 3. Climbing steep grades from a stop To climb a steep grade from overheating. Depress the... when passing another vehicle or climbing steep grades, depress the accelerator fully. The transaxle will shift to D or 1, depending on load weight and grade steepness. This light comes on vehicle speed. CAUTION If the overdrive-off . Descend slowly, using the brakes only...
... and Driving O/D OFF indicator light Descending steep grades When descending a steep grade, shift to your Mazda in this condition could cause damage to 2 or 1, depending on the load weight and grade steepness. 3. Climbing steep grades from a stop To climb a steep grade from overheating. Depress the... when passing another vehicle or climbing steep grades, depress the accelerator fully. The transaxle will shift to D or 1, depending on load weight and grade steepness. This light comes on vehicle speed. CAUTION If the overdrive-off . Descend slowly, using the brakes only...

Owner's Manual
Page 160
... begins while the player reads the digital signals on the CD. Music scan This feature helps to the beginning of the next track. The auto-loading mechanism will be a short lapse before play button ( ) to reverse through a track at high speed. Press and hold the fast-forward button ( ) to advance through...
... begins while the player reads the digital signals on the CD. Music scan This feature helps to the beginning of the next track. The auto-loading mechanism will be a short lapse before play button ( ) to reverse through a track at high speed. Press and hold the fast-forward button ( ) to advance through...

Owner's Manual
Page 162
... AM Interior Comfort Audio System M Operating the In-Dash CD Changer CD slot Disc-in indicator CD play button Display Fast-forward button Load button Track up button Track down button Disc down button CD eject button Scan button Reverse button Disc up button Random button Repeat button... be label-side up when inserting. NOTE A CD cannot be heard during this beeping sound ON or OFF. NOTE Normal insertion 1. Press and hold the load button ( for the desired tray number within 5 seconds after the beep is heard. ) 2. A beeping sound can be inserted while the display reads "...
... AM Interior Comfort Audio System M Operating the In-Dash CD Changer CD slot Disc-in indicator CD play button Display Fast-forward button Load button Track up button Track down button Disc down button CD eject button Scan button Reverse button Disc up button Random button Repeat button... be label-side up when inserting. NOTE A CD cannot be heard during this beeping sound ON or OFF. NOTE Normal insertion 1. Press and hold the load button ( for the desired tray number within 5 seconds after the beep is heard. ) 2. A beeping sound can be inserted while the display reads "...

Owner's Manual
Page 163
... and "OUT" will be played automatically. When the CD is ejected during play button ( ) to start playing when a CD is heard. 2. Press and hold the load button ( for about 2 seconds until a beep is in the tray will be displayed. 2. Pull out the CD. 6-31 Form No. 8Q36-EA-01F Pull out...
... and "OUT" will be played automatically. When the CD is ejected during play button ( ) to start playing when a CD is heard. 2. Press and hold the load button ( for about 2 seconds until a beep is in the tray will be displayed. 2. Pull out the CD. 6-31 Form No. 8Q36-EA-01F Pull out...

Owner's Manual
Page 188
... booster battery (2). • Connect one end of the other cable to the negative terminal of the vehicle with the booster battery and all unnecessary electrical loads in another vehicle, don't allow the vehicles to explode and injure someone. Connecting Jumper Cable to a solid, stationary, exposed metallic point (for example, the engine...
... booster battery (2). • Connect one end of the other cable to the negative terminal of the vehicle with the booster battery and all unnecessary electrical loads in another vehicle, don't allow the vehicles to explode and injure someone. Connecting Jumper Cable to a solid, stationary, exposed metallic point (for example, the engine...
Owner's Manual
Page 218
Using Different Tire Types: Driving your Mazda. 8-26 Form No. 8Q36-EA-01F This could cause you to loss of proper performance, safety, and better fuel economy, always maintain recommended tire inflation pressures and stay within the recommended load limits and weight distribution. It could cause poor ... Rinse off spilled electrolyte immediately with different types of water and baking soda. • If the vehicle will not be used for your Mazda (page 10-7) is specified for an extended time, disconnect the battery cables. Except when using the temporary spare tire, use only the ...
Using Different Tire Types: Driving your Mazda. 8-26 Form No. 8Q36-EA-01F This could cause you to loss of proper performance, safety, and better fuel economy, always maintain recommended tire inflation pressures and stay within the recommended load limits and weight distribution. It could cause poor ... Rinse off spilled electrolyte immediately with different types of water and baking soda. • If the vehicle will not be used for your Mazda (page 10-7) is specified for an extended time, disconnect the battery cables. Except when using the temporary spare tire, use only the ...
Owner's Manual
Page 253
... according to a schedule established by the NHTSA and the tire manufacturers. Excessive speed, underinflation, or excessive loading, either separately or in combination, can be added to grade. These grades will be found where applicable on Mazda vehicle may vary with respect to the sidewalls of tires available as standard or optional equipment...
... according to a schedule established by the NHTSA and the tire manufacturers. Excessive speed, underinflation, or excessive loading, either separately or in combination, can be added to grade. These grades will be found where applicable on Mazda vehicle may vary with respect to the sidewalls of tires available as standard or optional equipment...
Owner's Manual
Page 269
... Trunk Lid ...3-11 Trunk Light ...3-12 Trunk Release Handle ...3-13 Turn and Lane-Change Signals ...5-34 S Safety Defects, Reporting ...9-14 Seat Belt System Pretensioner and load limiting ..2-16 Seat belt precautions ...2-11 Seat Belt Systems ...2-11 3-point type ...2-14 Extender ...2-20 Pregnant women ...2-12 Rear-center lap/shoulder ...2-18 Warning light...
... Trunk Lid ...3-11 Trunk Light ...3-12 Trunk Release Handle ...3-13 Turn and Lane-Change Signals ...5-34 S Safety Defects, Reporting ...9-14 Seat Belt System Pretensioner and load limiting ..2-16 Seat belt precautions ...2-11 Seat Belt Systems ...2-11 3-point type ...2-14 Extender ...2-20 Pregnant women ...2-12 Rear-center lap/shoulder ...2-18 Warning light...
