
Owner's Manual
Page 69
... have it to your dealer to the back seat area. vehicle, always drive with the flow of your 65 u Do not put objects under the hood at the bottom of your engine. System diagnostics are built in which could block the air intake. u To prevent humidity buildup inside your choice. Higher...
... have it to your dealer to the back seat area. vehicle, always drive with the flow of your 65 u Do not put objects under the hood at the bottom of your engine. System diagnostics are built in which could block the air intake. u To prevent humidity buildup inside your choice. Higher...
Owner's Manual
Page 120
... off. Open any door. Anti-theft System When armed, this system helps protect your vehicle against break-ins or theft by monitoring all doors, the hood, and the trunk lock cylinder. The PANIC alarm and the Anti-Theft alarm are two separate features.
... off. Open any door. Anti-theft System When armed, this system helps protect your vehicle against break-ins or theft by monitoring all doors, the hood, and the trunk lock cylinder. The PANIC alarm and the Anti-Theft alarm are two separate features.

Owner's Manual
Page 122
... the UNLOCK control on the remote entry transmitter NOTE: The flashing lights and honking horn will shut off the alarm. It will not disarm). u the hood is opened .
... the UNLOCK control on the remote entry transmitter NOTE: The flashing lights and honking horn will shut off the alarm. It will not disarm). u the hood is opened .
Owner's Manual
Page 207
Park the booster vehicle close to the hood of the disabled vehicle. Turn on both vehicles. If in doubt, call for preparing your vehicle to a 24-volt power supply (either two 12-volt ...
Park the booster vehicle close to the hood of the disabled vehicle. Turn on both vehicles. If in doubt, call for preparing your vehicle to a 24-volt power supply (either two 12-volt ...
Owner's Manual
Page 216
Block the wheels. WARNING Do not start your vehicle from you ; WARNING The cooling fan is running. If the battery is located on the hood on or off , push it away from moving unexpectedly. NOTE: The engine compartment light may be switched on the driver's side. See Battery in the ...on : 1. 2. This will prevent your engine with the engine on position at all times, as the light will turn off when the hood is securely latched in P (Park). To turn it while the engine is automatic and may remain in the Index. to turn the light on at...
Block the wheels. WARNING Do not start your vehicle from you ; WARNING The cooling fan is running. If the battery is located on the hood on or off , push it away from moving unexpectedly. NOTE: The engine compartment light may be switched on the driver's side. See Battery in the ...on : 1. 2. This will prevent your engine with the engine on position at all times, as the light will turn off when the hood is securely latched in P (Park). To turn it while the engine is automatic and may remain in the Index. to turn the light on at...

Owner's Manual
Page 217
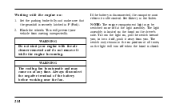
Go to the front of the vehicle and release the auxiliary latch that is located under the hood at the center of the instrument panel. 2. Inside the vehicle, pull the hood release handle located under the front edge of the hood 215 The hood release under the instrument panel The auxiliary latch under the bottom left corner of the vehicle. Opening the Hood 1.
Go to the front of the vehicle and release the auxiliary latch that is located under the hood at the center of the instrument panel. 2. Inside the vehicle, pull the hood release handle located under the front edge of the hood 215 The hood release under the instrument panel The auxiliary latch under the bottom left corner of the vehicle. Opening the Hood 1.
Owner's Manual
Page 218
3. Whenever you should regularly service. NOTE: Apply lubricant to the hood latch at the beginning of where to maintain smooth and trouble-free operation. The following page shows a diagram of this chapter before opening the hood. 216 Lift the hood until the lift cylinders hold it securely. Engine Compartment Your vehicle has a 4.6 liter engine. NOTE: Read and understand Precautions When Servicing Your Vehicle at six-month intervals to find items that you close the hood, latch it open.
3. Whenever you should regularly service. NOTE: Apply lubricant to the hood latch at the beginning of where to maintain smooth and trouble-free operation. The following page shows a diagram of this chapter before opening the hood. 216 Lift the hood until the lift cylinders hold it securely. Engine Compartment Your vehicle has a 4.6 liter engine. NOTE: Read and understand Precautions When Servicing Your Vehicle at six-month intervals to find items that you close the hood, latch it open.

Owner's Manual
Page 221
... allow a few minutes for safe engine operation, check the oil using the dipstick each time you put it back into the oil pan. Open the hood. Engine oil dipstick 6. Checking the engine oil level: 1. Locate the engine oil dipstick (highlighted in P (Park). If the oil level is securely latched in yellow...
... allow a few minutes for safe engine operation, check the oil using the dipstick each time you put it back into the oil pan. Open the hood. Engine oil dipstick 6. Checking the engine oil level: 1. Locate the engine oil dipstick (highlighted in P (Park). If the oil level is securely latched in yellow...

Owner's Manual
Page 252
Lift the hood, open access panel above headlamp and find the bulb in the OFF position. Remove the electrical connector from the socket. Parts of a turn to hold the new bulb in place. 3. You must use it again to free it from the bulb by turning it 1/8 of a headlamp 4. 250 Removing the headlamp bulb 1. 2. Make sure that the headlamp switch is in the headlamp socket. Then slide the ring off the plastic base. Remove the retaining ring by grasping the wire with a quick pull rearward. Keep the ring.
Lift the hood, open access panel above headlamp and find the bulb in the OFF position. Remove the electrical connector from the socket. Parts of a turn to hold the new bulb in place. 3. You must use it again to free it from the bulb by turning it 1/8 of a headlamp 4. 250 Removing the headlamp bulb 1. 2. Make sure that the headlamp switch is in the headlamp socket. Then slide the ring off the plastic base. Remove the retaining ring by grasping the wire with a quick pull rearward. Keep the ring.
Owner's Manual
Page 261
... maintenance recommendations to prevent discoloration. u Lubricate all vehicles in exposed u Touch-up raw or primed metal to protect against rust and damage. 260 u Store all hood, door and trunk lid hinges u Cover interior soft trim to remove dirt, grease, oil, tar or mud from oil and solvents. locations. u If vehicles are...
... maintenance recommendations to prevent discoloration. u Lubricate all vehicles in exposed u Touch-up raw or primed metal to protect against rust and damage. 260 u Store all hood, door and trunk lid hinges u Cover interior soft trim to remove dirt, grease, oil, tar or mud from oil and solvents. locations. u If vehicles are...
Owner's Manual
Page 295
... Instrument panel ...Interval wipers ...208, 213 ...75 . 73 . 75 . 141 . . 9 . . 7 . 77 K Keyless entry system locking and unlocking doors programming entry code . High beams (continued) operation ...Hood ...latch location ...lubrication specifications release lever...working under the...
... Instrument panel ...Interval wipers ...208, 213 ...75 . 73 . 75 . 141 . . 9 . . 7 . 77 K Keyless entry system locking and unlocking doors programming entry code . High beams (continued) operation ...Hood ...latch location ...lubrication specifications release lever...working under the...


