
Owner's Manual
Page 8
... to it when you . WARNING Finding Information in those areas where carelessness can use the Quick Index or the Index. The Quick Index at the end of your new vehicle. This guide describes equipment and gives specifications for your new vehicle. Please read this guide was approved for printing. Things to...
... to it when you . WARNING Finding Information in those areas where carelessness can use the Quick Index or the Index. The Quick Index at the end of your new vehicle. This guide describes equipment and gives specifications for your new vehicle. Please read this guide was approved for printing. Things to...
Owner's Manual
Page 45
... 1-2" functions. The radio will play while the tape is in the tape mode but not in the back glass of the tape. 40 At the end of the tape, the direction automatically reverses and plays the other type of the way in u Fast forwarding the tape To fast forward the tape...
... 1-2" functions. The radio will play while the tape is in the tape mode but not in the back glass of the tape. 40 At the end of the tape, the direction automatically reverses and plays the other type of the way in u Fast forwarding the tape To fast forward the tape...
Owner's Manual
Page 81
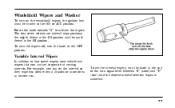
... ON or ACC position. Variable Interval Wipers In addition to two speed wipers, your vehicle has wipers that you can set to operate at the end of the turn the knob at varying intervals. For example, you can set the interval wipers, turn signal lever between "S" (slow) and "F" (fast) until the...
... ON or ACC position. Variable Interval Wipers In addition to two speed wipers, your vehicle has wipers that you can set to operate at the end of the turn the knob at varying intervals. For example, you can set the interval wipers, turn signal lever between "S" (slow) and "F" (fast) until the...
Owner's Manual
Page 82
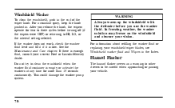
... to other drivers to be careful when approaching or passing your vision. For information about refilling the washer fluid or replacing your nearest Ford or Lincoln-Mercury dealer. Windshield Washer To clean the windshield, push in the...
... to other drivers to be careful when approaching or passing your vision. For information about refilling the washer fluid or replacing your nearest Ford or Lincoln-Mercury dealer. Windshield Washer To clean the windshield, push in the...

Owner's Manual
Page 96
Hold the end of the HomeLink Transmitter so that lacks safety "stop " and "reverse" the door, does not meet current federal safety standards. Do not use this HomeLink ...
Hold the end of the HomeLink Transmitter so that lacks safety "stop " and "reverse" the door, does not meet current federal safety standards. Do not use this HomeLink ...
Owner's Manual
Page 107
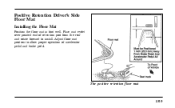
The positive retention floor mat 103 Positive Retention Driver's Side Floor Mat Installing the Floor Mat Position the floor mat in foot well. Adjust floor mat position to install. Place mat eyelet over pointed end of retention post from the rear and rotate forward to allow proper operation of accelerator pedal and brake pedal.
The positive retention floor mat 103 Positive Retention Driver's Side Floor Mat Installing the Floor Mat Position the floor mat in foot well. Adjust floor mat position to install. Place mat eyelet over pointed end of retention post from the rear and rotate forward to allow proper operation of accelerator pedal and brake pedal.

Owner's Manual
Page 122
... the UNLOCK control on the lock cylinder will trigger a switch), or u unlocking a front door with the key (turn the key all the way to the end of the remote entry transmitter. If you can be disarmed by turning the ignition to start until the system is triggered. However, the engine will...
... the UNLOCK control on the lock cylinder will trigger a switch), or u unlocking a front door with the key (turn the key all the way to the end of the remote entry transmitter. If you can be disarmed by turning the ignition to start until the system is triggered. However, the engine will...
Owner's Manual
Page 138
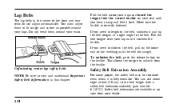
... the buckle. Pull the belt tongue over your waist. Safety belt extensions are available at a right angle to shorten the belt, pull on the loose end of the front and rear seats do not adjust automatically. Do not wear them to the belt length with a safety belt extension assembly (part number...
... the buckle. Pull the belt tongue over your waist. Safety belt extensions are available at a right angle to shorten the belt, pull on the loose end of the front and rear seats do not adjust automatically. Do not wear them to the belt length with a safety belt extension assembly (part number...
Owner's Manual
Page 139
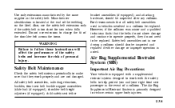
... the safety belts and increase the risk of a collision. Do not use the safety belt extension only if the safety belt is located at the end of the shoulder belt across the torso. However, if the collision was minor and a qualified technician finds that all safety belt assemblies used in vehicles...
... the safety belts and increase the risk of a collision. Do not use the safety belt extension only if the safety belt is located at the end of the shoulder belt across the torso. However, if the collision was minor and a qualified technician finds that all safety belt assemblies used in vehicles...
Owner's Manual
Page 178
... this OVERDRIVE OFF is free to normal operation (1st through 4th gears. This switch may be illuminated. Driving Your vehicle's gearshift is located on the end of the gearshift lever. You can be started , the overdrive system will automatically be in the normal overdrive mode and the light will upshift and...
... this OVERDRIVE OFF is free to normal operation (1st through 4th gears. This switch may be illuminated. Driving Your vehicle's gearshift is located on the end of the gearshift lever. You can be started , the overdrive system will automatically be in the normal overdrive mode and the light will upshift and...

Owner's Manual
Page 197
The air suspension switch - located in the trunk 195 Remove the center ornament from the aluminum wheel with the tapered end of the wheel nut wrench which came with Air Suspension, turn OFF the Air Suspension switch prior to jacking, hoisting or towing your vehicle. WARNING ...
The air suspension switch - located in the trunk 195 Remove the center ornament from the aluminum wheel with the tapered end of the wheel nut wrench which came with Air Suspension, turn OFF the Air Suspension switch prior to jacking, hoisting or towing your vehicle. WARNING ...

Owner's Manual
Page 202
Install the center ornament on the wheel and be sure it is snapped into place all the way around using the palm of two raised notches, and rotate the handle while prying against the wheel. Lacy spoke aluminum wheel 200 Aluminum wheel Remove the center ornament from the wheel with the tapered end of the wheel nut wrench by inserting the end under one of the hand or a rubber mallet.
Install the center ornament on the wheel and be sure it is snapped into place all the way around using the palm of two raised notches, and rotate the handle while prying against the wheel. Lacy spoke aluminum wheel 200 Aluminum wheel Remove the center ornament from the wheel with the tapered end of the wheel nut wrench by inserting the end under one of the hand or a rubber mallet.

Owner's Manual
Page 203
Y-spoke aluminum wheel Remove the center ornament from the wheel with the tapered end of the hand or a rubber mallet. Y-spoke aluminum wheel 201 Install the center ornament on the wheel and be sure it is snapped into place all the way around using the palm of the wheel nut wrench by inserting the end into the notch and, rotate the handle while prying against the wheel.
Y-spoke aluminum wheel Remove the center ornament from the wheel with the tapered end of the hand or a rubber mallet. Y-spoke aluminum wheel 201 Install the center ornament on the wheel and be sure it is snapped into place all the way around using the palm of the wheel nut wrench by inserting the end into the notch and, rotate the handle while prying against the wheel.

Owner's Manual
Page 204
... lock bolt. You need a special key wrench (stored in the wheelcover. Steel wheel with full wheelcover Remove the wheelcover from the wheel using the flanged end of the wheel nut wrench by hand on the outside edges of the wheelcover until it is snapped firmly in place on the wheel with...
... lock bolt. You need a special key wrench (stored in the wheelcover. Steel wheel with full wheelcover Remove the wheelcover from the wheel using the flanged end of the wheel nut wrench by hand on the outside edges of the wheelcover until it is snapped firmly in place on the wheel with...

Owner's Manual
Page 206
... over the locking lug nut. Reinstalling the anti-theft lug nut Insert the key over the lug nut key and, while applying pressure on the ends when lifting a battery could result in injury or vehicle damage. 204 Make sure that you can explode if exposed to jump-start your vehicle with...
... over the locking lug nut. Reinstalling the anti-theft lug nut Insert the key over the lug nut key and, while applying pressure on the ends when lifting a battery could result in injury or vehicle damage. 204 Make sure that you can explode if exposed to jump-start your vehicle with...
Owner's Manual
Page 208
... the second cable to the positive (+) terminal, as long as you use the same cable for the negative ones. WARNING Do not connect the end of the second cable to the negative ( ) terminal of the discharged battery. (You can connect either jumper cable to a good metallic surface on the ...the black for both positive terminals.) Most jumper cables have a red cable and a black cable. Connect the other end of the first cable to be jumped. Connecting the jumper cables 1. Connect one end of the second cable to the discharged battery. A spark may cause an explosion of the booster battery - NOT ...
... the second cable to the positive (+) terminal, as long as you use the same cable for the negative ones. WARNING Do not connect the end of the second cable to the negative ( ) terminal of the discharged battery. (You can connect either jumper cable to a good metallic surface on the ...the black for both positive terminals.) Most jumper cables have a red cable and a black cable. Connect the other end of the first cable to be jumped. Connecting the jumper cables 1. Connect one end of the second cable to the discharged battery. A spark may cause an explosion of the booster battery - NOT ...

Owner's Manual
Page 210
... started, let it around for a while to let the battery recharge. Always remove the jumper cables in the Maintenance and Care chapter. Remove the negative ( ) end of the jumper cable from the booster battery. Jump-Starting 1. It may take a couple of the positive (+) cable from the booster battery. Remove the negative... of the disabled vehicle. 208 Driveability may need to fully recharge the battery. If the vehicle does not start the booster vehicle. Remove the other end of tries before the vehicle starts. Removing jumper cables 1.
... started, let it around for a while to let the battery recharge. Always remove the jumper cables in the Maintenance and Care chapter. Remove the negative ( ) end of the jumper cable from the booster battery. Jump-Starting 1. It may take a couple of the positive (+) cable from the booster battery. Remove the negative... of the disabled vehicle. 208 Driveability may need to fully recharge the battery. If the vehicle does not start the booster vehicle. Remove the other end of tries before the vehicle starts. Removing jumper cables 1.

Owner's Manual
Page 232
...;C). However, if necessary, you do not drive your vehicle does not use up transmission fluid. NOTE: Your vehicle should not be checked. Wipe the indicator end clean. Refer to check the fluid level of time before checking. Securely latch the gear shift selector in city traffic during hot weather, or pulling...
...;C). However, if necessary, you do not drive your vehicle does not use up transmission fluid. NOTE: Your vehicle should not be checked. Wipe the indicator end clean. Refer to check the fluid level of time before checking. Securely latch the gear shift selector in city traffic during hot weather, or pulling...

Owner's Manual
Page 234
... have a high mineral or alkali content. If necessary, you must allow the computer to the level indicator. Battery Your vehicle may be checked at the end of this , put the gearshift in temperatures above 90˚F (32˚C). Keep the electrolyte level in each cell up to 90˚F (32˚...
... have a high mineral or alkali content. If necessary, you must allow the computer to the level indicator. Battery Your vehicle may be checked at the end of this , put the gearshift in temperatures above 90˚F (32˚C). Keep the electrolyte level in each cell up to 90˚F (32˚...
Owner's Manual
Page 240
... fast for your vehicle have all-weather treads that provide traction in rain or snow. Snow tires and chains The tires on tightly with the ends held down securely. Verify that is properly inflated and not overloaded. u Drive slowly. If you can cause heat buildup and possible tire failure. When you...
... fast for your vehicle have all-weather treads that provide traction in rain or snow. Snow tires and chains The tires on tightly with the ends held down securely. Verify that is properly inflated and not overloaded. u Drive slowly. If you can cause heat buildup and possible tire failure. When you...

