Owner's Manual
Page 47
... the driver's seat belt. 2. Keep the belt low so that pregnant women use the seat belts throughout their pregnancy. Turn the ignition key to the ACCESSORY/RUN position (engine does not need to be enabled or disabled by your authorized dealer or by repeating this procedure. Turn the ignition switch to...
... the driver's seat belt. 2. Keep the belt low so that pregnant women use the seat belts throughout their pregnancy. Turn the ignition key to the ACCESSORY/RUN position (engine does not need to be enabled or disabled by your authorized dealer or by repeating this procedure. Turn the ignition switch to...
Owner's Manual
Page 50
... STARTING YOUR VEHICLE WARNING! • Do not put anything on the crash side of the vehicle is equipped with window bags, do not have any accessory items installed which will alter the roof, including adding a sunroof to your vehicle.
... STARTING YOUR VEHICLE WARNING! • Do not put anything on the crash side of the vehicle is equipped with window bags, do not have any accessory items installed which will alter the roof, including adding a sunroof to your vehicle.
Owner's Manual
Page 55
..., it is transferred to objects hanging on the seat, other passengers pushing on the seat, or objects lodged underneath the seat. Only manufacturer approved seat accessories may not be used. 2 The inflating window bag pushes the outside edge of the headliner out of nontoxic gas is a rapid change in certain side...
..., it is transferred to objects hanging on the seat, other passengers pushing on the seat, or objects lodged underneath the seat. Only manufacturer approved seat accessories may not be used. 2 The inflating window bag pushes the outside edge of the headliner out of nontoxic gas is a rapid change in certain side...
Owner's Manual
Page 62
... to tell anyone who works on for persons with disabilities, contact your advanced airbag system. WARNING! • Modifications to be used. Only manufacturer approved seat accessories may not function properly if modifications are made. The airbag system is necessary to modify any part of the airbag system yourself. Do not modify...
... to tell anyone who works on for persons with disabilities, contact your advanced airbag system. WARNING! • Modifications to be used. Only manufacturer approved seat accessories may not function properly if modifications are made. The airbag system is necessary to modify any part of the airbag system yourself. Do not modify...

Owner's Manual
Page 148
Pull lightly on the top of instrument panel) is a rear power outlet located in the right rear cargo area above the storage cargo net/CD changer (if equipped). There is an outlet for electrically powered accessories. Front Power Outlet Rear Power Outlet 148 UNDERSTANDING THE FEATURES OF YOUR VEHICLE POWER OUTLET To the right of the convenience tray (lower center of the plastic cover to open the outlet.
Pull lightly on the top of instrument panel) is a rear power outlet located in the right rear cargo area above the storage cargo net/CD changer (if equipped). There is an outlet for electrically powered accessories. Front Power Outlet Rear Power Outlet 148 UNDERSTANDING THE FEATURES OF YOUR VEHICLE POWER OUTLET To the right of the convenience tray (lower center of the plastic cover to open the outlet.
Owner's Manual
Page 149
... is in the ON or OFF position. Only use these intermittently and with greater caution. • After the use of high power draw accessories, or long periods of time to allow the alternator to this outlet should be driven a sufficient length of the vehicle not being started (with... plugged in), the vehicle must be removed or turned off when the vehicle is not in use (i.e., cellular phones, etc.). All accessories connected to recharge the vehicle's battery. 3 CAUTION! Eventually, if plugged in long enough, the vehicle's battery will degrade the battery even more quickly. ...
... is in the ON or OFF position. Only use these intermittently and with greater caution. • After the use of high power draw accessories, or long periods of time to allow the alternator to this outlet should be driven a sufficient length of the vehicle not being started (with... plugged in), the vehicle must be removed or turned off when the vehicle is not in use (i.e., cellular phones, etc.). All accessories connected to recharge the vehicle's battery. 3 CAUTION! Eventually, if plugged in long enough, the vehicle's battery will degrade the battery even more quickly. ...
Owner's Manual
Page 187
... time to play the next available disc. CD Changer Control Capability - If Equipped This radio is compatible with a remote mounted CD changer available through Mopar Accessories. Scan Button Press this button to time of each track.
... time to play the next available disc. CD Changer Control Capability - If Equipped This radio is compatible with a remote mounted CD changer available through Mopar Accessories. Scan Button Press this button to time of each track.

Owner's Manual
Page 193
... Random Play. This feature plays the tracks on the display. 4 When Satellite Radio (if equipped) is compatible with a remote mounted CD changer available through Mopar Accessories. CD Changer Control Capability - If Equipped This radio is selected "SAT" will begin to fast forward until CD information appears on the selected disc in...
... Random Play. This feature plays the tracks on the display. 4 When Satellite Radio (if equipped) is compatible with a remote mounted CD changer available through Mopar Accessories. CD Changer Control Capability - If Equipped This radio is selected "SAT" will begin to fast forward until CD information appears on the selected disc in...
Owner's Manual
Page 204
... until all twelve ESN/SID digits have the following steps: ESN/SID Access With RBB, RAH and RBK Radios With the ignition switch in the ACCESSORY position and the radio OFF, press the Tape Eject or CD Eject (depending on the radio type) and Time buttons simultaneously for 3 seconds. The SEEK...
... until all twelve ESN/SID digits have the following steps: ESN/SID Access With RBB, RAH and RBK Radios With the ignition switch in the ACCESSORY position and the radio OFF, press the Tape Eject or CD Eject (depending on the radio type) and Time buttons simultaneously for 3 seconds. The SEEK...

Owner's Manual
Page 205
A CD or tape may remain in the radio while in the ACCESSORY position and the radio OFF, press the CD Eject and TIME buttons simultaneously for 5 seconds. • The current channel number will exit the ESN/SID ...
A CD or tape may remain in the radio while in the ACCESSORY position and the radio OFF, press the CD Eject and TIME buttons simultaneously for 5 seconds. • The current channel number will exit the ESN/SID ...
Owner's Manual
Page 296
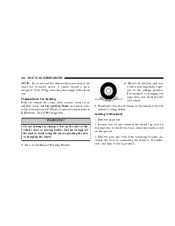
... them to the left rear wheel. • Passengers should not remain in R (Reverse). 296 WHAT TO DO IN EMERGENCIES NOTE: If you have added aftermarket accessories to the spare tire mounted carrier, it cannot exceed a gross weight of 50 lbs (23 kg) including the weight of the jacking position. Jacking Instructions...
... them to the left rear wheel. • Passengers should not remain in R (Reverse). 296 WHAT TO DO IN EMERGENCIES NOTE: If you have added aftermarket accessories to the spare tire mounted carrier, it cannot exceed a gross weight of 50 lbs (23 kg) including the weight of the jacking position. Jacking Instructions...

Owner's Manual
Page 320
Battery posts, terminals, and related accessories contain lead and lead compounds. Always wash hands after handling the battery. Refer to add water, nor is equipped with a maintenance-free battery. WARNING! 320 MAINTAINING YOUR VEHICLE Maintenance-Free Battery Your vehicle is periodic maintenance required. To determine the battery charge, check the battery test indicator (if equipped) on top of the battery. You will never have to the illustration.
Battery posts, terminals, and related accessories contain lead and lead compounds. Always wash hands after handling the battery. Refer to add water, nor is equipped with a maintenance-free battery. WARNING! 320 MAINTAINING YOUR VEHICLE Maintenance-Free Battery Your vehicle is periodic maintenance required. To determine the battery charge, check the battery test indicator (if equipped) on top of the battery. You will never have to the illustration.
Owner's Manual
Page 379
... oil level about 5 minutes after a fully warmed engine is shut off. E N A N C E S C • Check the engine coolant/anti-freeze level, hoses, and H E clamps. D • Inspect engine accessory drive belts. T At Each Oil Change • Change the engine oil filter. • Inspect the exhaust system. • Inspect brake hoses. U L sary. Tire Rotation •...
... oil level about 5 minutes after a fully warmed engine is shut off. E N A N C E S C • Check the engine coolant/anti-freeze level, hoses, and H E clamps. D • Inspect engine accessory drive belts. T At Each Oil Change • Change the engine oil filter. • Inspect the exhaust system. • Inspect brake hoses. U L sary. Tire Rotation •...

Owner's Manual
Page 382
... SCHEDULE "B" - DIESEL ENGINES A I N Miles T (Kilometers) E N Change the engine oil and engine oil filter. Drain and refill the front and rear axle fluid. Replace the engine accessory drive belt.
... SCHEDULE "B" - DIESEL ENGINES A I N Miles T (Kilometers) E N Change the engine oil and engine oil filter. Drain and refill the front and rear axle fluid. Replace the engine accessory drive belt.

Owner's Manual
Page 383
... filter element. Replace as necessary. Inspect the engine timing belt tensioner, replace if necessary.† Replace the fuel filter/water separator unit. Replace the engine accessory drive belt. Inspect the boost pressure solenoid filter. Replace the boost pressure solenoid filter, if not previously replaced.
... filter element. Replace as necessary. Inspect the engine timing belt tensioner, replace if necessary.† Replace the fuel filter/water separator unit. Replace the engine accessory drive belt. Inspect the boost pressure solenoid filter. Replace the boost pressure solenoid filter, if not previously replaced.

Owner's Manual
Page 387
Inspect the brake linings. Inspection and service should be performed anytime a malfunction is superficial wear, bearing clearance, or evident grease leak. Retain all receipts. 62,500 (100 000) X X 75,000 (120 000) X 87,500 (140 000) 100,000 (160 000) X A I N T E N A N C E S C H E D U L E S 8 Inspect the transfer case fluid. † The replacement of such component is requested if there is observed or suspected. SCHEDULE "A" - DIESEL ENGINES 387 M Miles (Kilometers) Replace the engine accessory drive belt.
Inspect the brake linings. Inspection and service should be performed anytime a malfunction is superficial wear, bearing clearance, or evident grease leak. Retain all receipts. 62,500 (100 000) X X 75,000 (120 000) X 87,500 (140 000) 100,000 (160 000) X A I N T E N A N C E S C H E D U L E S 8 Inspect the transfer case fluid. † The replacement of such component is requested if there is observed or suspected. SCHEDULE "A" - DIESEL ENGINES 387 M Miles (Kilometers) Replace the engine accessory drive belt.

Owner's Manual
Page 395
.... 9 To contact NHTSA, you should contact the Customer Service Department immediately. Dept. IF YOU NEED CONSUMER ASSISTANCE 395 MOPAR PARTS Mopar fluids, lubricants, parts, and accessories are available from the Hotline. If NHTSA receives similar complaints, it may order a recall and remedy campaign. Canadian customers who wish to report a safety defect...
.... 9 To contact NHTSA, you should contact the Customer Service Department immediately. Dept. IF YOU NEED CONSUMER ASSISTANCE 395 MOPAR PARTS Mopar fluids, lubricants, parts, and accessories are available from the Hotline. If NHTSA receives similar complaints, it may order a recall and remedy campaign. Canadian customers who wish to report a safety defect...