
Owner's Manual
Page 220
... the Service Manual. This section also includes Maintenance Schedules for normal driving and severe driving conditions, a Maintenance Record, and instructions for information on your Honda dealer. Maintenance This section explains why it is important to keep your vehicle well maintained and to take care of yourself. Maintenance Safety...220 Important......260 Tire Rotation...260 Replacing Tires and Wheels...261 Wheels and Tires...262 Winter Driving...262 Snow Tires...263 Tire Chains...263 Lights...264 Headlight Aiming...266 Replacing Bulbs...266 Storing Your Vehicle...275 Maintenance
... the Service Manual. This section also includes Maintenance Schedules for normal driving and severe driving conditions, a Maintenance Record, and instructions for information on your Honda dealer. Maintenance This section explains why it is important to keep your vehicle well maintained and to take care of yourself. Maintenance Safety...220 Important......260 Tire Rotation...260 Replacing Tires and Wheels...261 Wheels and Tires...262 Winter Driving...262 Snow Tires...263 Tire Chains...263 Lights...264 Headlight Aiming...266 Replacing Bulbs...266 Storing Your Vehicle...275 Maintenance

Owner's Manual
Page 265
Lights Check the operation of your intentions to signal your vehicle's exterior lights at least once a month. HEADLIGHT TURN SIGNAL/ SIDE MARKER/ PARKING LIGHTS Maintenance A burned out bulb can create an unsafe condition by reducing your vehicle's visibility and the ability to other drivers.
Lights Check the operation of your intentions to signal your vehicle's exterior lights at least once a month. HEADLIGHT TURN SIGNAL/ SIDE MARKER/ PARKING LIGHTS Maintenance A burned out bulb can create an unsafe condition by reducing your vehicle's visibility and the ability to other drivers.

Owner's Manual
Page 266
TURN SIGNAL LIGHT BACK-UP LIGHT LICENSE PLATE LIGHT Maintenance Refer to the chart on page 317 to determine what type of replacement bulb is needed. Lights Check the following: STOP/TAILLIGHTS/ SIDE MARKER LIGHTS TAILLIGHT HIGH-MOUNT BRAKE LIGHT Headlights (low and high beam) Parking lights Taillights Brake lights High-mount brake light Turn signals Back-up lights Hazard light function License plate light Side marker lights Daytime running lights (Canadian models) If you find any bulbs are burned out, replace them as soon as possible.
TURN SIGNAL LIGHT BACK-UP LIGHT LICENSE PLATE LIGHT Maintenance Refer to the chart on page 317 to determine what type of replacement bulb is needed. Lights Check the following: STOP/TAILLIGHTS/ SIDE MARKER LIGHTS TAILLIGHT HIGH-MOUNT BRAKE LIGHT Headlights (low and high beam) Parking lights Taillights Brake lights High-mount brake light Turn signals Back-up lights Hazard light function License plate light Side marker lights Daytime running lights (Canadian models) If you find any bulbs are burned out, replace them as soon as possible.

Owner's Manual
Page 267
... of the hold-down wire from its steel base and protect the glass from the bulb by its slot. Oil, perspiration, or a scratch on the glass can cause the bulb to change the headlight bulb on the driver's side, remove the air intake cover (see page 246). When ...vehicle was new. Remove the rubber weather seal by a Honda technician or other qualified mechanic. Open the hood. If you need to overheat and shatter. 2. Maintenance Adjustment of the way and remove the bulb. 1. Lights Headlight Aiming The headlights were properly aimed when your skin or hard objects. If...
... of the hold-down wire from its steel base and protect the glass from the bulb by its slot. Oil, perspiration, or a scratch on the glass can cause the bulb to change the headlight bulb on the driver's side, remove the air intake cover (see page 246). When ...vehicle was new. Remove the rubber weather seal by a Honda technician or other qualified mechanic. Open the hood. If you need to overheat and shatter. 2. Maintenance Adjustment of the way and remove the bulb. 1. Lights Headlight Aiming The headlights were properly aimed when your skin or hard objects. If...

Owner's Manual
Page 268
Install the rubber seal over the back of the headlight assembly. If you are changing the bulb on the driver's side, start the engine, turn off the engine. Turn on the passenger's side, turn the steering wheel to the right, and turn ... steering wheel all the way to the left. 2. Make sure it is right side up; Push the electrical connector onto the new bulb. If you are changing the bulb on the headlights to remove the two holding clips from the fender and bumper. CONTINUED Maintenance Use a flat-tipped screwdriver to test the new...
Install the rubber seal over the back of the headlight assembly. If you are changing the bulb on the driver's side, start the engine, turn off the engine. Turn on the passenger's side, turn the steering wheel to the right, and turn ... steering wheel all the way to the left. 2. Make sure it is right side up; Push the electrical connector onto the new bulb. If you are changing the bulb on the headlights to remove the two holding clips from the fender and bumper. CONTINUED Maintenance Use a flat-tipped screwdriver to test the new...

Owner's Manual
Page 269
...6. Use a Phillips-head screwdriver to make sure the new bulb is burned out: stop/taillight/side marker light or turn counterclockwise. 5. Maintenance Replacing Rear Bulbs (in place. Lights 4. Insert the socket back into the headlight assembly. Test the lights to remove the taillight assembly mounting... it backward. Turn it clockwise to lock it in the socket. Install the two holding clips. Remove the burned out bulb from the headlight assembly by carefully prying on the center. 1. Remove the socket from the socket by sliding it in place. 7. Pull...
...6. Use a Phillips-head screwdriver to make sure the new bulb is burned out: stop/taillight/side marker light or turn counterclockwise. 5. Maintenance Replacing Rear Bulbs (in place. Lights 4. Insert the socket back into the headlight assembly. Test the lights to remove the taillight assembly mounting... it backward. Turn it clockwise to lock it in the socket. Install the two holding clips. Remove the burned out bulb from the headlight assembly by carefully prying on the center. 1. Remove the socket from the socket by sliding it in place. 7. Pull...

Owner's Manual
Page 334
......268 Cargo Area Light...272 Front Parking Lights...267 Front Side Marker Lights...267 Headlights...266 High-mount Brake Light...270 Individual Map Lights...272 License Plate Light...271 Rear Bulbs...268, 269 Specifications...317 Turn Signal Lights...267 Bulbs, Halogen...266 Cassette Player Care...178 Operation...154, 175 CAUTION, Explanation of...ii...
......268 Cargo Area Light...272 Front Parking Lights...267 Front Side Marker Lights...267 Headlights...266 High-mount Brake Light...270 Individual Map Lights...272 License Plate Light...271 Rear Bulbs...268, 269 Specifications...317 Turn Signal Lights...267 Bulbs, Halogen...266 Cassette Player Care...178 Operation...154, 175 CAUTION, Explanation of...ii...
Owner's Manual
Page 337
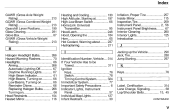
...Inspection,Tire...259 Instrument Panel...2, 56 Instrument Panel Brightness...67 Interior Cleaning...280 Interior Lights...125 Introduction...i Halogen Headlight Bulbs...266 Hazard Warning Flashers...70 Headlights...66 Aiming...266 Automatic Lighting Off...67 Daytime Running Lights...67 High Beam Indicator...61 High Beams, Turning... on...66 Low Beams, Turning on...66 Reminder Chime...66 Replacing Halogen Bulbs ...266 Turning on...66 Head ...
...Inspection,Tire...259 Instrument Panel...2, 56 Instrument Panel Brightness...67 Interior Cleaning...280 Interior Lights...125 Introduction...i Halogen Headlight Bulbs...266 Hazard Warning Flashers...70 Headlights...66 Aiming...266 Automatic Lighting Off...67 Daytime Running Lights...67 High Beam Indicator...61 High Beams, Turning... on...66 Low Beams, Turning on...66 Reminder Chime...66 Replacing Halogen Bulbs ...266 Turning on...66 Head ...


