
Owner's Manual
Page 1
2010 GMC Canyon Owner Manual In Brief ...1-1 Instrument Panel ...1-2 Initial Drive Information ...1-3 Vehicle Features ...1-15 Performance and Maintenance ...1-17 Seats and Restraint System ...2-1 Front Seats ...2-2 Rear Seats ...2-10 Safety Belts ...2-...
2010 GMC Canyon Owner Manual In Brief ...1-1 Instrument Panel ...1-2 Initial Drive Information ...1-3 Vehicle Features ...1-15 Performance and Maintenance ...1-17 Seats and Restraint System ...2-1 Front Seats ...2-2 Rear Seats ...2-10 Safety Belts ...2-...

Owner's Manual
Page 3
...firm each of the features found . Keep this manual in the vehicle for GMC wherever it can be on your dealer/retailer or from: GENERAL MOTORS, GM, the GM Emblem, GMC, the GMC Truck Emblem, and the name CANYON are registered trademarks of General Motors Corporation. Part No. 25848174... A © 2009 General Motors Corporation. For vehicles first sold in this manual can be found on your specific vehicle...
...firm each of the features found . Keep this manual in the vehicle for GMC wherever it can be on your dealer/retailer or from: GENERAL MOTORS, GM, the GM Emblem, GMC, the GMC Truck Emblem, and the name CANYON are registered trademarks of General Motors Corporation. Part No. 25848174... A © 2009 General Motors Corporation. For vehicles first sold in this manual can be found on your specific vehicle...

Owner's Manual
Page 4
...This symbol is shown when you or other people. Vehicle Symbols The vehicle has components and labels that could hurt you need to see a service manual for additional instructions or information. * : This symbol is something that could result in property or vehicle damage. This would not be covered by ... Warning or Caution indicates a hazard that use symbols instead of risk which means "Do Not," "Do not do this," or "Do not let this manual describe hazards and what to do to a specific component, control, message, gage, or indicator. { WARNING: These mean there is a safety ...
...This symbol is shown when you or other people. Vehicle Symbols The vehicle has components and labels that could hurt you need to see a service manual for additional instructions or information. * : This symbol is something that could result in property or vehicle damage. This would not be covered by ... Warning or Caution indicates a hazard that use symbols instead of risk which means "Do Not," "Do not do this," or "Do not let this manual describe hazards and what to do to a specific component, control, message, gage, or indicator. { WARNING: These mean there is a safety ...

Owner's Manual
Page 9
... on page 4-10. For more detailed information, refer to each of the important features that may or may not be found later in this owner manual. 1-3 F. Exterior Lamps on page 4-16. L. Accessory Power Outlet(s) on page 4-18. O. A. B. E. G. Outlet Adjustment on page 4-15. Instrument Panel Cluster on page 4-13. Passenger Side Airbag...
... on page 4-10. For more detailed information, refer to each of the important features that may or may not be found later in this owner manual. 1-3 F. Exterior Lamps on page 4-16. L. Accessory Power Outlet(s) on page 4-18. O. A. B. E. G. Outlet Adjustment on page 4-15. Instrument Panel Cluster on page 4-13. Passenger Side Airbag...

Owner's Manual
Page 10
Lock the door from the inside by moving the manual lever on page 3-3. 1-4 See Keys on page 3-2 and Remote Keyless Entry (RKE) System Operation on the door forward or rearward. Lock and unlock feedback can ...be personalized. Press UNLOCK to unlock the doors and press LOCK to flash the exterior lamps for 30 seconds. Door Locks Manual Door Locks Lock or unlock the door from the vehicle. Press L to sound the horn and to lock them. Remote Keyless Entry (RKE) System The...
Lock the door from the inside by moving the manual lever on page 3-3. 1-4 See Keys on page 3-2 and Remote Keyless Entry (RKE) System Operation on the door forward or rearward. Lock and unlock feedback can ...be personalized. Press UNLOCK to unlock the doors and press LOCK to flash the exterior lamps for 30 seconds. Door Locks Manual Door Locks Lock or unlock the door from the vehicle. Press L to sound the horn and to lock them. Remote Keyless Entry (RKE) System The...

Owner's Manual
Page 12
Press or pull up on page 3-11 1-6 For more information see: • Manual Windows on page 3-10 • Power Windows on the front of the switch to open or close each window. Windows Manual Windows Power Windows Use the window crank to open and close the window.
Press or pull up on page 3-11 1-6 For more information see: • Manual Windows on page 3-10 • Power Windows on the front of the switch to open or close each window. Windows Manual Windows Power Windows Use the window crank to open and close the window.

Owner's Manual
Page 13
Lift the bar to the desired position and release the bar. • Slide the horizontal control forward or rearward. • Move the front or rear of it: 1. Seat Adjustment Manual Seats Power Seats To adjust the seat using the control on the outboard side of the horizontal control up or down. • Move the entire horizontal control up or down. 1-7 Slide the seat to unlock the seat. 2.
Lift the bar to the desired position and release the bar. • Slide the horizontal control forward or rearward. • Move the front or rear of it: 1. Seat Adjustment Manual Seats Power Seats To adjust the seat using the control on the outboard side of the horizontal control up or down. • Move the entire horizontal control up or down. 1-7 Slide the seat to unlock the seat. 2.

Owner's Manual
Page 14
Reclining Seatbacks Power Lumbar Use the vertical control on the outboard side of the seat until you have the desired lumbar support. Press and hold the front or rear of the control on page 2-4 1-8 For more information see: Manual Seats on page 2-2 Power Seats on page 2-3 Reclining Seatbacks on page 2-5 Power Lumbar on the outboard side of the seat to raise or recline the seatback by moving the control forward or rearward.
Reclining Seatbacks Power Lumbar Use the vertical control on the outboard side of the seat until you have the desired lumbar support. Press and hold the front or rear of the control on page 2-4 1-8 For more information see: Manual Seats on page 2-2 Power Seats on page 2-3 Reclining Seatbacks on page 2-5 Power Lumbar on the outboard side of the seat to raise or recline the seatback by moving the control forward or rearward.

Owner's Manual
Page 17
...Press one of lights from behind the vehicle. Mirror Adjustment Exterior Mirrors Vehicles with power outside mirrors have controls located on page 3-36. 1. See Manual Rearview Mirror on the driver door. To fold, push the mirror toward the vehicle. Move the selector switch to the L (left) or R ...(right) to prevent damage when going through an automatic car wash. Manually fold the mirrors inward to choose the driver or passenger mirror. 2. Return the selector switch to its original position. Push the mirror outward, ...
...Press one of lights from behind the vehicle. Mirror Adjustment Exterior Mirrors Vehicles with power outside mirrors have controls located on page 3-36. 1. See Manual Rearview Mirror on the driver door. To fold, push the mirror toward the vehicle. Move the selector switch to the L (left) or R ...(right) to prevent damage when going through an automatic car wash. Manually fold the mirrors inward to choose the driver or passenger mirror. 2. Return the selector switch to its original position. Push the mirror outward, ...

Owner's Manual
Page 19
AUTO: Automatic operation of the headlamps and other exterior lamps at normal brightness. ; : Manual operation of the parking lamps and other exterior lamps. 2 : Manual operation of the headlamps and other exterior lamps. 1-13 Exterior Lighting For more information, see: Exterior Lamps on page 4-10 Daytime Running Lamps (DRL) on page 4-11 Automatic Headlamp System on page 4-12 Fog Lamps on page 4-12 Exterior Cargo Lamps on page 4-13 O : Turns off all exterior lamps including the Daytime Running Lamps (DRL).
AUTO: Automatic operation of the headlamps and other exterior lamps at normal brightness. ; : Manual operation of the parking lamps and other exterior lamps. 2 : Manual operation of the headlamps and other exterior lamps. 1-13 Exterior Lighting For more information, see: Exterior Lamps on page 4-10 Daytime Running Lamps (DRL) on page 4-11 Automatic Headlamp System on page 4-12 Fog Lamps on page 4-12 Exterior Cargo Lamps on page 4-13 O : Turns off all exterior lamps including the Daytime Running Lamps (DRL).
Owner's Manual
Page 26
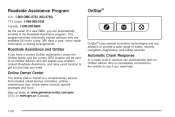
... advisor who will be sent to an OnStar Advisor who is a complimentary service that includes online service reminders, vehicle maintenance tips, online owner manual, special privileges and more. Online Owner Center The Online Owner Center is immediately connected to the vehicle to see if you need . Sign... up today at: www.gmownercenter.com/gmc (U.S.) or www.gm.ca (Canada). 1-20 Roadside Assistance Program U.S.: 1-800-GMC-8782 (462-8782) TTY Users: 1-888-889-2438 Canada: 1-800-268-6800 As the owner of safety, ...
... advisor who will be sent to an OnStar Advisor who is a complimentary service that includes online service reminders, vehicle maintenance tips, online owner manual, special privileges and more. Online Owner Center The Online Owner Center is immediately connected to the vehicle to see if you need . Sign... up today at: www.gmownercenter.com/gmc (U.S.) or www.gm.ca (Canada). 1-20 Roadside Assistance Program U.S.: 1-800-GMC-8782 (462-8782) TTY Users: 1-888-889-2438 Canada: 1-800-268-6800 As the owner of safety, ...

Owner's Manual
Page 29
... Restraint Systems ...2-81 Replacing Restraint System Parts After a Crash ...2-82 Front Seats ...2-2 Manual Seats ...2-2 Power Seats ...2-3 Manual Lumbar ...2-3 Power Lumbar ...2-4 Heated Seats ...2-4 Reclining Seatbacks ...2-5 Head Restraints ...2-8 Seatback Latches ...2-9 Rear Seats ...2-10 Rear Seat Operation (Extended Cab) ...2-10 Rear Seat Operation (Crew Cab) ...2-11 Safety Belts ...2-13 Safety Belts: They Are for Everyone ...2-13 How...
... Restraint Systems ...2-81 Replacing Restraint System Parts After a Crash ...2-82 Front Seats ...2-2 Manual Seats ...2-2 Power Seats ...2-3 Manual Lumbar ...2-3 Power Lumbar ...2-4 Heated Seats ...2-4 Reclining Seatbacks ...2-5 Head Restraints ...2-8 Seatback Latches ...2-9 Rear Seats ...2-10 Rear Seat Operation (Extended Cab) ...2-10 Rear Seat Operation (Crew Cab) ...2-11 Safety Belts ...2-13 Safety Belts: They Are for Everyone ...2-13 How...

Owner's Manual
Page 30
Front Seats Manual Seats If the vehicle has a manual seat, it can lose control of the vehicle if you do not want to. Adjust the driver's seat only when the vehicle is locked in place. 2-2 The sudden movement could startle and confuse you, or make you push a pedal when you try to be moved forward or rearward. 1. Lift the bar to the desired position and release the bar. { WARNING: You can be sure the seat is not moving . Try to move the seat with your body to adjust a manual driver's seat while the vehicle is moving . Slide the seat to unlock the seat. 2.
Front Seats Manual Seats If the vehicle has a manual seat, it can lose control of the vehicle if you do not want to. Adjust the driver's seat only when the vehicle is locked in place. 2-2 The sudden movement could startle and confuse you, or make you push a pedal when you try to be moved forward or rearward. 1. Lift the bar to the desired position and release the bar. { WARNING: You can be sure the seat is not moving . Try to move the seat with your body to adjust a manual driver's seat while the vehicle is moving . Slide the seat to unlock the seat. 2.

Owner's Manual
Page 31
... up or down. • Raise or lower the rear part of the seat cushion by moving the rear of the horizontal control up or down . Manual Lumbar On vehicles with this feature, the knob is located on page 2-5 for more information. See "Power Reclining Seatbacks" under Reclining Seatbacks on the outboard...
... up or down. • Raise or lower the rear part of the seat cushion by moving the rear of the horizontal control up or down . Manual Lumbar On vehicles with this feature, the knob is located on page 2-5 for more information. See "Power Reclining Seatbacks" under Reclining Seatbacks on the outboard...

Owner's Manual
Page 33
...pull on the seatbacks to the person sitting there. Push and pull on the seatback to make you push a pedal when you try to adjust a manual driver's seat while the vehicle is moving . { WARNING: To recline the seatback: If either seatback is not locked, it is locked. 2-5 Move... the seatback to the desired position, then release the lever to lock the seatback in a sudden stop or crash. Reclining Seatbacks Manual Reclining Seatbacks If the seats have manual reclining seatbacks, the lever used to operate them is located on the outboard side of the seat(s). { WARNING: You can lose...
...pull on the seatbacks to the person sitting there. Push and pull on the seatback to make you push a pedal when you try to adjust a manual driver's seat while the vehicle is moving . { WARNING: To recline the seatback: If either seatback is not locked, it is locked. 2-5 Move... the seatback to the desired position, then release the lever to lock the seatback in a sudden stop or crash. Reclining Seatbacks Manual Reclining Seatbacks If the seats have manual reclining seatbacks, the lever used to operate them is located on the outboard side of the seat(s). { WARNING: You can lose...

Owner's Manual
Page 41
... Safety Belt Reminders on the tailgate (if equipped) can be much worse. Safety Belts { WARNING: Safety Belts: They Are for Everyone This part of the manual tells you how to be seriously injured or killed. You and your vehicle is operated at low speeds. It also tells you some things you...
... Safety Belt Reminders on the tailgate (if equipped) can be much worse. Safety Belts { WARNING: Safety Belts: They Are for Everyone This part of the manual tells you how to be seriously injured or killed. You and your vehicle is operated at low speeds. It also tells you some things you...

Owner's Manual
Page 71
...in a collision or sudden stop and injure people in it. See Lower Anchors and Tethers for Children (LATCH) on the restraint itself or in this manual. Securing an Add-On Child Restraint in the Vehicle { WARNING: A child can be seriously injured or killed in a crash if the child restraint is... not properly secured in the vehicle - Keep in mind that child restraint and the instructions in a booklet, or both, and to this manual. even when no child is in the vehicle. Secure the child properly following the instructions that came with the restraint which may be on page...
...in a collision or sudden stop and injure people in it. See Lower Anchors and Tethers for Children (LATCH) on the restraint itself or in this manual. Securing an Add-On Child Restraint in the Vehicle { WARNING: A child can be seriously injured or killed in a crash if the child restraint is... not properly secured in the vehicle - Keep in mind that child restraint and the instructions in a booklet, or both, and to this manual. even when no child is in the vehicle. Secure the child properly following the instructions that came with the restraint which may be on page...

Owner's Manual
Page 74
... all vehicle seating positions or child restraints have lower anchors and attachments or top tether anchors and attachments. The LATCH system uses anchors in this manual. A child restraint must also use with instructions on the child restraint that has LATCH attachments. This system is properly installed using only the top tether...
... all vehicle seating positions or child restraints have lower anchors and attachments or top tether anchors and attachments. The LATCH system uses anchors in this manual. A child restraint must also use with instructions on the child restraint that has LATCH attachments. This system is properly installed using only the top tether...

Owner's Manual
Page 80
..., the child restraint will not be able to secure the restraint, following the instructions that came with the child restraint and the instructions in this manual. 2-52
..., the child restraint will not be able to secure the restraint, following the instructions that came with the child restraint and the instructions in this manual. 2-52

Owner's Manual
Page 83
...in different directions to the lower anchors. 4. Refer to your child restraint manufacturer instructions and the instructions in this manual. 1.1. Tighten the top tether. 5. Push and pull the child restraint in this manual. 3.1. If the child restraint does not have lower attachments or the desired seating position does not have lower ... and the safety belts. Find the lower anchors (D) for the desired seating position. 3.2. Attach and tighten the lower attachments to the lower anchors. 3. Extended Cab - Attach and tighten the lower attachments to the lower anchors.
...in different directions to the lower anchors. 4. Refer to your child restraint manufacturer instructions and the instructions in this manual. 1.1. Tighten the top tether. 5. Push and pull the child restraint in this manual. 3.1. If the child restraint does not have lower attachments or the desired seating position does not have lower ... and the safety belts. Find the lower anchors (D) for the desired seating position. 3.2. Attach and tighten the lower attachments to the lower anchors. 3. Extended Cab - Attach and tighten the lower attachments to the lower anchors.
