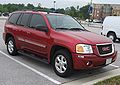
Owner's Manual
Page 1
... Axle ...377 380 382 388 428 428 429 1 2007 GMC Envoy and Envoy Denali Owner Manual Seats and Restraint Systems ...7 Front Seats ...8 Rear Seats ...18 Safety Belts ...20 Child Restraints ...42 Airbag System ...71 Restraint System Check ...90 Features and Controls ...93 Keys ...95 Doors and Locks ...100 Windows ...107 Theft-Deterrent Systems ...110 Starting...
... Axle ...377 380 382 388 428 428 429 1 2007 GMC Envoy and Envoy Denali Owner Manual Seats and Restraint Systems ...7 Front Seats ...8 Rear Seats ...18 Safety Belts ...20 Child Restraints ...42 Airbag System ...71 Restraint System Check ...90 Features and Controls ...93 Keys ...95 Doors and Locks ...100 Windows ...107 Theft-Deterrent Systems ...110 Starting...

Owner's Manual
Page 8
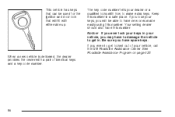
The sudden movement could startle and confuse you, or make you push a pedal when you want to unlock it and release the bar. Adjust the driver's seat only when the vehicle is not moving . Slide the seat to where you do not want it . Front Seats Manual Seats {CAUTION: You can lose control of the seat to . Try to move the seat with your body to adjust a manual driver's seat while the vehicle is locked in place. 8 Lift the bar located under the front of the vehicle if you try to be sure the seat is moving .
The sudden movement could startle and confuse you, or make you push a pedal when you want to unlock it and release the bar. Adjust the driver's seat only when the vehicle is not moving . Slide the seat to where you do not want it . Front Seats Manual Seats {CAUTION: You can lose control of the seat to . Try to move the seat with your body to adjust a manual driver's seat while the vehicle is locked in place. 8 Lift the bar located under the front of the vehicle if you try to be sure the seat is moving .

Owner's Manual
Page 14
... seatback to make you push a pedal when you try to adjust a manual driver's seat while the vehicle is moving . {CAUTION: If the seatback is not locked, it is locked. 14 To recline the seatback, do not want to. The sudden movement could startle and confuse you, or make sure it is... locked. Lift the recline lever. 2. That could move forward in place. 3. Reclining Seatbacks Manual Reclining Seatbacks If the seats have manual reclining seatbacks, the lever used ...
... seatback to make you push a pedal when you try to adjust a manual driver's seat while the vehicle is moving . {CAUTION: If the seatback is not locked, it is locked. 14 To recline the seatback, do not want to. The sudden movement could startle and confuse you, or make sure it is... locked. Lift the recline lever. 2. That could move forward in place. 3. Reclining Seatbacks Manual Reclining Seatbacks If the seats have manual reclining seatbacks, the lever used ...

Owner's Manual
Page 15
Lift the lever fully without applying pressure to the seatback and the seatback will return to an upright position, do the following: 1. Push and pull on the outboard side of the seat(s). • To recline the seatback, press the control toward the rear of the vehicle. • To raise the seatback, press the control toward the front of the vehicle. 15 Power Reclining Seatbacks If your seats have power reclining seatbacks, use the vertical power seat control located on the seatback to make sure it is locked. To return the seatback to the upright position. 2.
Lift the lever fully without applying pressure to the seatback and the seatback will return to an upright position, do the following: 1. Push and pull on the outboard side of the seat(s). • To recline the seatback, press the control toward the rear of the vehicle. • To raise the seatback, press the control toward the front of the vehicle. 15 Power Reclining Seatbacks If your seats have power reclining seatbacks, use the vertical power seat control located on the seatback to make sure it is locked. To return the seatback to the upright position. 2.

Owner's Manual
Page 19
Return the head restraints to the upright position by reaching behind the seat and pulling it forward until it is locked. 2. Push and pull on the head restraint to make sure it locks into place. 19 Flip the seat cushion back into the upright position. Push and pull on the seatback to ...be sure it could cause injury to make sure that it locks into place. Lift the seatback until it is locked. 3. To return the seat(s) to the original position, do the following: {CAUTION: If the seatback is not...
Return the head restraints to the upright position by reaching behind the seat and pulling it forward until it is locked. 2. Push and pull on the head restraint to make sure it locks into place. 19 Flip the seat cushion back into the upright position. Push and pull on the seatback to ...be sure it could cause injury to make sure that it locks into place. Lift the seatback until it is locked. 3. To return the seat(s) to the original position, do the following: {CAUTION: If the seatback is not...

Owner's Manual
Page 26
... position. How to Wear Safety Belts Properly This part is how to wear it get twisted. 26 Follow those rules for everyone's protection. Close and lock the door. 2.
... position. How to Wear Safety Belts Properly This part is how to wear it get twisted. 26 Follow those rules for everyone's protection. Close and lock the door. 2.

Owner's Manual
Page 27
... up on page 41. Pull up on the shoulder belt. If this happens, let the belt go back slightly to unlock it clicks. It may lock if you pull the belt across you more slowly. 4. Make sure the release button on smaller occupants. 27 The lap-shoulder belt may be able...
... up on page 41. Pull up on the shoulder belt. If this happens, let the belt go back slightly to unlock it clicks. It may lock if you pull the belt across you more slowly. 4. Make sure the release button on smaller occupants. 27 The lap-shoulder belt may be able...

Owner's Manual
Page 28
If you would apply force at your abdomen. The safety belt locks if there is a sudden stop or crash. 28 And you slid under the lap belt. These parts of the belt should go over the shoulder and across the chest. The shoulder belt should be less likely to take belt restraining forces. This could cause serious or even fatal injuries. In a crash, this applies force to the strong pelvic bones. The lap part of the body are best able to slide under it, the belt would be worn low and snug on the hips, just touching the thighs.
If you would apply force at your abdomen. The safety belt locks if there is a sudden stop or crash. 28 And you slid under the lap belt. These parts of the belt should go over the shoulder and across the chest. The shoulder belt should be less likely to take belt restraining forces. This could cause serious or even fatal injuries. In a crash, this applies force to the strong pelvic bones. The lap part of the body are best able to slide under it, the belt would be worn low and snug on the hips, just touching the thighs.

Owner's Manual
Page 35
... be thrown out of the belt out all the way and start again. 35 Accident statistics show that the fetus will engage the child restraint locking feature. The right front passenger's safety belt works the same way as for one thing.
... be thrown out of the belt out all the way and start again. 35 Accident statistics show that the fetus will engage the child restraint locking feature. The right front passenger's safety belt works the same way as for one thing.

Owner's Manual
Page 36
... rear seat positions have lap-shoulder belts. Pull up on page 41. If this happens, let the belt go back all the way, it will lock. When the shoulder belt is pulled out all the way and start again. If the belt is positioned so you would be able to unbuckle... 3. If it does, let it go back slightly to unlock it is how to . 1. To make sure it . Here is secure. The shoulder belt may lock if you pull the belt across you very quickly. Push the latch plate into the buckle until it get twisted. Then pull the belt across...
... rear seat positions have lap-shoulder belts. Pull up on page 41. If this happens, let the belt go back all the way, it will lock. When the shoulder belt is pulled out all the way and start again. If the belt is positioned so you would be able to unbuckle... 3. If it does, let it go back slightly to unlock it is how to . 1. To make sure it . Here is secure. The shoulder belt may lock if you pull the belt across you very quickly. Push the latch plate into the buckle until it get twisted. Then pull the belt across...

Owner's Manual
Page 37
... the hips, just touching the thighs. This could increase injury. The shoulder belt should go over the shoulder and across the chest. The safety belt locks if there is a sudden stop or a crash, or if you slid under the lap belt. If you pull the belt very quickly out of the...
... the hips, just touching the thighs. This could increase injury. The shoulder belt should go over the shoulder and across the chest. The safety belt locks if there is a sudden stop or a crash, or if you slid under the lap belt. If you pull the belt very quickly out of the...
Owner's Manual
Page 59
... to the anchors you will allow you to Put the Restraint on the floor in the rear rather than the front seat. There is locked into place. The labels are located above a flap, at the center of the seat where the seat cushion meets the seatback. This will need...
... to the anchors you will allow you to Put the Restraint on the floor in the rear rather than the front seat. There is locked into place. The labels are located above a flap, at the center of the seat where the seat cushion meets the seatback. This will need...

Owner's Manual
Page 61
... lower anchors, secure the child restraint with the safety belts secured may cause damage to set the lock, if your child restraint manufacturer instructions and the instructions in this manual. 1.1. Be sure the cushion is locked into place. 61 Secure any unused safety belts behind the child restraint that there is no...
... lower anchors, secure the child restraint with the safety belts secured may cause damage to set the lock, if your child restraint manufacturer instructions and the instructions in this manual. 1.1. Be sure the cushion is locked into place. 61 Secure any unused safety belts behind the child restraint that there is no...

Owner's Manual
Page 64
Pull the rest of the shoulder belt all the way out of the retractor to . 4. 3. Make sure the release button is positioned so you would be able to unbuckle the safety belt quickly if you ever had to set the lock. 64 Buckle the belt.
Pull the rest of the shoulder belt all the way out of the retractor to . 4. 3. Make sure the release button is positioned so you would be able to unbuckle the safety belt quickly if you ever had to set the lock. 64 Buckle the belt.

Owner's Manual
Page 69
4. Make sure the release button is positioned so you would be able to unbuckle the safety belt quickly if you ever had to set the lock. 69 Pull the rest of the shoulder belt all the way out of the retractor to . 5. Buckle the belt.
4. Make sure the release button is positioned so you would be able to unbuckle the safety belt quickly if you ever had to set the lock. 69 Pull the rest of the shoulder belt all the way out of the retractor to . 5. Buckle the belt.

Owner's Manual
Page 70
.... 70 You should not be sure it helpful to use your knee to RUN or START. Remove the child restraint from the retractor once the lock has been set. 7. Push and pull the child restraint in different directions to be able to tighten the lap portion of the belt from the...
.... 70 You should not be sure it helpful to use your knee to RUN or START. Remove the child restraint from the retractor once the lock has been set. 7. Push and pull the child restraint in different directions to be able to tighten the lap portion of the belt from the...

Owner's Manual
Page 81
..., turn off , and turn the interior lamps on, and flash the hazard warning flashers when the airbags in another crash. Improper service can lock the doors again, turn the interior lamps off the hazard warning flashers by using the controls for people with a history of the vehicle after...
..., turn off , and turn the interior lamps on, and flash the hazard warning flashers when the airbags in another crash. Improper service can lock the doors again, turn the interior lamps off the hazard warning flashers by using the controls for people with a history of the vehicle after...
Owner's Manual
Page 93
... Keys ...95 Remote Keyless Entry (RKE) System ...97 Remote Keyless Entry (RKE) System Operation ...98 Doors and Locks ...100 Door Locks ...100 Power Door Locks ...101 Delayed Locking ...102 Programmable Automatic Door Locks ...102 Rear Door Security Locks ...105 Lockout Protection ...105 Liftgate/Liftglass ...106 Windows ...107 Power Windows ...108 Sun Visors ...109 Theft-Deterrent Systems...
... Keys ...95 Remote Keyless Entry (RKE) System ...97 Remote Keyless Entry (RKE) System Operation ...98 Doors and Locks ...100 Door Locks ...100 Power Door Locks ...101 Delayed Locking ...102 Programmable Automatic Door Locks ...102 Rear Door Security Locks ...105 Lockout Protection ...105 Liftgate/Liftglass ...106 Windows ...107 Power Windows ...108 Sun Visors ...109 Theft-Deterrent Systems...
Owner's Manual
Page 96
The key code number tells your vehicle, call the GM Roadside Assistance Center. Keep this number in . Notice: If you ever lock your keys in your keys, you have this number. Your selling dealer should also have spare keys. When a new vehicle is delivered, the dealer provides ...the owner with either side up. See Roadside Assistance Program on page 532. Be sure you will be used for the ignition and door lock that can be able to have new ones made easily using this number. If you may have to damage the vehicle to make extra keys...
The key code number tells your vehicle, call the GM Roadside Assistance Center. Keep this number in . Notice: If you ever lock your keys in your keys, you have this number. Your selling dealer should also have spare keys. When a new vehicle is delivered, the dealer provides ...the owner with either side up. See Roadside Assistance Program on page 532. Be sure you will be used for the ignition and door lock that can be able to have new ones made easily using this number. If you may have to damage the vehicle to make extra keys...

Owner's Manual
Page 98
...up to your vehicle, any remaining transmitters with your vehicle. Remember to unlock all the doors. Each vehicle can be matched. Press lock again within three seconds to bring any remaining transmitters must also be turned off by pressing the horn button again, by starting the ... lamps to flash and the interior lights to go to it. 98 You can program different feedback settings through your dealer. Q (Lock): Press lock to Your Vehicle Each RKE transmitter is lost transmitter will chirp. L (Panic): Press the horn symbol to 30 seconds. Press the unlock button...
...up to your vehicle, any remaining transmitters with your vehicle. Remember to unlock all the doors. Each vehicle can be matched. Press lock again within three seconds to bring any remaining transmitters must also be turned off by pressing the horn button again, by starting the ... lamps to flash and the interior lights to go to it. 98 You can program different feedback settings through your dealer. Q (Lock): Press lock to Your Vehicle Each RKE transmitter is lost transmitter will chirp. L (Panic): Press the horn symbol to 30 seconds. Press the unlock button...


