

Owner's Manual
Page 9
Lift the lever to make you push a pedal when you , or make sure the seat is locked into place. 1-3 Front Seats Manual Seats {CAUTION: You can ...
Lift the lever to make you push a pedal when you , or make sure the seat is locked into place. 1-3 Front Seats Manual Seats {CAUTION: You can ...

Owner's Manual
Page 12
... how to operate the reclining seatback feature. 1-6 If your vehicle has power seats with the heated seatback symbol. Reclining Seatbacks To adjust the front seatback, lift the manual lever located on the outboard side of the seatback button will shut off automatically when the ignition is being heated.... Lift the lever again without pushing on the seatback and the seatback will be lit to designate that only the seatback is turned off. Press the ...
... how to operate the reclining seatback feature. 1-6 If your vehicle has power seats with the heated seatback symbol. Reclining Seatbacks To adjust the front seatback, lift the manual lever located on the outboard side of the seatback button will shut off automatically when the ignition is being heated.... Lift the lever again without pushing on the seatback and the seatback will be lit to designate that only the seatback is turned off. Press the ...

Owner's Manual
Page 14
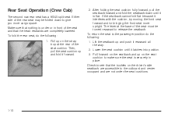
... fold forward to let you access the rear of the seat to make sure it is not locked, it latches. To fold a front seatback forward, lift the lever at the base of the cab. Head Restraints Seatback Latches {CAUTION: If the seatback is locked. 1-8 The lever is located on the seatback...
... fold forward to let you access the rear of the seat to make sure it is not locked, it latches. To fold a front seatback forward, lift the lever at the base of the cab. Head Restraints Seatback Latches {CAUTION: If the seatback is locked. 1-8 The lever is located on the seatback...
Owner's Manual
Page 16
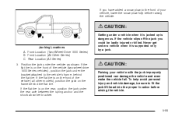
... up and push it latches into position. 3. The lever at the rear of the seat must be folded down until it rearward all the way. 2. Lift the seatback up on the seat cushion to make sure the seat is securely in front of the seat and that the buckles on the...
... up and push it latches into position. 3. The lever at the rear of the seat must be folded down until it rearward all the way. 2. Lift the seatback up on the seat cushion to make sure the seat is securely in front of the seat and that the buckles on the...

Owner's Manual
Page 105
... the tailgate, do the following: 1. Make sure the tailgate is secure. 2-15 Tailgate You can open the tailgate by lifting up , pull it back towards you . To release the retaining cable clips, lift the cable so it latches. Raise the tailgate slightly and release both retaining cable clips. After you put the...
... the tailgate, do the following: 1. Make sure the tailgate is secure. 2-15 Tailgate You can open the tailgate by lifting up , pull it back towards you . To release the retaining cable clips, lift the cable so it latches. Raise the tailgate slightly and release both retaining cable clips. After you put the...

Owner's Manual
Page 186
... could be equipped with a front ashtray located near the center of the power outlet can cause damage not covered by itself. To use the outlet, lift the cover. Do not use of the instrument panel. Do not hang any electrical equipment to your vehicle may occur to follow the proper installation...
... could be equipped with a front ashtray located near the center of the power outlet can cause damage not covered by itself. To use the outlet, lift the cover. Do not use of the instrument panel. Do not hang any electrical equipment to your vehicle may occur to follow the proper installation...

Owner's Manual
Page 407
Hood Release To open the hood do the following: 1. Then go to the lower left of the grille. 3. Before closing the hood, be sure all the filler caps are on the secondary hood release located near the center of the steering wheel. 2. Lift the hood. Pull the handle located inside the vehicle to the front of the vehicle and pull up on properly. Then pull down the hood and close it firmly. 5-13
Hood Release To open the hood do the following: 1. Then go to the lower left of the grille. 3. Before closing the hood, be sure all the filler caps are on the secondary hood release located near the center of the steering wheel. 2. Lift the hood. Pull the handle located inside the vehicle to the front of the vehicle and pull up on properly. Then pull down the hood and close it firmly. 5-13

Owner's Manual
Page 420
... as possible. 1. Locate the air cleaner/filter assembly on the front corner of the engine compartment on the passenger's side of the housing and lift up the cover. 4. Inspect or replace the engine air cleaner/filter. 6. Loosen the screws on the indicator. 5-26 Replacing the Engine Air Cleaner/Filter...
... as possible. 1. Locate the air cleaner/filter assembly on the front corner of the engine compartment on the passenger's side of the housing and lift up the cover. 4. Inspect or replace the engine air cleaner/filter. 6. Loosen the screws on the indicator. 5-26 Replacing the Engine Air Cleaner/Filter...

Owner's Manual
Page 433
... firing groups of coolant loss, change the oil and reset the oil life system. If you will be avoided. You may decide not to lift the hood but to the highest gear while driving - DRIVE (D) or THIRD (3). If you still have the overheat warning, you can drive.
... firing groups of coolant loss, change the oil and reset the oil life system. If you will be avoided. You may decide not to lift the hood but to the highest gear while driving - DRIVE (D) or THIRD (3). If you still have the overheat warning, you can drive.

Owner's Manual
Page 434
Engine-Driven Cooling Fan {CAUTION: An electric fan under the hood can start up and injure you even when the engine is what you decide it is safe to lift the hood, here is not running. Cooling System When you will see: All Other Engines A. Coolant Surge Tank B. Keep hands, clothing and tools away from any underhood electric fan. 5-40 Coolant Surge Tank Pressure Cap C. Coolant Surge Tank B. Coolant Surge Tank Pressure Cap C. Electric Engine Cooling Fan (If Equipped) 8100 V8 Engines A.
Engine-Driven Cooling Fan {CAUTION: An electric fan under the hood can start up and injure you even when the engine is what you decide it is safe to lift the hood, here is not running. Cooling System When you will see: All Other Engines A. Coolant Surge Tank B. Keep hands, clothing and tools away from any underhood electric fan. 5-40 Coolant Surge Tank Pressure Cap C. Coolant Surge Tank B. Coolant Surge Tank Pressure Cap C. Electric Engine Cooling Fan (If Equipped) 8100 V8 Engines A.

Owner's Manual
Page 459
... a new bulb into the turn signal housing and turn the bulb socket counterclockwise and remove it from the bulb socket. 6. Remove the two screws and lift off the lens. 2. Pull the turn signal housing, towards the outside of the vehicle. 4. Use care not to touch the bulb with your fingers...
... a new bulb into the turn signal housing and turn the bulb socket counterclockwise and remove it from the bulb socket. 6. Remove the two screws and lift off the lens. 2. Pull the turn signal housing, towards the outside of the vehicle. 4. Use care not to touch the bulb with your fingers...

Owner's Manual
Page 461
Reinstall the lens and tighten the screws. 1. Center High-Mounted Stoplamp (CHMSL) and Cargo Lamp To replace a center high-mounted stoplamp (CHMSL) bulb, do the following: 5. Remove the screws and lift off the lamp assembly. 5-67
Reinstall the lens and tighten the screws. 1. Center High-Mounted Stoplamp (CHMSL) and Cargo Lamp To replace a center high-mounted stoplamp (CHMSL) bulb, do the following: 5. Remove the screws and lift off the lamp assembly. 5-67

Owner's Manual
Page 465
...) A. Peel the rubber seal away from the socket. 4. For replacement bulbs not listed here, contact your hands. 2. Reinstall the lens and the lens seal. Stoplamp C. Lift the lens off the lamp assembly. 3. Pull the old bulb straight out from the lens using your dealer. 5-71 Back-up Lamp Replacement Bulbs Exterior...
...) A. Peel the rubber seal away from the socket. 4. For replacement bulbs not listed here, contact your hands. 2. Reinstall the lens and the lens seal. Stoplamp C. Lift the lens off the lamp assembly. 3. Pull the old bulb straight out from the lens using your dealer. 5-71 Back-up Lamp Replacement Bulbs Exterior...

Owner's Manual
Page 466
... twice a year for details. Install a new blade by a leading tire manufacturer. Tires Your new vehicle comes with your GM Warranty booklet for wear and cracking. Lift the wiper arm and turn the blade until it is facing away from the windshield. 2. Replacement blades come in different types and are removed in...
... twice a year for details. Install a new blade by a leading tire manufacturer. Tires Your new vehicle comes with your GM Warranty booklet for wear and cracking. Lift the wiper arm and turn the blade until it is facing away from the windshield. 2. Replacement blades come in different types and are removed in...

Owner's Manual
Page 485
... a flat tire. Use the jack provided with your vehicle is used for anything else, you maintain your foot off the road if possible. {CAUTION: Lifting a vehicle and getting under control by steering the way you 'd use your jacking equipment to leak out slowly. If a tire goes flat, the next...
... a flat tire. Use the jack provided with your vehicle is used for anything else, you maintain your foot off the road if possible. {CAUTION: Lifting a vehicle and getting under control by steering the way you 'd use your jacking equipment to leak out slowly. If a tire goes flat, the next...
Owner's Manual
Page 493
...the front of your vehicle with the jack improperly positioned can damage the vehicle and even make the vehicle fall. Front Location (Two-Wheel-Drive 1500 Series) B. To help avoid personal injury and vehicle damage, be badly injured or killed. If the vehicle slips off the jack you have ... to the vehicle's frame, behind the flat tire. Front Location (All Other Series) C. If you could be sure to fit the jack lift head into the proper location before raising the vehicle. {CAUTION: Getting under a vehicle when it is supported only by a jack. Never get under the...
...the front of your vehicle with the jack improperly positioned can damage the vehicle and even make the vehicle fall. Front Location (Two-Wheel-Drive 1500 Series) B. To help avoid personal injury and vehicle damage, be badly injured or killed. If the vehicle slips off the jack you have ... to the vehicle's frame, behind the flat tire. Front Location (All Other Series) C. If you could be sure to fit the jack lift head into the proper location before raising the vehicle. {CAUTION: Getting under a vehicle when it is supported only by a jack. Never get under the...

Owner's Manual
Page 501
Turn the wrench clockwise to the jack and place it lifts the end fitting. 11. Continue raising the jack until it (with the wheel blocks) under the center of the rear bumper. 9. Keep lowering the ... latch has released and the spare tire is hanging by turning the wheel wrench counterclockwise. Lower the jack by the cable. 5-107 Position the center lift point of the jack under the vehicle towards the front of the spare tire. 10. Attach the jack handle, extension, and wheel wrench to raise...
Turn the wrench clockwise to the jack and place it lifts the end fitting. 11. Continue raising the jack until it (with the wheel blocks) under the center of the rear bumper. 9. Keep lowering the ... latch has released and the spare tire is hanging by turning the wheel wrench counterclockwise. Lower the jack by the cable. 5-107 Position the center lift point of the jack under the vehicle towards the front of the spare tire. 10. Attach the jack handle, extension, and wheel wrench to raise...

Owner's Manual
Page 519
... Engine Compartment Overview on page 5-14 for access to the fuse/relay block. To remove fuses hold the end of the vehicle near the battery. Lift the cover for more information on the driver's side of the fuse between your thumb and index finger and pull straight out. Device DEFOG...
... Engine Compartment Overview on page 5-14 for access to the fuse/relay block. To remove fuses hold the end of the vehicle near the battery. Lift the cover for more information on the driver's side of the fuse between your thumb and index finger and pull straight out. Device DEFOG...

Owner's Manual
Page 523
Lift the cover for access to the underhood fuse block. Fuses BTSI CRNK LO HDLP-RT FOG LP FOG LP HORN W/S WASH W/S WASH INFO RADIO AMP ...
Lift the cover for access to the underhood fuse block. Fuses BTSI CRNK LO HDLP-RT FOG LP FOG LP HORN W/S WASH W/S WASH INFO RADIO AMP ...

Owner's Manual
Page 553
... Islands/Countries (Except Puerto Rico and U.S. de R.L. For more details, or to -Bumper warranty period, at no charge if you drive in the GMC Roadside Assistance program. Virgin Islands) General Motors de Mexico, S. Customer Assistance Center Paseo de la Reforma # 2740 Col. We will provide the following ...automatically enrolled in the city or travel the open road. Roadside Assistance Program As the owner of mind as hand controls and wheelchair/scooter lifts. Lomas de Bezares C.P. 11910, Mexico, D.F. 01-800-508-0000 Long Distance: 011-52-53 29 0 800 GM of vehicle purchase/lease....
... Islands/Countries (Except Puerto Rico and U.S. de R.L. For more details, or to -Bumper warranty period, at no charge if you drive in the GMC Roadside Assistance program. Virgin Islands) General Motors de Mexico, S. Customer Assistance Center Paseo de la Reforma # 2740 Col. We will provide the following ...automatically enrolled in the city or travel the open road. Roadside Assistance Program As the owner of mind as hand controls and wheelchair/scooter lifts. Lomas de Bezares C.P. 11910, Mexico, D.F. 01-800-508-0000 Long Distance: 011-52-53 29 0 800 GM of vehicle purchase/lease....

