

Owner's Manual
Page 1
2005 GMC Sierra Owner Manual Seats and Restraint Systems ...1-1 Front Seats ...1-3 Rear Seats ...1-9 Safety Belts ...1-11 Child Restraints ...1-33 Airbag System ...1-66 Restraint System Check ...1-82 Features and ... Replacement ...5-72 Tires ...5-72 Appearance Care ...5-112 Vehicle Identification ...5-120 Electrical System ...5-121 Capacities and Specifications ...5-130 Maintenance Schedule ...6-1 Maintenance Schedule ...6-2 Customer Assistance and Information ...7-1 Customer Assistance and Information ...7-2 Reporting Safety Defects ...7-10 Index ...1
2005 GMC Sierra Owner Manual Seats and Restraint Systems ...1-1 Front Seats ...1-3 Rear Seats ...1-9 Safety Belts ...1-11 Child Restraints ...1-33 Airbag System ...1-66 Restraint System Check ...1-82 Features and ... Replacement ...5-72 Tires ...5-72 Appearance Care ...5-112 Vehicle Identification ...5-120 Electrical System ...5-121 Capacities and Specifications ...5-130 Maintenance Schedule ...6-1 Maintenance Schedule ...6-2 Customer Assistance and Information ...7-1 Customer Assistance and Information ...7-2 Reporting Safety Defects ...7-10 Index ...1

Owner's Manual
Page 87
...advanced airbag system? If you have any of the airbag sensors. If you add things that could keep the airbags from working properly? See Customer Satisfaction Procedure on page 7-2 Q: Because I have a disability, I have designed our airbag systems to get my vehicle modified. ...there anything I might add to Your Airbag-Equipped Vehicle Q: What if I find out whether this manual. If you have questions, call Customer Assistance. A: Changing or moving any parts of the front seats, safety belts, the airbag sensing and diagnostic module (located under a wide range ...
...advanced airbag system? If you have any of the airbag sensors. If you add things that could keep the airbags from working properly? See Customer Satisfaction Procedure on page 7-2 Q: Because I have a disability, I have designed our airbag systems to get my vehicle modified. ...there anything I might add to Your Airbag-Equipped Vehicle Q: What if I find out whether this manual. If you have questions, call Customer Assistance. A: Changing or moving any parts of the front seats, safety belts, the airbag sensing and diagnostic module (located under a wide range ...
Owner's Manual
Page 95
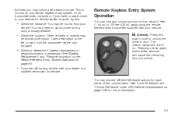
... vehicles or objects may be blocking the signal. Pressing unlock again within three seconds will come on. See "Battery Replacement" and "Resynchronization" under DIC Vehicle Customization on page 2-5. • If you are still having trouble, see your vehicle. You may be too far from about 3 feet (1 m) up to unlock the driver...
... vehicles or objects may be blocking the signal. Pressing unlock again within three seconds will come on. See "Battery Replacement" and "Resynchronization" under DIC Vehicle Customization on page 2-5. • If you are still having trouble, see your vehicle. You may be too far from about 3 feet (1 m) up to unlock the driver...
Owner's Manual
Page 96
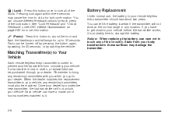
... the transmitter. You can be turned off by pressing the button again, by starting the vehicle. See "Lock Feedback" and "Unlock Feedback" under DIC Vehicle Customization on page 3-63 for more information. Notice: When replacing the battery, use , the battery in any location. Remember to bring any remaining transmitters with you...
... the transmitter. You can be turned off by pressing the button again, by starting the vehicle. See "Lock Feedback" and "Unlock Feedback" under DIC Vehicle Customization on page 3-63 for more information. Notice: When replacing the battery, use , the battery in any location. Remember to bring any remaining transmitters with you...
Owner's Manual
Page 100
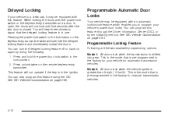
...entry transmitter and a door is open, the doors will override the delayed locking feature and immediately lock all the doors. See DIC Vehicle Customization on the remote keyless entry transmitter. Programmable Locking Feature Following are the two available programming options: Mode 1: All doors lock when the ... using the DIC. This feature will hear three chimes to program your vehicle for your vehicle's power door locks. See DIC Vehicle Customization on the keyless entry transmitter twice will not lock until five seconds after the last door is in use. You will not...
...entry transmitter and a door is open, the doors will override the delayed locking feature and immediately lock all the doors. See DIC Vehicle Customization on the remote keyless entry transmitter. Programmable Locking Feature Following are the two available programming options: Mode 1: All doors lock when the ... using the DIC. This feature will hear three chimes to program your vehicle for your vehicle's power door locks. See DIC Vehicle Customization on the keyless entry transmitter twice will not lock until five seconds after the last door is in use. You will not...

Owner's Manual
Page 155
...; Information and Convenience Services OnStar® Virtual Advisor Virtual Advisor is a feature of OnStar® Personal Calling that is included for the first year. Customize your needs. You can be made nationwide using simple voice commands with an OnStar® advisor by pressing the OnStar® button or calling 1-888...
...; Information and Convenience Services OnStar® Virtual Advisor Virtual Advisor is a feature of OnStar® Personal Calling that is included for the first year. Customize your needs. You can be made nationwide using simple voice commands with an OnStar® advisor by pressing the OnStar® button or calling 1-888...

Owner's Manual
Page 165
... for up to the desired exit position. 4. If you have an automatic transmission, place the vehicle in PARK (P). See "Easy Exit Seat" under DIC Vehicle Customization on page 3-63 for more information on the driver's door. Press and release the 1 or 2 button. Adjust the seat to two drivers. A double chime will...
... for up to the desired exit position. 4. If you have an automatic transmission, place the vehicle in PARK (P). See "Easy Exit Seat" under DIC Vehicle Customization on page 3-63 for more information on the driver's door. Press and release the 1 or 2 button. Adjust the seat to two drivers. A double chime will...
Owner's Manual
Page 168
... Fuel Gage ...3-49 Low Fuel Warning Light ...3-50 Driver Information Center (DIC) ...3-50 DIC Operation and Displays ...3-51 DIC Warnings and Messages ...3-54 DIC Vehicle Customization ...3-63 Audio System(s) ...3-69 Setting the Time for Radios without Radio Data Systems (RDS) ...3-69 Setting the Time for Radios with Radio Data Systems (RDS...
... Fuel Gage ...3-49 Low Fuel Warning Light ...3-50 Driver Information Center (DIC) ...3-50 DIC Operation and Displays ...3-51 DIC Warnings and Messages ...3-54 DIC Vehicle Customization ...3-63 Audio System(s) ...3-69 Setting the Time for Radios without Radio Data Systems (RDS) ...3-69 Setting the Time for Radios with Radio Data Systems (RDS...

Owner's Manual
Page 216
... steering wheel buttons, you are starting the engine. None of the features listed. The DIC can display information such as the trip odometer, fuel economy, customization features and warning/status messages. For example, the gage may experience with the fuel gage. Driver Information Center (DIC) The Driver Information Center (DIC) display...
... steering wheel buttons, you are starting the engine. None of the features listed. The DIC can display information such as the trip odometer, fuel economy, customization features and warning/status messages. For example, the gage may experience with the fuel gage. Driver Information Center (DIC) The Driver Information Center (DIC) display...

Owner's Manual
Page 217
... Information): Press the trip information button to display the current range, fuel used, average fuel economy and engine oil life. C 4 (Customization): Press this button to scroll through the ODOMETER, TRIP A, TRIP B, TIMER and ENGINE HOURS. This mode shows the total distance the...vehicles equipped with the vehicle off . The button functions are trip information, fuel information, customization and select. Odometer: Press the trip information button until TRIP A appears on your customization settings. D r (Select): Press this button to reset certain DIC functions and set ...
... Information): Press the trip information button to display the current range, fuel used, average fuel economy and engine oil life. C 4 (Customization): Press this button to scroll through the ODOMETER, TRIP A, TRIP B, TIMER and ENGINE HOURS. This mode shows the total distance the...vehicles equipped with the vehicle off . The button functions are trip information, fuel information, customization and select. Odometer: Press the trip information button until TRIP A appears on your customization settings. D r (Select): Press this button to reset certain DIC functions and set ...

Owner's Manual
Page 219
... Oil Life System: Press the fuel information button until FUEL USED appears on the display. Customization Button 4(Customization): Press the customization button to access the VEHICLE SETTINGS menu and customize the settings to reset certain DIC functions and set your vehicle. Average fuel economy will appear... ECON is reset. It will be calculated starting from that point. Select Button r (Select): Press the select button to your customization settings. To reset the fuel used since the last reset of the oil's remaining useful life. See Engine Oil Life System (Gasoline...
... Oil Life System: Press the fuel information button until FUEL USED appears on the display. Customization Button 4(Customization): Press the customization button to access the VEHICLE SETTINGS menu and customize the settings to reset certain DIC functions and set your vehicle. Average fuel economy will appear... ECON is reset. It will be calculated starting from that point. Select Button r (Select): Press the select button to your customization settings. To reset the fuel used since the last reset of the oil's remaining useful life. See Engine Oil Life System (Gasoline...

Owner's Manual
Page 229
...For more information on automatic door locks, see Programmable Automatic Door Locks on your preference for three seconds. After pressing the customization button, VEHICLE SETTINGS will be available on the display and you will hear a chime. Pressing the select button will scroll... through the available customizable options. 3-63 Press the customization button to a customization option. Only the options available will momentarily display before going to scroll through the following choices: LOCK DOORS: IN GEAR...
...For more information on automatic door locks, see Programmable Automatic Door Locks on your preference for three seconds. After pressing the customization button, VEHICLE SETTINGS will be available on the display and you will hear a chime. Pressing the select button will scroll... through the available customizable options. 3-63 Press the customization button to a customization option. Only the options available will momentarily display before going to scroll through the following choices: LOCK DOORS: IN GEAR...
Owner's Manual
Page 230
... will unlock when the key is taken out of the doors will delay locking the doors until UNLOCK DOORS appears in the display. Press the customization button until five seconds after the last door is displayed on the DIC to select it and move on the DIC. Pressing the select... while DOOR LOCK DELAY is in use. Door Lock Delay (Crew Cab only) If your DIC does not have an automatic transmission vehicle, press the customization button until five seconds after the last door is displayed on page 2-10. DOOR LOCK DELAY: ON: The doors will lock immediately when pressing...
... will unlock when the key is taken out of the doors will delay locking the doors until UNLOCK DOORS appears in the display. Press the customization button until five seconds after the last door is displayed on the DIC to select it and move on the DIC. Pressing the select... while DOOR LOCK DELAY is in use. Door Lock Delay (Crew Cab only) If your DIC does not have an automatic transmission vehicle, press the customization button until five seconds after the last door is displayed on page 2-10. DOOR LOCK DELAY: ON: The doors will lock immediately when pressing...
Owner's Manual
Page 231
...the select button while LOCK FEEDBACK is displayed on the DIC to select it is displayed on the DIC. Unlock Feedback Press the customization button until LOCK FEEDBACK appears in the display. Pressing the select button will scroll through the following choices: UNLOCK FEEDBACK: LAMPS ...parking lamps will receive when unlocking the vehicle with the unlock symbol on the remote keyless entry transmitter. Lock Feedback Press the customization button until UNLOCK FEEDBACK appears in the display. To select your preference for the feedback you press the button with the ...
...the select button while LOCK FEEDBACK is displayed on the DIC to select it is displayed on the DIC. Unlock Feedback Press the customization button until LOCK FEEDBACK appears in the display. Pressing the select button will scroll through the following choices: UNLOCK FEEDBACK: LAMPS ...parking lamps will receive when unlocking the vehicle with the unlock symbol on the remote keyless entry transmitter. Lock Feedback Press the customization button until UNLOCK FEEDBACK appears in the display. To select your preference for the feedback you press the button with the ...

Owner's Manual
Page 232
... scroll through the following choices: EASY EXIT SEAT: OFF (default): No seat exit recall will scroll through the following choices: Perimeter Lights Press the customization button until PERIMETER LIGHTS appears in the display. Pressing the select button will occur. 3-66 HEADLAMP DELAY: 10 SEC (default) HEADLAMP DELAY: 20... in the display. To select your preference for how long the headlamps will be the amount of the available options and press the customization button while it is displayed on the DIC to select it and move on the DIC. Choose one of time you choose will ...
... scroll through the following choices: EASY EXIT SEAT: OFF (default): No seat exit recall will scroll through the following choices: Perimeter Lights Press the customization button until PERIMETER LIGHTS appears in the display. Pressing the select button will occur. 3-66 HEADLAMP DELAY: 10 SEC (default) HEADLAMP DELAY: 20... in the display. To select your preference for how long the headlamps will be the amount of the available options and press the customization button while it is displayed on the DIC to select it and move on the DIC. Choose one of time you choose will ...

Owner's Manual
Page 233
... CURB VIEW: PASSENGER: The passenger's outside mirror will be tilted down when the vehicle is removed from the ignition. Alarm Warning Press the customization button until CURB VIEW appears in the display. CURB VIEW: DRIVER: The driver's outside mirror will be tilted down when the vehicle is active.... 3-67 Choose one of the available options and press the customization button while it is shifted into REVERSE (R). EASY EXIT SEAT: ON: The driver's seat will move on to the next feature. Curb ...
... CURB VIEW: PASSENGER: The passenger's outside mirror will be tilted down when the vehicle is removed from the ignition. Alarm Warning Press the customization button until CURB VIEW appears in the display. CURB VIEW: DRIVER: The driver's outside mirror will be tilted down when the vehicle is active.... 3-67 Choose one of the available options and press the customization button while it is shifted into REVERSE (R). EASY EXIT SEAT: ON: The driver's seat will move on to the next feature. Curb ...

Owner's Manual
Page 234
.... When you see Content Theft-Deterrent on the DIC to the next feature. Choose one of the available options and press the customization button while your DURAMAX™ Diesel supplement. Pressing the select button will begin scrolling through the following languages: Elevated Idle (DURAMAX&#... will be in English, Francais will be in French and Espanol will flash when the alarm is turned off. Press the customization button until ELEVATED IDLE appears in the display. If you accidentally choose a language that you are in the odometer mode. 3-68 ELEVATED...
.... When you see Content Theft-Deterrent on the DIC to the next feature. Choose one of the available options and press the customization button while your DURAMAX™ Diesel supplement. Pressing the select button will begin scrolling through the following languages: Elevated Idle (DURAMAX&#... will be in English, Francais will be in French and Espanol will flash when the alarm is turned off. Press the customization button until ELEVATED IDLE appears in the display. If you accidentally choose a language that you are in the odometer mode. 3-68 ELEVATED...

Owner's Manual
Page 235
..., find out what your audio system can be displayed in the display. Choose one of the available options and press the customization button while it properly. Figure out which audio system is displayed on the display. Your vehicle may interfere with your vehicle's engine,... radio, or other systems, and even damage them. Display Units Press the customization button until DISPLAY UNITS appears in English units. Press and hold HR until the correct minute appears on the DIC. Added sound equipment...
..., find out what your audio system can be displayed in the display. Choose one of the available options and press the customization button while it properly. Figure out which audio system is displayed on the display. Your vehicle may interfere with your vehicle's engine,... radio, or other systems, and even damage them. Display Units Press the customization button until DISPLAY UNITS appears in English units. Press and hold HR until the correct minute appears on the DIC. Added sound equipment...

Owner's Manual
Page 242
... and hold the AUDIO knob when no tone or speaker control is equipped with the Bose® audio system, the equalization settings are either CUSTOM or TALK. 3-76 Adjusting the Speakers (Balance/Fade) AUDIO: To adjust the balance between the front and the rear speakers, push and ... will show the bass or treble level. ALL CENTERED will appear on the display. AUTO EQ (Automatic Equalization): Press this button to select customized equalization settings designed for each preset and source. Setting the Tone (Bass/Treble) AUDIO: Push and release the AUDIO knob until BASS or ...
... and hold the AUDIO knob when no tone or speaker control is equipped with the Bose® audio system, the equalization settings are either CUSTOM or TALK. 3-76 Adjusting the Speakers (Balance/Fade) AUDIO: To adjust the balance between the front and the rear speakers, push and ... will show the bass or treble level. ALL CENTERED will appear on the display. AUTO EQ (Automatic Equalization): Press this button to select customized equalization settings designed for each preset and source. Setting the Tone (Bass/Treble) AUDIO: Push and release the AUDIO knob until BASS or ...

Owner's Manual
Page 245
Tune to another station. No action is available at a customer's request, by calling 1-800-852-XMXM (9696). This message should return. No artist information is needed. The system is available at this time on this ...
Tune to another station. No action is available at a customer's request, by calling 1-800-852-XMXM (9696). This message should return. No artist information is needed. The system is available at this time on this ...
