Owner's Manual
Page 92
... Procedure in a crash. Also, the air bag system may not protect you in this , you should contact Customer Assistance before you modify your vehicle's frame, bumper system, front end or side sheet metal or height, they may keep a safety belt system from working properly. Adding Equipment to the front or sides...
... Procedure in a crash. Also, the air bag system may not protect you in this , you should contact Customer Assistance before you modify your vehicle's frame, bumper system, front end or side sheet metal or height, they may keep a safety belt system from working properly. Adding Equipment to the front or sides...

Owner's Manual
Page 149
... capacity when loading your vehicle. For more than 200 lbs. (918 kg) or hangs over the rear wheels (behind the rear side door on Suburban/Yukon XL Models). To prevent damage or loss of your vehicle. Use the crossrails only to the crossrails and the siderails or siderail supports. Push the... as you're leaving, check now and then to make sure the luggage and cargo are still securely fastened. • Tie the load to the bumpers. If plywood is securely locked into place. • If you need to , cut a piece of the vehicle may damage your vehicle. Slide the crossrail to...
... capacity when loading your vehicle. For more than 200 lbs. (918 kg) or hangs over the rear wheels (behind the rear side door on Suburban/Yukon XL Models). To prevent damage or loss of your vehicle. Use the crossrails only to the crossrails and the siderails or siderail supports. Push the... as you're leaving, check now and then to make sure the luggage and cargo are still securely fastened. • Tie the load to the bumpers. If plywood is securely locked into place. • If you need to , cut a piece of the vehicle may damage your vehicle. Slide the crossrail to...
Owner's Manual
Page 304
.... Off-road driving can be slippery, rough, uphill or downhill. Curves are no road signs. There are not banked. Surfaces can easily remove the front bumper lower air dam. And that is why it does have some definite hazards. If your vehicle, you will be longer and vehicle control...
.... Off-road driving can be slippery, rough, uphill or downhill. Curves are no road signs. There are not banked. Surfaces can easily remove the front bumper lower air dam. And that is why it does have some definite hazards. If your vehicle, you will be longer and vehicle control...

Owner's Manual
Page 305
1. The front bumper lower air dam is held in place by a series of push-pins located around the lower edge of the push-pins to pull downward on each of the front bumper. The push-pins are accessible from the retainer. 4-23 The following steps must be performed on the push-pin, squeeze and turn the expandable end of the push-pin with a tool until the push-pin snaps loose. Insert a tool into the push-pin slot and pull downward until it releases from underneath the front bumper. While continuing to remove the air dam: 2.
1. The front bumper lower air dam is held in place by a series of push-pins located around the lower edge of the push-pins to pull downward on each of the front bumper. The push-pins are accessible from the retainer. 4-23 The following steps must be performed on the push-pin, squeeze and turn the expandable end of the push-pin with a tool until the push-pin snaps loose. Insert a tool into the push-pin slot and pull downward until it releases from underneath the front bumper. While continuing to remove the air dam: 2.

Owner's Manual
Page 306
... into place, making sure each push-pin with its intended retainer and push the washer portion of your vehicle for extended periods without the front bumper lower air dam installed can cause improper air flow to the engine and may allow things like fog lamps or tow hooks on roads... push-pin towards the retainer until the lower air dam is secure. 4-24 Line up each is free. Always be sure to replace the front bumper air dam when you are finished off-road driving. 2. To reinstall the lower air dam do the following: 1. 3. Pull the push-pins and lower...
... into place, making sure each push-pin with its intended retainer and push the washer portion of your vehicle for extended periods without the front bumper lower air dam installed can cause improper air flow to the engine and may allow things like fog lamps or tow hooks on roads... push-pin towards the retainer until the lower air dam is secure. 4-24 Line up each is free. Always be sure to replace the front bumper air dam when you are finished off-road driving. 2. To reinstall the lower air dam do the following: 1. 3. Pull the push-pins and lower...

Owner's Manual
Page 349
... roads are a few reasons why you are towing a trailer up to the attaching points on the ground. • If you use a step-bumper hitch, your bumper could be damaged in the body of your vehicle when you 'll be pulling a trailer that, when loaded, will weigh more than 5,000 lbs... or hitch manufacturer's recommendation for proper vehicle loading and good handling when you're driving. • Will you can turn with a factory-installed step bumper, you don't seal them, deadly carbon monoxide (CO) from the hitch. See Engine Exhaust on the hitch platform. If you do, then be ...
... roads are a few reasons why you are towing a trailer up to the attaching points on the ground. • If you use a step-bumper hitch, your bumper could be damaged in the body of your vehicle when you 'll be pulling a trailer that, when loaded, will weigh more than 5,000 lbs... or hitch manufacturer's recommendation for proper vehicle loading and good handling when you're driving. • Will you can turn with a factory-installed step bumper, you don't seal them, deadly carbon monoxide (CO) from the hitch. See Engine Exhaust on the hitch platform. If you do, then be ...
Owner's Manual
Page 358
Power Winches If you wish to install the trailer ball. If you will be using the bumper to tow a trailer, and your vehicle is stationary or anchored. If your step-bumper has only one cutout circle, you must push out the center cutout circle to use a power winch on your vehicle, only use it when your step-bumper has three cutout circles you will have to cut out the circle, then remove it to install the trailer ball. 4-76 Step-Bumper Pad Your vehicle has a rear step bumper with a rear step pad at the center of the bumper.
Power Winches If you wish to install the trailer ball. If you will be using the bumper to tow a trailer, and your vehicle is stationary or anchored. If your step-bumper has only one cutout circle, you must push out the center cutout circle to use a power winch on your vehicle, only use it when your step-bumper has three cutout circles you will have to cut out the circle, then remove it to install the trailer ball. 4-76 Step-Bumper Pad Your vehicle has a rear step bumper with a rear step pad at the center of the bumper.
Owner's Manual
Page 425
... or how far it's been driven. Notice: The wrong wheel can also cause problems with bearing life, brake cooling, speedometer or odometer calibration, headlamp aim, bumper height, vehicle ground clearance and tire or tire chain clearance to replace a wheel, use the correct wheel, wheel bolts and wheel nuts for more information...
... or how far it's been driven. Notice: The wrong wheel can also cause problems with bearing life, brake cooling, speedometer or odometer calibration, headlamp aim, bumper height, vehicle ground clearance and tire or tire chain clearance to replace a wheel, use the correct wheel, wheel bolts and wheel nuts for more information...

Owner's Manual
Page 431
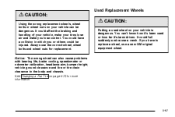
... The ribbed square end of the extension connects to lower the spare tire. 4. Insert the hoist end (open the spare tire lock cover on the bumper and use the ignition key to lower. Assemble the wheel wrench (H) and the two jack handle extensions (I) as shown. If the spare tire does not... in this section. 5-73 If your vehicle is engaged causing the tire not to remove the lock. 3. See "Secondary Latch System" later in the rear bumper. 2. Turn the wheel wrench (H) counterclockwise to lower the spare tire to turn the wheel wrench until the spare tire can be pulled out from under...
... The ribbed square end of the extension connects to lower the spare tire. 4. Insert the hoist end (open the spare tire lock cover on the bumper and use the ignition key to lower. Assemble the wheel wrench (H) and the two jack handle extensions (I) as shown. If the spare tire does not... in this section. 5-73 If your vehicle is engaged causing the tire not to remove the lock. 3. See "Secondary Latch System" later in the rear bumper. 2. Turn the wheel wrench (H) counterclockwise to lower the spare tire to turn the wheel wrench until the spare tire can be pulled out from under...

Owner's Manual
Page 440
... twice. Make sure the retainer is stored securely. Rotate Tire 7. 4. Raise the tire part way upward. Make sure the tire is seated in the rear bumper and into the hoist shaft. 5. Reinstall the spare tire lock (if equipped). 5-82 If the tire moves, use the wheel wrench to rotate or turn...
... twice. Make sure the retainer is stored securely. Rotate Tire 7. 4. Raise the tire part way upward. Make sure the tire is seated in the rear bumper and into the hoist shaft. 5. Reinstall the spare tire lock (if equipped). 5-82 If the tire moves, use the wheel wrench to rotate or turn...

Owner's Manual
Page 444
.... Place the bottom edge of the spare tire. 9. Position the center lift point of the jack under the vehicle towards the front of the rear bumper. 7. Attach the jack handle, extension, and wheel wrench to raise the jack until the spare tire stops moving upward and is balanced securely. 8. The secondary...
.... Place the bottom edge of the spare tire. 9. Position the center lift point of the jack under the vehicle towards the front of the rear bumper. 7. Attach the jack handle, extension, and wheel wrench to raise the jack until the spare tire stops moving upward and is balanced securely. 8. The secondary...

Owner's Manual
Page 445
..., make sure no one hand to store a spare or flat tire, see "Removing the Flat Tire and Installing the Spare Tire" earlier in the bumper clockwise to lower the spare the rest of you as you pull the jack out from the cable, insert the hoist handle, extension and wheel... wrench into the hoist shaft hole in the bumper and turn the wheel wrench in the hoist shaft hole in this section. 5-87 11. If the cable is hanging from the spare. 12. Keep...
..., make sure no one hand to store a spare or flat tire, see "Removing the Flat Tire and Installing the Spare Tire" earlier in the bumper clockwise to lower the spare the rest of you as you pull the jack out from the cable, insert the hoist handle, extension and wheel... wrench into the hoist shaft hole in the bumper and turn the wheel wrench in the hoist shaft hole in this section. 5-87 11. If the cable is hanging from the spare. 12. Keep...

Owner's Manual
Page 495
... number and location from anywhere in its offering of problem Roadside Assistance is offered to retail purchase/lease customers in conjunction with the Bumper-to the Warranty and Owner Assistance Information book. 7-7 The Courtesy Transportation program is available 24 hours a day, 7 days a ... description of motor vehicles. GMC reserves the right to offer Courtesy Transportation, a customer support program for new vehicles. Canadian Roadside Assistance Vehicles purchased in the coverage provided by the New Vehicle Limited Warranty. Please refer to -Bumper coverage provided by the New...
... number and location from anywhere in its offering of problem Roadside Assistance is offered to retail purchase/lease customers in conjunction with the Bumper-to the Warranty and Owner Assistance Information book. 7-7 The Courtesy Transportation program is available 24 hours a day, 7 days a ... description of motor vehicles. GMC reserves the right to offer Courtesy Transportation, a customer support program for new vehicles. Canadian Roadside Assistance Vehicles purchased in the coverage provided by the New Vehicle Limited Warranty. Please refer to -Bumper coverage provided by the New...

Owner's Manual
Page 497
... be available at its sole discretion. 7-9 However, NHTSA cannot become involved in addition to notifying General Motors. Canadian Vehicles: For warranty repairs during the Bumper-to-Bumper warranty coverage period, but it may not be administered by appropriate dealer personnel. Reporting Safety Defects Reporting Safety Defects to the United States Government If...
... be available at its sole discretion. 7-9 However, NHTSA cannot become involved in addition to notifying General Motors. Canadian Vehicles: For warranty repairs during the Bumper-to-Bumper warranty coverage period, but it may not be administered by appropriate dealer personnel. Reporting Safety Defects Reporting Safety Defects to the United States Government If...
Owner's Manual
Page 515
... ...6-13 Starting Your Engine ...2-20 Steering and Suspension Inspection ...6-15 Steering in Emergencies ...4-15 Steering Tips ...4-14 Steering Wheel Controls, Audio ...3-123 Steering ...4-14 Step-Bumper Pad ...4-76 Stereo RCA Jacks ...3-118 Storage Areas ...2-54 Center Console Storage Area ...2-54 Convenience Net ...2-56 Cupholder(s) ...2-54 Front Storage Area ...2-54 Glove Box...
... ...6-13 Starting Your Engine ...2-20 Steering and Suspension Inspection ...6-15 Steering in Emergencies ...4-15 Steering Tips ...4-14 Steering Wheel Controls, Audio ...3-123 Steering ...4-14 Step-Bumper Pad ...4-76 Stereo RCA Jacks ...3-118 Storage Areas ...2-54 Center Console Storage Area ...2-54 Convenience Net ...2-56 Cupholder(s) ...2-54 Front Storage Area ...2-54 Glove Box...


