Owner's Manual
Page 2
Part Number X2010 A © Copyright General Motors Corporation 1999 All Rights Reserved i 2000 GMC Safari Owner's Manual Litho in U.S.A.
Part Number X2010 A © Copyright General Motors Corporation 1999 All Rights Reserved i 2000 GMC Safari Owner's Manual Litho in U.S.A.
Owner's Manual
Page 3
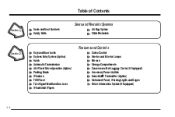
Table of Contents Seats and Restraint Systems Section 1 Seats and Seat Controls Safety Belts Air Bag System Child Restraints Features and Controls Section 2 Keys and Door Locks Keyless Entry System (Option) Hatch Automatic Transmission All-Wheel Drive Operation (Option) Parking Brake Windows Tilt Wheel Turn Signal/Multifunction Lever Windshield Wipers Cruise Control Interior and Exterior Lamps Mirrors Storage Compartments Convenience Net/Luggage Carrier (If Equipped) Accessory Power Outlets HomeLink® Transmitter (Option) Instrument Panel, Warning Lights and Gages Driver Information ...
Table of Contents Seats and Restraint Systems Section 1 Seats and Seat Controls Safety Belts Air Bag System Child Restraints Features and Controls Section 2 Keys and Door Locks Keyless Entry System (Option) Hatch Automatic Transmission All-Wheel Drive Operation (Option) Parking Brake Windows Tilt Wheel Turn Signal/Multifunction Lever Windshield Wipers Cruise Control Interior and Exterior Lamps Mirrors Storage Compartments Convenience Net/Luggage Carrier (If Equipped) Accessory Power Outlets HomeLink® Transmitter (Option) Instrument Panel, Warning Lights and Gages Driver Information ...
Owner's Manual
Page 4
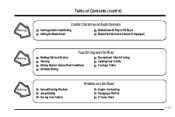
Table of Contents (cont'd) Comfort Controls and Audio Systems Section 3 Heating and Air Conditioning Setting the Radio Clock Radio/Cassette Player/CD Player Radio Theft-Deterrent Feature (If Equipped) Your Driving and the Road Section 4 Braking/Anti-lock Brakes Steering Driving Tips for Various Road Conditions Off-Road Driving Recreational Vehicle Towing Loading Your Vehicle Towing a Trailer Problems on the Road Section 5 Hazard Warning Flashers Jump Starting Towing Your Vehicle Engine Overheating Changing a Flat Tire If You're Stuck iii
Table of Contents (cont'd) Comfort Controls and Audio Systems Section 3 Heating and Air Conditioning Setting the Radio Clock Radio/Cassette Player/CD Player Radio Theft-Deterrent Feature (If Equipped) Your Driving and the Road Section 4 Braking/Anti-lock Brakes Steering Driving Tips for Various Road Conditions Off-Road Driving Recreational Vehicle Towing Loading Your Vehicle Towing a Trailer Problems on the Road Section 5 Hazard Warning Flashers Jump Starting Towing Your Vehicle Engine Overheating Changing a Flat Tire If You're Stuck iii
Owner's Manual
Page 5
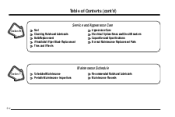
Table of Contents (cont'd) Service and Appearance Care Section 6 Fuel Checking Fluids and Lubricants Bulb Replacement Windshield Wiper Blade Replacement Tires and Wheels Appearance Care Electrical System/Fuses and Circuit Breakers Capacities and Specifications Normal Maintenance Replacement Parts Maintenance Schedule Section 7 Scheduled Maintenance Periodic Maintenance Inspections Recommended Fluids and Lubricants Maintenance Records iv
Table of Contents (cont'd) Service and Appearance Care Section 6 Fuel Checking Fluids and Lubricants Bulb Replacement Windshield Wiper Blade Replacement Tires and Wheels Appearance Care Electrical System/Fuses and Circuit Breakers Capacities and Specifications Normal Maintenance Replacement Parts Maintenance Schedule Section 7 Scheduled Maintenance Periodic Maintenance Inspections Recommended Fluids and Lubricants Maintenance Records iv
Owner's Manual
Page 6
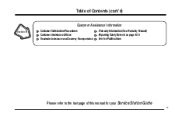
You can use it to quickly find an alphabetical listing of almost every subject in this manual for your Service Station Guide v Please refer to the last page of this manual. Table of Contents (cont'd) Customer Assistance Information Section 8 Customer Satisfaction Procedures Customer Assistance Offices Roadside Assistance and Courtesy Transportation Warranty Information (See Warranty Manual) Reporting Safety Defects on page 8-10 Service Publications Index Section 9 In the Index you will find something you want to read.
You can use it to quickly find an alphabetical listing of almost every subject in this manual for your Service Station Guide v Please refer to the last page of this manual. Table of Contents (cont'd) Customer Assistance Information Section 8 Customer Satisfaction Procedures Customer Assistance Offices Roadside Assistance and Courtesy Transportation Warranty Information (See Warranty Manual) Reporting Safety Defects on page 8-10 Service Publications Index Section 9 In the Index you will find something you want to read.
Owner's Manual
Page 7
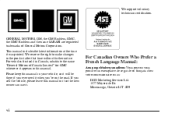
... was printed. This manual includes the latest information at the time it . GENERAL MOTORS, GM, the GM Emblem, GMC, the GMC Emblem and the name SARARI are registered trademarks of Canada Limited" for GMC whenever it when you're on the road. For Canadian Owners Who Prefer a French Language Manual: Aux proprié...
... was printed. This manual includes the latest information at the time it . GENERAL MOTORS, GM, the GM Emblem, GMC, the GMC Emblem and the name SARARI are registered trademarks of Canada Limited" for GMC whenever it when you're on the road. For Canadian Owners Who Prefer a French Language Manual: Aux proprié...
Owner's Manual
Page 8
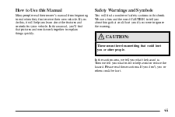
In the caution area, we tell you were to explain things quickly. Safety Warnings and Symbols You will help avoid or reduce the hazard. In this manual, you learn about things that pictures and words work together to ignore the warning. We use a box and the word CAUTION to tell you about the features and controls for your vehicle. CAUTION: These mean there is . If you don't, you do to end when they first receive their owner's manual from beginning to help you 'll find a number of safety cautions in this , it will find that could hurt you if you what the hazard is ...
In the caution area, we tell you were to explain things quickly. Safety Warnings and Symbols You will help avoid or reduce the hazard. In this manual, you learn about things that pictures and words work together to ignore the warning. We use a box and the word CAUTION to tell you about the features and controls for your vehicle. CAUTION: These mean there is . If you don't, you do to end when they first receive their owner's manual from beginning to help you 'll find a number of safety cautions in this , it will find that could hurt you if you what the hazard is ...
Owner's Manual
Page 9
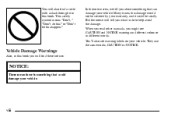
viii Many times, this book. When you read other manuals, you might see warning labels on your warranty, and it in this damage would not be covered by your vehicle. They use the same words, CAUTION or NOTICE. But the notice will tell you what to do this" or "Don't let this book you about something that can damage your vehicle. You'll also see CAUTION and NOTICE warnings in different colors or in this happen." In the notice area, we tell you will find a circle with a slash through it could damage your vehicle. This safety symbol means "Don't," "Don't do to ...
viii Many times, this book. When you read other manuals, you might see warning labels on your warranty, and it in this damage would not be covered by your vehicle. They use the same words, CAUTION or NOTICE. But the notice will tell you what to do this" or "Don't let this book you about something that can damage your vehicle. You'll also see CAUTION and NOTICE warnings in different colors or in this happen." In the notice area, we tell you will find a circle with a slash through it could damage your vehicle. This safety symbol means "Don't," "Don't do to ...
Owner's Manual
Page 10
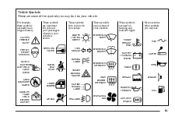
Vehicle Symbols These are some other symbols you may find on warning and indicator lights: Here are used on your vehicle. For example, these symbols are used on an original battery: CAUTION POSSIBLE INJURY PROTECT EYES BY SHIELDING CAUSTIC BATTERY ACID COULD CAUSE BURNS AVOID SPARKS OR FLAMES SPARK OR FLAME COULD EXPLODE BATTERY These symbols are important for you and your passengers whenever your vehicle is driven: These symbols have to do with your lamps: MASTER LIGHTING SWITCH These symbols are on some of your controls: WINDSHIELD WIPER These symbols are some of the symbols ...
Vehicle Symbols These are some other symbols you may find on warning and indicator lights: Here are used on your vehicle. For example, these symbols are used on an original battery: CAUTION POSSIBLE INJURY PROTECT EYES BY SHIELDING CAUSTIC BATTERY ACID COULD CAUSE BURNS AVOID SPARKS OR FLAMES SPARK OR FLAME COULD EXPLODE BATTERY These symbols are important for you and your passengers whenever your vehicle is driven: These symbols have to do with your lamps: MASTER LIGHTING SWITCH These symbols are on some of your controls: WINDSHIELD WIPER These symbols are some of the symbols ...
Owner's Manual
Page 11
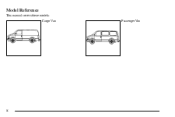
Model Reference This manual covers these models: Cargo Van Passenger Van x
Model Reference This manual covers these models: Cargo Van Passenger Van x
Owner's Manual
Page 12
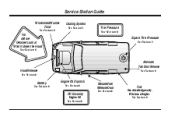
See Section 6 Oil Viscosity Engine Oil See Section 6 Service Station Guide Windshield Washer Fluid See Section 6 Cooling System See Section 5 Tire Pressure See Section 6 For a More Detailed Look at What's Under the Hood See Section 6 Spare Tire Pressure See Section 5 Alternate Fuel Door Release Hood Release See Section 6 See Section 6 Battery See Section 6 Engine Oil Dipstick See Section 6 Remote Fuel Release Door See Section 6 Fuel Use unleaded gas only, 87 Octane or higher.
See Section 6 Oil Viscosity Engine Oil See Section 6 Service Station Guide Windshield Washer Fluid See Section 6 Cooling System See Section 5 Tire Pressure See Section 6 For a More Detailed Look at What's Under the Hood See Section 6 Spare Tire Pressure See Section 5 Alternate Fuel Door Release Hood Release See Section 6 See Section 6 Battery See Section 6 Engine Oil Dipstick See Section 6 Remote Fuel Release Door See Section 6 Fuel Use unleaded gas only, 87 Octane or higher.

Owner's Manual
Page 13
and the Answers How to use your safety belts properly. You can also learn about the seats in your vehicle and how to Wear Safety Belts Properly Driver Position Safety Belt Use During Pregnancy Right Front Passenger Position Air Bag System Rear Seat Passengers 1-37 1-39 1-41 1-45 1-59 1-62 1-62 1-63 Rear Safety Belt Comfort Guides for Everyone Here Are Questions Many People Ask About Safety Belts -- Section 1 Seats and Restraint Systems Here you'll find information about some things you should not do with air bags and safety belts. 1-2 1-13 1-17 1-18 1-18 1-26 1-27 1-27 1-34 Seats and ...
and the Answers How to use your safety belts properly. You can also learn about the seats in your vehicle and how to Wear Safety Belts Properly Driver Position Safety Belt Use During Pregnancy Right Front Passenger Position Air Bag System Rear Seat Passengers 1-37 1-39 1-41 1-45 1-59 1-62 1-62 1-63 Rear Safety Belt Comfort Guides for Everyone Here Are Questions Many People Ask About Safety Belts -- Section 1 Seats and Restraint Systems Here you'll find information about some things you should not do with air bags and safety belts. 1-2 1-13 1-17 1-18 1-18 1-26 1-27 1-27 1-34 Seats and ...
Owner's Manual
Page 14
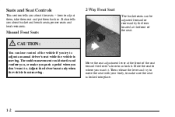
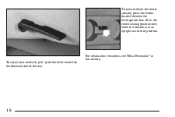
Move the seat adjustment lever at the front of the seat. Manual Front Seats CAUTION: You can be adjusted forward or rearward by the lever located at the front of the seat toward the driver's door to unlock it . The sudden movement could startle and confuse you, or make sure the seat is not moving . Adjust the driver's seat only when the vehicle is locked into place. 1-2 how to adjust them, take them out and put them back in. Slide the seat to where you want to. It also tells you about the seats -- Then release the lever and try to adjust a manual driver's seat while the ...
Move the seat adjustment lever at the front of the seat. Manual Front Seats CAUTION: You can be adjusted forward or rearward by the lever located at the front of the seat toward the driver's door to unlock it . The sudden movement could startle and confuse you, or make sure the seat is not moving . Adjust the driver's seat only when the vehicle is locked into place. 1-2 how to adjust them, take them out and put them back in. Slide the seat to where you want to. It also tells you about the seats -- Then release the lever and try to adjust a manual driver's seat while the ...

Owner's Manual
Page 15
If you have this feature, there will be a control pad located on the inboard side of the driver and passenger bucket seats. The front control makes the front of the seat go up and down. 1-3 Turn the knob toward the rear of the vehicle to increase lumbar support. The center control makes the whole seat go up or down . The rear control makes the rear of the seat go forward, rearward, up and down . Manual Lumbar Support (If Equipped) Power Seats (If Equipped) If you have this feature, there will be a knob located on the inboard side of the driver and passenger bucket...
If you have this feature, there will be a control pad located on the inboard side of the driver and passenger bucket seats. The front control makes the front of the seat go up and down. 1-3 Turn the knob toward the rear of the vehicle to increase lumbar support. The center control makes the whole seat go up or down . The rear control makes the rear of the seat go forward, rearward, up and down . Manual Lumbar Support (If Equipped) Power Seats (If Equipped) If you have this feature, there will be a knob located on the inboard side of the driver and passenger bucket...
Owner's Manual
Page 16
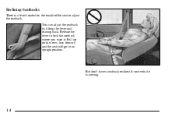
Reclining Seatbacks There is moving. 1-4 But don't have a seatback reclined if your vehicle is a lever located on the lever, lean forward and the seat will go to an upright position. Release the lever to adjust the seatback. Pull up on the inside of the seat to lock the seatback where you want it. You can adjust the seatback by lifting the lever and leaning back.
Reclining Seatbacks There is moving. 1-4 But don't have a seatback reclined if your vehicle is a lever located on the lever, lean forward and the seat will go to an upright position. Release the lever to adjust the seatback. Pull up on the inside of the seat to lock the seatback where you want it. You can adjust the seatback by lifting the lever and leaning back.
Owner's Manual
Page 17
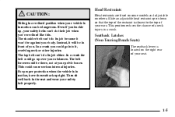
Instead, it will be there, not at your safety belt properly. The belt forces would be in front of a neck injury in a crash. Then sit well back in the seat and wear your pelvic bones. This position reduces the chance of you. Even if you buckle up, your vehicle is closest to the top of your body. In a crash you could cause serious internal injuries. The lap belt can't do its job either. For proper protection when the vehicle is located on others. Head restraints are fixed on some models and adjustable on the right rear of your abdomen. Head Restraints CAUTION: Sitting...
Instead, it will be there, not at your safety belt properly. The belt forces would be in front of a neck injury in a crash. Then sit well back in the seat and wear your pelvic bones. This position reduces the chance of you. Even if you buckle up, your vehicle is closest to the top of your body. In a crash you could cause serious internal injuries. The lap belt can't do its job either. For proper protection when the vehicle is located on others. Head restraints are fixed on some models and adjustable on the right rear of your abdomen. Head Restraints CAUTION: Sitting...

Owner's Manual
Page 18
After the latch has been released, push the seatback toward the rear of the vehicle. Move the seatback into the upright position. To fold your non-touring bench seatback forward, pull up on the lever while pushing down on the latch release lever while pulling the seatback toward the front of the vehicle until it could cause injury to be sure it is locked. That could move forward in a sudden stop or crash. CAUTION: If the seatback isn't locked, it locks in the upright position. 1-6 To raise the seatback, unlock the seatback latch by pushing up on the upper edge of the ...
After the latch has been released, push the seatback toward the rear of the vehicle. Move the seatback into the upright position. To fold your non-touring bench seatback forward, pull up on the lever while pushing down on the latch release lever while pulling the seatback toward the front of the vehicle until it could cause injury to be sure it is locked. That could move forward in a sudden stop or crash. CAUTION: If the seatback isn't locked, it locks in the upright position. 1-6 To raise the seatback, unlock the seatback latch by pushing up on the upper edge of the ...
Owner's Manual
Page 19
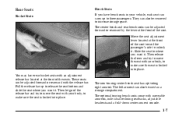
Move the seat adjustment lever located at the front of the seat toward the passenger's side to make sure the seat is locked into place. Then release the lever and try to move the seat with your body, to unlock it . Slide the seat to move the seat with your vehicle, each seat can also be used as a storage compartment. Rear Seats Bucket Seats Bench Seats If you have rear bucket seats with an adjustment release bar located at the front of the seats. Then let go of the seat. The left armrest can also be removed to make sure the seat is locked into place. The ...
Move the seat adjustment lever located at the front of the seat toward the passenger's side to make sure the seat is locked into place. Then release the lever and try to move the seat with your body, to unlock it . Slide the seat to move the seat with your vehicle, each seat can also be used as a storage compartment. Rear Seats Bucket Seats Bench Seats If you have rear bucket seats with an adjustment release bar located at the front of the seats. Then let go of the seat. The left armrest can also be removed to make sure the seat is locked into place. The ...
Owner's Manual
Page 20
To raise or lower the center console, press the button located between the beverage holders. Sit in the center seating position only when the console is in this section. To adjust your seatback, pull up on the lever located on the lower outside of the seat. 1-8 For details about headrests, see "Head Restraints" in an upright and locked position.
To raise or lower the center console, press the button located between the beverage holders. Sit in the center seating position only when the console is in this section. To adjust your seatback, pull up on the lever located on the lower outside of the seat. 1-8 For details about headrests, see "Head Restraints" in an upright and locked position.
Owner's Manual
Page 21
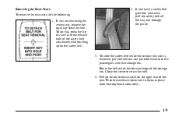
If you have a safety belt guide on your seat, pull the safety belt all the way out through the guide. 3. To store the safety belt while the second row seat is removed, pull the belt out and put both buckles in place (non-touring bench seats only). 1-9 Push the seatback down until it locks in the passenger's side rear storage bin. To do the following: 1. Pull up on the safety belt. 2. Close the cover to retain the belt. 4. If you are removing the center seat, remove the right lap-shoulder belt. Route the belt out of the forward edge of the seat. Removing the Rear Seats...
If you have a safety belt guide on your seat, pull the safety belt all the way out through the guide. 3. To store the safety belt while the second row seat is removed, pull the belt out and put both buckles in place (non-touring bench seats only). 1-9 Push the seatback down until it locks in the passenger's side rear storage bin. To do the following: 1. Pull up on the safety belt. 2. Close the cover to retain the belt. 4. If you are removing the center seat, remove the right lap-shoulder belt. Route the belt out of the forward edge of the seat. Removing the Rear Seats...
