Owner's Manual
Page 129
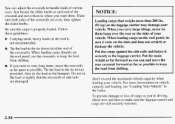
... the maximum vehicle capacity when loading your on vehicle capacity and loading, see "Loading Your Vehicle'' in the Index. You can and move the rear crossrail forward as far aspossible to keep the load from shifting. Tie the load to the tie down (at each end of your vehicle. When... Carrying small, heavy loads on the roof panel, use the crossrails to where you carry large things, never let them . Tie the load to the bumpers. When loading cargodirectly on the roof is properly loaded. To prevent damage or loss of the crossrails are still securely fastened. 2-56
... the maximum vehicle capacity when loading your on vehicle capacity and loading, see "Loading Your Vehicle'' in the Index. You can and move the rear crossrail forward as far aspossible to keep the load from shifting. Tie the load to the tie down (at each end of your vehicle. When... Carrying small, heavy loads on the roof panel, use the crossrails to where you carry large things, never let them . Tie the load to the bumpers. When loading cargodirectly on the roof is properly loaded. To prevent damage or loss of the crossrails are still securely fastened. 2-56
Owner's Manual
Page 227
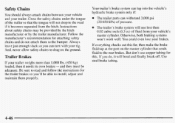
... 'll be able toinstall, adjust and maintain them to read and follow the instructions for this. And, never allow safety chains to the rear brakes. Be sure to the bumper. Use steel brake tubing. 4-46 Your trailer's brake system can tap into the vehicle's hydraulic brake system only if 0 The trailer parts...
... 'll be able toinstall, adjust and maintain them to read and follow the instructions for this. And, never allow safety chains to the rear brakes. Be sure to the bumper. Use steel brake tubing. 4-46 Your trailer's brake system can tap into the vehicle's hydraulic brake system only if 0 The trailer parts...
Owner's Manual
Page 242
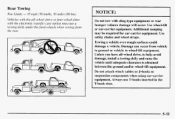
.... Additional ramping may be required for car-carrier equipment. Damage can occur from the reay: NOTICE: Do not tow with sling-type equipment or rear bumper valance damage will occur. I 5-11 Towing a vehicle over rough surfaces could damage a vehicle. Use wheel-lift or car-carrier equipment. Unless ...youhave all -wheel drive or.four-wlzee1 drive with the electronic transfercase option must use T-hooks inserted in the T-hook slots. Rear Towing Tow Limits -- 35 mph (56 k d h ) , 50 miles (80 km) Vehicles with the all -wheel drive, to suspension components ...
.... Additional ramping may be required for car-carrier equipment. Damage can occur from the reay: NOTICE: Do not tow with sling-type equipment or rear bumper valance damage will occur. I 5-11 Towing a vehicle over rough surfaces could damage a vehicle. Use wheel-lift or car-carrier equipment. Unless ...youhave all -wheel drive or.four-wlzee1 drive with the electronic transfercase option must use T-hooks inserted in the T-hook slots. Rear Towing Tow Limits -- 35 mph (56 k d h ) , 50 miles (80 km) Vehicles with the all -wheel drive, to suspension components ...
Owner's Manual
Page 254
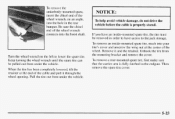
... and unscrew the wing nut at the end of the cable and pull it and the retainer. Remove it through the wheel opening. To remove a rear-mounted spare tire, first make sure that the carrier arm is vehicle before the cable properly stored. Turn the wheel wrench to the left to... tire, the tire must be pulled out from under the vehicle. Keep turning the wheel wrench until the spare tire can be removed in the rear bumper. Be sure the chisel end of the wheel wrench connects into the hoist shaft. Unhook the tire from the mounting bracket and remove the cover...
... and unscrew the wing nut at the end of the cable and pull it and the retainer. Remove it through the wheel opening. To remove a rear-mounted spare tire, first make sure that the carrier arm is vehicle before the cable properly stored. Turn the wheel wrench to the left to... tire, the tire must be pulled out from under the vehicle. Keep turning the wheel wrench until the spare tire can be removed in the rear bumper. Be sure the chisel end of the wheel wrench connects into the hoist shaft. Unhook the tire from the mounting bracket and remove the cover...

Owner's Manual
Page 262
...tire is raised against the underside of the vehicle, with the valve stem pointed down and to the rear. Follow this diagram to make sure. A. B. Pull the retainer through the hole in the rear bumper and into the hoist shaft. Turn the wheel wrench to the right until the Spare or Flat Tire... tire is secure, Wheel Wrench but pull on the tire to store theunderbody-mounted spare. 1. E G. Retainer 3. Put the chisel end of the wheel wrench, on the ground at the rear of...
...tire is raised against the underside of the vehicle, with the valve stem pointed down and to the rear. Follow this diagram to make sure. A. B. Pull the retainer through the hole in the rear bumper and into the hoist shaft. Turn the wheel wrench to the right until the Spare or Flat Tire... tire is secure, Wheel Wrench but pull on the tire to store theunderbody-mounted spare. 1. E G. Retainer 3. Put the chisel end of the wheel wrench, on the ground at the rear of...


