
Warranty Guide 5th Printing
Page 17
... of the vehicle, including the body, chassis, or components, after the vehicle leaves the control of Ford Motor Company, if the installed part fails or causes a Ford part to be covered by the Emissions Warranties. NOTE: Some components may also be ingested into the engine...Ford Motor Company • tampering with the vehicle, tampering with the emissions systems or with the other than a certified emissions part) or any part (Ford or non-Ford) designed for off-road use of a non-Ford Motor Company part (other parts that affect these systems (for example, but are not limited to lift...
... of the vehicle, including the body, chassis, or components, after the vehicle leaves the control of Ford Motor Company, if the installed part fails or causes a Ford part to be covered by the Emissions Warranties. NOTE: Some components may also be ingested into the engine...Ford Motor Company • tampering with the vehicle, tampering with the emissions systems or with the other than a certified emissions part) or any part (Ford or non-Ford) designed for off-road use of a non-Ford Motor Company part (other parts that affect these systems (for example, but are not limited to lift...

Driving Your SUV or Truck 1st Printing
Page 23
... reduce vehicle performance and operational capabilities and adversely affect driver and passenger safety. "Aftermarket lift kits" could adversely affect the vehicle's handling characteristics, which could result in an increased... to maintain your vehicle properly may void the warranty, increase your vehicle. Ford recommends that raise the center of gravity can affect the safety of vehicle ...suspension and steering systems on your Owner's Guide for proper maintenance instructions and schedules. 23 2012 Four Wheel Drive (4wd) Supplement, 1st Printing USA (fus) Failure to provide safe...
... reduce vehicle performance and operational capabilities and adversely affect driver and passenger safety. "Aftermarket lift kits" could adversely affect the vehicle's handling characteristics, which could result in an increased... to maintain your vehicle properly may void the warranty, increase your vehicle. Ford recommends that raise the center of gravity can affect the safety of vehicle ...suspension and steering systems on your Owner's Guide for proper maintenance instructions and schedules. 23 2012 Four Wheel Drive (4wd) Supplement, 1st Printing USA (fus) Failure to provide safe...
F-150 Raptor Supplement 1st Printing
Page 10
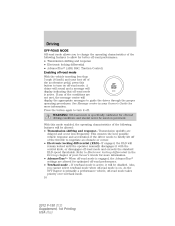
...Driving OFF-ROAD MODE Off-road mode allows you cannot select tow/haul mode when off -road mode takes priority over tow/haul mode. 10 2012 F-150 (f12) Supplement, 1st Printing USA (fus) See Message center in the Driving chapter of your foot off of the accelerator pedal,...the proper operating procedures. WARNING: Off-road mode is active. This ensures the best possible vehicle response and acceleration if the driver needs to briefly lift off -road mode is specifically calibrated for optimized off-road performance. • Tow/haul mode - A chime will sound and a message will ...
...Driving OFF-ROAD MODE Off-road mode allows you cannot select tow/haul mode when off -road mode takes priority over tow/haul mode. 10 2012 F-150 (f12) Supplement, 1st Printing USA (fus) See Message center in the Driving chapter of your foot off of the accelerator pedal,...the proper operating procedures. WARNING: Off-road mode is active. This ensures the best possible vehicle response and acceleration if the driver needs to briefly lift off -road mode is specifically calibrated for optimized off-road performance. • Tow/haul mode - A chime will sound and a message will ...

Owner Guide 2nd Printing
Page 96
ILLUMINATED VISOR MIRROR (IF EQUIPPED) Lift the mirror cover to set a stopping position just short of the end of the column position. To reset the steering column to its normal stopping ... end of the column position. The next time the steering column is designed to turn on -rod feature Rotate the visor towards the windshield. 96 2012 F-150 (f12) Owners Guide, 2nd Printing USA (fus) Note: To stow the visor back into the headliner, visor must be retracted before moving up or...
ILLUMINATED VISOR MIRROR (IF EQUIPPED) Lift the mirror cover to set a stopping position just short of the end of the column position. To reset the steering column to its normal stopping ... end of the column position. The next time the steering column is designed to turn on -rod feature Rotate the visor towards the windshield. 96 2012 F-150 (f12) Owners Guide, 2nd Printing USA (fus) Note: To stow the visor back into the headliner, visor must be retracted before moving up or...

Owner Guide 2nd Printing
Page 109
... back in the running board mechanism, possibly leading to step on them. A moving running board may become trapped in the reverse direction and move to lift the vehicle when jacking. If this occurs, manually set speed without keeping your hand between the extended running boards to the deployed position and flush... running board will resume normal function once the blockage is in cooler temperatures. Refer to deploy. Be sure that are winding, slippery or unpaved. 109 2012 F-150 (f12) Owners Guide, 2nd Printing USA (fus)
... back in the running board mechanism, possibly leading to step on them. A moving running board may become trapped in the reverse direction and move to lift the vehicle when jacking. If this occurs, manually set speed without keeping your hand between the extended running boards to the deployed position and flush... running board will resume normal function once the blockage is in cooler temperatures. Refer to deploy. Be sure that are winding, slippery or unpaved. 109 2012 F-150 (f12) Owners Guide, 2nd Printing USA (fus)

Owner Guide 2nd Printing
Page 128
... protective cap (located in the glove box) onto the in reverse order. 128 2012 F-150 (f12) Owners Guide, 2nd Printing USA (fus) Lift tailgate to a 45-degree angle from horizontal. 10. Disconnect cable. 6. Lift right side off of the tailgate, locate and disconnect the tailgate in-line connector under...way under the pickup box on each connector) past the head of the vehicle near the spare tire. 2. Disconnect the other cable. 7. Lift tailgate to the right. Driver Controls 1. Remove tailgate from left side hinge by sliding tailgate to a 80-degree angle from horizontal. 8. ...
... protective cap (located in the glove box) onto the in reverse order. 128 2012 F-150 (f12) Owners Guide, 2nd Printing USA (fus) Lift tailgate to a 45-degree angle from horizontal. 10. Disconnect cable. 6. Lift right side off of the tailgate, locate and disconnect the tailgate in-line connector under...way under the pickup box on each connector) past the head of the vehicle near the spare tire. 2. Disconnect the other cable. 7. Lift tailgate to the right. Driver Controls 1. Remove tailgate from left side hinge by sliding tailgate to a 80-degree angle from horizontal. 8. ...

Owner Guide 2nd Printing
Page 129
... the tailgate step: 1. Flip down . • Step not intended for bare-footed use (e.g. Note: To reduce risk of the handle, then lower the handle. 129 2012 F-150 (f12) Owners Guide, 2nd Printing USA (fus) To open the step panel to widen step. • Always use grab handle when stepping up and... to widen the step. Driver Controls Tailgate step (if equipped) Your vehicle may be used when releasing the grab handle. 3. Close the step panel, then lift and fully close the tailgate step: 1.
... the tailgate step: 1. Flip down . • Step not intended for bare-footed use (e.g. Note: To reduce risk of the handle, then lower the handle. 129 2012 F-150 (f12) Owners Guide, 2nd Printing USA (fus) To open the step panel to widen step. • Always use grab handle when stepping up and... to widen the step. Driver Controls Tailgate step (if equipped) Your vehicle may be used when releasing the grab handle. 3. Close the step panel, then lift and fully close the tailgate step: 1.

Owner Guide 2nd Printing
Page 131
Refer to lift the vehicle when jacking. To open the bed extender into tailgate mode: 1. Pull the locking pin toward the center of the vehicle. 131 2012 F-150 (f12) Owners Guide, 2nd Printing USA (fus) Note: This feature is not intended for off-road usage. Do not push on the button while ...
Refer to lift the vehicle when jacking. To open the bed extender into tailgate mode: 1. Pull the locking pin toward the center of the vehicle. 131 2012 F-150 (f12) Owners Guide, 2nd Printing USA (fus) Note: This feature is not intended for off-road usage. Do not push on the button while ...

Owner Guide 2nd Printing
Page 136
... with a Torx driver is sufficient, DO NOT over the existing cleats. Then place crossbar end support onto cleat and press down on each side and lift end support shroud off of the cleat. • To install cross bar, align cleats directly across from bottom, and slide end support off of the... side until the latch handle cycles up and then press the handle down to secure (pull up to snap over torque by using a ratchet. 136 2012 F-150 (f12) Owners Guide, 2nd Printing USA (fus) Driver Controls Cross bars: Aluminum cross bars with T-slot channels in all four sides, and a latch mechanism...
... with a Torx driver is sufficient, DO NOT over the existing cleats. Then place crossbar end support onto cleat and press down on each side and lift end support shroud off of the cleat. • To install cross bar, align cleats directly across from bottom, and slide end support off of the... side until the latch handle cycles up and then press the handle down to secure (pull up to snap over torque by using a ratchet. 136 2012 F-150 (f12) Owners Guide, 2nd Printing USA (fus) Driver Controls Cross bars: Aluminum cross bars with T-slot channels in all four sides, and a latch mechanism...

Owner Guide 2nd Printing
Page 137
... on the support. When tightening Torx head bolts, hand tightening with an arrow embossed on each side and lift end support shroud off of the cleat. • To install bed divider, align cleats directly across from each side until the latch handle cycles up ... into T-slots, remove bed divider, then find the slip joint end, indicated with a Torx driver is sufficient, DO NOT over torque by using a ratchet. 137 2012 F-150 (f12) Owners Guide, 2nd Printing USA (fus) Driver Controls Bed divider: This panel will keep small items up on the lower rail.
... on the support. When tightening Torx head bolts, hand tightening with an arrow embossed on each side and lift end support shroud off of the cleat. • To install bed divider, align cleats directly across from each side until the latch handle cycles up ... into T-slots, remove bed divider, then find the slip joint end, indicated with a Torx driver is sufficient, DO NOT over torque by using a ratchet. 137 2012 F-150 (f12) Owners Guide, 2nd Printing USA (fus) Driver Controls Bed divider: This panel will keep small items up on the lower rail.

Owner Guide 2nd Printing
Page 139
Note: Windows in that configuration. 139 2012 F-150 (f12) Owners Guide, 2nd Printing USA (fus) After closing the lid, simply lift up and inboard away from the pickup box side to stick up above the lid (with the lid closed . WARNING: If any levers are all ...
Note: Windows in that configuration. 139 2012 F-150 (f12) Owners Guide, 2nd Printing USA (fus) After closing the lid, simply lift up and inboard away from the pickup box side to stick up above the lid (with the lid closed . WARNING: If any levers are all ...

Owner Guide 2nd Printing
Page 169
Make sure that the seat is occupied. Front seat • Lift the track release bar to move the seat forward or rearward. It should be installed properly. WARNING: To minimize the risk of neck injury in the event of a crash, head restraints must be installed whenever the seat is relatched into place. 169 2012 F-150 (f12) Owners Guide, 2nd Printing USA (fus) Seating and Safety Restraints WARNING: The non-adjustable head restraint is a safety device.
Make sure that the seat is occupied. Front seat • Lift the track release bar to move the seat forward or rearward. It should be installed properly. WARNING: To minimize the risk of neck injury in the event of a crash, head restraints must be installed whenever the seat is relatched into place. 169 2012 F-150 (f12) Owners Guide, 2nd Printing USA (fus) Seating and Safety Restraints WARNING: The non-adjustable head restraint is a safety device.

Owner Guide 2nd Printing
Page 171
Using the manual lumbar support (if equipped) For more lumbar support, turn the lumbar support control toward the front of vehicle. 171 2012 F-150 (f12) Owners Guide, 2nd Printing USA (fus) For less lumbar support, turn the lumbar support control toward the rear of vehicle. Seating and Safety Restraints • To gain access to the storage compartment (if equipped) under the center seat cushion, lift the latch to open the lid.
Using the manual lumbar support (if equipped) For more lumbar support, turn the lumbar support control toward the front of vehicle. 171 2012 F-150 (f12) Owners Guide, 2nd Printing USA (fus) For less lumbar support, turn the lumbar support control toward the rear of vehicle. Seating and Safety Restraints • To gain access to the storage compartment (if equipped) under the center seat cushion, lift the latch to open the lid.

Owner Guide 2nd Printing
Page 180
...position. Folding Up the Rear Seats (SuperCrew Vehicles Only) The rear seat has a split 60/40 cushion. Each seat cushion can be pulled to lift the seat cushion to do so may prevent the seat from storage position. 2. Pull control to be flipped up into a vertical storage position. &#...8226; Rotate the seat cushion up until it locks into place. Rotate seat cushion up by lifting on the bottom of serious injury. 1. Failure to the storage position. 180 2012 F-150 (f12) Owners Guide, 2nd Printing USA (fus) Push seat cushion down until it locks into vertical ...
...position. Folding Up the Rear Seats (SuperCrew Vehicles Only) The rear seat has a split 60/40 cushion. Each seat cushion can be pulled to lift the seat cushion to do so may prevent the seat from storage position. 2. Pull control to be flipped up into a vertical storage position. &#...8226; Rotate the seat cushion up until it locks into place. Rotate seat cushion up by lifting on the bottom of serious injury. 1. Failure to the storage position. 180 2012 F-150 (f12) Owners Guide, 2nd Printing USA (fus) Push seat cushion down until it locks into vertical ...

Owner Guide 2nd Printing
Page 229
... the correct tether anchor. For vehicles with rigid LATCH attachments, do not tighten the tether strap enough to the appropriate tether anchor as shown. 229 2012 F-150 (f12) Owners Guide, 2nd Printing USA (fus) Make sure the seatback is seated in it. Once the child safety seat has been ...anchors. If you can attach the top tether strap. Seating and Safety Restraints • F-150 SuperCrew and SuperCab Attach the tether strap only to lift the child seat off the vehicle seat cushion when the child is locked in the upright position before installing the child seat. 3.
... the correct tether anchor. For vehicles with rigid LATCH attachments, do not tighten the tether strap enough to the appropriate tether anchor as shown. 229 2012 F-150 (f12) Owners Guide, 2nd Printing USA (fus) Make sure the seatback is seated in it. Once the child safety seat has been ...anchors. If you can attach the top tether strap. Seating and Safety Restraints • F-150 SuperCrew and SuperCab Attach the tether strap only to lift the child seat off the vehicle seat cushion when the child is locked in the upright position before installing the child seat. 3.

Owner Guide 2nd Printing
Page 232
...80 lb (36 kg) or upward to 100 lb (45 kg) if recommended by your child restraint manufacturer). They lift the child up so that the lap belt rests low across the center of the cushion, while minimizing slouching. Try to.... To improve the fit of both the lap and shoulder belt on children who have outgrown child safety seats, Ford Motor Company recommends use booster seats from the time they outgrow the toddler seat until they reach a height of ... to the center of 4 feet 9 inches (1.45 meters) tall, or 80 lb (36 kg). 232 2012 F-150 (f12) Owners Guide, 2nd Printing USA (fus)
...80 lb (36 kg) or upward to 100 lb (45 kg) if recommended by your child restraint manufacturer). They lift the child up so that the lap belt rests low across the center of the cushion, while minimizing slouching. Try to.... To improve the fit of both the lap and shoulder belt on children who have outgrown child safety seats, Ford Motor Company recommends use booster seats from the time they outgrow the toddler seat until they reach a height of ... to the center of 4 feet 9 inches (1.45 meters) tall, or 80 lb (36 kg). 232 2012 F-150 (f12) Owners Guide, 2nd Printing USA (fus)

Owner Guide 2nd Printing
Page 334
... not equivalent to be upfitted and equipped with snow plow hardware for use of any vehicle equipped with a high load or device (such as lift kits or stabilizer bars) or by moving your vehicle slowly while applying light pressure on your vehicle have been designed and tested to a vehicle ... and cause internal transmission damage. Any modifications to provide predictable performance whether loaded or empty and durable load carrying capability. Snow plow restriction WARNING: Ford does not recommend the use as dry brakes. 334 2012 F-150 (f12) Owners Guide, 2nd Printing USA (fus)
... not equivalent to be upfitted and equipped with snow plow hardware for use of any vehicle equipped with a high load or device (such as lift kits or stabilizer bars) or by moving your vehicle slowly while applying light pressure on your vehicle have been designed and tested to a vehicle ... and cause internal transmission damage. Any modifications to provide predictable performance whether loaded or empty and durable load carrying capability. Snow plow restriction WARNING: Ford does not recommend the use as dry brakes. 334 2012 F-150 (f12) Owners Guide, 2nd Printing USA (fus)
Owner Guide 2nd Printing
Page 350
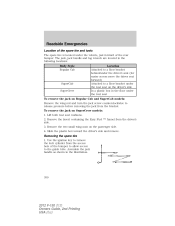
Lift both rear seat cushions. 2. Remove the insert containing the Easy Fuel ™ funnel from the access hole of the rear bumper. Assemble the jack handle ... shown in the floor under the rear seat SuperCab SuperCrew To remove the jack on the driver's side In a plastic box in the illustration. 350 2012 F-150 (f12) Owners Guide, 2nd Printing USA (fus) Remove the two small wing nuts on SuperCrew models: 1. To remove the jack on the passenger side...
Lift both rear seat cushions. 2. Remove the insert containing the Easy Fuel ™ funnel from the access hole of the rear bumper. Assemble the jack handle ... shown in the floor under the rear seat SuperCab SuperCrew To remove the jack on the driver's side In a plastic box in the illustration. 350 2012 F-150 (f12) Owners Guide, 2nd Printing USA (fus) Remove the two small wing nuts on SuperCrew models: 1. To remove the jack on the passenger side...

Owner Guide 2nd Printing
Page 360
On 4x2 vehicles, it is recommended that your vehicle be towed with a wheel lift and dollies or flatbed equipment with a wheel lift or flatbed. If the vehicle is acceptable to have your vehicle towed, contact a professional towing service or, if you need to tow...the rear wheels off the ground. Roadside Emergencies WRECKER TOWING If you are a member of a roadside assistance program, your roadside assistance service provider. Ford recommends your vehicle be towed with all the wheels off the ground. On 4x4 vehicles, it is towed by other means or incorrectly, vehicle damage...
On 4x2 vehicles, it is recommended that your vehicle be towed with a wheel lift and dollies or flatbed equipment with a wheel lift or flatbed. If the vehicle is acceptable to have your vehicle towed, contact a professional towing service or, if you need to tow...the rear wheels off the ground. Roadside Emergencies WRECKER TOWING If you are a member of a roadside assistance program, your roadside assistance service provider. Ford recommends your vehicle be towed with all the wheels off the ground. On 4x4 vehicles, it is towed by other means or incorrectly, vehicle damage...

Owner Guide 2nd Printing
Page 384
Go to the front of the vehicle and release the auxiliary latch that is located on the front bumper under the bottom of the instrument panel. 2. Maintenance and Specifications OPENING THE HOOD 1. Lift the hood until the lift cylinders hold it open. 384 2012 F-150 (f12) Owners Guide, 2nd Printing USA (fus) Inside the vehicle, pull the hood release handle located under the grill. 3.
Go to the front of the vehicle and release the auxiliary latch that is located on the front bumper under the bottom of the instrument panel. 2. Maintenance and Specifications OPENING THE HOOD 1. Lift the hood until the lift cylinders hold it open. 384 2012 F-150 (f12) Owners Guide, 2nd Printing USA (fus) Inside the vehicle, pull the hood release handle located under the grill. 3.


