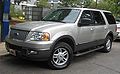
Warranty Guide 5th Printing
Page 11
...,000 miles, whichever occurs first), you must pay a $100 deductible for five years after the vehicle leaves Ford's control 7 WHAT IS NOT COVERED? Ford Motor Company or Ford Motor Vehicle Assurance Company covers these components: cylinder block, heads and all internal parts, intake and exhaust manifolds, flywheel, timing gear, harmonic balancer, valve covers, oil...
Owner Guide 1st Printing (Spanish)
Page 408
... tapes. • Allow tapes which have been subjected to extreme heat, humidity or cold to reach a moderate temperature before playing. • Clean the cassette player head with your reception. • Station overload: When you pass a broadcast tower, a stronger signal may overtake a weaker one and play to disable the rear seat controls...
Owner Guide 1st Printing (Spanish)
Page 416
... controls will illuminate. When replacing the batteries, use two new batteries (alkaline recommended) and install them off . • Adjust the headphones to comfortably fit your head. • Adjust the volume control to preserve battery power. ON OFF Note: The volume level of the wireless headphones. VOL POW ER ON OF F 41...
Owner Guide 1st Printing (Spanish)
Page 432
... allows you press CD, the system will automatically search for an audio CD in the CD DJ and begin play if it is in the head unit and you to change the signal mode to adjust the sound between the front and rear or between the front and rear speakers using...
Owner Guide 1st Printing (Spanish)
Page 443
... headphones (thereby being able to final destination 3. Distance to adjust the volume) and the front seat passengers listen via the front seat speakers. Current directional heading and GPS signal strength (color) 5.
Owner Guide 1st Printing (Spanish)
Page 445
... your location. Press to move the current view of the screen might change color to the main Destination Entry menu and start again. The directional heading indicator at the bottom of the map. • ZOOM - The GPS signal is being received. • Yellow - If you to the previous screen. Entertainment Systems...
Owner Guide 1st Printing (Spanish)
Page 455
Choose between 'Heading up' to put your direction of travel toward the top of the screen, or 'North up' to select and enter the desired voice and text ...
Owner Guide 1st Printing (Spanish)
Page 467
... temperature of the airflow in the REAR position. Press the mode selector again to select air distribution through the floor vents. Only the auxiliary control head (front or rear) that is functioning on the temperature control selector. To control the auxiliary unit using the rear control, the front control must be...
Owner Guide 1st Printing (Spanish)
Page 498
...; and hand-held transmitters' radio frequency signals.) 5. If the light is a constant red, programming is pressed and released. At the garage door opener receiver (motor-head unit) in the "Programming" section -
Owner Guide 1st Printing (Spanish)
Page 536
... Ensure that no objects such as the system will move forward when you lift the release handle. 161 The purpose of these head restraints is to help limit head motion in the event of the filter and rotate up into the housing until it is all the way up in the housing.... Ensure that the second row seat headrest clears the front seat. To properly adjust your head or as close to the flat back position as books, purses or briefcases are on the floor in front of the second row seats or...
Owner Guide 1st Printing (Spanish)
Page 542
... on the floor in the event of the third row seats or on the seat cushion before lowering them. Third row seats Ensure that the head restraints are not buckled when moving the seat to the load floor position. Folding down into place. 167 To return the seatback to its original...
Owner Guide 1st Printing (Spanish)
Page 544
The head restraints can be moved up and down. Push control to that position as close to lower head restraint. 169 Seating and Safety Restraints Third row adjustable head restraints Your vehicle's third row outboard seating positions are equipped with head restraints which are vertically adjustable. To properly adjust your head restraints, lift the head restraint so that it is to help limit head motion in the event of these head restraints is located directly behind your head or as possible. The purpose of a rear collision.
Owner Guide 1st Printing (Spanish)
Page 563
All occupants of the inflatable Safety Canopy. 188 See your head on the door. To reduce risk of injury, do not obstruct or place objects in the event of a collision. Seating and Safety Restraints Safety Canopy... modify the Safety Canopy system, its fuses, the A, B, or C pillar trim, or the headliner on a vehicle containing a Safety Canopy. Do not lean your Ford or Lincoln Mercury dealer.
Owner Guide 1st Printing (Spanish)
Page 568
...; Can the child sit all the way back against the vehicle seat back with a higher seat back and lap/shoulder belts. 193 If your child's head (top of ear level) above the top of belt-positioning booster seats: • Those that are backless. If a seating position has a low seat back... and no head restraint, a backless booster seat may place your backless booster seat has a removable shield, remove the shield and use booster seats from the time they outgrow...
Owner Guide 1st Printing (Spanish)
Page 569
... can slide around and increase the likelihood of the shoulder. The importance of shoulder belts Using a booster without a shoulder belt increases the risk of a child's head hitting a hard surface in a seating position equipped with a backless booster seat, you should rest low and snug across the hips, never up high across the...
Owner Guide 1st Printing (Spanish)
Page 576
Grasp the tether strap and position it to the anchor on the seat frame. 201 Seating and Safety Restraints • center seating position (if equipped) 3. Rotate the tether strap, and clip the tether strap to the seat frame. 5. Route the child safety seat tether strap under the head restraint (outboard seats) and over the back of the seat. 4.
Owner Guide 1st Printing (Spanish)
Page 594
... P (Park) when the ignition is in the ON position unless brake pedal is not blown, perform the following procedure: 1. Remove the access plug using a flat-head screwdriver, then insert your vehicle until you , apply the brake pedal and shift the transmission into N (Neutral). 5. If you . If the fuse is depressed. Reinstall...
Owner Guide 1st Printing (Spanish)
Page 627
...) (KA power), Speed control deactivation switch, Manual climate control mode switch, Stoplamp switch, Brake-shift interlock (BSI) solenoid, EATC control head, Body Security Module (BSM) (KA power), Speed control servo, 3rd row seat relay coils, SecuriLock LED Headlamp switch (parklamps and switch...(illumination), BSM (autolamp, parklamps) Foglamp indicator Radio (start signal) Rear window defroster switch, Rear window defroster indicator (climate control head), Heated outside mirrors Not used Trailer tow back-up lamps relay, Trailer tow 7-wire connector (back-up lamps), Trailer tow parklamp relay...
Owner Guide 1st Printing (Spanish)
Page 628
... (IWE) solenoid Speed control servo, Speed control relay Manual climate control mode switch, Rear window defroster relay coil, A/C refrigerant containment switch, A/C compressor thermistor, DEATC control head, DEATC solenoids, DEATC blower control, Trailer tow battery charge relay coil Daytime Running Lamps (DRL) ignition relay coil, Digital Transmission Range Sensor (DTRS) back-up...
Owner Guide 1st Printing (Spanish)
Page 633
... Panel Description Fuse # 35, Hi-beam headlamps, Hi-beam indicator Fuse 8 (heated mirrors), Rear window defroster, Heated outside mirrors, Rear window defroster indicator (climate control head) Trailer tow 7-wire connector (battery charge) Front blower motor Trailer tow 7-wire and 4-wire connectors (park lamps) Front foglamps Fuse 32, Fuse 33, Fuse 34...