Four Wheeling Supplement 1st Printing
Page 3
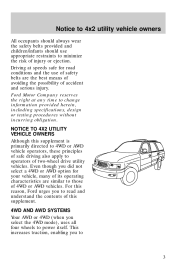
... this supplement. 4WD AND AWD SYSTEMS Your AWD or 4WD (when you select the 4WD mode), uses all four wheels to power itself. Ford Motor Company reserves the right at speeds safe for your vehicle, many of its operating characteristics are the best means of avoiding the possibility of... two-wheel drive utility vehicles. Even though you to 3 For this reason, Ford urges you to read and understand the contents of injury or ejection. Notice to 4x2 utility vehicle owners All occupants should always wear the safety...
... this supplement. 4WD AND AWD SYSTEMS Your AWD or 4WD (when you select the 4WD mode), uses all four wheels to power itself. Ford Motor Company reserves the right at speeds safe for your vehicle, many of its operating characteristics are the best means of avoiding the possibility of... two-wheel drive utility vehicles. Even though you to 3 For this reason, Ford urges you to read and understand the contents of injury or ejection. Notice to 4x2 utility vehicle owners All occupants should always wear the safety...
Scheduled Maintenance Guide 2nd Printing
Page 14
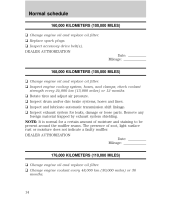
... trapped by exhaust system shielding. DEALER AUTHORIZATION Date: Mileage: 176,000 KILOMETERS (110,000 MILES) u Change engine oil and replace oil filter. u Inspect accessory drive belt(s). check coolant strength every 24,000 km (15,000 miles) or 12 months. u Inspect exhaust system for a certain amount of moisture and staining to be...
... trapped by exhaust system shielding. DEALER AUTHORIZATION Date: Mileage: 176,000 KILOMETERS (110,000 MILES) u Change engine oil and replace oil filter. u Inspect accessory drive belt(s). check coolant strength every 24,000 km (15,000 miles) or 12 months. u Inspect exhaust system for a certain amount of moisture and staining to be...
Scheduled Maintenance Guide 2nd Printing
Page 15
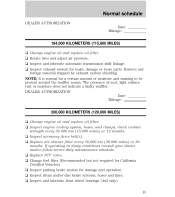
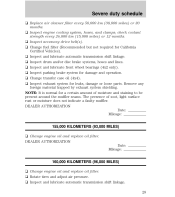
... Date: Mileage: 184,000 KILOMETERS (115,000 MILES) u u u u Change engine oil and replace oil filter. Inspect and lubricate automatic transmission shift linkage. u Inspect accessory drive belt(s). u Change fuel filter (Recommended but not required for a certain amount of moisture and staining to be present around the muffler seams. The presence of soot...
... Date: Mileage: 184,000 KILOMETERS (115,000 MILES) u u u u Change engine oil and replace oil filter. Inspect and lubricate automatic transmission shift linkage. u Inspect accessory drive belt(s). u Change fuel filter (Recommended but not required for a certain amount of moisture and staining to be present around the muffler seams. The presence of soot...
Scheduled Maintenance Guide 2nd Printing
Page 29
... system for leaks, damage or loose parts. u Inspect and lubricate automatic transmission shift linkage. 29 u Inspect engine cooling system, hoses, and clamps; u Inspect accessory drive belt(s). check coolant strength every 24,000 km (15,000 miles) or 12 months. u Change transfer case oil (4x4). u Rotate tires and adjust air pressure.
... system for leaks, damage or loose parts. u Inspect and lubricate automatic transmission shift linkage. 29 u Inspect engine cooling system, hoses, and clamps; u Inspect accessory drive belt(s). check coolant strength every 24,000 km (15,000 miles) or 12 months. u Change transfer case oil (4x4). u Rotate tires and adjust air pressure.
Scheduled Maintenance Guide 2nd Printing
Page 32
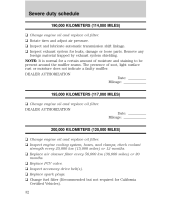
... required for leaks, damage or loose parts. u Inspect engine cooling system, hoses, and clamps; Inspect exhaust system for California Certified Vehicles). 32 u Inspect accessory drive belt(s). check coolant strength every 25,000 km (15,000 miles) or 12 months. u Replace spark plugs. DEALER AUTHORIZATION Date: Mileage: 195,000 KILOMETERS (117,000...
... required for leaks, damage or loose parts. u Inspect engine cooling system, hoses, and clamps; Inspect exhaust system for California Certified Vehicles). 32 u Inspect accessory drive belt(s). check coolant strength every 25,000 km (15,000 miles) or 12 months. u Replace spark plugs. DEALER AUTHORIZATION Date: Mileage: 195,000 KILOMETERS (117,000...
Scheduled Maintenance Guide 2nd Printing
Page 35
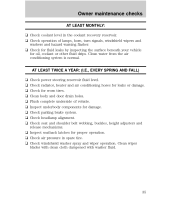
... warning flasher. u Check windshield washer spray and wiper operation. Owner maintenance checks AT LEAST MONTHLY: u Check coolant level in spare tire. Check seat and shoulder belt webbing, buckles, height adjusters and release mechanisms. u Inspect seatback latches for oil, coolant or other fluid drips. Check radiator, heater and air conditioning hoses for...
... warning flasher. u Check windshield washer spray and wiper operation. Owner maintenance checks AT LEAST MONTHLY: u Check coolant level in spare tire. Check seat and shoulder belt webbing, buckles, height adjusters and release mechanisms. u Inspect seatback latches for oil, coolant or other fluid drips. Check radiator, heater and air conditioning hoses for...
Owner Guide 1st Printing
Page 8
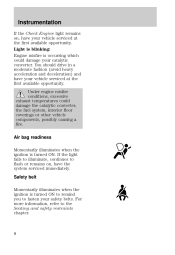
You should drive in a moderate fashion (avoid heavy acceleration and deceleration) and have your safety belts. If the light fails to illuminate, continues to flash or remains on , have your catalytic converter. Safety belt Momentarily illuminates when the ignition is turned ON to remind you to the Seating and safety restraints chapter. 8 For...
You should drive in a moderate fashion (avoid heavy acceleration and deceleration) and have your safety belts. If the light fails to illuminate, continues to flash or remains on , have your catalytic converter. Safety belt Momentarily illuminates when the ignition is turned ON to remind you to the Seating and safety restraints chapter. 8 For...
Owner Guide 1st Printing
Page 12
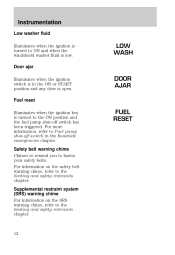
... WASH DOOR AJAR FUEL RESET 12 Instrumentation Low washer fluid Illuminates when the ignition is turned to the Seating and safety restraints chapter. Safety belt warning chime Chimes to remind you to the Seating and safety restraints chapter. Door ajar Illuminates when the ignition switch is in the Roadside emergencies ...-off switch has been triggered. Fuel reset Illuminates when the ignition key is open. Supplemental restraint system (SRS) warning chime For information on the safety belt warning chime, refer to ON and when the windshield washer fluid is low.
... WASH DOOR AJAR FUEL RESET 12 Instrumentation Low washer fluid Illuminates when the ignition is turned to the Seating and safety restraints chapter. Safety belt warning chime Chimes to remind you to the Seating and safety restraints chapter. Door ajar Illuminates when the ignition switch is in the Roadside emergencies ...-off switch has been triggered. Fuel reset Illuminates when the ignition key is open. Supplemental restraint system (SRS) warning chime For information on the safety belt warning chime, refer to ON and when the windshield washer fluid is low.

Owner Guide 1st Printing
Page 60
Seating and safety restraints SEATING Using the manual lumbar support Turn the lumbar support control counterclockwise to increase softness. Turn the lumbar support control clockwise to increase firmness. Do not pile cargo higher than the seatbacks to avoid injuring people in a collision or sudden stop. Always drive and ride with your seatback upright and the lap belt snug and low across the hips. 60 Front seats Never adjust the driver's seat or seatback when the vehicle is moving.
Seating and safety restraints SEATING Using the manual lumbar support Turn the lumbar support control counterclockwise to increase softness. Turn the lumbar support control clockwise to increase firmness. Do not pile cargo higher than the seatbacks to avoid injuring people in a collision or sudden stop. Always drive and ride with your seatback upright and the lap belt snug and low across the hips. 60 Front seats Never adjust the driver's seat or seatback when the vehicle is moving.
Owner Guide 1st Printing
Page 62
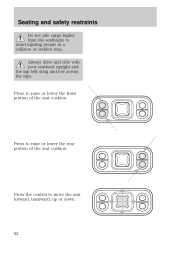
Press to raise or lower the front portion of the seat cushion. Press to raise or lower the rear portion of the seat cushion. Always drive and ride with your seatback upright and the lap belt snug and low across the hips. Press the control to avoid injuring people in a collision or sudden stop. Seating and safety restraints Do not pile cargo higher than the seatbacks to move the seat forward, backward, up or down. 62
Press to raise or lower the front portion of the seat cushion. Press to raise or lower the rear portion of the seat cushion. Always drive and ride with your seatback upright and the lap belt snug and low across the hips. Press the control to avoid injuring people in a collision or sudden stop. Seating and safety restraints Do not pile cargo higher than the seatbacks to move the seat forward, backward, up or down. 62
Owner Guide 1st Printing
Page 65
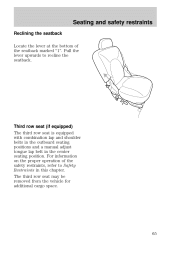
Seating and safety restraints Reclining the seatback Locate the lever at the bottom of the safety restraints, refer to recline the seatback. The third row seat may be removed from the vehicle for additional cargo space. 65 For information on the proper operation of the seatback marked "1". Pull the lever upwards to Safety Restraints in the center seating position. Third row seat (if equipped) The third row seat is equipped with combination lap and shoulder belts in the outboard seating positions and a manual adjust tongue lap belt in this chapter.
Seating and safety restraints Reclining the seatback Locate the lever at the bottom of the safety restraints, refer to recline the seatback. The third row seat may be removed from the vehicle for additional cargo space. 65 For information on the proper operation of the seatback marked "1". Pull the lever upwards to Safety Restraints in the center seating position. Third row seat (if equipped) The third row seat is equipped with combination lap and shoulder belts in the outboard seating positions and a manual adjust tongue lap belt in this chapter.

Owner Guide 1st Printing
Page 67
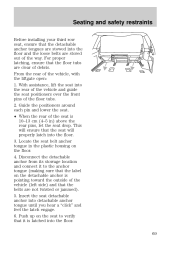
Seating and safety restraints Removing the third row seat From the rear of the detachable anchor. Then, press the release button to stow the loose seat belt. 67 Use the black plastic clip (located just above the detachable anchor) to separate the detachable anchor from the floor by inserting a key or small screwdriver through the hole in the boot of the vehicle, with the liftgate open: 1. Before removing the seat, be sure that the detachable anchor tongue is stowed flat into the vehicle floor. 3. Disengage the lap/shoulder belt from the anchor tongue. 2.
Seating and safety restraints Removing the third row seat From the rear of the detachable anchor. Then, press the release button to stow the loose seat belt. 67 Use the black plastic clip (located just above the detachable anchor) to separate the detachable anchor from the floor by inserting a key or small screwdriver through the hole in the boot of the vehicle, with the liftgate open: 1. Before removing the seat, be sure that the detachable anchor tongue is stowed flat into the vehicle floor. 3. Disengage the lap/shoulder belt from the anchor tongue. 2.

Owner Guide 1st Printing
Page 68
... latch the vehicle seat to release the floor latches. 5. Refer to the warning label on the release bar, lift the seat up on the seat belt. 68 When reinstalling a rear seat in your vehicle it must be placed in its original position. Lift the seat release bar located at the center... lower right side of the seatback while pushing the seatback down into the seat cushion. • The seatback will prevent correct use of the safety belts and could increase the risk of injury. If not latched, the seat may cause injury during a sudden stop.
... latch the vehicle seat to release the floor latches. 5. Refer to the warning label on the release bar, lift the seat up on the seat belt. 68 When reinstalling a rear seat in your vehicle it must be placed in its original position. Lift the seat release bar located at the center... lower right side of the seatback while pushing the seatback down into the seat cushion. • The seatback will prevent correct use of the safety belts and could increase the risk of injury. If not latched, the seat may cause injury during a sudden stop.
Owner Guide 1st Printing
Page 69
... detachable anchor into the rear of the vehicle and guide the seat positioners over the front pins of the vehicle (left side) and that the belts are not twisted or jammed). 5. Push up on the detachable anchor is latched into the floor. 69 This will ensure that the seat will properly... latch into the floor and the loose belts are stored out of debris. Locate the seat belt anchor tongue in ) above the rear pins, let the seat drop. Seating and safety restraints Before installing your third row seat...
... detachable anchor into the rear of the vehicle and guide the seat positioners over the front pins of the vehicle (left side) and that the belts are not twisted or jammed). 5. Push up on the detachable anchor is latched into the floor. 69 This will ensure that the seat will properly... latch into the floor and the loose belts are stored out of debris. Locate the seat belt anchor tongue in ) above the rear pins, let the seat drop. Seating and safety restraints Before installing your third row seat...
Owner Guide 1st Printing
Page 70
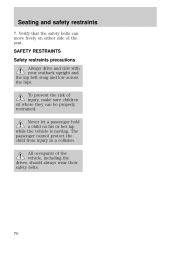
... and low across the hips. The passenger cannot protect the child from injury in a collision. Verify that the safety belts can be properly restrained. All occupants of injury, make sure children sit where they can move freely on his or her lap while the vehicle ... on either side of the seat. Seating and safety restraints 7. To prevent the risk of the vehicle, including the driver, should always wear their safety belts. 70
... and low across the hips. The passenger cannot protect the child from injury in a collision. Verify that the safety belts can be properly restrained. All occupants of injury, make sure children sit where they can move freely on his or her lap while the vehicle ... on either side of the seat. Seating and safety restraints 7. To prevent the risk of the vehicle, including the driver, should always wear their safety belts. 70
Owner Guide 1st Printing
Page 71
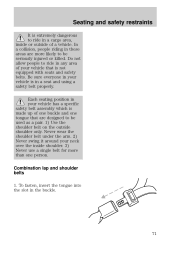
Each seating position in your vehicle is made up of one buckle and one person. Combination lap and shoulder belts 1. Never wear the shoulder belt under the arm. 2) Never swing it around your vehicle that are more than one tongue that is extremely dangerous to ride in a cargo area, ...inside shoulder. 3) Never use a single belt for more likely to be used as a pair. 1) Use the shoulder belt on the outside of your neck over the inside or outside shoulder only. Be sure everyone in your vehicle has...
Each seating position in your vehicle is made up of one buckle and one person. Combination lap and shoulder belts 1. Never wear the shoulder belt under the arm. 2) Never swing it around your vehicle that are more than one tongue that is extremely dangerous to ride in a cargo area, ...inside shoulder. 3) Never use a single belt for more likely to be used as a pair. 1) Use the shoulder belt on the outside of your neck over the inside or outside shoulder only. Be sure everyone in your vehicle has...
Owner Guide 1st Printing
Page 72
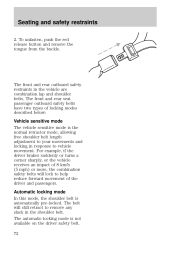
...described below: Vehicle sensitive mode The vehicle sensitive mode is automatically pre-locked. The front and rear outboard safety restraints in the shoulder belt. For example, if the driver brakes suddenly or turns a corner sharply, or the vehicle receives an impact of the driver and ...passengers. Automatic locking mode In this mode, the shoulder belt is the normal retractor mode, allowing free shoulder belt length adjustment to your movements and locking in response to vehicle movement. The automatic locking mode is not available...
...described below: Vehicle sensitive mode The vehicle sensitive mode is automatically pre-locked. The front and rear outboard safety restraints in the shoulder belt. For example, if the driver brakes suddenly or turns a corner sharply, or the vehicle receives an impact of the driver and ...passengers. Automatic locking mode In this mode, the shoulder belt is the normal retractor mode, allowing free shoulder belt length adjustment to your movements and locking in response to vehicle movement. The automatic locking mode is not available...
Owner Guide 1st Printing
Page 73
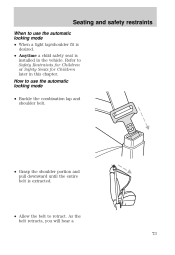
Seating and safety restraints When to use the automatic locking mode • Buckle the combination lap and shoulder belt. • Grasp the shoulder portion and pull downward until the entire belt is installed in this chapter. How to Safety Restraints for Children or Safety Seats for Children later in the vehicle. As the belt retracts, you will hear a 73 Refer to use the automatic locking mode • When a tight lap/shoulder fit is desired. • Anytime a child safety seat is extracted. • Allow the belt to retract.
Seating and safety restraints When to use the automatic locking mode • Buckle the combination lap and shoulder belt. • Grasp the shoulder portion and pull downward until the entire belt is installed in this chapter. How to Safety Restraints for Children or Safety Seats for Children later in the vehicle. As the belt retracts, you will hear a 73 Refer to use the automatic locking mode • When a tight lap/shoulder fit is desired. • Anytime a child safety seat is extracted. • Allow the belt to retract.

Owner Guide 1st Printing
Page 74
Adjust to disengage the automatic locking mode and activate the vehicle sensitive (emergency) locking mode. To tighten the belt, pull the loose end of the belt through the tongue until it fits snugly across your lap until it to retract completely to fit snugly and as low as ... a right angle to disengage the automatic locking mode Disconnect the combination lap/shoulder belt and allow it reaches the buckle. How to the belt and pull across the hips. 74 Lap belts Adjusting the lap belt The lap belt does not adjust automatically. Insert the tongue into the correct buckle. Do not ...
Adjust to disengage the automatic locking mode and activate the vehicle sensitive (emergency) locking mode. To tighten the belt, pull the loose end of the belt through the tongue until it fits snugly across your lap until it to retract completely to fit snugly and as low as ... a right angle to disengage the automatic locking mode Disconnect the combination lap/shoulder belt and allow it reaches the buckle. How to the belt and pull across the hips. 74 Lap belts Adjusting the lap belt The lap belt does not adjust automatically. Insert the tongue into the correct buckle. Do not ...
Owner Guide 1st Printing
Page 75
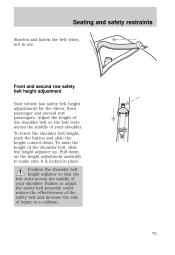
...height adjustment assembly to adjust the safety belt properly could reduce the effectiveness of the safety belt and increase the risk of the shoulder belt, slide the height adjuster up. Front and second row safety belt height adjustment Your vehicle has safety belt height adjustments for the driver, front... passenger and second row passengers. Position the shoulder belt height adjuster so that the belt rests across the middle of your shoulder. Adjust the height of the shoulder belt so the belt rests across the middle of your shoulder. Pull down . To raise the...
...height adjustment assembly to adjust the safety belt properly could reduce the effectiveness of the safety belt and increase the risk of the shoulder belt, slide the height adjuster up. Front and second row safety belt height adjustment Your vehicle has safety belt height adjustments for the driver, front... passenger and second row passengers. Position the shoulder belt height adjuster so that the belt rests across the middle of your shoulder. Adjust the height of the shoulder belt so the belt rests across the middle of your shoulder. Pull down . To raise the...


