Owner's Manual
Page 309
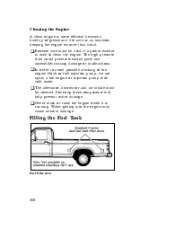
... an insulator, keeping the engine warmer than usual. Water getting into the engine may cause internal damage. The high pressure fluid could penetrate sealed parts and assemblies causing damage or malfunctions. running. engine block or fuel injection pump, do not spray a hot engine or injection pump ...with cold water. u Extreme care must u Never wash or rinse the engine while it is Filling the Fuel Tank Fuel filler door 310 u In order to clean the engine. Covering these components will help prevent water damage. Cleaning the Engine A clean engine is more efficient...
... an insulator, keeping the engine warmer than usual. Water getting into the engine may cause internal damage. The high pressure fluid could penetrate sealed parts and assemblies causing damage or malfunctions. running. engine block or fuel injection pump, do not spray a hot engine or injection pump ...with cold water. u Extreme care must u Never wash or rinse the engine while it is Filling the Fuel Tank Fuel filler door 310 u In order to clean the engine. Covering these components will help prevent water damage. Cleaning the Engine A clean engine is more efficient...
Owner's Manual
Page 310
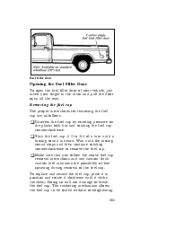
... the fuel cap 1/2 to 3/4 of a turn until the hissing sound stops and then continue rotating counterclockwise to be sealed without overtightening. 311 Fuel filler door Opening the Fuel Filler Door To open the fuel filler door of your vehicle, just insert your finger in position and rotate it clockwise until it in the divot... and pull the door open all the way. Removing the fuel cap The proper instructions for removing the fuel cap are as follows: u Unscrew the fuel cap by exerting ...
... the fuel cap 1/2 to 3/4 of a turn until the hissing sound stops and then continue rotating counterclockwise to be sealed without overtightening. 311 Fuel filler door Opening the Fuel Filler Door To open the fuel filler door of your vehicle, just insert your finger in position and rotate it clockwise until it in the divot... and pull the door open all the way. Removing the fuel cap The proper instructions for removing the fuel cap are as follows: u Unscrew the fuel cap by exerting ...

Owner's Manual
Page 309
... used to avoid possible cracking of grease and dirt acts as an insulator, keeping the engine warmer than usual. The high pressure fluid could penetrate sealed parts and assemblies causing damage or malfunctions. Water getting into the engine may cause internal damage. engine block or fuel injection pump, do not spray... a hot engine or injection pump with cold water. be used if a power washer is Filling the Fuel Tank Fuel filler door 310 u In order to clean the engine. running. Covering these components will help prevent water damage.
... used to avoid possible cracking of grease and dirt acts as an insulator, keeping the engine warmer than usual. The high pressure fluid could penetrate sealed parts and assemblies causing damage or malfunctions. Water getting into the engine may cause internal damage. engine block or fuel injection pump, do not spray... a hot engine or injection pump with cold water. be used if a power washer is Filling the Fuel Tank Fuel filler door 310 u In order to clean the engine. running. Covering these components will help prevent water damage.

Owner's Manual
Page 310
...clicks (ratchets). The ratcheting mechanism allows the fuel cap to remove the fuel cap. place it in the divot and pull the door open the fuel filler door of a turn until a hissing sound is heard. Doing so will minimize the possibility of fuel spraying during removal of the fuel... cap. Wait until it clockwise until the hissing sound stops and then continue rotating counterclockwise to be sealed without overtightening. 311 Such caution ...
...clicks (ratchets). The ratcheting mechanism allows the fuel cap to remove the fuel cap. place it in the divot and pull the door open the fuel filler door of a turn until a hissing sound is heard. Doing so will minimize the possibility of fuel spraying during removal of the fuel... cap. Wait until it clockwise until the hissing sound stops and then continue rotating counterclockwise to be sealed without overtightening. 311 Such caution ...


